Store your root cellar food with wood ash using these proven methods: Use a steel container with a tight-fitting lid to hold the ash, keeping it 10 feet from combustibles. Create 1/2-inch ash layers between produce for ideal preservation, avoiding direct contact with vegetables. Maintain cellar humidity at 80-95% using ash mixed with sawdust or hay. Place tomatoes stem-side down and pack root vegetables in ash-lined containers with proper airflow. Monitor temperatures closely, using insulation and ventilation to prevent freezing. Choose untreated hardwoods like cypress or oak for ash production. These time-tested techniques hold the key to months of successful food preservation.
Wood Ash Storage Container Setup
For safe wood ash storage in your root cellar, you'll need a proper metal container with specific features. Choose a sturdy steel container with a black finish, measuring approximately 15 inches high with a 13.5-inch diameter top and 10-inch diameter base. Having a brass carrying handle makes transporting the container much easier.
Make certain it has a tight-fitting lid to prevent ash spillage and an insulated bottom to protect surfaces from heat damage.
You'll want to position your ash container on a cement or brick slab within your root cellar, keeping it at least 10 feet away from any combustible materials. Don't place it near wooden structures or in areas with poor ventilation.
Select a spot that's easily accessible for regular maintenance and emptying.
Before transferring ashes to your storage container, let them cool completely in your fireplace or woodstove. When handling the ashes, always wear protective gloves and confirm the lid is secured properly after each use.
Check your stored ashes regularly for any signs of re-ignition, especially during the initial storage period. If you notice any warmth or smoking, move the container outside immediately and place it on a non-combustible surface until completely cool.
Root Cellar Temperature Control
Throughout the year, maintaining stable temperatures in your root cellar requires a well-planned combination of insulation and ventilation systems. You'll need to focus on both passive and active methods to keep your storage space at ideal conditions. For optimal temperature regulation, ensure vents are closed when temperatures approach 32 degrees Fahrenheit to prevent freezing.
Start by choosing the right insulation method for your situation. If you're building new, rigid foam insulation offers excellent temperature control, while existing cellars can benefit from mineral wool batts or straw bales. Don't forget to install an insulated steel door to prevent temperature fluctuations.
| Temperature Control | Implementation |
|---|---|
| Ventilation | Install dual vents: one at ceiling, one at floor |
| Insulation | Apply chosen material to walls and ceiling |
| Ice Storage | Fill 1/3 of space with winter-made ice |
| Air Movement | Use fans when temperature differential requires |
Your ventilation strategy should include two vents positioned at different heights to promote natural air circulation. For summer cooling, consider creating an ice chamber using Rubbermaid bins filled during winter. You'll want the ice to occupy about one-third of your cellar's volume to effectively maintain temperatures around 37°F. Remember to include a drainage system for melting ice and regularly check your insulation and ventilation systems for ideal performance.
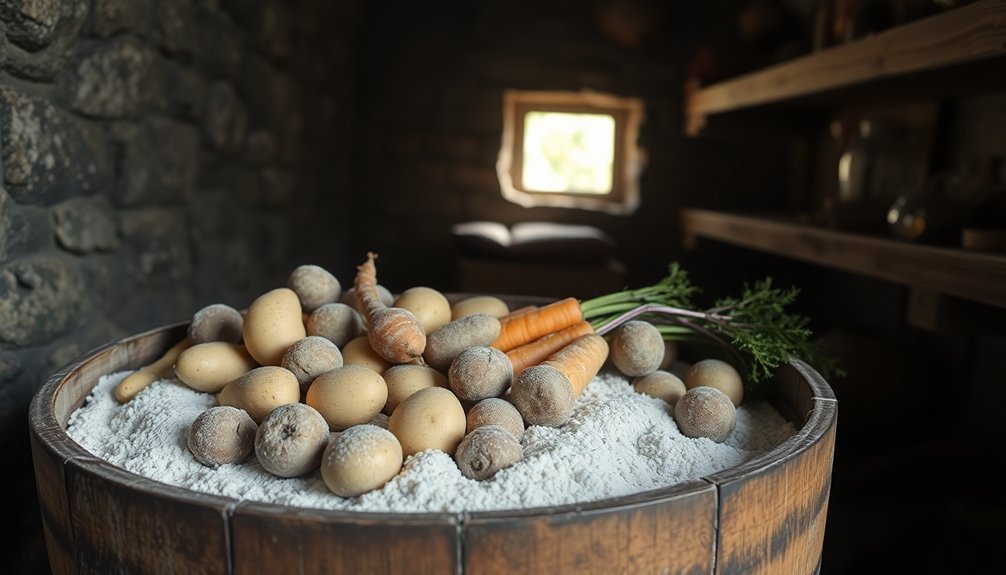
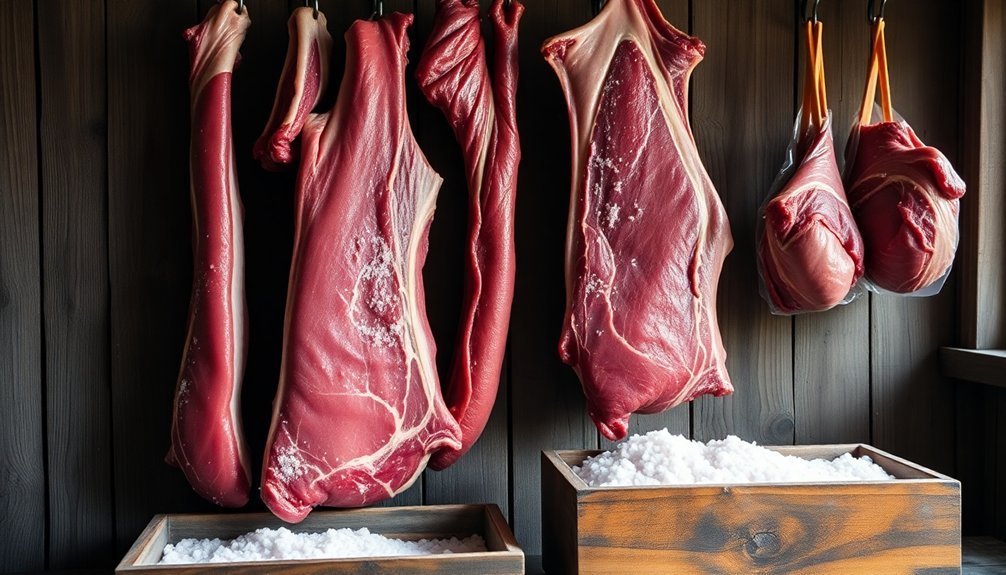
Layering Produce With Wood Ash
You'll need to maintain an ash layer depth of about 1/4 inch between each row of produce, ensuring complete coverage without excess powder that could waste materials.
For effective moisture control, line your wooden or cardboard container with paper before adding the first ash layer, and keep the container's lid slightly loose to allow minimal airflow while preventing external moisture from seeping in. Place tomatoes upside down with stems in each layer for optimal preservation.
Select protective materials carefully, starting with clean newspaper or kraft paper for the base liner, followed by finely sifted hardwood ash that's completely cool and free of debris.
Ash Layer Depth Guide
Successful wood ash layering in root cellars requires precise depth measurements to protect stored produce. When applying wood ash, you'll need to maintain a careful balance between effectiveness and safety.
Mix the ash into the top 2-4 inches of soil rather than placing it directly under your vegetables, as direct contact can damage your produce.
For ideal results, follow these critical depth measurements:
- Apply a maintenance rate of 10-15 pounds per 1,000 square feet annually, incorporating it evenly into the soil
- Keep a minimum 1-inch barrier between wood ash and stored produce using clean soil or sand
- Maintain consistent 2-inch spacing between produce layers to guarantee proper air circulation
Remember that different vegetables have varying storage needs, so you'll want to adjust your layering system accordingly.
As you build your layers, confirm proper ventilation throughout the storage area to prevent moisture buildup and spoilage. If you're storing root crops like carrots or turnips, use only a light dusting of ash in the soil during spring planting, and always test your soil's pH before making any applications.
This will help you avoid over-alkalizing your storage area.
Moisture Control Techniques
Proper moisture control plays an essential role when layering produce with wood ash in root cellars. While wood ash can help absorb excess moisture, it shouldn't be your primary moisture control method, as root cellars actually require high humidity levels of 90-95% to prevent food from shriveling.
Instead of relying on wood ash, you'll want to focus on proven moisture maintenance techniques. Start with a dirt floor, as it naturally retains more moisture than concrete or stone. You can sprinkle gravel with water or place damp burlap bags on the floor to boost humidity levels. For additional moisture control, position pans of water strategically throughout your root cellar.
When storing your produce, guarantee proper air circulation by keeping shelves 2-3 inches from walls and installing mesh-covered vents or PVC tubes. This helps prevent mold while removing ethylene gas.
For vegetables like carrots, beets, and parsnips, pack them in damp sawdust, sand, or moss to reduce surface evaporation. Remember that leafy vegetables and root crops particularly benefit from high-humidity environments, so maintain consistent moisture levels for ideal storage conditions.
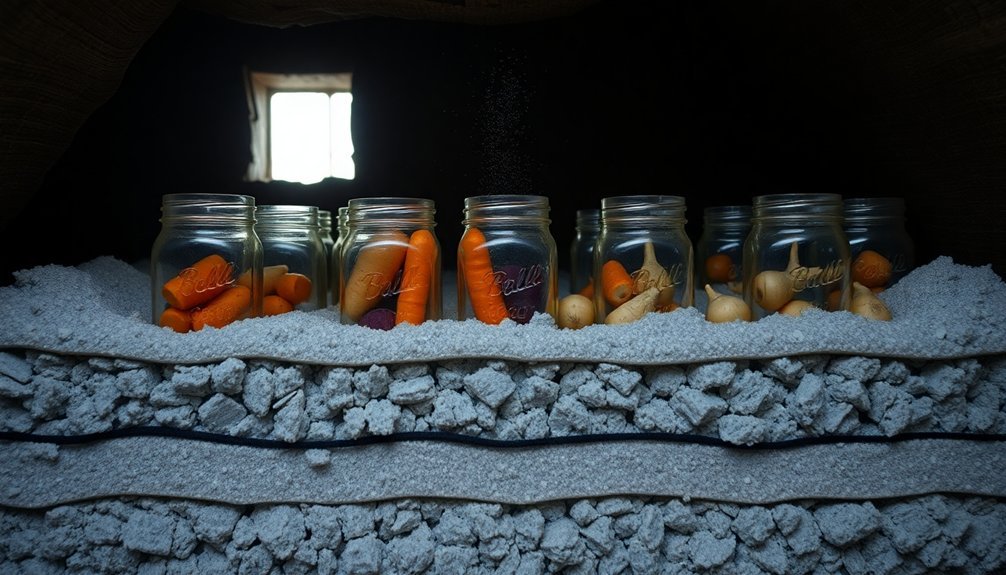
Protective Material Selection
While wood ash can serve as a protective layer for some root cellar produce, selecting the right combination of materials requires careful consideration of each crop's specific needs.
You'll want to analyze your wood ash source carefully, especially if it's from commercial origins, to guarantee it's free from harmful metals like cadmium and arsenic. When layering produce with wood ash, it's vital to create buffer zones that prevent direct contact, as the high salt content can damage certain crops.
For ideal protection, consider these key material combinations:
- Layer wood ash with straw or dried leaves to regulate humidity while providing nutrient benefits from the ash's potassium and calcium content.
- Combine wood chips with a thin ash layer to create a moisture-controlling barrier that won't overwhelm sensitive produce.
- Use polyethylene sheets beneath ash layers when storing root vegetables to prevent direct contact while maintaining the ash's protective properties.
Remember that wood ash isn't suitable for all produce types, particularly those that prefer acidic conditions like potatoes and blueberries.
If you're unsure about using wood ash, you can opt for alternative materials like gravel or rigid foam insulation, which provide consistent protection without affecting soil pH.
Safe Wood Selection Guidelines
Selecting the right wood for your root cellar storage comes down to choosing between durability and food safety. You'll want to focus on naturally rot-resistant woods that won't contaminate your stored food items. Locust, cedar, and cypress are your best options, as they provide excellent durability without the need for chemical treatments.
If you can't source these premium woods, you've got solid alternatives in 1-inch oak planks or 2-inch Douglas fir planks. When constructing your storage solutions, make sure you're using slatted designs with proper cleats to keep the shelves away from the walls, allowing essential air circulation.
You'll need to strictly avoid any pressure-treated or creosoted woods, as their chemicals can leach into your stored food. Pine isn't recommended unless it's free and you don't mind replacing it frequently.
While it might be tempting to use treated woods for their durability, the risk to food safety isn't worth it. Instead, stick with natural, untreated hardwoods that offer both longevity and safety.
Remember that wood shelving is naturally antibacterial and provides better temperature regulation than metal alternatives.
Moisture Management Techniques

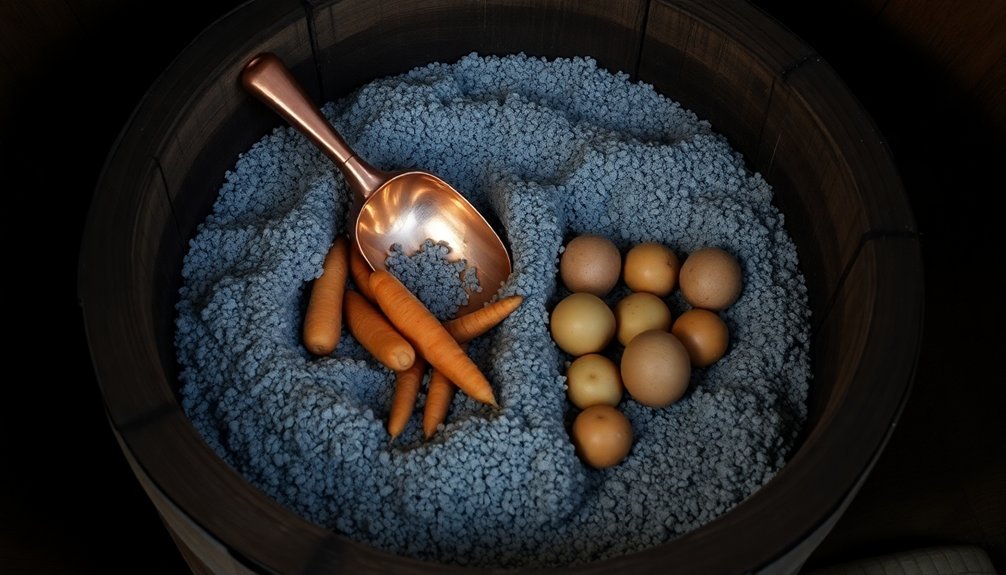
To manage moisture effectively in your root cellar, you'll want to spread wood ash in strategic layers between your stored vegetables, as the ash naturally absorbs excess water from roots while maintaining proper humidity levels.
Create ash layers that are 1/2 inch thick around root vegetables, making sure not to over-apply, which could dry out your produce too much.
Position your ash-layered storage containers near air vents or circulation paths to maximize the ash's moisture-controlling properties while maintaining proper airflow throughout your root cellar.
Absorbing Excess Root Water
Effective moisture management stands as a critical cornerstone of root cellar storage. When dealing with excess root water, you'll need to implement strategic absorption methods to protect your stored produce. Wood ash serves as an excellent natural absorber, but you'll want to combine it with other moisture-controlling materials for ideal results.
To effectively manage root moisture, spread a layer of moisture-absorbing materials across your cellar floor. You can combine wood ash with sawdust or hay to create a more effective moisture barrier. These materials work together to prevent excess water from damaging your stored vegetables and fruits.
Don't forget to monitor humidity levels with a hygrometer, aiming for that sweet spot between 80-95%.
- Place charcoal alongside wood ash to enhance moisture absorption and maintain proper humidity levels
- Layer plastic sheeting beneath your absorption materials to prevent ground moisture from seeping upward
- Implement a dual vent system to guarantee proper airflow, which helps regulate moisture levels
Remember to check your absorption materials regularly and replace them when they become saturated. This proactive approach helps maintain ideal storage conditions and prevents produce spoilage due to excess moisture.
Ash Layer Thickness Control
Proper ash layer thickness serves as the foundation for successful root cellar storage. You'll need to start with a 1.5-inch layer (4 cm) of ash at the bottom of your storage container, guaranteeing it's spread uniformly to provide consistent moisture absorption throughout your stored items.
When selecting your ash, you'll want to use cool remnants from cooking fires, making sure to sift out any sharp particles that could damage your produce. Don't use ash that's been exposed to rain or high humidity, as this can lead to mold growth and spoilage. The ash you choose should have low moisture content to maintain ideal storage conditions.
You'll need to arrange your items carefully, placing produce like tomatoes stem-side down to prevent moisture buildup. Keep everything in a single layer and fully covered by ash, but don't overcrowd your container. Leave enough space between layers for proper air circulation.
Your storage container should have some airflow capability while maintaining consistent humidity levels. Remember to use a loose-fitting cover that allows minimal air exchange while keeping the ash undisturbed, and regularly monitor conditions to guarantee your ash isn't too dry or moist.
Strategic Air Flow Placement
Building on your ash layer setup, strategic airflow placement makes the difference between successful storage and spoiled produce.
You'll need to position your ventilation points carefully to create an effective flow that works with natural air movement patterns. Place your inlet vent near the floor and the outlet vent near the ceiling on opposite sides of your cellar to maximize air circulation.
To maintain ideal moisture levels while using wood ash, you'll want to monitor humidity closely and adjust your ventilation accordingly. A dirt floor naturally helps regulate moisture, but if you're working with concrete or wood, you can place pans of water strategically near your inlet vents to add necessary humidity.
- Install opposing vents to create a natural draft that pulls cool air in while pushing warm, humid air out
- Extend your vent stack outside the cellar to enhance the drawing effect of warm air
- Position your inlet vent at floor level and outlet vent at ceiling height for ideal thermal circulation
Monitor your setup with thermometers and humidistats, making weekly adjustments to maintain humidity between 60-80 percent.
This guarantees your ash-stored produce stays fresh without developing mold or drying out.
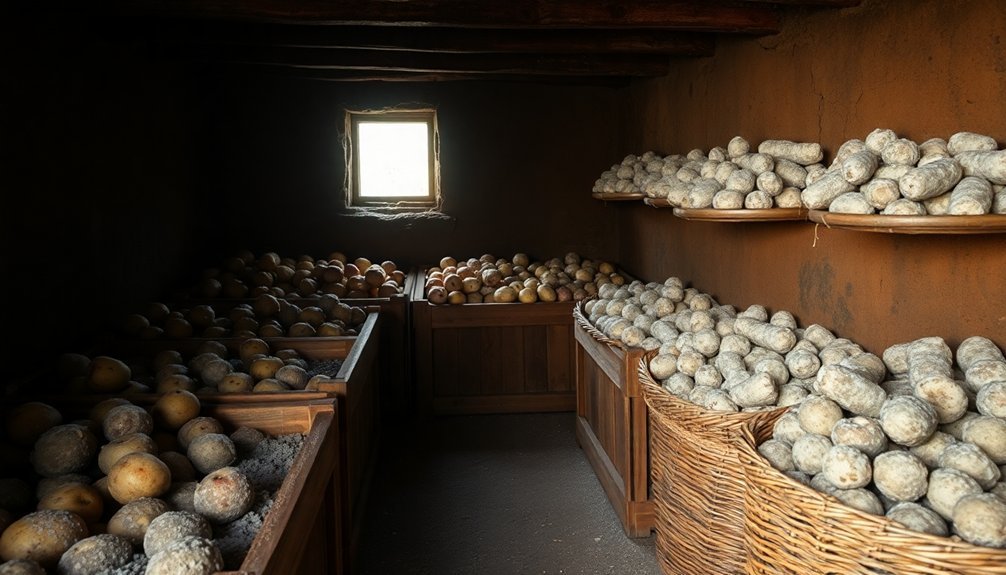
Traditional Preservation Success Stories
Pioneer families across generations have documented remarkable success stories using wood ash preservation methods.
You'll find compelling accounts of Cherokee communities successfully preserving various meats using hickory ash, particularly for game like moose and rabbit. Their techniques have proven effective for storing meat through multiple seasons.
African farmers have demonstrated notable success with preserving tomatoes in wood ash, showing how this method transcends cultures and climates.
In traditional European farming communities, you'll discover documented cases of successfully storing hard cheeses like Gruyere for extended periods, using precise layering techniques in stoneware containers.
Perhaps the most widely reported success comes from egg preservation, where families have maintained fresh eggs for up to a year by carefully surrounding them with 1-1.5 inches of sifted wood ash in cool cellars.
You'll want to replicate their careful placement methods, ensuring eggs don't touch each other and remain fully covered.
Root vegetables have also shown remarkable longevity when stored in ash-filled earthenware crocks, with some families reporting successful preservation through multiple growing seasons, demonstrating the versatility and reliability of this time-tested method.
Root Cellar Location Planning
Successful root cellar storage begins with selecting an ideal location. You'll want to focus on a north-facing slope that provides natural cooling and maintains stable temperatures between 32 to 40 degrees Fahrenheit.
When choosing your site, test the ground conditions with a soil probe to guarantee proper drainage and avoid areas prone to flooding after heavy rain.
The ideal depth for your root cellar is at least 10 feet underground, as this provides maximum natural insulation. You'll need to verify there aren't any underground utilities before excavation begins.
Remember that even one foot of earth can reduce temperature by 20 degrees, making proper depth vital for maintaining consistent conditions.
- Choose a location that's convenient to access year-round, especially during winter months when you'll need regular access to stored foods.
- Confirm the site has adequate shade throughout the day, particularly around the doorway and exposed areas.
- Position the cellar away from heat sources like furnaces and water heaters if building in a basement.
Consider a cellar size between 6×8 feet to 8×10 feet, depending on your family's needs.
Install proper ventilation to prevent mold growth and manage ethylene gas buildup.
Frequently Asked Questions
How Long Can Tomatoes Typically Stay Fresh When Stored in Wood Ash?
You can expect your tomatoes to stay fresh in wood ash for about 6 weeks, though results may vary based on the tomatoes' ripeness when stored and the type of wood ash you're using.
Can Wood Ash From Different Tree Species Affect Preservation Quality?
Yes, you'll find that hardwood ash typically offers better preservation due to its higher potassium and phosphorus content, while softwood ash's higher calcium levels may provide different preservation qualities for your stored foods.
What Signs Indicate Stored Produce Needs Immediate Removal From Ash Storage?
You'll need to remove produce immediately if you spot mold, detect foul odors, feel soft spots, notice slime or liquid leakage, or see pest damage. Don't ignore discoloration or ash clumping around items.
Does Wood Ash Storage Affect the Taste of Preserved Vegetables?
You'll notice minimal taste changes in ash-preserved vegetables, though you might detect a slight smoky flavor. It won't greatly alter your food's natural taste, especially if you're using clean, chemical-free wood ash.
Can Wood Ash Preservation Work in Humid Tropical Climates?
Yes, you'll find wood ash works in humid tropical climates, particularly for seed storage and cheese. It's effective because it's hygroscopic, absorbing excess moisture. However, it's less reliable for tomatoes in these conditions.
In Summary
You'll find wood ash preservation is an effective traditional method for extending your root cellar harvest storage. By following proper wood selection, layering techniques, and moisture control, you're able to keep vegetables fresh for months. Remember to monitor your cellar's temperature and maintain appropriate ash coverage. With careful planning and these time-tested methods, you'll enjoy your preserved produce throughout the winter season.

Leave a Reply