
To preserve vegetables in oil safely, you'll need to start with peak-ripeness produce that's thoroughly cleaned and dried. First, cook your vegetables using methods like roasting, grilling, or steaming until tender. Create a preservation mixture using a 2:1 ratio of olive oil to vinegar, ensuring the acidity level is safe for storage. Add flavor enhancers like garlic, herbs, and chilies before packing everything into sterile, airtight containers. Keep your vegetables completely submerged in oil, refrigerate immediately, and use within three weeks. Following proper techniques and safety measures will reveal the traditional art of oil preservation in your kitchen.
Why Preserve Vegetables in Oil

The cultural significance of oil preservation connects you to traditional food practices while offering practical solutions for modern living.
You're not just preserving food; you're participating in a time-honored culinary art that enhances your cooking possibilities.
Whether you're dealing with an abundance of garden vegetables or looking to extend your pantry's variety, oil preservation provides a reliable and effective storage method. This practice dates back to ancient Mediterranean civilizations who pioneered the use of olive oil for food preservation.
Selecting Your Fresh Vegetables
When you're selecting vegetables for oil preservation, you'll want to pick them at their peak ripeness to guarantee the best flavor and nutrient content.
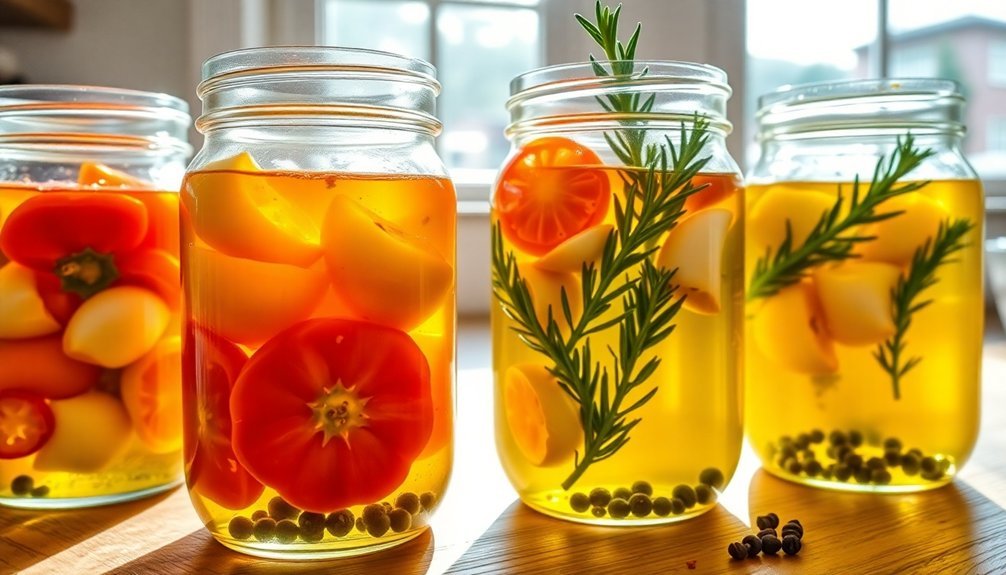
Choose from a variety of options like tomatoes, peppers, eggplant, and mushrooms, as they'll respond well to the preservation process.
Check each vegetable carefully for bruising, soft spots, or discoloration, since any damage can lead to spoilage during preservation.
Use sterilized glass jars for storing your selected vegetables to ensure they remain fresh and contamination-free.
Peak Ripeness Matters Most
Success in preserving vegetables begins with selecting produce at its peak ripeness. You'll want to harvest or purchase vegetables when they're at their ideal maturity to guarantee the best flavor and nutrient content in your preserved goods. If you're working with a local farm or your own garden, coordinate with experienced farmers who understand the precise timing for each vegetable variety. Using the traditional Sottolio method of Puglia, you'll achieve the most authentic results in preserving your harvest.
| Vegetable Type | Peak Ripeness Signs | Best Season |
|---|---|---|
| Root Vegetables | Firm, smooth skin | Late Fall |
| Leafy Greens | Bright color, crisp leaves | Spring/Early Summer |
| Cruciferous | Compact, heavy heads | Winter |
When selecting vegetables for oil preservation, you'll need to check for firmness, cleanness, and uniform size. Don't choose vegetables that show any signs of mechanical damage, disease, or insect infestation. Remember that timing is vital – you should process your vegetables immediately after harvesting or purchasing to maintain their peak quality. Once you've selected your vegetables, move quickly through the preparation steps of washing, peeling, and sorting to prevent deterioration. Keep your prepared vegetables in a cool, dry place until you're ready to begin the preservation process.
Variety for Best Results
Fresh vegetables destined for oil preservation must meet specific criteria to guarantee both safety and quality.
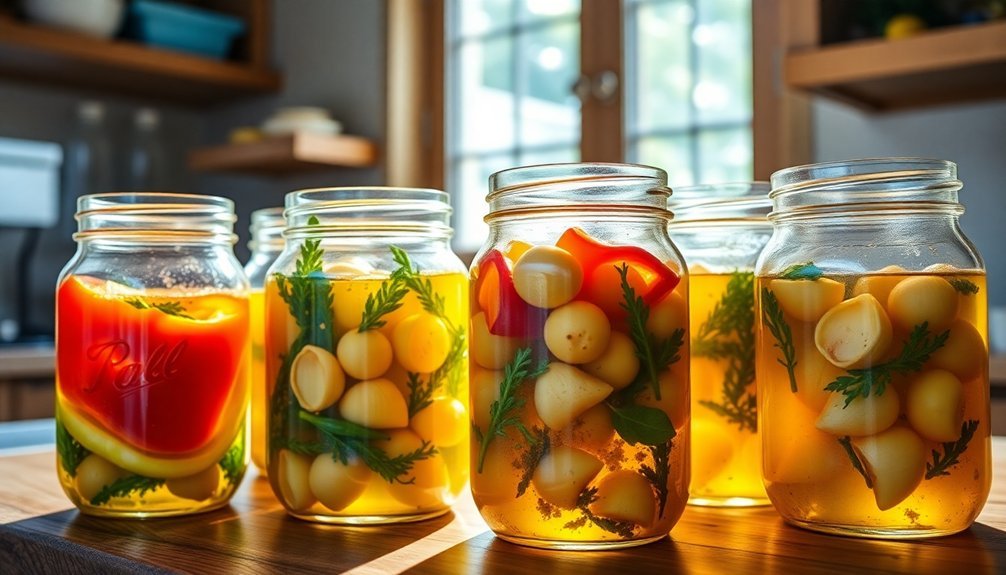
You'll want to focus on firm, unblemished vegetables like artichokes, mushrooms, asparagus, eggplant, and capsicums. These varieties have proven reliable for oil preservation due to their texture and moisture content.
When selecting tomatoes, particularly sun-dried ones, you're in luck as their natural acidity makes them ideal candidates. For other vegetables, you'll need to take into account their pH levels carefully. Most vegetables require acidification with vinegar or lemon juice before they're safe for oil preservation.
You should avoid using raw garlic and fresh herbs in your preserves unless you're planning to acidify them properly. Instead, opt for vegetables that you can slow-roast, grill, or steam before preservation.
It's essential to dry your chosen vegetables almost to the point of crispness before submerging them in oil.
For best results, select vegetables at their peak ripeness and prepare them immediately. You'll need to make certain they're completely dry and free from any spoilage before processing.
Watch for Visible Damage
Building on your vegetable selection knowledge, careful inspection for damage marks your next important step. You'll need to thoroughly examine each vegetable for signs of bruising, cuts, soft spots, or any mechanical damage that could compromise your preservation efforts. Look closely for discoloration, unusual marks, or irregularities that might indicate disease or pest damage.
Start by washing your vegetables in clean water to remove field dirt and debris, which will make inspection easier. As you clean each piece, run your fingers over the surface to feel for any damaged areas you might've missed visually. You'll want to check for proper firmness, as soft spots can indicate internal decay that's not immediately visible.
If you find damaged sections, you can often salvage the vegetable by carefully cutting away the affected parts. Don't try to save severely damaged produce – it's better to discard it than risk contaminating your entire batch.
Remember that any imperfection could lead to spoilage during the preservation process, so be selective. Sort your vegetables into groups based on quality, keeping only the best specimens for oil preservation.
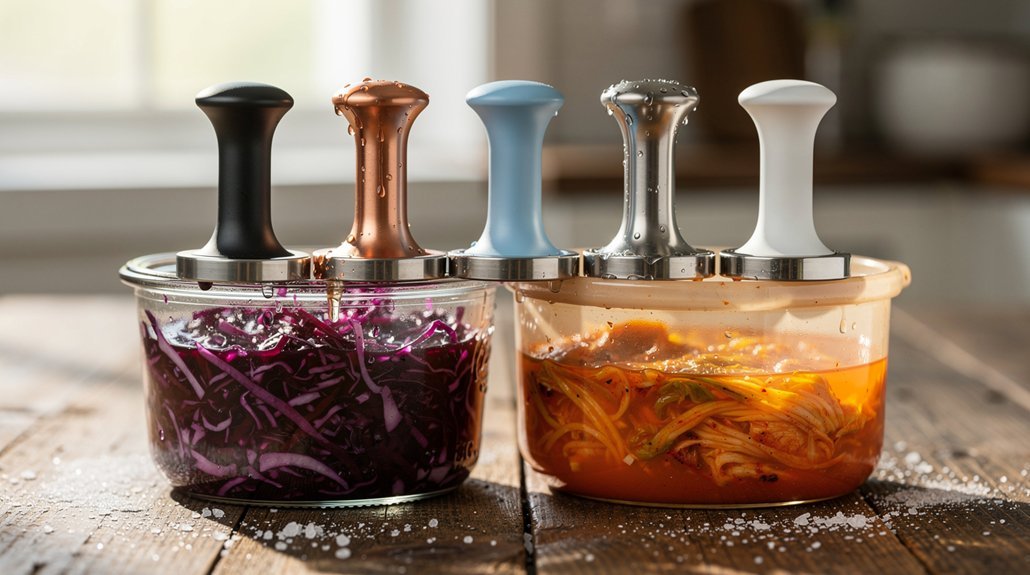
Essential Equipment and Tools

Properly preserving vegetables in oil requires five essential categories of equipment and tools.
You'll need clean, sterile jars with tight-fitting lids and seals to maintain anaerobic conditions. Make certain to stock baking dishes and an oven or grill for cooking vegetables until they're tender before preservation.
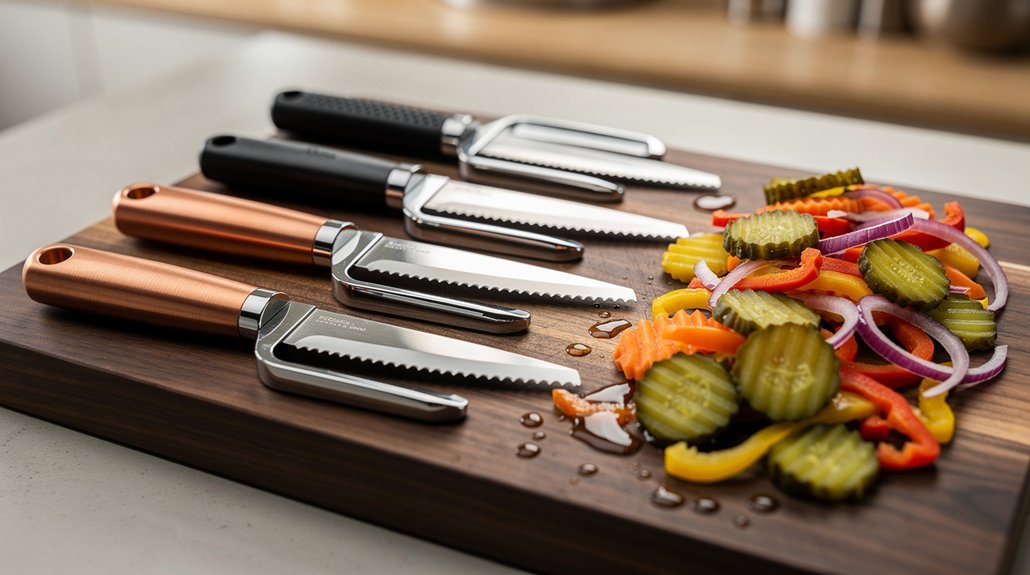
Your preparation tools should include sharp knives, cutting boards, spatulas, and measuring equipment to guarantee precise ingredient proportions.
Don't forget utensils and skewers for removing air bubbles from jars, and keep cheesecloth handy for straining flavored oils if needed.
Storage equipment is vital for food safety. You'll need a refrigerator set below 40°F (4°C) and possibly a freezer for long-term storage.
If you can't freeze your preserved vegetables, store them in a cool, dark place, though refrigeration is always preferred.
For safety and hygiene, gather sterilization equipment, gloves, and pH test strips to monitor acidity levels.
You'll also need labels and markers to track preservation dates.
Keep your workspace clean and sanitized, and always have food safety guidelines nearby for reference during the preservation process.
Oil and Vinegar Ratios
Safe vegetable preservation hinges on precise oil and vinegar ratios that prevent harmful bacterial growth. You'll need to maintain a vegetable-to-vinegar ratio that doesn't exceed three parts vegetables to one part vinegar by weight. For example, if you're using 300 grams of vegetables, you'll need at least 100 grams of vinegar to achieve proper acidification.
When creating your marinade, combine olive oil and vinegar in a 2:1 ratio to guarantee complete coverage of your vegetables. The vinegar's acidity must bring the pH below 4.6, which is vital for preventing the growth of dangerous bacteria like C. botulinum. You'll need to allow time for the vegetables to equilibrate with the vinegar, typically overnight.
Here are the key points for maintaining safe ratios:
- Use domestic vinegar with 4% acetic acid concentration
- Confirm vegetables are completely submerged in the oil-vinegar mixture
- Remove all air bubbles from the preservation jar
- Cook vegetables before preserving them in the oil-vinegar solution
Remember that this preservation method requires refrigeration and isn't suitable for shelf storage. Your preserved vegetables will last 1-2 months when properly refrigerated and covered in marinade.
Preparing Vegetables for Preservation
Start with peak-season vegetables for ideal preservation results, ensuring you're selecting firm, unblemished produce that's at its prime.
Before preserving, you'll need to thoroughly clean your vegetables by washing them under cold water and patting them dry to remove any dirt, debris, or moisture that could affect the preservation process.
Once cleaned, you must cook your vegetables using your preferred method (roasting, grilling, or steaming) until they're tender but still maintain their structure, as proper cooking is essential for safe preservation in oil.
Select Peak-Season Vegetables
The success of your oil-preserved vegetables hinges on picking the right produce at its peak. You'll want to focus on vegetables that maintain their texture and flavor well during the preservation process. When selecting your vegetables, look for firm, unblemished produce that's fresh and in season.
Vegetables with higher water content, like summer squash and cucumbers, work particularly well as they'll help maintain their structure in the oil-based preservation.
For the best results, contemplate these essential vegetable choices for oil preservation:
- Mediterranean favorites: zucchini, eggplant, and bell peppers – they'll hold up well and absorb the flavors of your marinade.
- Firm vegetables: beets, green beans, and artichoke hearts – they'll retain their shape and provide excellent texture.
- Aromatic additions: mushrooms and onions – they'll contribute depth of flavor to your preserved mixture.
- Summer produce: tomatoes and summer squash – they're ideal for their water content and preservation qualities.
Remember to check each vegetable carefully for any signs of damage or decay before preserving.
You'll also want to contemplate how the flavors will complement each other in your final preserved mixture, as these vegetables will share their flavors during storage.
Proper Cleaning Methods
Proper preparation forms the foundation of successfully preserved vegetables in oil. You'll need to start by thoroughly washing your vegetables in cold water to remove all dirt, debris, and potential contaminants that could compromise your preservation efforts.
For vegetables with firm skins like beets and carrots, you'll want to use a soft-bristled brush to guarantee thorough cleaning. Don't skip inspecting your produce for any damaged or rotten spots – these need to be removed immediately to prevent spoilage from spreading.
If you're working with vegetables that have tough or bitter skins, you'll need to peel them before proceeding.
Before moving forward with the preservation process, it's essential to dry your vegetables completely. Use a clean kitchen towel or paper towels to pat them dry, removing all excess moisture. Any remaining water can lead to bacterial growth and spoilage.
You'll also need to prepare your storage containers properly – use only clean, sterilized jars that are free from cracks or chips. Make sure to wash them in hot, soapy water and dry them thoroughly.
Cooking Before Preservation
Once your vegetables are clean and dry, cooking them correctly before preservation becomes your next key step.
You'll need to verify all vegetables are thoroughly cooked to prevent bacterial growth and maintain food safety. Choose from several effective cooking methods based on your vegetables and preferences.
- Roasting: Preheat your oven to 350°F, place vegetables in a baking dish, and coat them with olive oil, salt, pepper, and herbs. Roast for 20-60 minutes until tender, perfect for zucchini, bell peppers, tomatoes, and mushrooms.
- Grilling: For a smoky flavor, brush vegetables like zucchini, bell peppers, and eggplant with olive oil and seasonings. Grill until tender and lightly charred, then let cool before preserving.
- Steaming/Boiling: Blanch vegetables like beetroots, green beans, and artichoke hearts in boiling water until tender-crisp, then immediately plunge into an ice bath to stop cooking.
- Stovetop Cooking: If you can't roast or grill, cook vegetables in a pan with olive oil and seasonings until tender.
Remember to cook any raw components like garlic or fresh herbs thoroughly, especially if you're planning long-term storage.
Adding Flavors and Seasonings
Successfully preserving vegetables in oil relies heavily on the careful selection and combination of complementary flavors and seasonings.
You'll want to start by adding smashed garlic cloves, lemon zest, fresh chilies, and shallots to create a robust flavor base. Include herb sprigs like rosemary, thyme, and sage in your oil mixture for aromatic depth.
When it comes to vinegar selection, you've got multiple options: balsamic, white, apple cider, red wine, rice wine, champagne, or sherry vinegar. Maintain a 2:1 ratio of olive oil to vinegar, as the acid helps preserve your vegetables and keeps harmful bacteria away.
After baking your vegetables at 350°F until tender, you can enhance their flavor further by combining them with additional seasonings.
If you're planning to store your preserved vegetables for more than a week, remember to remove all fresh herbs and raw ingredients. For long-term storage, use a hot oil infusion method: heat your oils with low-acid foods, then strain through a fine-meshed sieve or cheesecloth to remove solids.
Don't forget to store your finished product in clean, sterile jars to maintain both quality and safety.
Safe Storage Methods
Safe storage is absolutely critical when preserving vegetables in oil, as improper methods can lead to dangerous bacterial growth, especially Clostridium botulinum.
You'll need to refrigerate your oil-preserved vegetables immediately after preparation and keep them at a consistent temperature. Don't store these mixtures at room temperature unless they're properly acidified, and remember that homemade acidification isn't reliable.
For ideal safety and freshness, follow these essential storage guidelines:
- Use sterile, airtight containers and keep vegetables completely submerged in your oil-vinegar mixture (2:1 ratio)
- Label containers with dates and don't store them for longer than 3 weeks in the refrigerator
- Remove raw ingredients like garlic or fresh herbs if you're planning to store for more than a week
- Store containers in a dark place in your refrigerator to maintain oil quality
If you need longer storage, freezing is your best option.
When checking your preserved vegetables, look for any signs of spoilage or rancidity. Remember to let the oil thaw at room temperature before serving if it becomes cloudy from refrigeration.
Using Your Preserved Vegetables
Now that you've properly stored your preserved vegetables, it's time to put them to good use in your cooking. You'll find these flavorful ingredients can transform ordinary dishes into something extraordinary, particularly through their rich umami profile that develops during the preservation process.
Start by incorporating your preserved vegetables into stir-fries, where they'll add depth and complexity. Dry fry them with vinegar and sugar to adjust their taste, then combine them with proteins like beef or chicken.
Don't forget to add aromatics like garlic and finish with stock and thickening agents for the perfect consistency.
For plant-based options, pair your preserved vegetables with medium-firm tofu. Create a savory sauce using oyster or mushroom sauce, sugar, and black pepper, thickened with cornflour.
You can also toss them into fresh salads, pasta dishes, or layer them in sandwiches with pesto for an instant flavor boost.
For maximum impact, combine preserved vegetables like Sichuan mustard stem with black fungus to create complex flavor profiles.
Remember that these preserved ingredients work particularly well in Asian-inspired dishes, where their umami characteristics can fully shine.
Troubleshooting Common Issues

Preservation problems can arise even with the most careful preparation methods. When troubleshooting issues with your oil-preserved vegetables, it's essential to recognize signs of spoilage early. If you notice unpleasant odors, off-putting tastes, unusual cloudiness, or slimy textures, discard the mixture immediately to prevent potential foodborne illnesses.
Common storage mistakes can greatly impact your preserved vegetables' quality and safety. Keep your jars away from light, heat sources, and strong-smelling substances. Confirm proper sealing to prevent oxidation, and don't store oils near stoves or radiators where temperatures fluctuate.
- Always use clean, sterile jars for preservation
- Completely submerge vegetables in the oil-vinegar mixture
- Remove all air bubbles before sealing
- Check regularly for signs of spoilage
When handling and preparing your preservation mixture, avoid adding raw ingredients like garlic or herbs if you're planning long-term storage.
If you won't use the mixture within the recommended timeframe, consider freezing it. Don't ignore manufacturer recommendations for storage and use, and always trust your senses – if something seems off about the appearance, smell, or taste, it's better to be safe and discard the mixture.
Frequently Asked Questions
Can I Reuse the Oil Mixture After Finishing the Preserved Vegetables?
Yes, you can reuse the oil mixture for cooking, sautéing, and salad dressings. It'll have extra flavor from the vegetables. Just strain it first and store it properly in the refrigerator for safety.
What Causes Some Vegetables to Float Instead of Staying Submerged?
Your vegetables float when they're less dense than the oil, usually due to high water content or trapped air pockets. Their size, shape, and temperature can also affect buoyancy, making them rise instead of sink.
How Long Should I Wait Before Eating Newly Preserved Vegetables?
You'll want to wait at least 24 hours before eating your preserved vegetables. This gives them time to properly marinate and develop flavors, but don't exceed one week if using fresh ingredients.
Why Do Some Vegetables Change Color During the Preservation Process?
You'll notice vegetables change color due to oxidation when exposed to light and heat. Their natural compounds like chlorophyll break down, while chemical reactions between amino acids can cause unexpected color transformations during preservation.
Can I Mix Different Types of Oils for Preserving Vegetables?
While you can mix oils, it's not recommended. You'll get better results using a single oil type, preferably olive oil, as different oils have varying storage requirements and mixing could affect preservation quality.
In Summary
Now you're ready to enjoy your homemade oil-preserved vegetables! Remember to always check for signs of spoilage before consuming, store your jars in a cool, dark place, and refrigerate after opening. You'll find these preserved vegetables add incredible flavor to salads, pasta dishes, and antipasti platters. With proper preparation and storage techniques, you'll have delicious, homemade preserved vegetables to enjoy year-round.

Leave a Reply