To store winter ice effectively, you'll need to follow both time-tested methods and modern innovations. Start by ensuring ice thickness of at least 10-14 inches for safe harvesting, then cut uniform blocks using traditional tools like ice saws or modern power equipment. You'll want to transport blocks quickly to a well-insulated storage house with at least 12 inches of insulation in floors, walls, and ceiling. Modern storage techniques include ENERGY STAR® systems that use 32% less energy than older methods. Whether you choose traditional or contemporary approaches, proper maintenance and safety protocols will determine your success. The journey from ice block to year-round cooling holds many fascinating layers.
The Ancient Art of Harvesting
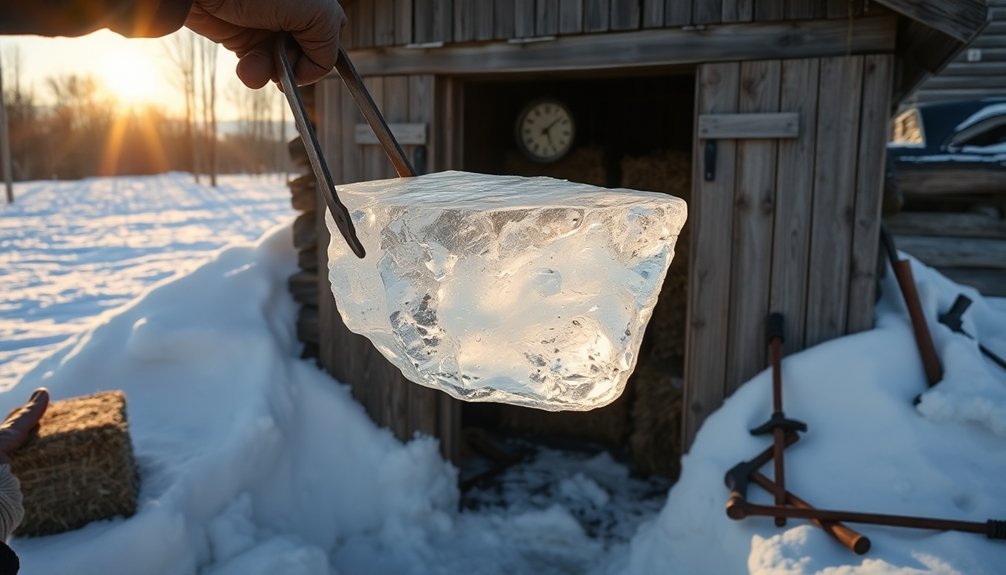
The crisp winter air rings with the sound of saws and breaking ice during the traditional harvest season. Before you begin harvesting, you'll need to verify the ice is at least 2 inches thick to support a person, though 10-14 inches is ideal for a successful harvest. January and February typically offer the best conditions, when winter's grip has thoroughly frozen lakes and ponds. Modern safety checks help ensure ice stability and thickness before any harvesting begins.
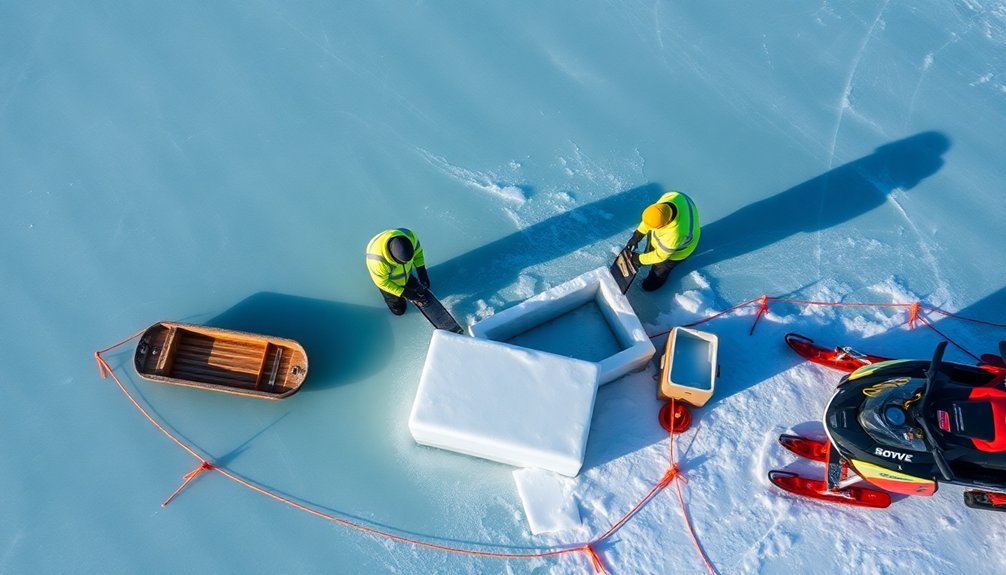
You'll start by clearing snow from the surface, then coordinate with a team of 20-30 workers who each have specific roles. Using horse-drawn plows or tractors equipped with circular saws, you'll cut initial paths through the ice.
Next, you'll create long strips that workers will break into manageable blocks using breaking bars. As you work, you'll see teams of horses pulling wagons alongside the ice field, ready to transport the harvested blocks.
The process requires careful coordination – you'll need sawyers to cut the ice, barmen to break it, and handlers to move the blocks. The ice you're harvesting isn't just for immediate use; it's a valuable commodity that'll keep food fresh and drinks cool throughout the warmer months ahead.
Tools of Traditional Ice Cutting
If you're planning to harvest ice using traditional methods, you'll need both essential hand tools and horse-drawn equipment to get the job done efficiently.
Your basic hand tool kit should include ice saws that cut on the down stroke and breaking bars for splitting uniform ice cakes, while larger operations require horse-drawn implements like the Ice King Plow for marking and deepening grid patterns.
In the 19th century, these innovative cutting methods revolutionized the massive ice industry, making harvesting more efficient and profitable.
The combination of manual tools and horse-drawn equipment lets you systematically harvest ice blocks of standard sizes, typically 22-24 inches wide, which are ideal for storage and transport.
Essential Hand Tools Needed
Successfully harvesting ice from frozen lakes and ponds required a specialized set of hand tools that evolved over decades of practice.
You'll need ice saws designed to cut through ice up to 18 inches thick, which you can operate alone or with a partner. While manual saws were common initially, power saws emerged around 1918, cutting 100 feet of 12-inch thick ice per minute. For safety and efficiency, the most effective technique involves pulling the saw up and leaning over to push the handles.
For marking and initial cutting, you'll want manual ice plows. These tools create precise grooves about two-thirds through the ice thickness without breaking it.
Using a swing guide, you can lay out a grid pattern for uniform ice cakes. Once you've marked your cuts, you'll need heavy chisels and pry bars to separate the blocks cleanly along the grooves.
To move the cut blocks, you'll require pike poles, which can extend up to 16 feet to reach distant ice. These work alongside gaff hooks and float hooks to guide ice blocks through channels toward your storage area.
Don't forget specialized tools like caulk-bars and breaking off bars – they're essential for various stages of ice handling and manipulation.
Horse-Drawn Equipment Guide
When transporting harvested ice, you'll rely on horse-drawn sleds and wagons.
Guide the blocks up loading ramps using ice picks, and make certain your horses maintain steady footing throughout the process.
Safety First on Frozen Lakes
Before you step onto any frozen lake with your ice harvesting tools, you'll need to verify the ice thickness is at least 4 inches by drilling test holes at multiple points.
You must carry essential safety gear, including ice picks, a PFD under your winter clothing, and a reliable means of communication.
It's critical to bring a partner and let others know your planned location and return time, as ice conditions can change rapidly and vary greatly across the same body of water.
Testing Ice Thickness Properly
Since your safety on frozen lakes depends entirely on proper ice thickness measurements, knowing how to test the ice correctly is essential. You'll need specific tools to get accurate readings: an ice chisel, auger, or cordless drill with a 5/8-inch wood auger bit. When testing, start near the shore and continue checking as you move farther out.
| Ice Thickness | Safe Activities | Required Actions |
|---|---|---|
| Under 4" | None – Stay Off | Test with chisel or Nordic poles |
| 4" – 7" | Ice fishing, walking | Check every 150 feet |
| 8"+ | Small vehicles | Test multiple spots, verify clear ice |
Remember that white ice or snow ice is only half as strong as clear ice, so you'll need to double the thickness requirements. If you're planning to keep a load stationary for more than two hours, add 50% to the recommended thickness. Don't rely on just one measurement – ice thickness can vary considerably across the same lake. While modern methods like SONAR and ultrasonic devices exist, traditional tools remain the most practical for individual use. Always carry safety gear and check for water seepage through test holes, which indicates considerable ice deflection.
Rescue Equipment Requirements
Anyone venturing onto frozen lakes must carry essential rescue equipment to guarantee survival in emergency situations.
You'll need a Personal Flotation Device (PFD) that provides 25-35 pounds of buoyancy, and ice awls for self-rescue if you break through. Don't forget waterproof gloves to maintain grip and protect your hands from the cold.
For group activities, you should carry rescue throw bags and heaving lines to help others in distress. A pike pole helps distribute your weight and can reach someone who's fallen in. Anti-exposure coveralls provide vital protection against cold water and harsh elements.
You'll need proper equipment to guarantee stable rescue platforms. Consider carrying a rescue sled or board to distribute weight effectively.
If you're working with a team, make sure you've got at least two ice rescue suits with wool socks for primary and backup rescuers. Keep water rescue helmets, carabiners, and rescue buoys readily accessible.
For extended operations, maintain a stokes basket or backboard with ice screws to secure equipment on safe ice.
Remember to bring a water sample bottle for potential medical evaluation if someone falls through.
Proper Ice Block Transportation
Throughout the ice handling process, safe and efficient transportation remains critical for maintaining quality and preventing workplace accidents. You'll need to use specialized equipment and follow proper handling procedures to guarantee both safety and ice integrity during movement.
For efficient transportation, you should utilize dedicated ice totes and caddies with lids rather than general-purpose containers. These ergonomically designed tools prevent cross-contamination while making the handling process easier on your staff.
When you're dealing with larger operations, consider installing pneumatic tube-conveyor systems like Ice Link, which can transport ice up to 500 feet horizontally and 40 feet vertically.
Here's what you'll need to maintain during ice transportation:
- Place "wet floor" signs around ice loading areas to prevent slip hazards
- Clean up any scattered ice or water immediately to maintain safety
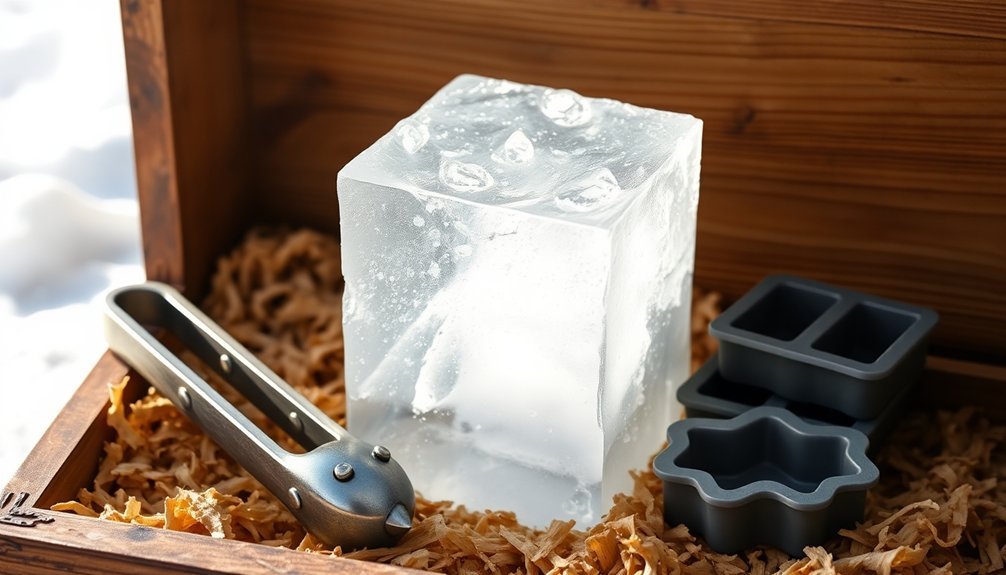
- Use serrated tongs for handling ice cubes to prevent damage
- Transport block ice in sealed containers to preserve quality
For enhanced efficiency, you can implement the Archimedys™ modular screw system, which prevents ice clumping and guarantees continuous flow.
This techno-polymer solution offers excellent corrosion resistance while requiring minimal maintenance, making it ideal for high-volume operations.
Building an Ice Storage House
When building an ice storage house, you'll need to carefully assess your location's drainage, sun exposure, and accessibility to guarantee ideal ice preservation.
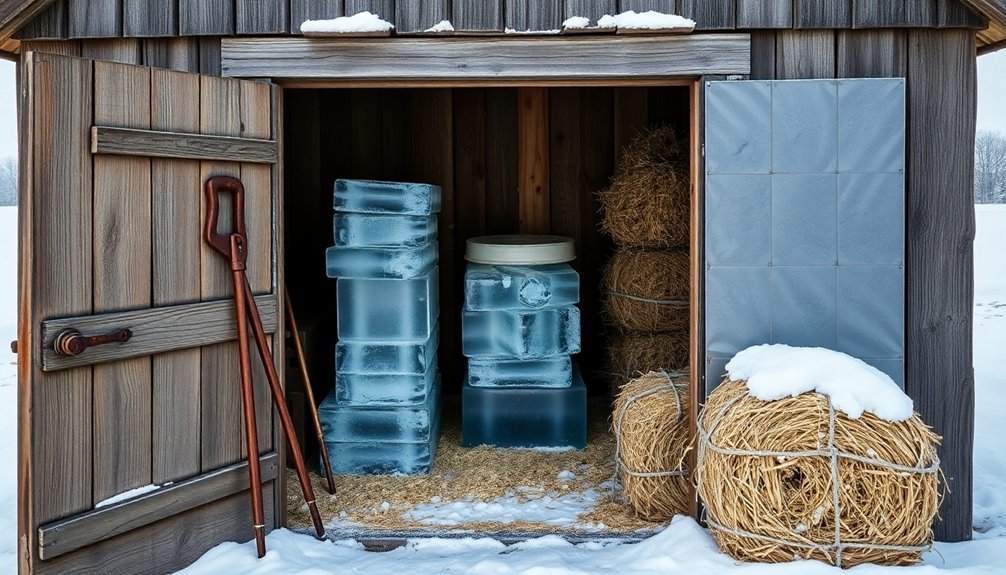
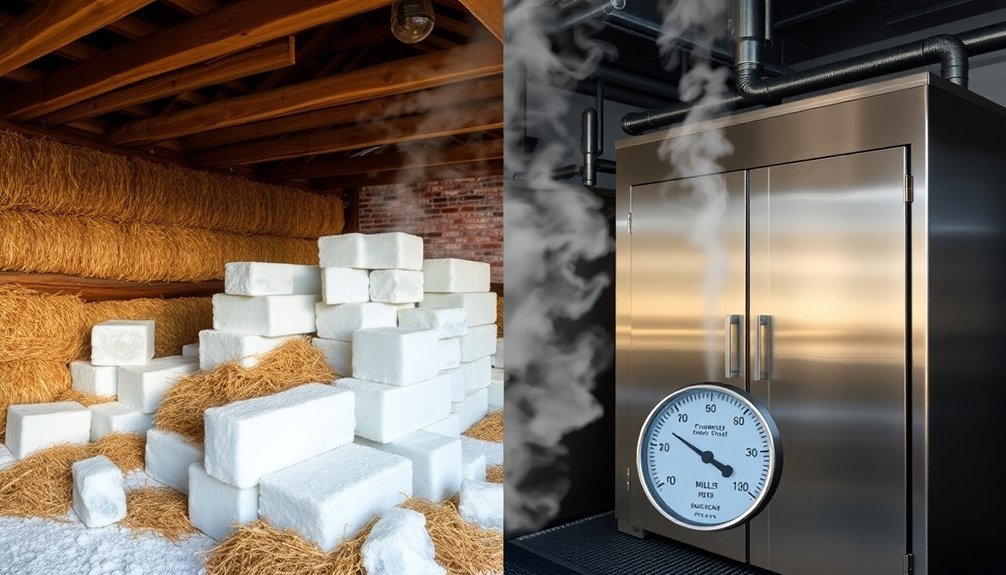
Your structure's insulation must include multiple layers of non-conducting materials between double partition walls, such as sawdust or modern insulation materials, to maintain consistently cold temperatures.
You'll want to follow specific design guidelines for the foundation, framing, and roof construction to create a weatherproof and well-ventilated space that effectively stores ice throughout warmer months.
Location and Site Planning
Choosing the right location for your ice storage house can make the difference between successful long-term ice preservation and rapid melting. You'll want to position your structure near your main house for convenience while guaranteeing it's in a naturally cool, shaded area that's protected from direct sunlight.
When selecting your site, prioritize these essential factors:
- Natural shade – Place the structure under mature trees or on a north-facing hillside to minimize sun exposure.
- Proper drainage – Select ground that's slightly elevated or sloped, with sandy or gravelly soil that won't retain water.
- Cool air circulation – Allow space around the structure for air movement, and take into account adding a vine-covered trellis for extra shade.
- Accessibility – Guarantee easy access for ice harvesting and regular maintenance.
You'll also need to take into account the foundation requirements for your specific location. The ground should be stable enough to support a concrete slab or piers, and you'll need to dig footings below the frost line.
Remember to position the structure away from high-traffic areas and heat sources that could compromise your ice storage efforts.
Insulation Layer Requirements
Proper insulation serves as the cornerstone of any successful ice storage house, determining how long your ice will stay frozen throughout the warmer months. You'll need to install at least 12 inches of insulation material throughout your structure, paying special attention to floors, walls, and ceilings.
| Material Type | Thickness Required | Special Considerations |
|---|---|---|
| Styrofoam | 12+ inches | High R-value, recommended choice |
| Natural Materials | 12+ inches | Treat with borax for termite protection |
| Cork/Sawdust | 12+ inches | Traditional, readily available |
| Door Insulation | 6+ inches | Use natural cork or styrofoam |
| Air Spaces | 6+ inches | Between walls for additional protection |
When installing your insulation layers, you'll want to overlap the sheets carefully to prevent any gaps where warm air might penetrate. For peak performance, create a double roof system with proper ventilation space between layers. Don't forget to treat any organic insulation materials with borax powder if you're in a warmer climate. Remember to maintain an R-value of at least 32 throughout your structure, and consider installing insulated metal panels for consistent thermal resistance. Regular inspections will help guarantee your insulation remains effective year-round.
Structure Design Guidelines
In constructing an ice storage house, you'll need to follow specific structural guidelines to guarantee ideal temperature control and longevity. Your foundation must extend below the frost line with a thickness of 6-12 inches, while the floor should slope toward a drain to manage melting ice.
Consider using cobblestones for the foundation to create naturally cold floors and enhance drainage.
Build your walls using standard 2×4 stud construction, creating both inner and outer frameworks with space between them for insulation. You'll want to use board-and-batten or tongue-and-groove materials for the exterior covering.
For the entrance, install double doors packed with at least 6 inches of insulation material like cork or styrofoam.
Here's what you'll need for proper ventilation and drainage:
- A trapped drain system to prevent warm air infiltration
- Adequate space between insulation and roof for air circulation
- Strategic air vents to maintain consistent temperatures
- A platform of fence rails or similar structure beneath the floor for proper drainage
Remember to incorporate proper latching mechanisms on both sides of your doors and guarantee all joints are sealed to maintain the cold environment.
Natural Insulation Materials Through History
Three ancient civilizations pioneered the use of natural insulation materials that we still reference today. The ancient Egyptians mastered mud brick construction to regulate desert temperatures, while northern Europeans perfected the use of straw and reed for thatching. The Romans innovated with cork insulation, particularly in their aqueducts and Mediterranean buildings.
You'll find that many of these traditional materials remain relevant for ice storage. Natural fiber insulation like cellulose, which emerged in 1920s Scandinavia, offers excellent temperature control.
If you're looking for tested solutions, reflect that medieval builders used straw-clay mixtures and hung tapestries to combat drafts in castles. They'd learned what native tribes in North Africa already knew – that mud and straw combinations create effective insulating barriers.
The late 19th century brought significant advances you might want to reflect on. The Cabot-Quilt system of 1893 used dried eelgrass between paper layers, while mineral wool production began in 1840s Wales.
These developments paved the way for modern insulation, though they weren't as revolutionary as the 1941 introduction of plastic foams, which transformed cold storage capabilities.
Modern Ice Storage Technologies
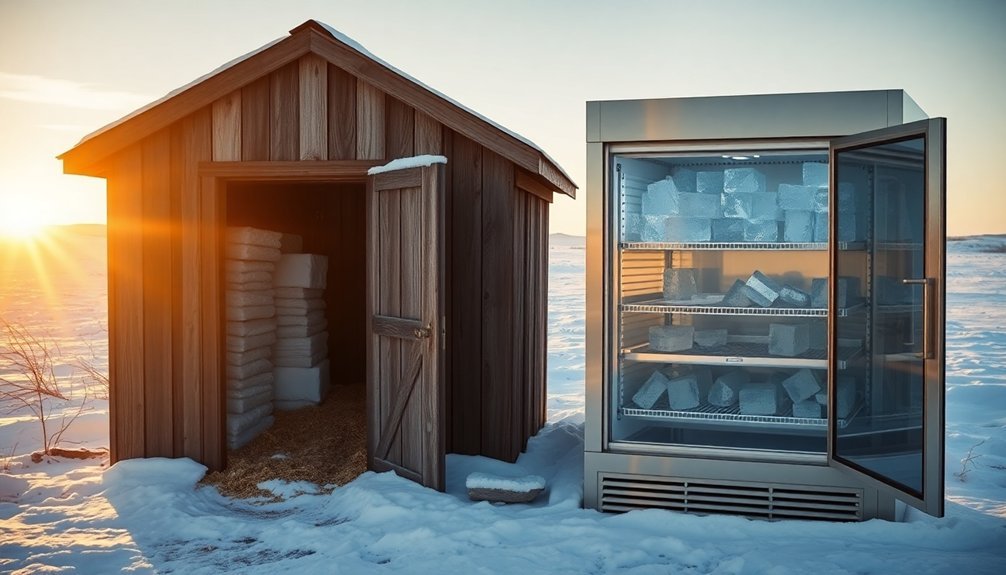
Modern ice storage systems present four revolutionary technologies that maximize efficiency and sustainability. You'll find these systems dramatically reduce energy costs while providing reliable cooling solutions for various applications. The IceBrick™ system, for example, offers modular cells that store 25 kWh of electricity and can be installed on rooftops or walls, costing 80% less per kWh than traditional systems.
When you're considering modern ice storage, these key technologies stand out:
- Internal melt systems with factory-assembled components that provide consistent quality and simple controls, perfect for both new and retrofit projects.
- Moving floor conveyor technology ensuring first-in/first-out rotation and eliminating residual ice concerns.
- Low Interfacial Toughness (LIT) materials that reduce ice adhesion strength to less than 10 kPa, making ice removal easier without defrosting.
- Multiple operating modes that adapt to time-of-day and seasonal changes, with chillers running at just 60% of conventional system sizes.
You'll benefit from primary and secondary pumping loops that use heat exchangers to separate different fluid circuits, making the system more efficient and easier to maintain.
The technology's versatility allows for customization across various industrial applications while maintaining FDA and USDA compliance.
Efficiency in Commercial Ice Systems
Commercial ice systems can dramatically reduce their energy footprint through smart efficiency measures and load shifting strategies. You'll find that replacing older machines with ENERGY STAR® qualified models can cut energy use by 32% and save up to 6,000 kWh annually. Modern systems operate at 4.34 kWh per 100 lb of ice, compared to 6.54 kWh in older models.
| System Type | Energy Usage | Water Usage |
|---|---|---|
| Old Models | 6.54 kWh/100lb | 28.0 gal/100lb |
| ENERGY STAR® | 4.34 kWh/100lb | 24.0 gal/100lb |
| Best Available | 3.96 kWh/100lb | 18.0 gal/100lb |
| Peak Hours | High Cost | Standard |
| Off-Peak | Low Cost | Standard |
To maximize efficiency, you can implement load shifting by operating your ice machines during non-peak hours. This strategy works best when you've got sufficient storage capacity. You'll need time clock-based controls for machines with peak duty cycles below 70%. Don't forget about water efficiency – newer models use considerably less water, dropping from 28.0 to 24.0 gallons per 100 lb of ice. Regular maintenance and proper sizing are essential for ideal performance and minimal waste.
Year Round Ice Preservation

Winter's freezing temperatures provide an excellent opportunity to create and preserve ice year-round without electricity.
You'll need to take advantage of cold winter days, ideally below 5 degrees F, to make ice in large containers like Rubbermaid bins. Using drip irrigation systems or frost-free hydrants, you can efficiently fill multiple containers simultaneously and let them freeze over several nights.
To maintain your ice supply throughout the year, you'll need a well-insulated storage area within your root cellar. The storage chamber should include a drain for melt water and maintain temperatures around 32 degrees F. Your ice storage space should occupy about one-third of your cellar volume for peak efficiency.
Here are four essential steps for long-term ice preservation:
- Seal ice from air and moisture to prevent odor absorption
- Keep large ice blocks physically separated to prevent fusion
- Use stackable, closed containers for efficient storage
- Guarantee easy access to minimize melting during retrieval
Environmental Impact of Storage Methods
Traditional ice storage methods can have surprising environmental consequences that you'll want to take into consideration before choosing a preservation system.
Standard ice rinks are particularly resource-intensive, consuming around 16,800 kW of energy and 19,900 liters of water monthly for a 200m2 surface, while generating 5.52 tonnes of CO2 emissions.
You'll find that conventional storage methods often rely heavily on non-renewable energy sources and can pose significant risks.
There's the potential for chemical leaks, including glycol, which can contaminate nearby water bodies. If you're using deicing materials, you'll need to weigh their long-term environmental impact, as salts persist in the environment and can harm aquatic life even during summer months.
Modern alternatives offer more sustainable solutions you can implement.
Synthetic ice rinks are completely recyclable and don't require water or energy to maintain.
If you're managing a cold storage facility, you can integrate IoT technology for precise monitoring and adopt renewable energy sources like solar and wind power.
These eco-friendly options won't just reduce your environmental impact – they'll often lower your operational costs while maintaining effective preservation capabilities.
Cost Analysis Traditional Vs Modern
Making the switch from traditional to modern ice storage methods requires careful financial consideration of both upfront and long-term costs. While traditional methods might seem more straightforward with basic infrastructure like ice houses, they often result in higher operational expenses due to labor-intensive processes and inefficient storage conditions.
Modern systems, though requiring a higher initial investment of around $450 per ton of cooling capacity, typically deliver considerable long-term savings through automation and energy efficiency.
When comparing costs between traditional and modern methods, you'll find these key differences:
- Your energy bills will likely decrease by 30-40% with modern systems due to off-peak operation and better insulation.
- Your labor costs will drop considerably as automated systems replace manual ice handling and monitoring.
- Your maintenance expenses will be more predictable with modern systems due to better equipment longevity.
- Your storage capacity will increase per square foot, maximizing your investment return.
Modern systems' ability to integrate with existing HVAC infrastructure and utilize advanced control strategies means you'll benefit from improved efficiency and reduced waste, ultimately leading to better cost management despite the higher upfront investment.
Maintaining Ice Quality Long Term
Long-term ice quality's success depends on a thorough maintenance strategy that combines regular cleaning, component inspection, and professional servicing. You'll need to clean your ice storage system at least twice yearly, with more frequent cleanings if your water source has high mineral content or if you're operating in an environment with yeast, sugar, or flour particles.
| Maintenance Task | Frequency | Key Benefits |
|---|---|---|
| Descaling | Every 3-4 months | Prevents mineral buildup and freeze-ups |
| Component Inspection | Monthly | Identifies wear and potential failures |
| Professional Service | Bi-annually | Extends system lifespan |
To maintain peak ice quality, you'll want to focus on proper airflow management and water quality control. Keep your air vents and fans clean, replace water filters regularly, and monitor your water source quality. Don't forget to implement a condition-based monitoring system to track the health of critical components. When you notice signs of wear on conveyor belts, fans, or other moving parts, replace them promptly. Remember to lubricate all moving components according to manufacturer specifications, and calibrate temperature sensors regularly to guarantee accurate readings.
Future of Ice Storage

Innovation in ice storage technology is revolutionizing how we'll manage thermal energy and food preservation in the coming decades.
You'll see significant changes in how businesses and homes store and utilize ice, particularly through advanced solutions like IceBricks and isochoric freezing methods. These technologies aren't just improving efficiency; they're transforming our approach to energy management and food preservation.
Looking ahead, you can expect these major developments in ice storage:
- IceBrick systems will become common on commercial buildings, converting excess renewable energy into ice during off-peak hours and reducing cooling costs by up to 80%.
- Isochoric freezing technology will help you preserve food longer while maintaining better quality, potentially saving billions in energy costs and reducing food waste.
- You'll see increased integration of ice storage systems with district cooling networks, making sustainable cooling more accessible in urban areas.
- Smart ice storage solutions will automatically respond to grid demands, helping you save money while supporting renewable energy adoption.
These advancements won't just change how you store ice; they'll fundamentally alter your relationship with energy consumption and food preservation, making both more sustainable and cost-effective.
Frequently Asked Questions
How Does Ice Thickness Affect the Storage Life of Harvested Blocks?
You'll find thicker ice blocks last longer in storage because they've got more mass and less surface area relative to volume, reducing melting rates. They're also easier to stack tightly, minimizing warm air exposure.
Can Traditional Ice Harvesting Methods Be Adapted for Smaller Backyard Ponds?
You can adapt ice harvesting for small ponds by using handheld saws and ice picks. It is crucial to maintain safe ice thickness and create smaller, manageable blocks that you'll insulate with sawdust.
What Alternative Cooling Solutions Exist for Areas Without Natural Ice Sources?
You can rely on zeer pots, ice boxes with PCMs, or evaporative cooling systems. Modern flake ice machines and small-scale TES systems also offer effective alternatives when you don't have access to natural ice.
How Do Different Water Sources Affect the Clarity of Stored Ice?
Your ice's clarity depends heavily on water quality. You'll get clearest results using distilled or RO water with low TDS levels, while tap water's minerals and dissolved gases will create cloudy, less-attractive ice.
What Emergency Backup Systems Are Recommended for Modern Ice Storage Facilities?
You'll need ice storage systems, backup generators, thermal energy storage tanks, and redundant cooling systems. Install real-time monitoring sensors and emergency protocols to guarantee uninterrupted temperature control during power outages or equipment failures.
In Summary
You'll find that both traditional and modern ice storage methods have their place in today's world. While historic techniques remind us of our resourceful past and offer eco-friendly solutions, modern adaptations provide efficiency and convenience. Whether you're preserving ice for practical needs or maintaining cultural traditions, you can blend time-tested wisdom with current technology to achieve the best results for your specific situation.


Leave a Reply