
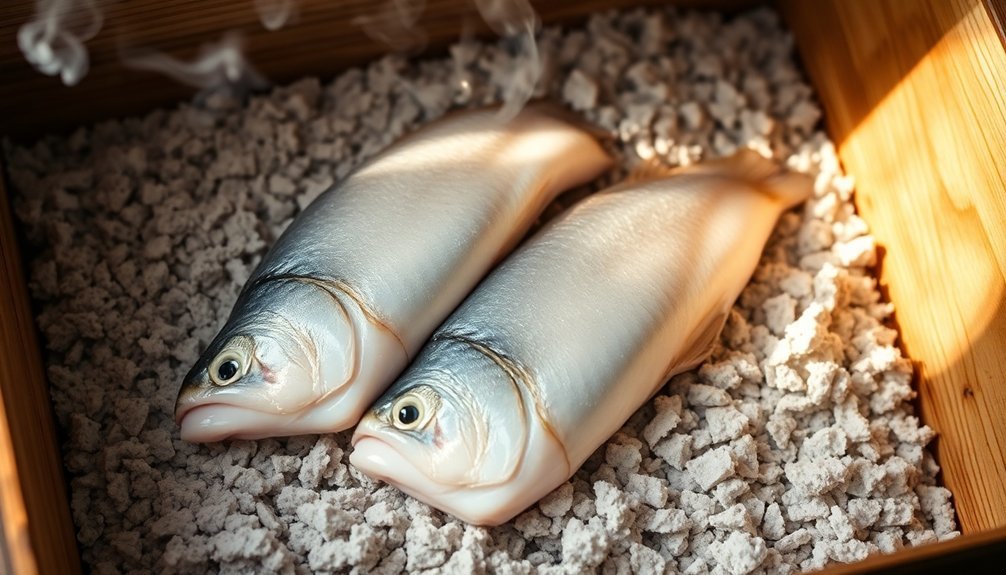
You'll find wood ash preservation highly effective when using specific hardwoods like maple, oak, or hickory due to their ideal mineral content. Start by thoroughly cleaning and scaling your medium-sized fish, then layer them in a clean container with 1-1.5 inches of finely sifted ash. Don't let the ash directly contact the fish, and maintain proper temperature control below 36°F for best results. Combine this method with traditional techniques like smoking or salt curing to enhance both preservation and flavor. For maximum effectiveness, select premium hardwoods and burn them at 500-900°C. The following methods will transform your fish preservation game completely.
Selecting the Right Wood Ash

When preserving fish with wood ash, selecting the right type of ash is essential to your success. You'll want to use ash specifically from hardwoods like maple, oak, or hickory, as these provide the best mineral composition for preservation. Traditional uses demonstrate that wood ash extends preservation of foods significantly compared to other methods.
Make sure you're burning the wood at temperatures between 500-900°C to retain the most beneficial nutrients.
Don't use ash from softwoods, pressure-treated lumber, or any materials containing plastics or hazardous substances. You'll need to sift the ash thoroughly to remove larger chunks and any leftover charcoal for better consistency.
The ash you select should be free from fly ash, which contains dangerous levels of toxic metals like cadmium and chromium.
Your chosen ash should have a high calcium content (around 26% of dry weight) and significant potassium levels. While the ash will be highly alkaline with a pH around 12, this property helps with preservation.
You'll need to store it properly to prevent moisture absorption and keep it away from water sources.
Preparing Fish for Ash Storage
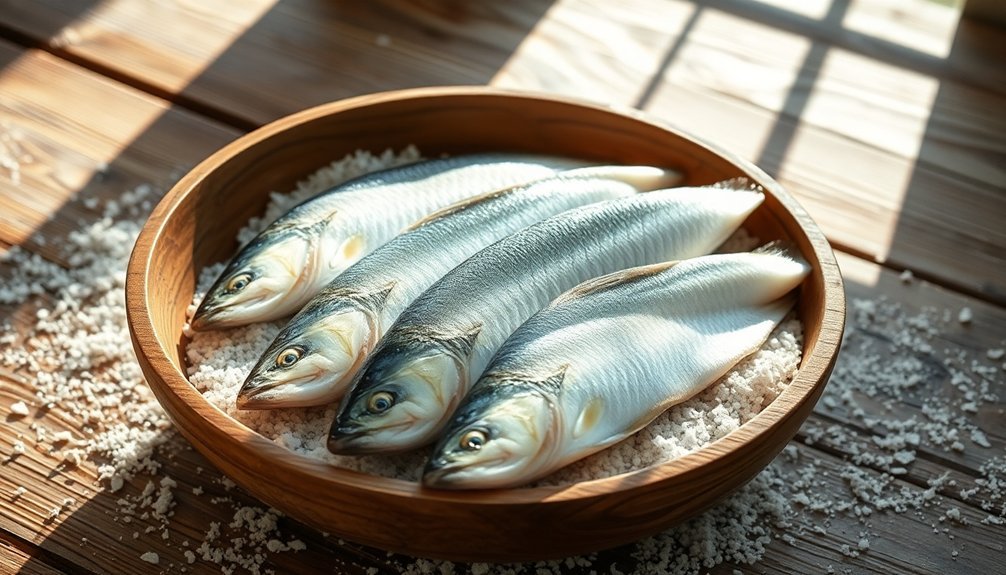
Based on the facts provided, you'll need to start with thorough cleaning and scaling of your fish, ensuring all blood, innards, and scales are completely removed to prevent spoilage.
When gutting the fish, make precise cuts from the vent to the gills and remove all internal organs while rinsing with cold water to maintain cleanliness.
Choose medium-sized fish that aren't too thick, as they'll cure more evenly and dry more consistently throughout the preservation process. Store your prepared fish in a covered metal container to maintain optimal safety and prevent contamination during the preservation process.
Clean and Scale First
Proper fish preparation's first critical step involves thorough cleaning and scaling, which sets the foundation for any preservation method. You'll need to rinse your fish under cold running water to remove dirt and loosen scales. Grasp the tail firmly, using a paper towel for better grip, and scrape from tail to head with a blunt knife edge to remove scales effectively. For best results, you can use a stainless steel scraper designed specifically for scaling.
Once you've scaled both sides, rinse the fish again to wash away any remaining scales and blood. Run your finger against the grain to check for missed spots. Always work in a clean environment with sanitized tools to prevent contamination. Pat the fish dry thoroughly with paper towels, working from head to tail to avoid injury from fin spines.
| Step | Critical Action | Safety Note |
|---|---|---|
| 1 | Cold water rinse | Avoid hot water that promotes bacteria |
| 2 | Scale removal | Keep firm grip to prevent slipping |
| 3 | Secondary rinse | Guarantee all blood is removed |
| 4 | Complete drying | Reduce bacterial growth risk |
While wood ash isn't typically used for fish preservation, these cleaning steps are essential before proceeding with any preservation method, whether you choose smoking, canning, or freezing.
Proper Gutting Techniques
The four essential steps of gutting fish begin with removing the head and gills cleanly at the base.
You'll need to make a precise cut along the belly from the anus to where the gills were, creating an opening to access the body cavity. Carefully extract all innards, including the organs and bloodline, ensuring you don't rupture any internal organs that could contaminate the meat.
Next, you'll want to focus on removing the bloodline that runs along the spine and any dark meat in the belly area.
These parts spoil quickly and can affect the overall quality of your preserved fish. Use a sharp knife to make clean cuts, being careful not to damage the surrounding flesh. After removing these elements, give the fish another thorough rinse.
Finally, you'll need to clean the cavity meticulously under cold running water.
Use a soft brush to remove any remaining debris, and check carefully for leftover scales or innards. Pat the fish completely dry with paper towels to remove excess moisture.
Once cleaned, immediately chill the fish at 40 degrees F or lower until you're ready to proceed with preservation.
Optimal Fish Size Selection
Selecting the right size fish is essential for successful ash preservation. You'll want to guarantee your fish pieces maintain a thickness of about 1.5 inches to withstand the preservation process effectively.
Keep in mind that thin fillets won't work well, as they can become too dry or fall apart during storage.
When preparing your fish, focus on these key dimensions:
- Cut large fish into uniform pieces that are at least 1.5 inches thick
- Guarantee each piece has enough meat to survive the moisture reduction process
- Maintain consistent thickness throughout all cuts for even preservation
If you're working with whole fish, don't hesitate to cut them into manageable sections. This approach helps guarantee the ash preservation method works uniformly across all pieces.
Remember that thicker, harder fish pieces preserve better than soft, delicate varieties. When you're selecting fish, choose firmer species that can hold up to the preservation process.
You'll find that fish with higher fat content, like salmon, may need special handling compared to leaner varieties. Just make sure you're not packing the pieces too tightly together, as this can lead to uneven preservation and potential contamination.
Traditional Earthenware Layering Technique
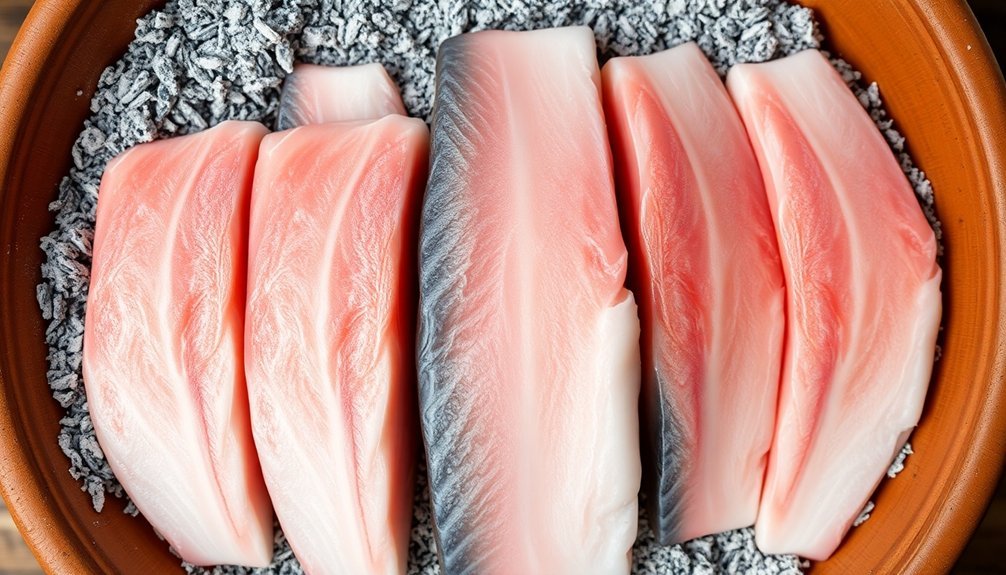
Creating an effective wood ash preservation system begins with mastering the traditional earthenware layering technique. You'll need a clean, dry earthenware crock or stoneware pot with a proper lid to guarantee ideal preservation conditions. The layering process requires careful attention to detail and proper tools, including a knife for food handling and a large spoon for ash distribution.
| Step | Action | Key Detail |
|---|---|---|
| 1 | Container Prep | Select clean, dry earthenware or stoneware |
| 2 | Fish Placement | Center the fish in container carefully |
| 3 | Ash Application | Add 1-1.5 inches of sifted ash around fish |
Once you've placed your fish in the center of the container, you'll need to surround it with a uniform layer of sifted wood ashes. It's essential to use only finely sifted ash to prevent any large particles from damaging the fish. The ash layer should be approximately 1 to 1.5 inches thick, creating a protective barrier against moisture and contamination. After completing the layering, you'll need to cover the container with a well-fitting lid or plate, optionally weighted with a stone or brick to guarantee a tight seal.
Direct Ash Contact Method
Safety concerns make direct ash contact an unsuitable method for fish preservation. You'll want to avoid placing wood ash directly on your fish, as there's no scientific evidence supporting this practice.
The chemical composition of wood ash can introduce harmful substances and unwanted flavors into your catch, while failing to provide the antimicrobial properties needed for proper preservation.
Instead of experimenting with wood ash, you should stick to these proven preservation methods:
- Salt curing – draws out moisture and creates an inhospitable environment for bacteria
- Smoking – uses heat and smoke compounds to preserve while adding flavor
- Pickling – relies on vinegar and salt to create an acidic preservation environment
You'll find that wood ash is better suited for other purposes, like gardening or melting ice.
The alkaline nature of ash can actually work against you when preserving fish, potentially altering the pH and leading to spoilage.
There aren't any established protocols for using wood ash in fish preservation, and you won't find any equipment designed for this purpose.
For your safety and best results, stick to traditional preservation methods that have been tested and proven effective over generations.
Hardwood Ash Preservation System
Traditional hardwood ash systems offer a balanced approach to fish smoking, combining preservation with rich flavor development. You'll want to select premium hardwoods like maple, oak, or alder, while avoiding softwoods that can impart unpleasant tastes. When collecting ash, verify it's completely cooled and sifted to remove larger particles.
| Process Step | What to Do | What to Avoid |
|---|---|---|
| Wood Selection | Choose maple, oak, alder, hickory | Avoid conifers, softwoods, moss |
| Ash Preparation | Sift thoroughly, verify fine consistency | Don't use hot ash or large particles |
| Smoking Setup | Maintain dense smoke, control temperature | Prevent fire flare-ups, avoid wet wood |
Your smoking setup should include a proper oil drum or smoking stove with carefully controlled temperature and ventilation. Prepare your fish by cleaning and curing it first, with small fish requiring about 30 minutes of salting. Remember that while the smoke adds flavor, it's not the primary preservative – you'll need to store your smoked fish below 36°F and consume it within 14 days. For longer preservation, freeze your smoked fish immediately after the smoking process is complete.
Long-Term Fish Storage
While wood ash smoking offers effective short-term preservation, long-term fish storage requires additional techniques to maintain quality and prevent spoilage.
You'll need to evaluate several proven methods depending on your storage goals and available resources.
For maximum longevity, you'll find these storage durations particularly useful:
- Store vacuum-sealed frozen fish for up to 2 years at 0 degrees F
- Keep properly canned fish for more than 5 years in a cool, dry place
- Preserve salt-cured fish for up to 9 months below 70 degrees F
If you're freezing fish, you'll want to act quickly after purchase, as immediate freezing maintains peak freshness.
Remember that fatty fish like salmon won't last as long as leaner varieties.
For canning, you'll need to process your fish within two hours of catching and use a pressure canner for safety.
If you're smoking fish, don't expect it to last beyond 14 days without freezing, but you can extend its life to 2 months in the freezer.
When using salt preservation, the brine-salting process draws out moisture, creating an environment that prevents harmful microorganisms from growing.
Mixed Ash Curing Process
Contrary to popular belief, wood ash curing isn't a reliable method for preserving fish, despite its occasional mention in survival guides.
There's no scientific evidence supporting its effectiveness, and the alkaline nature of wood ash can pose potential risks. Instead, you'll want to focus on proven preservation methods that have stood the test of time.
Salt curing is your most dependable option. You'll find it's highly effective at drawing out moisture and inhibiting bacterial growth, which greatly extends your fish's shelf life.
You can enhance the flavor by adding sugar and spices during the curing process, and it works well with both lean and fatty fish species.
If you're looking for additional preservation methods, consider smoking your fish. You can choose between hot smoking, which cooks the fish, or cold smoking, which preserves it while adding flavor.
For best results, you'll want to combine smoking with salt curing.
You can also dry your salt-cured fish to further extend its preservation. Just rinse off excess salt, hang the fish in a well-ventilated area, and protect it with cheesecloth.
This method works particularly well for smaller fish in warm, dry climates.
Frequently Asked Questions
Can Wood Ash Preserved Fish Be Eaten Without Cooking?
You shouldn't eat fish preserved in wood ash without cooking it first. There's no scientific evidence supporting its safety, and uncooked preserved fish could contain harmful bacteria that may make you sick.
How Long Should Fish Acclimate to Room Temperature Before Ash Preservation?
You don't need to acclimate fish to room temperature before preservation. It's actually unsafe to let fish warm up – you should keep it cold until you're ready to begin the preservation process immediately.
Does the Size of Fish Affect the Preservation Time in Ash?
Yes, you'll find that larger fish would likely need longer preservation times in ash since their greater mass and moisture content require more time for the ash to effectively draw out moisture and protect against spoilage.
Can Wood Ash Preserved Fish Be Used for Making Fish Sauce?
You shouldn't use wood ash preserved fish for making fish sauce. It'll disrupt the fermentation process and could introduce harmful contaminants. Stick to fresh fish and traditional salt-based fermentation for proper fish sauce.
Should Different Types of Fish Be Stored Separately in Ash?
You shouldn't use wood ash to store fish at all. Instead, keep different types of fish separate using proper preservation methods like freezing, smoking, or salting to prevent cross-contamination and maintain quality.
In Summary
You've now learned multiple effective methods for preserving fish using wood ash. Whether you're using the traditional earthenware technique or the direct contact method, remember to select clean hardwood ash and properly prepare your fish. Don't forget to monitor storage conditions and rotate your preserved fish regularly. With these time-tested ash preservation techniques, you'll be able to keep your catch fresh for extended periods.


Leave a Reply