Community ice houses lasted through summer thanks to smart architectural design and practical preservation methods you'd recognize from modern-day building practices. You'll find they used thick walls with high thermal mass, built structures into hillsides, and created multi-layer insulation systems using straw and sawdust. They'd manage moisture through elevated platforms and sophisticated drainage systems, while strategic ventilation kept temperatures low and humidity controlled. Proper maintenance by community members, including regular inspections and repairs, guaranteed these essential structures preserved ice well into fall. There's much more to discover about these remarkable pre-modern cooling solutions.
Strategic Ice Block Placement

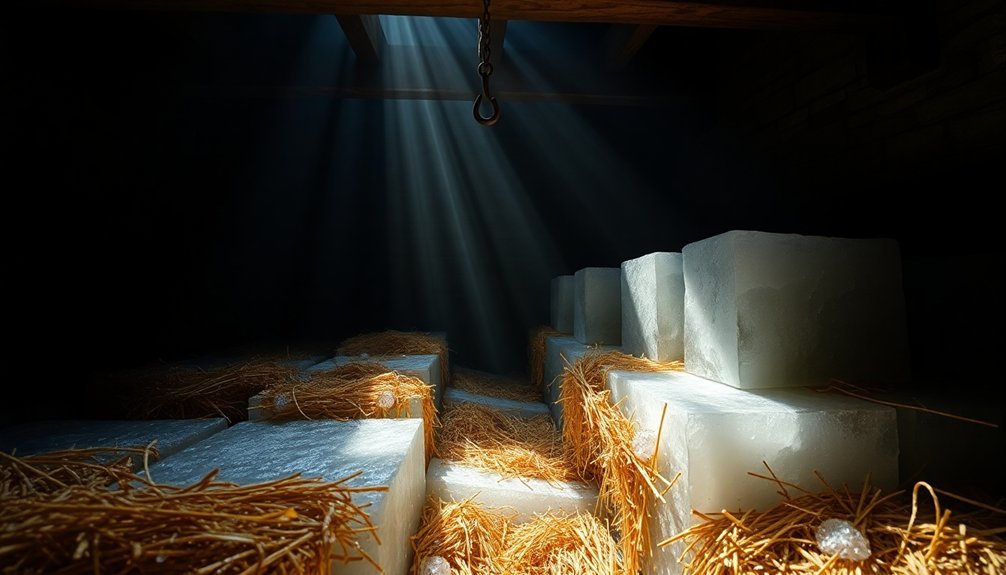
In traditional community ice houses, proper ice block placement serves as the foundation for effective long-term ice storage. Today's ice is produced at temperatures of -32 degrees to ensure superior clarity compared to pond ice. You'll want to use square ice blocks to minimize surface area, with larger 2 x 2 x 2 foot blocks being ideal for traditional setups, though smaller blocks work well in modern, insulated structures.
When placing your blocks, maintain 1-2 inch spaces between them and fill these gaps with fresh, dry sawdust or similar insulating materials like shavings, tanbark, or rock wool. It's vital that the blocks don't touch each other, as direct contact promotes melting.
You'll need to break some ice into smaller pieces and pack them solidly using heavy clubs or batons to consolidate the mass. The tighter you pack the ice, the longer it'll last.
Create distinct layers, covering each with sawdust or ground wood before adding the next layer. Don't forget to maintain an 8-12 inch insulation barrier between the ice and the walls.
As you build up the layers, make sure you're leaving enough insulating material at the top for the final covering. This systematic approach helps maintain the ice's integrity throughout the warmer months.
Natural Cooling Design Elements
Beyond the careful stacking of ice blocks, successful community ice houses rely on intelligent natural cooling design elements that work year-round.
You'll find these structures strategically built into hillsides or underground, where the earth's natural insulation helps maintain cool temperatures. They're carefully oriented to maximize shade during the hottest parts of the day while minimizing exposure to warm winds.
The buildings incorporate sophisticated ventilation systems that let warm air escape while trapping cool air inside. A heat exchange system helps optimize the cooling efficiency throughout the structure. You'll notice carefully positioned vents that create a natural flow, working alongside trapped drainage systems that prevent water accumulation from melting ice.
The structures feature thick walls made of high thermal mass materials like concrete or stone, often wrapped with insulating materials such as sawdust or rock wool.
You'll see these ice houses take full advantage of passive cooling mechanisms. They're designed to use clear night skies as natural heat sinks and incorporate features that minimize daytime heat gain while maximizing nighttime cooling.
Water tanks that freeze and thaw act as temperature regulators, while strategic placement near water sources guarantees easy ice harvesting during winter months.
Multi-Layer Insulation Systems

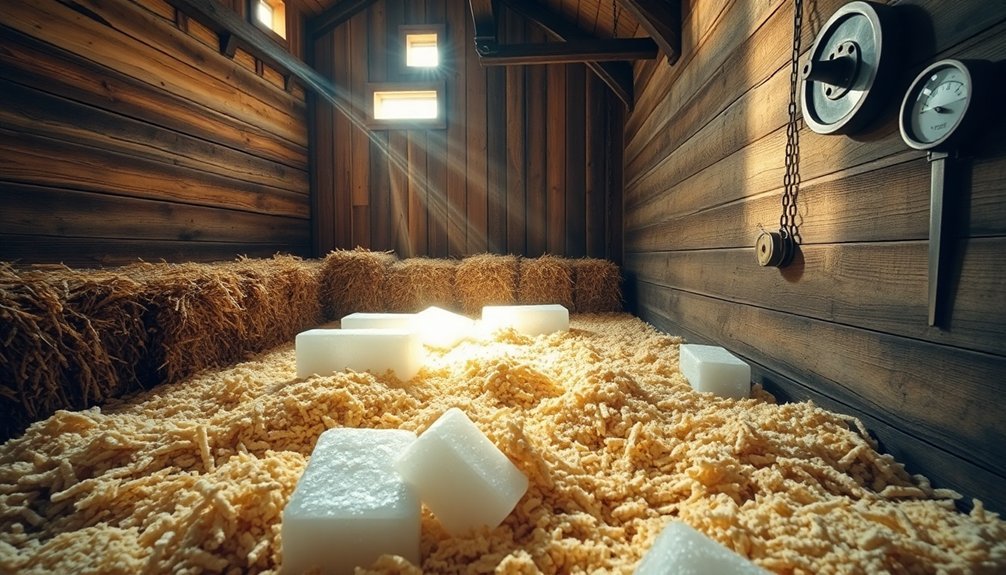
You'll find that traditional ice houses relied on multiple layers of insulation, typically combining straw and sawdust with deliberate air spaces between materials to trap cold air.
These natural materials work together to create an effective thermal barrier, much like modern multi-layer insulation systems but without the need for vacuum conditions. Proper sealing was essential to maintain the effectiveness of these layered systems.
The key to the system's success lies in proper moisture control through strategic drainage layers, which prevent insulation degradation and maintain the ice house's cooling efficiency.
Layered Straw and Sawdust
Historically, community ice houses relied on sophisticated layering of straw and sawdust to create remarkably effective insulation systems. You'll find that these natural materials were surprisingly efficient, with straw bales providing R-values between 26 and 30, while sawdust's particle structure trapped air effectively to prevent ice from melting.
The success of these ice houses depended on careful layering techniques. You'd typically see sawdust packed around ice blocks and between wall cavities, while straw bales, with their 90% air void composition, were used for wall construction and additional insulation. What made this combination particularly effective was the complementary properties of both materials.
| Property | Straw | Sawdust | Benefit |
|---|---|---|---|
| Air Content | 90% voids | Multiple air pockets | Enhanced insulation |
| Moisture Resistance | Tubular stalks prevent wicking | Requires proper drying | Reduces ice melt |
| Fire Safety | Needs render protection | Highly flammable | Manageable with proper handling |
| Longevity | Durable when protected | Needs replacement | Year-round ice storage |
When properly implemented, these layered systems could keep ice frozen for several years, proving especially valuable for community food preservation and early refrigeration needs.
Air Pockets Between Materials
A network of precisely engineered air pockets formed the backbone of advanced multi-layer insulation (MLI) systems in ice houses.
You'll find that these systems worked best when operating in near-vacuum conditions, where air pockets between materials like aluminum foil and fabric spacers created exceptional insulating properties.
The careful arrangement of these layers, typically attached only at the edges, helped minimize heat transfer through radiation and conduction.
When you're examining these historical insulation systems, you'll notice they share principles with modern spacecraft insulation.
The key was maintaining separation between the layers while reducing direct thermal contact.
Here's what made these air pocket systems so effective:
- Low-emittance radiation shields (like aluminum) reflected heat away from the stored ice
- Spacer materials (such as fabric or netting) kept the layers separated without creating thermal bridges
- Multiple layers worked together to create a series of thermal barriers
- Edge attachments minimized direct contact between layers
- Careful installation prevented compression and maintained air pocket integrity
The success of these systems depended heavily on proper installation techniques and maintaining the integrity of the air spaces between materials.
Moisture Control Through Drainage
Moisture control through effective drainage stood at the heart of successful ice house design. You'd find that ice houses employed a sophisticated system where ice blocks were placed on platforms made of fence rails, keeping them elevated about two feet above a gravel base. This strategic positioning allowed water to drain away without making contact with the stored ice, preventing accelerated melting.
When you're storing ice long-term, you'll notice that proper drainage works alongside effective insulation. The ice house builders would pack broken ice pieces tightly together, reducing the surface area exposed to heat. They'd also line the walls with straw between the ice and stone, while filling the space between the ceiling boards and roof with the same material.
You'll find that this combination of drainage and insulation could keep ice viable until October or November, sometimes even lasting until Christmas in larger structures. The key was ensuring that any melting water could escape without re-freezing against the stored ice.
When you maintained these drainage systems properly, they'd effectively preserve ice throughout the summer months, making it available for community use when needed most.
Water Management Solutions
The management of water and melting ice proved critical to the success of community ice houses.
You'll find that these structures incorporated sophisticated drainage systems to prevent water accumulation, which could accelerate ice melt and compromise the entire storage system. The builders designed the facilities with carefully engineered waste pipes and drainage channels that would carry away any water from melting ice.
To effectively manage water, ice houses relied on several key features:
- Wood block platforms elevated the ice off the ground, allowing meltwater to drain away without pooling
- Specially designed waste pipes conducted water out of the structure in less porous soil conditions
- The bottom of the ice vault was engineered to let water gradually seep away
- Wood shavings were strategically placed to facilitate drainage and keep the ice dry
- The drainage system prevented ice from having prolonged contact with standing water
You'll notice that these water management solutions worked in tandem with the insulation systems.
The combination of proper drainage and insulation meant that ice could be preserved throughout the summer months, making these community ice houses reliable sources of refrigeration for extended periods.
Community Maintenance Schedules
While preserving ice throughout the year required careful planning, community ice houses maintained strict maintenance schedules to assure their continued functionality. You'll find that these schedules focused on four critical areas: insulation, drainage, sanitation, and structural upkeep.
You'd need to regularly inspect the insulation materials, including straw mats and sawdust, to ascertain they're effectively protecting the ice from sun exposure and warm drafts. The space between the roof and ice required constant monitoring to maintain proper insulation levels, while vents needed checking to confirm they're allowing warm air to escape.
You must maintain the drainage systems by guaranteeing the wooden platforms remain elevated two feet above the gravel base, allowing meltwater to drain properly. Regular cleaning and sanitizing of all surfaces helped prevent bacterial growth and contamination of the ice. You'll want to use appropriate cleaning solutions on contact surfaces while keeping the floor area free from dirt and debris.
The structure itself demands consistent inspection. You need to check for any damage to walls, roof leaks, or weakening support systems that could compromise the ice house's ability to bear heavy ice loads and withstand environmental pressures.
Ice Packing Techniques
Beyond maintaining the physical structure, successful ice preservation hinged on proper packing methods. You'll find that breaking ice into pieces and ramming them tightly together created a solid mass that lasted longer. The technique involved pounding the ice with heavy clubs or battons until it became a consolidated block, leaving no air pockets that could speed up melting.
The key to long-lasting ice storage lay in proper insulation and drainage. You'd need to pack straw or sawdust between the ice and walls, while ensuring the foundation stayed well-drained to prevent damaging moisture buildup. Community ice houses often featured double walls and thick stone construction, with strategic placement on north-facing slopes.
Here are the essential elements that made ice packing effective:
- Dense consolidation of ice pieces into a solid mass
- Layer of straw or sawdust between ice and walls
- Elevated platforms with proper drainage underneath
- Ventilation systems to maintain ice quality
- Strategic insulation in walls, ceiling, and roof spaces
You'll want to focus on these techniques since they were vital in keeping ice frozen throughout the warm seasons, allowing communities to maintain a reliable cold storage system.
Seasonal Temperature Control Methods
You'll find that effective seasonal temperature control in community ice houses relies heavily on strategic underground placement to harness the earth's natural cooling properties.
The careful management of insulation layers, including materials like straw and sawdust between walls and ceilings, works to maintain consistently cold temperatures throughout the warmer months.
Ventilation control systems, featuring specially designed vents and domed roofs, let you regulate airflow by allowing warm air to escape while trapping the cooler air at lower levels.
Strategic Underground Placement
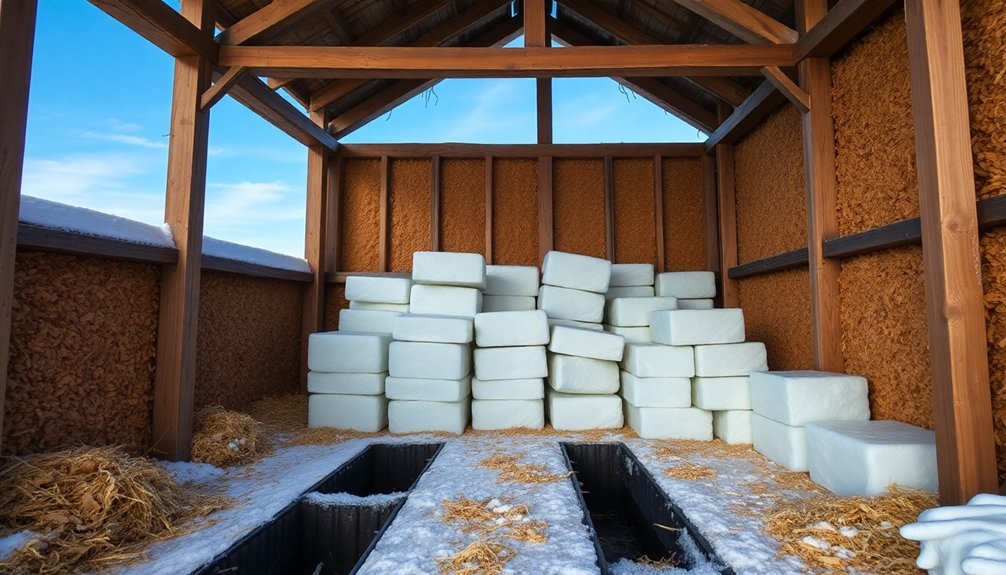
Constructing community ice houses underground represented one of history's most innovative approaches to natural refrigeration. You'll find these structures were strategically built 3-5 feet deep in soil that retained moisture while providing proper drainage. They avoided clayey or rocky ground that could conduct unwanted heat and moisture, instead utilizing cobblestone foundations for cold floors and effective water management.
The design incorporated several vital elements for maintaining ice throughout summer:
- Cylindrical, tapered shapes that minimized surface area exposure to heat
- Brick dome roofs covered with earth for superior thermal mass
- Double partition walls in above-ground sections to enhance insulation
- Separate passages for loading and retrieving ice to minimize heat entry
- Strategic door placement above ice level with tight seals
You'd notice these ice houses featured careful attention to environmental controls. Natural refrigeration was enhanced by underground placement, while marble elements allowed daylight without heat transfer.
The structures maintained excellent ventilation through lattice windows and floor drainage systems. Exterior shade from trees and vines provided additional temperature control, while proper sealing after ice loading guaranteed consistent cold temperatures year-round.
Insulation Layer Management
The complex art of managing insulation layers in community ice houses relied upon multiple materials and precise layering techniques.
You'd need to carefully pack each layer of ice with 4 to 6 inches of ground wood, typically sawdust, while maintaining 1 to 2-inch spaces between ice blocks filled with fresh, dry sawdust.
For the walls, you'll want to create a 12-inch wide cavity between inner and outer surfaces, filled with effective insulators like styrofoam, perlite, or rock wool.
Your floor requires at least 8 inches of styrofoam insulation beneath the concrete pad, while the top needs one to two feet of insulation above the storage room.
You're going to want double roofs: an inner weather-proof layer and an outer sun roof to deflect sunlight.
Don't forget to seal all joints with expandable spray foam if you're using styrofoam blocks.
For maximum efficiency, you'll need to pack the doors with natural cork or styrofoam to match the wall thickness.
Consider adding a rubber membrane lining around door seals and flooring to prevent any water infiltration that could compromise your insulation's effectiveness.
Ventilation Control Systems
Beyond proper insulation, maintaining stable temperatures in community ice houses depends heavily on smart ventilation control systems.
You'll find that successful designs incorporate features like domed roofs that naturally allow hot air to rise while keeping cooler air at ground level. Double-roof systems prove particularly effective, with an outer sun roof protecting an inner weather-proof layer from direct heat exposure.
To regulate seasonal airflow effectively, you'll need strategically placed vents and double-door systems that let you control the amount of cold air entering the structure.
The foundation plays an essential role too, requiring ample airspace underneath for proper drainage and frost prevention.
Here are key ventilation control features you'll commonly find in effective ice houses:
- Marble-covered roof openings that allow natural light while blocking heat
- Wrap-around porches that shield walls from direct sunlight
- Shade trees and vines strategically planted to reduce building temperatures
- Double-door systems for precise cold air regulation
- Foundation vents that maintain proper air circulation
These ventilation elements work together to create a natural cooling system that helps preserve ice throughout the warmer months without requiring mechanical refrigeration.
Frequently Asked Questions
How Did Communities Handle Ice Shortages During Unexpectedly Warm Winters?
You'd find communities buying manufactured ice when natural supplies ran low, while strictly rationing what they had. They'd also transport ice from distant locations and use alternative cooling methods like snow when necessary.
What Happened to Ice Houses During Times of War or Crisis?
During wartime, you'd find ice houses struggling with labor shortages and resource scarcity. They'd often switch to manufactured ice or get repurposed for storage. Some communities converted them into mushroom farms or cold storage facilities.
How Did Communities Decide Who Got Priority Access to Ice?
You'd get priority access to ice based on your wealth and social status. If you owned an icehouse or contributed to its operations, you'd have first rights, while businesses and medical facilities followed suit.
What Alternative Cooling Methods Were Used When Ice Supplies Ran Low?
You'd rely on evaporative cooling using wet mats and porous water pots. You could also use windcatchers to direct cool breezes, water-powered fans, or swamp coolers to keep your spaces comfortable.
How Were Ice House Workers Protected From Extreme Cold Conditions?
You'd stay warm in an icehouse by wearing multiple layers, including thermal underwear and waterproof outerwear. You'd also pace your work carefully to avoid sweating and keep protective gear like gloves and hats on.
In Summary
You'll find that historic community ice houses succeeded through a combination of smart design and dedicated maintenance. By using strategic block stacking, sawdust insulation, and proper drainage systems, you're able to prevent rapid melting. When you combine these features with regular community upkeep and careful temperature monitoring, you'll understand how these structures kept ice frozen from winter harvest through the hottest summer months.


Leave a Reply