The Victorians mastered seven ingenious methods to keep ice frozen year-round. You'll find their most impressive technique in underground brick-lined ice houses, built with double walls and domed roofs. They'd pack ice blocks tightly with precise layers of sawdust and straw, creating remarkable insulation. Canal-side storage facilities made transportation efficient, while innovative drainage systems prevented melting. Domed structures added both practicality and status, distributing weight perfectly while keeping contents frozen. You'll be amazed how these clever storage methods revolutionized food preservation and influenced modern cold storage designs.
Underground Brick-Lined Ice Houses
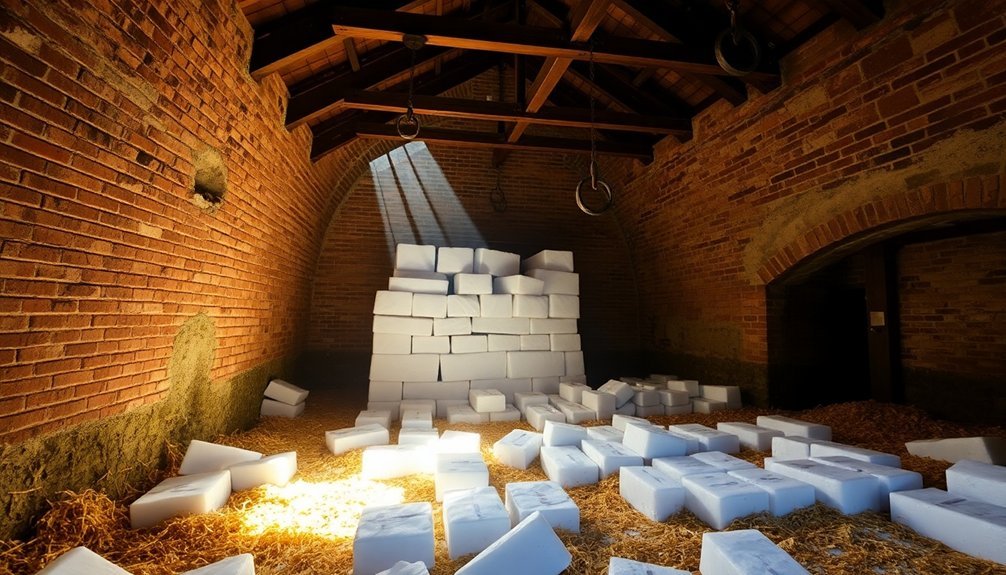
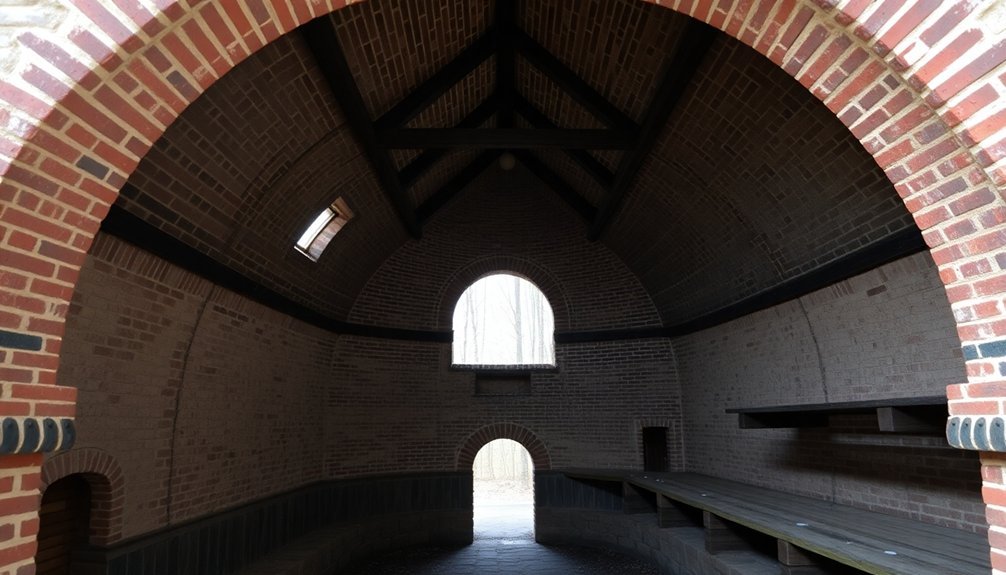
During the Victorian era, underground brick-lined ice houses represented remarkable feats of engineering designed to preserve ice year-round. You'd find these structures built partially or fully underground, with thick brick or stone walls and distinctive domed roofs. They were strategically positioned in shady locations and faced north to minimize sun exposure, ensuring ideal cooling conditions.
If you'd peek inside one of these ice houses, you'd notice several clever design features. The entrances featured multiple doors to keep warm air out, while double-lined walls filled with wet tan or sawdust provided excellent insulation. These innovative storage facilities could hold up to 250,000 tons of ice in larger commercial operations.
You'd also spot lattice windows at the gable ends that helped ventilate the space between the upper floor and roof. At the base, there'd be a drain to handle melting ice.
The ice houses' efficiency was remarkable – ice blocks could last up to 18 months when properly stored with layers of straw. You'd find these structures primarily at wealthy estates, as they were expensive to build and maintain.
The quality of the brickwork directly influenced their effectiveness, making skilled construction essential. Eventually, they fell out of use when Norwegian ice imports and mechanical refrigeration became available.
Straw-Packed Ice Block Chambers
You'll find Victorian ice houses relied heavily on layered straw insulation between ice blocks, with thick blankets of hay or sawdust covering the top layer to maximize preservation.
The underground brick chambers featured strategic drainage systems to whisk away melt-water, while maintaining the essential cold temperatures needed for long-term storage. First built in 1619 by King James I, these structures pioneered food preservation innovation.
These chambers' effectiveness depended on proper moisture control through careful packing techniques, ensuring spaces between blocks prevented them from freezing together while maintaining ideal insulation with straw or sawdust between layers.
Layered Straw Insulation Techniques
Victorian ice storage relied heavily on the ingenious use of straw and sawdust as primary insulating materials. You'd find these natural insulators packed tightly around ice blocks, creating an effective barrier against heat transfer. The materials' natural, porous structure trapped air pockets, providing insulation comparable to modern fiberglass.
To enhance the insulation's effectiveness, you'd need to follow specific layering techniques. First, you'd stack ice blocks tightly together, ensuring minimal gaps between them. Then, you'd shovel thick layers of straw or sawdust around the perimeter of the ice stack. The key was maintaining consistent layer thickness – you could position straw bales either flat or on edge to achieve ideal insulation performance. The cost-effective solution made ice storage accessible to many Victorian households.
When done correctly, you'd achieve remarkable results. The thermal mass of properly layered straw and sawdust could keep ice frozen for several years. This wasn't just about preservation; it was about efficiency. You'd save time and resources by reducing the frequency of ice harvesting.
The technique proved particularly valuable for preserving dairy products during transportation and played a significant role in food preservation before mechanical refrigeration became widespread.
Underground Chamber Construction
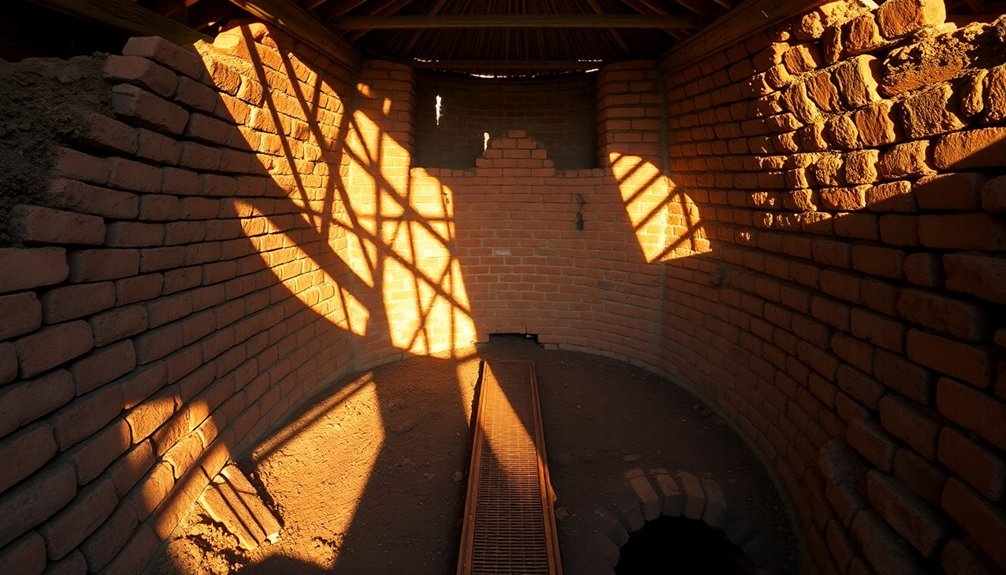
Beneath the Victorian landscape, carefully excavated chambers served as sophisticated ice storage facilities, typically shaped like inverted cones and covered with protective mounds.
You'll find these chambers were built with impressive engineering precision, using stone walls that often started without mortar at the base but incorporated it near the surface for added stability.
The chamber's construction focused heavily on insulation. You'd see thick stone and mortar walls surrounding the ice storage area, with double partitions filled with wet tan or sawdust to prevent melting.
The floor design was equally thoughtful – workers would lay small wooden blocks and shavings beneath a sturdy plank floor, then cover it with dry tan or sawdust for maximum insulation.
You wouldn't find these chambers without proper ventilation systems. They'd include lattice windows at the gable ends to release warm air, while strategically placed access doors allowed for ice loading and retrieval.
These doors were carefully positioned above the ice level and remained sealed when not in use. The entire structure's foundation encompassed the full ice storage area, creating an efficient system that could preserve ice from winter through summer.
Moisture Control Methods
Throughout ice storage chambers, meticulous moisture control methods played an essential role in preserving winter ice. You'd find carefully designed drainage systems at the base of these chambers, which prevented meltwater from pooling and accelerating the thawing process of the surrounding ice blocks.
When you stacked ice blocks, you'd need to pack straw or sawdust between the layers, as these materials weren't just insulating but also absorbed excess moisture. You'll notice that Victorians specifically chose these natural materials because they were readily available and highly effective at moisture management. The sawdust, a common byproduct from nearby sawmills, would pull moisture away from the ice while maintaining its insulating properties.
You'd also need to maintain tight stacking formations with uniformly cut blocks, as this reduced air gaps where moisture could accumulate. At the top of your ice stack, you'd add an extra-thick layer of insulating material to prevent condensation from the chamber's ceiling from dripping onto the ice.
If you followed these methods correctly, your ice could remain frozen for several months, and in some cases, even years, making it available for summer use in food preservation and cooling.
Canal-Side Storage Facilities

Canal-side ice storage facilities played a crucial role in Victorian-era food preservation, offering both strategic advantages and practical solutions for the ice trade. You'll find these structures were deliberately positioned near waterways, allowing merchants to efficiently harvest ice during winter months and transport it via barges to storage facilities.
The buildings themselves were engineering marvels, typically featuring underground chambers with brick-lined walls and sophisticated drainage systems to manage inevitable melting.
The proximity to canals wasn't just about convenience – it was essential for the entire ice distribution network. You'd see ice merchants using these waterways to transport their frozen cargo to urban centers, where it would be distributed to households and businesses throughout the warmer months.
- Picture yourself watching workers skillfully maneuvering huge ice blocks from canal barges
- Imagine the satisfaction of preserving summer fruits using ice harvested months ago
- Feel the cool air rush out as you open the heavy wooden doors of an ice house
- Envision the bustling activity of ice wagons delivering to Victorian households
- Think about the pride merchants took in maintaining these crucial community resources
Sawdust Insulation Layering Techniques
You'll need to start with a thick, uniform layer of sawdust at least six inches deep across the icehouse floor before placing any ice.
When stacking the ice blocks, you must pack a three-inch layer of sawdust between each ice layer and guarantee it fills every gap and corner to prevent air pockets.
You'll want to maintain consistent sawdust density throughout, packing it firmly but not so tightly that it prevents proper drainage of meltwater.
Precise Layering Methods
Successfully storing winter ice required meticulous attention to sawdust layering techniques.
You'll need to create a dense, 40cm-thick layer of sawdust that's uniformly distributed around your ice storage. The key is keeping the sawdust dry and tightly compacted, as this greatly reduces thermal conductivity and prevents heat from reaching the ice.
You can enhance your ice storage's effectiveness by combining sawdust with other insulating materials. While fleece is an option, sawdust's superior insulation properties (0.075 W/mK thermal conductivity) make it the preferred choice, especially at lower altitudes where maintaining ice is more challenging.
- Feel the satisfaction of preserving winter's chill through the scorching summer months
- Experience the pride of mastering a time-tested Victorian preservation technique
- Imagine the wonderment of your guests when you serve perfectly preserved ice in July
- Embrace the self-sufficiency of maintaining your own ice storage system
- Connect with history by practicing the same methods your ancestors relied upon
When layering, guarantee each section is thoroughly packed and evenly distributed.
Start from the bottom and work your way up, maintaining consistent density throughout. This method has proven more effective than modern alternatives, particularly when preserving large quantities of ice for seasonal use.
Thickness And Density Rules
The critical rules of sawdust layering combine precise thickness and density requirements for ideal ice preservation. You'll need 50-60mm thick sawdust layers to achieve the best insulation, as this thickness provides thermal resistance equivalent to 600mm of brick masonry. When you're packing the sawdust, maintain a density between 330-360 kg/m³ – this range guarantees effective insulation while keeping the material lightweight.
The sawdust's thermal conductivity of 0.075 W/mK makes it remarkably effective, but you'll need to keep it dry. Moisture can greatly reduce its insulating properties and increase its density beyond the best range.
| Layer Aspect | Requirement | Impact |
|---|---|---|
| Thickness | 50-60mm | Maximum thermal resistance |
| Density | 330-360 kg/m³ | Best insulation balance |
| Moisture | Keep minimal | Maintains effectiveness |
| Compaction | Light packing | Preserves air pockets |
| Distribution | Even coverage | Prevents cold spots |
Domed Ice Storage Structures
During the Victorian era, domed ice storage structures represented the pinnacle of ice preservation technology, with their sophisticated underground or partially submerged designs.
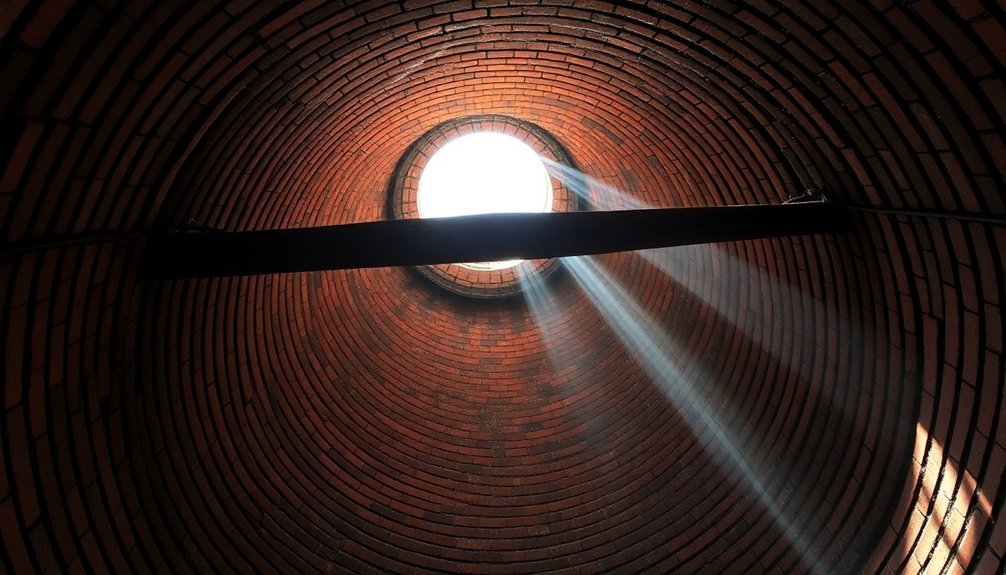
You'll find these remarkable structures built with thick brick or stone walls, often lined with earth and covered in thatch or straw for maximum insulation. The distinctive domed roofs, typically constructed in header bond brickwork, distributed weight evenly while maintaining structural integrity.
You'd be impressed by how the thermal mass of these domes worked alongside the strategic use of insulating materials like sawdust and hay to slow ice melting.
These structures weren't just functional – they became status symbols for wealthy families who could afford to store ice year-round.
- You can still find these architectural marvels tucked away in the shady corners of grand estates
- You'll marvel at how the carefully engineered dome shapes have stood the test of time
- You might feel a chill imagining massive blocks of ice being lowered into these cool chambers
- You'd be amazed at how these structures kept ice frozen without any mechanical refrigeration
- You can't help but admire the Victorian ingenuity that made year-round ice storage possible
Drainage Management Systems
While ice houses needed careful water management, Victorian drainage systems took water control to a whole new level. You'll find some of history's most impressive examples in London, where Sir Joseph Bazalgette's revolutionary sewer system featured four major pumping stations that effectively managed both sewage and rainwater. The system's success in reducing cholera demonstrated the Victorians' engineering prowess.
If you're examining drainage techniques from this era, you'll notice they relied heavily on gravity and strategic placement. Much like today's Melbourne system, which manages thousands of kilometers of drains, Victorian systems needed to direct water away from storage areas efficiently. They'd often incorporate interceptor drains at the base of slopes, similar to those used in modern rural drainage strategies.
You'll find that Victorian drainage methods shared principles with current subsurface systems, particularly in how they managed groundwater. They'd install drains at specific angles to collect and redirect water flow, much like today's mole and interceptor drains.
The Victorians understood that proper drainage wasn't just about removing water – it was about controlling where it went and how quickly it moved through the system.
Double-Walled Ice Houses
Standing as marvels of Victorian engineering, double-walled ice houses represented the pinnacle of pre-modern cooling technology. You'll find these structures featured two distinct walls separated by a cavity up to 3 feet wide, filled with remarkable insulating materials. The Victorians used everything from fresh dry straw to rice hulls, creating a barrier against summer's relentless heat.
While modern builders opt for concrete blocks with 12-inch styrofoam-filled cavities, traditional ice houses relied on wicker walls spaced 3 feet apart, packed with straw. You'll appreciate how these double-walled structures maintained consistently low temperatures, protecting precious ice blocks throughout the warmest months.
- Marvel at the ingenuity of using natural materials like straw and rice hulls to keep ice frozen
- Picture the satisfaction of retrieving crystal-clear ice blocks in the heat of August
- Imagine the pride of Victorian engineers as they perfected these impressive structures
- Feel the cool air rush past as you open the heavy, insulated double doors
- Consider the sustainable wisdom of using locally available materials like sawdust and cork
This clever design wasn't just about insulation – it was about creating a complete system that would preserve winter's frozen bounty well into summer.
Frequently Asked Questions
How Much Did Ice Cost for an Average Victorian Household?
You'd pay 6-25 cents per pound for ice, though most Victorian households couldn't afford regular deliveries. If you were middle class, you might purchase occasional small blocks for your ice box.
Could Ice Houses Be Used to Store Other Perishable Items?
Yes, you'd find ice houses were perfect for storing various perishable items like meat, dairy products, fruits, and vegetables. They provided consistent cool temperatures that helped preserve your food long before modern refrigeration existed.
What Happened to Ice House Workers During Warmer Months?
You'll find that ice house workers didn't stay idle – they'd shift to other jobs like brick-making, farming, or delivering ice to city homes. Many also worked distributing stored ice throughout warmer months.
How Long Could a Single Ice Block Survive in Victorian Storage?
You'd find that a single large ice block could survive for several months in a Victorian ice house. With proper insulation like straw and sawdust, you could keep your ice frozen until the next winter.
Did Different Types of Ice Produce Varying Storage Results?
You'll find that clear, dense ice from pure mountain lakes lasted considerably longer than cloudy or white ice. The purer and more transparent your ice was, the better it would maintain its frozen state.
In Summary
You'll find these Victorian ice storage methods remarkably ingenious even by today's standards. Whether you're examining the brick-lined underground chambers or the clever use of sawdust insulation, each technique demonstrates remarkable understanding of thermal dynamics. By incorporating these historical preservation methods into modern sustainable living practices, you're not just learning from the past – you're helping preserve these innovative solutions for future generations.


Leave a Reply