To master moisture control in salt box storage for meat curing, you'll need to maintain precise environmental conditions. Keep your storage temperature between 36-40°F and humidity levels at 60-70% to prevent spoilage. Choose pure salt without anti-caking agents and store it in airtight containers made of glass, ceramic, or food-grade plastic in cool, dark locations. Your salt box should accommodate meat cuts with proper drainage and allow for additional salt layers. Install strategic ventilation to guarantee consistent airflow and prevent dead spots. Monitor conditions daily and make immediate adjustments when needed. Proper moisture management holds the key to successful meat preservation.
Understanding Salt Box Construction
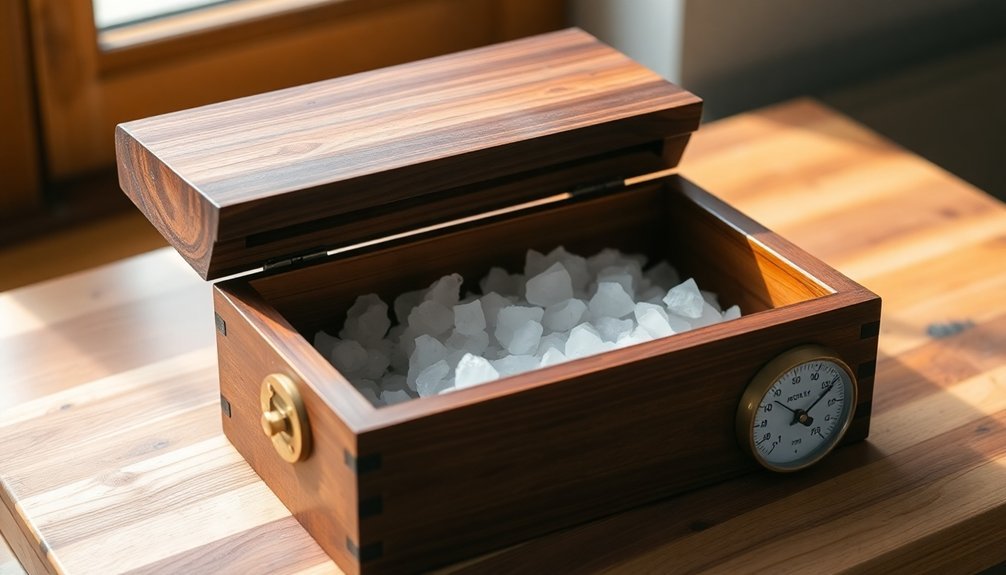
Successfully constructing a salt box for meat curing requires careful attention to both materials and setup. You'll need to select containers that can withstand the corrosive nature of salt while maintaining a sterile environment. Choose boxes, barrels, stone jars, or sturdy pans that won't react with the salt or meat juices during the curing process. Natural moisture extraction occurs as the salt draws liquid from the meat.
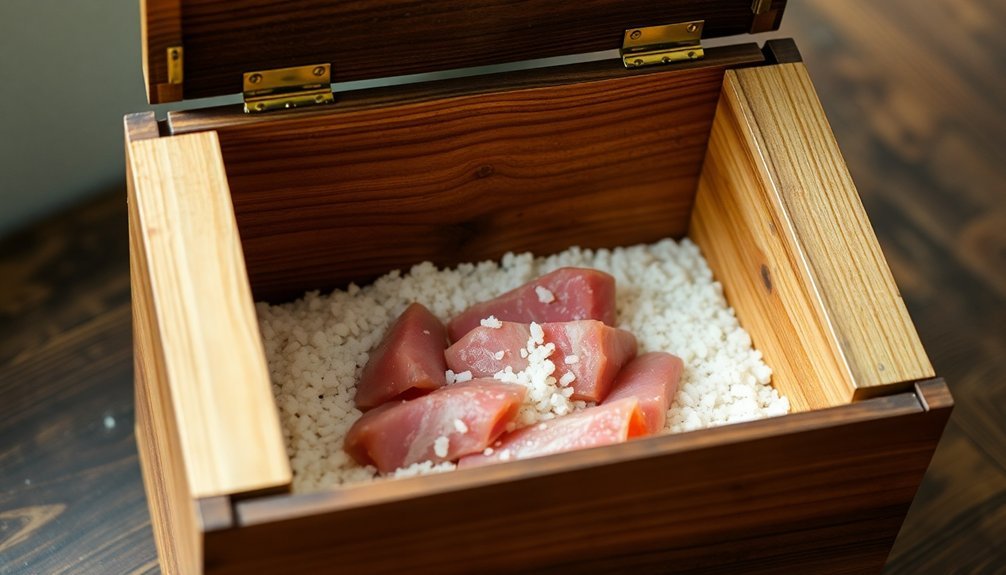
When building your salt box setup, start by selecting pure salt without anti-caking agents or added minerals. You'll layer this salt at the bottom of your chosen container, creating a bed that's thick enough to prevent meat from touching the container's surface.
The container must be stored in a cool environment, maintaining temperatures between 38 to 45 degrees Fahrenheit to guarantee proper curing.
You'll need to take into account the size of your container based on the meat cuts you're planning to cure. Confirm there's enough space to completely surround the meat with salt on all sides.
Don't forget to include room for additional salt layers that you'll need to reapply every seven days. Your container should also allow for proper drainage of extracted liquids while maintaining the integrity of the salt barrier around the meat.
Essential Environmental Moisture Controls
Through careful monitoring and control, maintaining proper humidity levels is critical for meat curing success. You'll need to keep humidity between 60-70% to prevent your meat from drying too quickly and support beneficial bacterial growth. If levels drop below 60%, you're risking case hardening, where the meat's exterior dries too fast, trapping moisture inside. Small-scale operations require extra diligence in monitoring these conditions throughout the curing process.
Your salt box environment requires consistent temperature control, ideally between 50-60°F, which allows enzymes to properly break down proteins and fats. You'll want to minimize temperature fluctuations to maintain stable curing conditions.
Remember that higher temperatures can accelerate bacterial growth, potentially compromising your meat's safety.
To control moisture effectively, you'll need reliable equipment. Consider installing a desiccant dehumidifier to remove excess moisture and prevent condensation.
Humidity controllers are essential tools for monitoring and adjusting levels precisely. When you're setting up your ventilation system, make sure it's capable of maintaining both temperature and humidity within ideal ranges.
Selecting the Right Salt
When you're choosing salt for your meat curing box, you'll want to select pure salt without any anti-caking agents or additives that could interfere with the curing process.
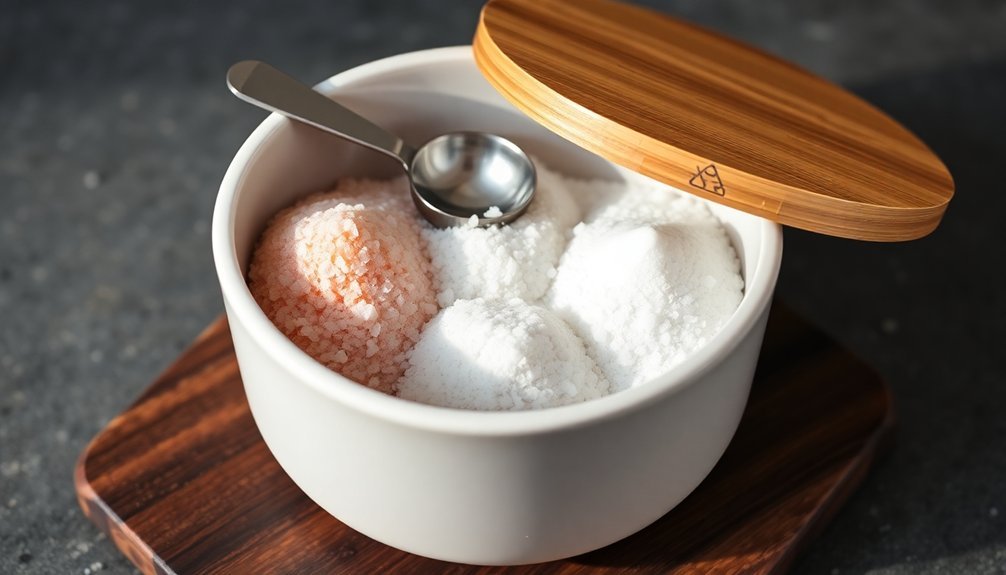
Your best options include kosher salt or pure coarse salt, as they're free from iodine and other minerals that might affect the cure.
The larger grain size of these salts makes them easier to handle and distribute evenly across your meat's surface, leading to more consistent results. Following proper manufacturer guidelines for salt is essential for keeping your cured meats safe for consumption.
Pure Salt Vs Additives
The choice between pure salt and curing salts marks a critical decision in meat preservation. While pure salt effectively draws out moisture and concentrates flavor, it can't match the thorough protection that curing salts provide.
You'll find that pure salt's main strength lies in its ability to penetrate meat easily and create an inhospitable environment for many bacteria.
However, you shouldn't rely on pure salt alone when safety is paramount. Curing salts containing sodium nitrite are essential for preventing dangerous bacteria like Clostridium botulinum, especially in meats you won't cook before eating.
They'll also give you that characteristic pink color and "hammy" flavor you expect in cured meats.
When you're working with curing salts, you'll need to follow specific USDA guidelines – like keeping sodium nitrite levels at 120 ppm for wet-cured bacon and 200 ppm for dry-cured bacon.
If you're making products like prosciutto that won't be cooked, curing salts aren't optional – they're necessary for safety.
Remember that natural nitrate sources, such as greens, won't give you the consistent results you need for proper meat preservation.
Salt Grain Size Matters
Selecting the right salt grain size can make or break your meat curing project. Finer grains are typically your best choice, as they'll spread more evenly across the meat's surface and absorb faster than coarser alternatives.
When you're working with one inch of meat, you can expect salt to penetrate about 1/4 inch daily from both sides, completing the process in roughly a week.
You'll want to evaluate how grain size affects your curing timeline. Smaller grains speed up the process by penetrating more quickly and drawing out moisture more effectively. This is especially important when you're working with thicker cuts, where proper penetration is vital for food safety.
For delicate cuts, fine grains are particularly suitable, while you might opt for slightly coarser grains with tougher meats.
When you're handling salt for curing, remember that finer grains give you better control over distribution and help prevent over-salting. They'll also mix more thoroughly with any additional curing agents you're using, ensuring even flavor distribution throughout your meat.
This uniform distribution isn't just about taste—it's essential for creating a consistently safe curing environment.
Meat Preparation Techniques
You'll need to start with pristinely clean meat surfaces, removing any blood spots and patting the cuts completely dry with paper towels.
Keep your fresh-cut selections at a consistent 35-38°F during preparation, and guarantee your meat pieces are cut to uniform sizes that match your salt box dimensions.
Select only the freshest cuts with good color and minimal surface moisture, as proper initial meat quality directly impacts your curing success.
Proper Meat Surface Cleaning
Proper meat surface cleaning stands as a critical foundation for successful curing in a salt box.
You'll need to begin by thoroughly inspecting your meat and removing any visible contaminants, excess fat, or connective tissue that could interfere with even salt absorption.
Start by rinsing the meat under cold water – never hot, as it can denature proteins and compromise the curing process.
You'll want to use clean paper towels or cloth to blot away any blood spots or impurities from the surface.
Be gentle during handling to avoid damaging the muscle fibers, which can affect how well your meat takes the cure.
Before proceeding with the cure, verify you're working in a sanitized environment with clean equipment.
Pat the meat completely dry after cleaning, as excess moisture can disrupt proper salt absorption.
You'll need to maintain a temperature between 36-40°F (2-4°C) throughout this process.
Make a final inspection of your cleaned meat surfaces, checking for uniform preparation and any remaining impurities.
Document any issues you find – this helps maintain quality control and improves your future curing projects.
Temperature and Size Control
After confirming your meat surfaces are clean, precise temperature and size control become the next key factors in successful salt box curing.
You'll need to maintain temperatures between 36-40°F (2-5°C) for best results, as temperatures outside this range can either halt the curing process or promote harmful bacterial growth.
When selecting and preparing your meat cuts, consider that larger and thicker pieces will require extended curing times.
You'll want to account for bone and fat content, as these elements affect how the cure penetrates the meat.
For smaller cuts like bacon or ham, you can rely on dry curing methods, but you'll need to guarantee even distribution of the cure throughout the meat.
You must monitor your curing environment daily, making immediate adjustments if temperatures drift from the ideal range.
If you're working with a traditional setup like a basement cellar, you'll typically encounter temperatures around 46-50°F (8-10°C).
While these temperatures aren't ideal, they've been historically successful.
However, you'll need to adjust your curing times accordingly and pay extra attention to prevent bacterial growth at these slightly higher temperatures.
Fresh Cut Selection Basics
For successful meat curing, selecting the right fresh cuts marks the foundation of your entire process. You'll want to focus on meat that's firm to the touch, with a clean, neutral smell and proper coloring – bright cherry-red for beef, pale pink for pork, and light pink for poultry. The meat's quality directly impacts your curing results, so don't compromise on freshness.
When examining potential cuts, pay attention to these critical factors:
- Marbling distribution – look for even, small flecks of fat throughout the meat, as this influences both the curing process and final flavor.
- Surface texture – avoid any cuts with slimy or sticky surfaces, and verify there's no excess liquid in the packaging.
- Color consistency – reject any meat showing signs of discoloration or graying, especially around the edges.
You'll find that different cuts respond differently to curing. Larger, uniform pieces like pork belly or beef brisket typically cure more evenly than irregular cuts.
Always check the packaging integrity before purchase, as any tears or holes can jeopardize the meat's freshness and safety for curing purposes.
Temperature and Humidity Balance
Achieving the right balance between temperature and humidity is essential when curing meat in a salt box storage system. You'll need to maintain temperatures between 33°F and 40°F (0.5°C to 4°C) while controlling humidity levels to prevent spoilage and guarantee proper curing.
To regulate humidity effectively, you can use saturated salt solutions. NaCl (table salt) maintains a stable relative humidity of around 75% across various temperatures, making it an excellent choice for consistent control.
If you need different humidity levels, you can select alternative salts or create salt mixtures – NH4Cl provides about 84% RH, while lower humidity options are available for different curing stages.
You'll want to keep humidity below 80% RH to prevent unwanted mold growth. The sweet spot is typically around 60-70% RH, where most harmful microbes can't thrive, but your meat will still cure properly.
Remember that temperature fluctuations won't greatly affect NaCl's humidity control due to its flat RH-temperature curve, but other salts might be more sensitive to temperature changes. Monitor both factors regularly to maintain ideal curing conditions and prevent spoilage.
Air Flow Management
You'll need to create strategic airflow patterns in your salt box by positioning vents at both high and low points to guarantee proper air circulation throughout the meat-curing space.
Your ventilation system should incorporate both passive and mechanical elements, with fans positioned to create a consistent flow that reaches all corners of the storage area.
To eliminate dead air spots that could compromise your curing process, install multiple vents and use directional baffles to guide airflow around shelving units and meat-hanging areas.
Circulation Patterns for Success
Proper air flow management stands at the heart of successful meat curing, where uniform distribution and controlled velocities play essential roles.
You'll need to maintain low air velocities to prevent surface collapse while guaranteeing sufficient circulation to remove evaporated water and prevent spoilage. Consider your local climate conditions, as ambient air might be suitable for drying if the conditions are favorable.
To achieve ideal circulation patterns in your salt box storage, you'll want to focus on these key aspects:
- Establish uniform air distribution throughout the chamber while avoiding high-velocity currents that could damage your product's surface.
- Monitor and adjust humidity levels, starting with higher humidity (66-75%) in the initial phase before shifting to drier conditions.
- Direct air flow away from raw meat areas and maintain 20-25 air changes per hour to remove contaminants.
Your ventilation system shouldn't be oversized, as this leads to unnecessary energy costs.
Instead, opt for a correctly dimensioned system that provides sufficient air movement while maintaining efficiency.
Remember that the drying air often serves as the primary energy source in your curing chamber, so proper management of heat losses is vital for success.
Ventilation System Design Basics
The fundamentals of ventilation system design rely on controlled, intermittent air exchange rather than continuous airflow.
You'll want to avoid installing fans or drilling additional holes that could disrupt your chamber's carefully controlled environment. Instead, focus on periodic opening of your curing chamber to introduce fresh air and remove stale air when needed.
When you're designing your ventilation system, remember that your primary goal is maintaining consistent humidity and temperature levels without creating direct airflow that could cause uneven drying.
You'll need to pay special attention during the initial stages when the meat's moisture content is highest. Don't create a system that continuously moves air, as this can lead to case hardening and improper curing.
You should monitor your chamber's conditions regularly and adjust your ventilation practices based on the specific type of meat you're curing.
If you're working with products like culatello or biltong, you might need different airflow patterns, but for most curing projects, minimal air movement is best.
Keep in mind that every time you open the chamber, you're affecting the internal environment, so plan your air exchanges strategically.
Preventing Dead Air Spots
Managing dead air spots in your curing chamber requires careful attention to air circulation patterns without creating excessive airflow.
You'll need to maintain consistent air movement throughout the space while avoiding direct currents that could cause case hardening. Dead spots, where air becomes stagnant, can lead to uneven curing and potential spoilage of your meat products.
To effectively prevent dead air spots in your curing chamber, focus on these key strategies:
- Position your dehumidifier to create gentle, uniform air circulation that reaches all corners of the chamber without directing air straight onto the meat.
- Open your chamber door briefly each day to exchange stale air, but don't rely on fans or drilled holes that could create excessive airflow.
- Monitor different areas of your chamber regularly to identify potential dead spots where air might become trapped.
Your chamber's natural cooling system can often provide sufficient air movement without additional fans.
If you notice inconsistent curing or moisture buildup in certain areas, adjust your product placement rather than increasing airflow.
Remember that maintaining proper humidity levels is just as important as preventing dead spots, so avoid any modifications that might compromise your chamber's controlled environment.
Traditional Storage Methods
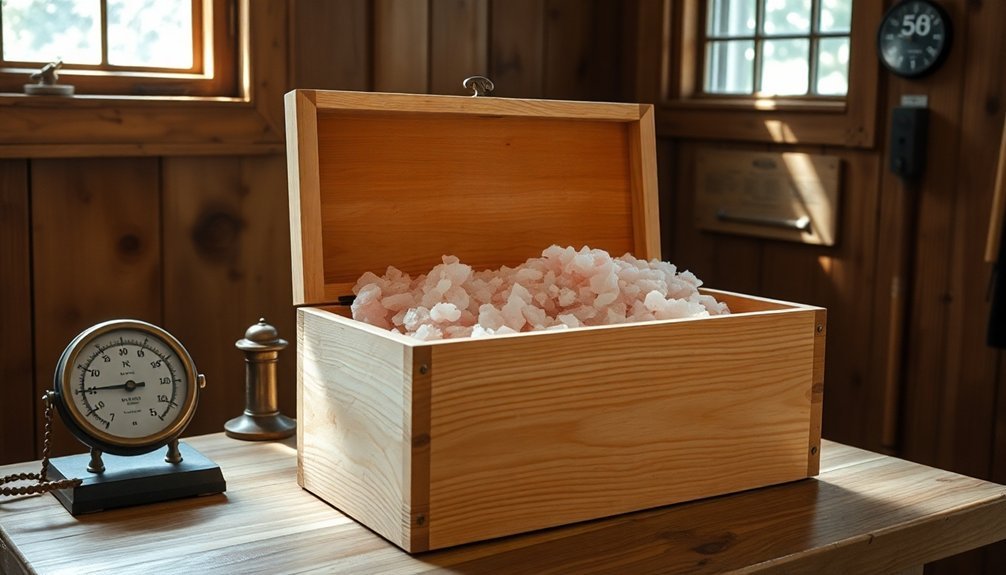
Successful meat curing depends heavily on traditional salt storage practices that have stood the test of time. You'll need to select pure salt without anti-caking agents, choosing options like sea salt, Pink Himalayan salt, or canning salt for ideal results. Store your salt in airtight containers made of glass, ceramic, or food-grade plastic, and keep it in a cool, dry, dark place to maintain its quality.
| Storage Element | Traditional Method |
|---|---|
| Container Type | Glass/Ceramic/Food-grade Plastic |
| Environment | Cool, Dark, Dry Location |
| Salt Type | Pure, No Anti-caking Agents |
| Packaging | Airtight Containers |
| Moisture Control | Regular Monitoring |
When you're ready to cure meat, you'll apply salt using either dry curing or equilibrium methods. For dry curing, coat the meat completely in salt for 24 hours. If you're using equilibrium curing, measure out 3% of the meat's weight in salt, apply it evenly, and vacuum seal. After curing, rinse the meat thoroughly and pat it dry. You'll want to hang it in a well-ventilated area until it loses about 30% of its original weight for raw consumption preparations.
Monitoring Salt Box Conditions
Proper monitoring of your salt box conditions stands as a critical cornerstone of meat curing success. You'll need to maintain tight control over temperature and humidity levels, keeping your curing environment between 38°F and 45°F with humidity at 60-70%. Use reliable thermometers and hygrometers to track these conditions daily, as fluctuations can greatly impact your cure's quality.
- Check your salt's quality regularly, ensuring it's free from anti-caking agents and contaminants that could compromise your cure.
- Monitor moisture levels in your meat by testing firmness and checking for proper weight loss (around 30% for most cuts).
- Inspect your curing area daily for proper ventilation and signs of harmful mold growth.
You'll want to examine your meat's surface regularly for salt adherence and adjust your process accordingly. If you notice salt scabbing, you may need to soak the meat briefly in water to reduce salinity.
Keep your tools and storage containers clean and sanitized, and don't forget to maintain proper airflow to prevent ammonia buildup.
Troubleshooting Common Moisture Issues
Common moisture issues can derail even the most carefully planned meat curing process. If you notice your curing salt becoming clumpy or damp, you'll need to take immediate action to prevent compromising your meat preservation efforts.
When you discover moisture problems, first assess your storage container. If you're using cardboard or metal containers, switch to airtight glass containers with plastic lids immediately. These materials provide superior protection against humidity.
Next, evaluate your salt box's location – if it's near cooking areas or in naturally humid spaces, you'll need to relocate it to a cooler, drier spot.
For salt that's already affected by moisture, you can often salvage it by spreading it on a baking sheet and drying it in a warm oven. However, if your salt has formed a solid sheet, you'll need to discard it and start fresh. Don't take chances with compromised curing salt.
To prevent future issues, incorporate moisture-absorbing products like Damp-Rid near your storage area and maintain smaller quantities in sealed containers. This approach reduces exposure time and helps maintain the ideal dry conditions necessary for effective meat curing.
Long Term Storage Solutions
Long-term storage of cured meats demands a careful balance of temperature, humidity, and packaging methods. For best preservation, you'll want to keep your cured meats in refrigerated storage at temperatures below 64°F (18°C).
If you're working with whole muscle salumi or jerky, you can utilize insulated containers in cool environments like cellars, maintaining temperatures between 15-20°C.
- Use vacuum sealing for maximum shelf life, extending preservation up to 4-6 months.
- Install humidity control devices to maintain 60-80% RH, preventing mold growth.
- Cover cut surfaces with gauze or cotton cloth when storing non-vacuum sealed meats.
Your storage setup should include proper monitoring of both temperature and humidity levels.
Consider using salt packs to maintain consistent relative humidity – NaCl provides approximately 75% RH, while NH4Cl delivers around 84% RH.
If you're storing multiple pieces, modify your refrigerated containers with shelving for efficient organization.
Remember to hang your cured meats upside down when possible, and never expose vacuum-sealed products to direct heat sources or damp areas.
These practices will help guarantee your cured meats maintain their quality and safety for extended periods.
Frequently Asked Questions
Can Different Types of Meat Be Cured Together in the Same Salt Box?
You can cure different meats together, but you'll need to take into account their varying thicknesses and moisture content. It's best to separate them to guarantee proper curing times and avoid flavor mixing.
How Does Altitude Affect the Salt Curing Process and Timing?
At higher altitudes, you'll notice faster dehydration and slower salt penetration due to lower humidity and pressure. You'll need to adjust curing times, use more salt, and monitor moisture levels more carefully.
What Signs Indicate That Meat Has Been Over-Cured With Salt?
You'll notice your meat is over-cured when it's extremely salty, feels excessively dry and hard, shows uneven coloration or green patches, and develops off-flavors like mustiness or rancidity. The texture becomes leathery.
Is It Safe to Cure Meat During Thunderstorms or Extreme Weather?
You shouldn't cure meat during thunderstorms or extreme weather. Power outages and humidity changes can disrupt ideal curing conditions, making it risky. If you must cure, make sure you've got backup power and climate control.
Can Previously Frozen Meat Be Successfully Salt-Cured in a Salt Box?
You can successfully cure previously frozen meat in a salt box, but you'll notice some texture differences. Confirm your meat was properly frozen and thawed to minimize quality loss and guarantee food safety.
In Summary
You'll find that successful salt box storage comes down to careful attention to moisture control and proper setup. By selecting the right salt, maintaining ideal humidity levels, and monitoring your storage conditions regularly, you're setting yourself up for the best meat curing results. Remember, it's the balance of traditional methods with modern moisture control that'll give you consistently well-preserved meats time after time.


Leave a Reply