Start with fresh pickling cucumbers, making certain they're firm and blemish-free. You'll need clean glass jars, fermentation lids, and weights for your setup. Create a 3% salt brine solution using non-iodized salt and filtered water. Cut your cucumbers uniformly, removing blossom ends, and pack them tightly in jars with your chosen spices like dill, garlic, and peppercorns. Keep the temperature steady at 65-70°F and make certain cucumbers stay submerged. Monitor daily for 3-10 days, watching for bubbles and cloudy brine. Once they reach your desired tanginess, transfer to cold storage. These basic steps lay the foundation for your fermentation journey.
Choose Your Cucumbers Wisely
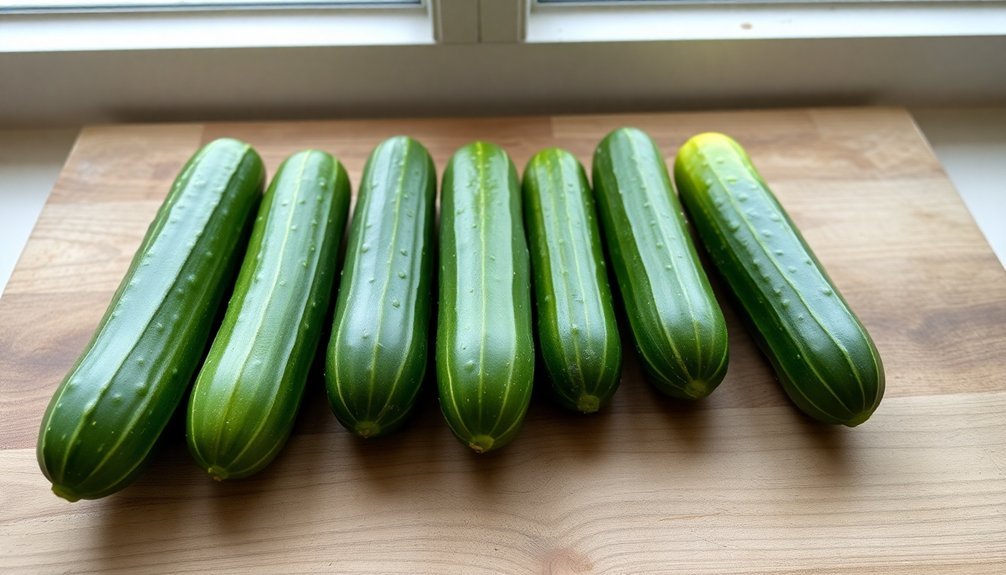
Three key factors make choosing the right cucumber variety essential for successful pickle fermentation: variety, size, and condition.
You'll want to select cucumbers specifically bred for pickling, like Boston Pickling, Calypso, or H-19 Little Leaf, which offer thin skins for better brine absorption and firm flesh that maintains crunchiness throughout fermentation.
Look for cucumbers between 1-1/2 to 6 inches long with blunt ends, which will pack more efficiently in your fermentation jars.
The National Pickling variety, developed specifically for pickling, offers an ideal 5-inch length and thicker skin that's perfect for spears. Growing these varieties requires full sun exposure and well-drained soil for optimal results.
Don't use standard slicing cucumbers or traditional salad varieties – their waxy coatings interfere with fermentation, and they're often too seedy.
If you can't find dedicated pickling varieties, consider Persian or Lebanese cucumbers as alternatives. They're nearly seedless and have tender skins that work well for fermentation.
Remember to check for disease resistance when selecting varieties.
Options like Calypso and H-19 Little Leaf offer broad protection against common cucumber ailments, ensuring your pickling crop stays healthy and productive.
Gather Essential Equipment
You'll need basic fermentation equipment, including wide-mouth glass jars with screw-on lids and proper-fitting weights to keep your cucumbers submerged in brine.
Air control is vital, so invest in airlocks or fermentation lids that allow gases to escape while preventing oxygen from entering your containers. Half-gallon jars are perfect for larger batches of pickles and provide ample space for liquid expansion during fermentation.
Keep your tools clean and sanitized, including your kitchen scale for accurate salt measurements, chef's knife for cucumber prep, and fermentation pestle for proper packing.
Basic Containers and Lids
For successful pickle fermentation, selecting the right containers and lids is a crucial first step. Glass containers, particularly Mason jars and fermentation crocks, are your best options as they don't react with the brine.
Wide-mouth jars offer the most versatility and compatibility with various fermentation lids. Before filling your containers, make sure to remove blossom ends from your cucumbers for optimal results.
When it comes to lids, you'll want to choose options that allow carbon dioxide to escape while keeping air out. Air lock lids and pickle pipe fermenting lids made from food-grade silicone are excellent choices, eliminating the need for manual "burping."
If you're using regular canning lids, make sure to keep them slightly loose to let gases escape.
- Choose wide-mouth Mason jars (quart size for beginners) or a 2.5-liter fermentation crock for your first batch
- Invest in air lock lids or pickle pipe fermenting lids to create an ideal environment
- Keep your containers and lids clean, and maintain temperatures between 70-75°F for best results
Remember to check that your chosen lid fits your container properly before starting.
While plastic lids are preferable to metal ones due to brine corrosion, verify any plastic components are BPA-free and food-grade quality.
Weights and Airlocks Matter
While selecting the right containers sets the foundation for fermentation, proper weights and airlocks transform your setup into a professional-grade system. You'll need weights to keep your vegetables submerged in brine and airlocks to release carbon dioxide while preventing oxygen from entering.
| Equipment Type | What You Need to Know |
|---|---|
| Glass Weights | Custom-fitted to your jars, easy to clean, prevents floating vegetables |
| Pickle Pebbles | Ready-made option that fits standard Mason jars |
| Water Airlocks | Traditional design that uses water as a barrier |
| One-way Valves | Modern solution that automatically releases pressure |
When choosing weights, you'll find glass options are ideal for their durability and ease of cleaning. Make sure they're slim enough to sit high in your fermentation vessel without protruding. For airlocks, you've got choices between traditional water locks and modern one-way valves like Pickle Pipes. They're vital for preventing jar explosions from CO2 buildup while keeping harmful oxygen out.
Remember to wash your weights in hot soapy water before each use and store your airlocks flat to prevent warping. With proper maintenance, these tools will serve you through countless successful fermentation projects.
Clean Tools Stay Safe
Success in fermentation begins with properly sanitized equipment and the right tools for the job. You'll need a combination of basic kitchen equipment and specialized fermentation tools to create perfect pickles. Start by gathering essential items like a reliable scale for accurate salt measurements, canning jars with proper lids, and a sharp chef's knife for vegetable preparation.
- Set up your workspace with clean cutting boards and preparation tools, including a mandoline for uniform slicing and a food processor for quick vegetable processing (except onions, which can become bitter).
- Keep specialized fermentation equipment ready, such as pickle pipes, glass or ceramic vessels, and fermentation weights to keep vegetables submerged.
- Don't forget safety monitoring tools like pH strips or meters to track acidity levels throughout the process.
Store your tools in a clean, dry place and always disinfect them before use. Opt for glass or ceramic vessels instead of metal ones to prevent unwanted chemical reactions with acidic ferments.
Use cheesecloth or butter muslin to keep small vegetable pieces submerged, and keep fermentation crocks with water-lock lids handy for larger batches.
Prepare The Brine Solution
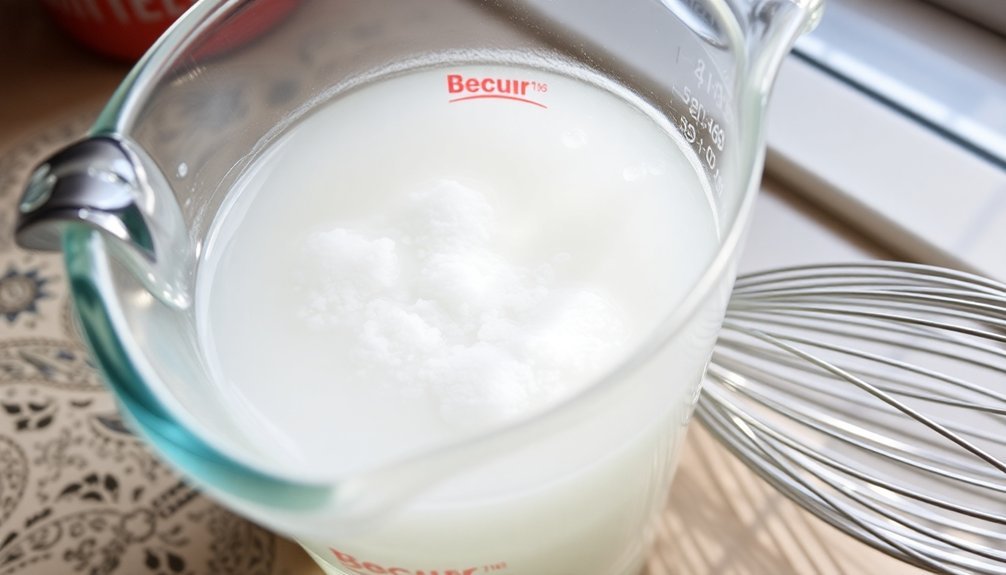
Creating the perfect brine solution forms the foundation of pickle fermentation. You'll need to combine water and vinegar in a 50:50 ratio, using vinegar with at least 5% acidity. Choose from apple cider, white wine, or rice vinegar, but avoid balsamic or malt varieties due to their overpowering flavors.
For your salt selection, stick to kosher, sea, or pickling salt, maintaining a 3% solution (about 2 tablespoons per 5 cups of water) for ideal fermentation. While sugar isn't mandatory, adding a small amount will balance the vinegar's tanginess without making your pickles sweet.
To prepare the brine, combine your ingredients in a medium saucepan. If you're adding spices like mustard seeds, coriander, or dill, include them now.
Heat the mixture over medium-high heat until it boils, making sure the salt and sugar dissolve completely. For quick pickles, you can use the brine while it's still warm. However, if you're making fermented pickles, let the solution cool before pouring it over your cucumbers.
Always make sure your cucumbers remain fully submerged in the brine during fermentation.
Clean And Cut Cucumbers
Your success in pickle fermentation depends heavily on how you prepare and cut your cucumbers.
When cutting, you'll want uniform sizes to guarantee even fermentation – whether you're making slices, spears, or keeping them whole.
Start by thoroughly washing your cucumbers and removing the blossom end, then cut them according to your recipe's specifications while maintaining consistent sizes throughout.
Size Matters When Cutting
When fermenting pickles, uniform cutting sizes play an essential role in achieving consistent results. Whether you're making spears, rounds, or strips, maintaining even dimensions guarantees that your pickles ferment at the same rate and develop balanced flavors throughout.
You'll want to choose your cutting technique based on how you plan to use your pickles. For sandwiches and snacking, spears work best – cut your cucumbers lengthwise into quarters or eighths after trimming the ends. If you're making traditional dill or sweet pickles, rounds are ideal, and you can use either a straight knife or crinkle cutter for added texture. For relish or finely chopped condiments, thin strips are your best choice.
- Cut all pieces to similar thickness (about 1/4 inch for rounds, 1/2 inch for spears)
- Remove both ends of cucumbers before cutting to eliminate bitter notes
- Use a sharp knife or mandoline to achieve clean, precise cuts
Remember that inconsistent sizes can lead to uneven fermentation, where some pieces become too soft while others remain too firm. Keep your cuts uniform, and you'll achieve that perfect pickle crunch every time.
Proper Cucumber Prep Techniques
Proper preparation up front can make or break your pickle fermentation success. You'll need to start by gently cleaning your cucumbers without over-washing them, as some beneficial bacteria on the skin are essential for fermentation. Simply wipe them with a damp cloth to remove dirt, or if they're commercially bought, use diluted vinegar or lemon water to remove any wax coating that could interfere with fermentation.
Pay special attention to the blossom end of your cucumbers, as it can harbor unwanted bacteria. You'll want to either thoroughly clean this area or cut it off completely. Some fermenters prefer to scrape the blossom end with a nail until they reach clean flesh. This step is vital for maintaining crisp pickles and ensuring proper fermentation.
When you're ready to cut, remove both ends of the cucumbers since they contain enzymes that can lead to softening.
Make uniform cuts, whether you're creating spears or slices, to promote even fermentation throughout. Remember, your cutting technique directly affects the final texture of your pickles, so take care to maintain consistency in your cuts.
Add Spices And Aromatics
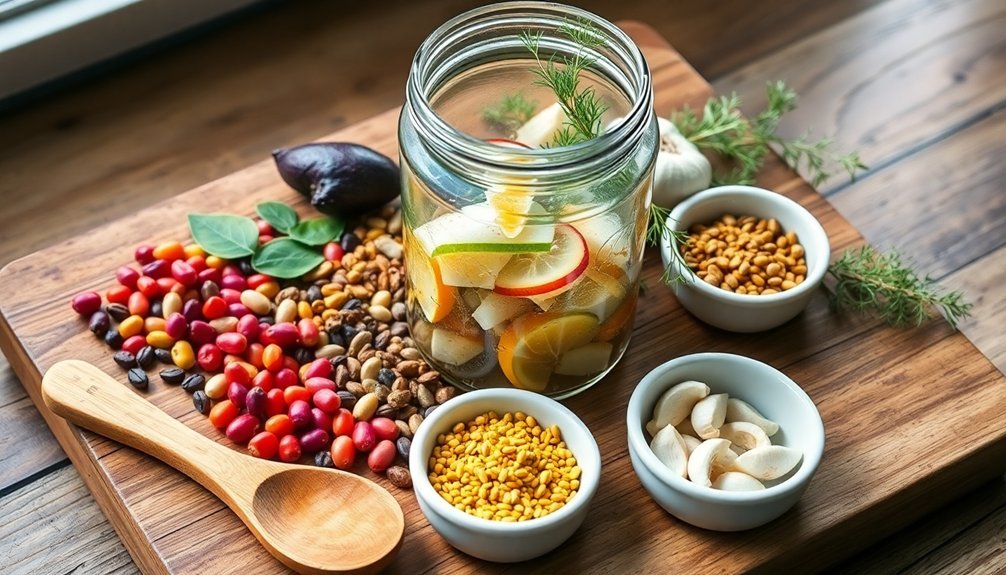
Successfully seasoning fermented pickles relies on a thoughtful combination of spices and aromatics. Start with essential components like mustard seed, coriander seeds, and dill seed to create your base flavor profile.
You'll want to layer in complementary ingredients like bay leaves and allspice berries for depth, while garlic and black peppercorns add pronounced savory notes.
For the most effective flavor infusion, you can add your spices in two ways: either directly to the jar before adding the brine, or by mixing them into the hot brine mixture. If you're new to pickle making, consider using a pre-packaged pickling spice blend until you're comfortable creating your own combinations.
- Layer spices at the bottom of your jar, add cucumbers, then top with another layer of spices for maximum flavor penetration.
- Keep all vegetables fully submerged using fermentation weights to guarantee even spice distribution.
- Taste your pickles periodically during fermentation, adjusting seasonings as needed.
Remember to distribute your aromatics evenly throughout the jar, and don't hesitate to experiment with additional ingredients like red chili flakes or fresh herbs to customize your recipe.
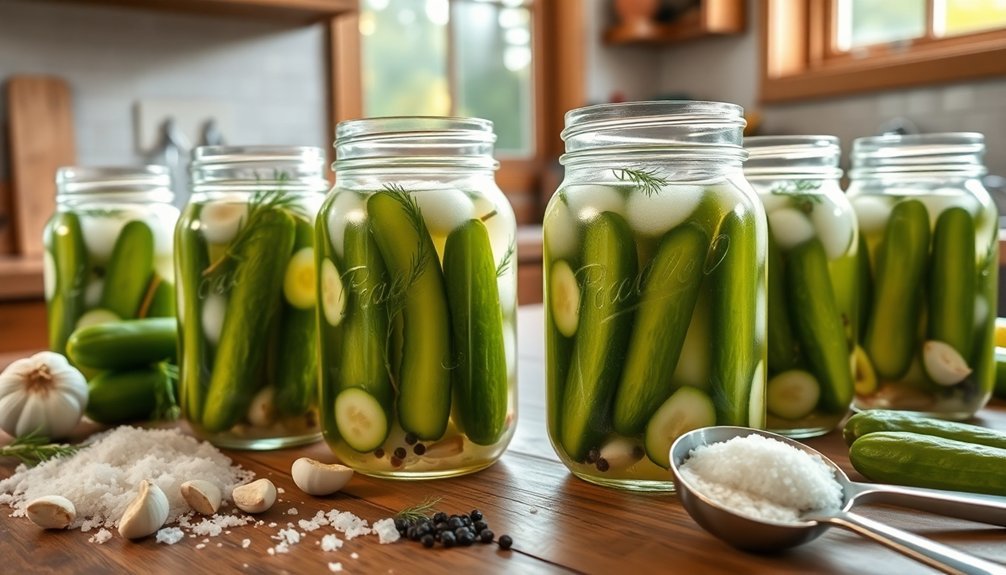
Pack Your Fermentation Container
When packing your fermentation container, you'll want to carefully layer your ingredients to guarantee even distribution of flavors and proper fermentation.
Start by placing a portion of your spices and aromatics at the bottom, then add your prepared cucumbers in tightly packed layers with additional spices between them.
You must keep all cucumbers completely submerged beneath the brine level using weights or a water-filled bag to prevent spoilage and guarantee successful fermentation.
Layer Ingredients With Care
The art of layering your fermentation ingredients determines the success of your pickle batch. Start with an impeccably clean container, whether you're using wide-mouth mason jars or fermentation crocks. You'll want to guarantee there aren't any lingering odors or flavors that could affect your pickles.
Begin layering by distributing half of your aromatic ingredients at the container's bottom. You'll need:
- Fresh or dried dill, garlic cloves, and bay leaves for traditional flavor
- Mustard seeds and peppercorns for a pungent kick
- Optional dried red peppers or whole mixed pickling spices for extra heat
Pack your cleaned cucumbers firmly into the container, making sure you've removed the blossom ends to prevent softening. Don't overlap or crush them – they should fit snugly but comfortably.
Sprinkle the remaining aromatics on top of your cucumbers before pouring the 2% brine solution until everything's completely covered.
Finally, weigh down your cucumbers using glass weights or a zip-lock bag filled with marbles to keep them submerged. Cover with a fermentation lid or loose regular lid, and place the container on a tray to catch any overflow during fermentation.
Keep Cucumbers Below Brine
Maintaining proper brine coverage stands as a vital factor in successful pickle fermentation. You'll need to start with the right container – a clean, wide-mouth glass jar or food-grade plastic vessel. For every 5 pounds of vegetables, use a 1-gallon container, or opt for quart and half-gallon Mason jars for smaller batches.
Create a 3% salt water brine and let it cool before pouring it over your cucumbers. Leave 1-2 inches of headroom at the top to allow for expansion and gas release. It's essential to keep the cucumbers completely submerged under the brine to prevent mold growth and guarantee proper fermentation.
You'll need to weigh down the cucumbers to keep them submerged. Use fermentation weights, a water-filled zip-lock bag, or a dinner plate weighted with sealed jars. Cover the container loosely with a lid or clean towel to allow gases to escape while keeping contaminants out.
Place your fermentation container on a plate to catch any overflow, and keep it at room temperature away from direct sunlight.
Check the jar every few days to remove any scum and confirm the cucumbers remain submerged throughout the fermentation process.
Maintain Proper Temperature
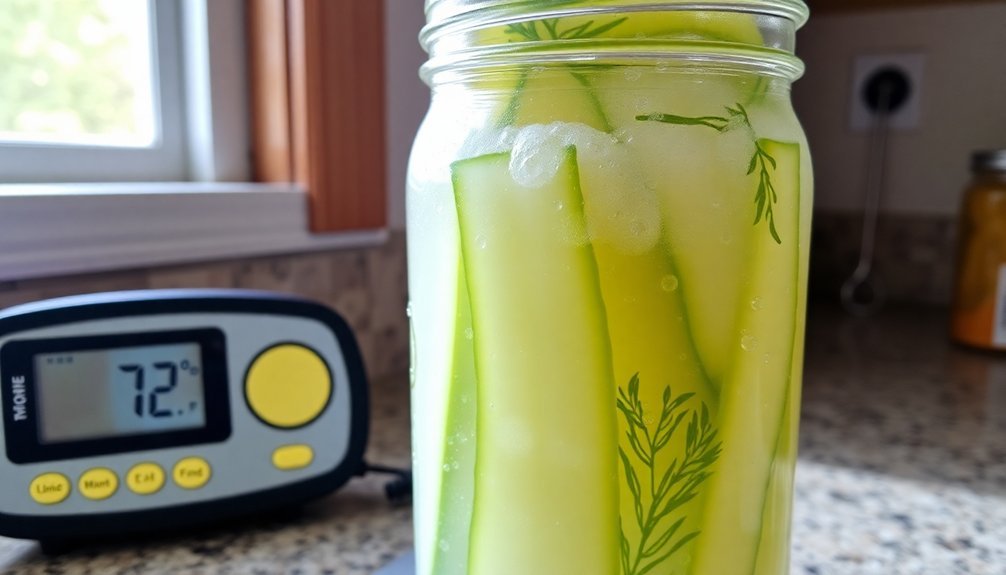
Proper temperature control stands as the cornerstone of successful pickle fermentation. You'll want to maintain temperatures between 60°F and 70°F, with 65°F being the sweet spot for ideal flavor and texture development.
At this prime range, beneficial bacteria like Lactobacillus thrive, creating the perfect environment for crisp, flavorful pickles that'll last longer in storage.
When temperatures climb above 72°F, you're risking mushy pickles and sharp, funky flavors. Below 58°F, the fermentation slows dramatically, potentially allowing harmful bacteria to take hold. Don't let either scenario compromise your fermentation efforts.
- Place a reliable thermometer in your fermentation area to monitor current, high, and low temperatures.
- Use temperature control devices like seedling mats with controllers or wine fridges to maintain consistency.
- Choose appropriate storage locations based on seasonal changes – the top of your fridge or a cool, dark pantry often work well.
Monitor The Fermentation Process
Successfully monitoring your pickle fermentation requires daily attention to multiple factors that work together with proper temperature control.
You'll need to check your fermentation container daily for surface scum or mold, promptly removing any that appears. Keep your cucumbers fully submerged in the brine using a clean weight, and guarantee your container remains covered to prevent contamination.
Monitor your brine solution carefully, maintaining a 4% salt concentration during fermentation. You'll notice the brine becoming cloudy with white residue – this is normal and indicates active fermentation.
Check the pH level regularly; your pickles are ready when it reaches between 3.0 and 3.5, with a final salinity around 10%.
Watch for the cucumber's transformation from white to translucent interior, which signals proper fermentation. Replace old dill or spices with fresh ones as needed, and always use clean utensils when handling the contents.
Conduct regular taste tests to guarantee you're achieving a full-bodied, fermented flavor. If you're using analytical methods, PCA and LDA can help you classify fermentation stages, while VOC detection provides precise tracking of your fermentation progress.
Check For Pickle Readiness
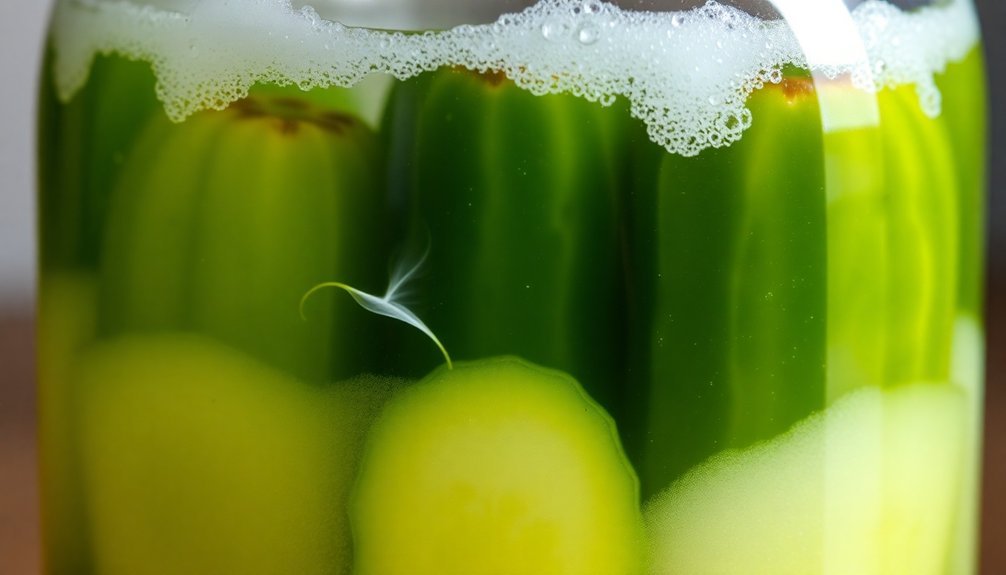
A watchful eye for key indicators will tell you when your pickles have reached their fermentation peak. You'll notice a cloudy brine developing, along with bubbles rising to the surface when you gently tap the jar. These signs, coupled with a pleasant pickle-y aroma, confirm that your fermentation is progressing well.
Your cucumbers will transform visibly during fermentation. The rind should lose its bright green color and become more translucent, while the interior shifts from white to translucent as well. You'll want to maintain some crunchiness – if they're getting soft or slimy, they've gone too far and should be discarded.
- Test the brine by tasting it – it should be as salty as sea water and have developed a full-bodied, tangy flavor.
- Check for gas release by gently tapping the jar – healthy fermentation produces bubbles and may cause brine overflow.
- Look for white residue settling on the pickles and a cloudy brine, both indicating readiness.
After 5-6 days, taste-test a small cucumber. If it's achieved your desired tanginess, your pickles are ready to enjoy.
Remember to discard any batch with foul odors or visible mold.
Store Your Fermented Pickles
Once your pickles reach their perfect fermentation point, storing them correctly guarantees they'll maintain their delicious flavor and crunch for months to come.
Transfer your pickles to clean, nonreactive containers made of glass or food-grade plastic, placing half of your dill and spices at the bottom before adding the cucumbers.
You'll need to keep your fermented pickles submerged in brine using weights to prevent mold growth. Store them in your refrigerator at temperatures between 32 and 50 degrees Fahrenheit, away from direct sunlight. This cool environment slows down fermentation and helps preserve your pickles for 4 to 6 months.
Don't forget to monitor your pickles regularly by checking for any surface scum, mold, or signs of spoilage like softness or unusual odors. If you notice any issues, remove the affected areas promptly.
Keep your containers sealed with nonreactive lids to prevent contamination.
If you're looking for longer storage options, you can try canning or freezing your pickles. While canning will extend shelf life, it'll reduce probiotic benefits. For freezing, use multiple layers of protection to prevent freezer burn and maintain quality.
Frequently Asked Questions
Can I Reuse the Brine From a Previous Batch of Fermented Pickles?
Yes, you can reuse pickle brine once or twice for refrigerator pickles. You'll need to add fresh vinegar, strain the liquid, and check for spoilage. It's not suitable for canned pickles.
Why Did My Pickles Turn Out Mushy Instead of Crispy?
Your pickles are likely mushy because you didn't remove the blossom ends, used weak brine, or stored them at too high temperatures. You'll want to trim ends, maintain proper salt levels, and control fermentation temps.
Is It Safe to Eat the White Film That Forms on Top?
While the white film (Kahm yeast) is technically safe to eat, you'll want to skim it off to avoid any off-flavors. It won't make you sick, but it can affect your pickles' taste.
Can I Mix Different Types of Vegetables in the Same Fermentation Batch?
Yes, you can mix different vegetables in the same fermentation batch. However, be sure to choose vegetables with similar fermentation times and textures. Layer firmer ones at the bottom and keep everything submerged in brine.
What Causes Pickles to Develop a Hollow or Empty Center?
You'll get hollow pickles from inconsistent watering, poor pollination, or delayed processing. If you don't store cucumbers properly after picking or use weak brine during fermentation, they can develop empty centers.
In Summary
You've now got all the knowledge needed to create amazing fermented pickles at home. By following these simple steps and staying attentive to the fermentation process, you'll be enjoying crisp, tangy pickles in no time. Don't be afraid to experiment with different spices and cucumber varieties – each batch is an opportunity to perfect your technique. Remember, patience and careful monitoring will reward you with delicious results.


Leave a Reply