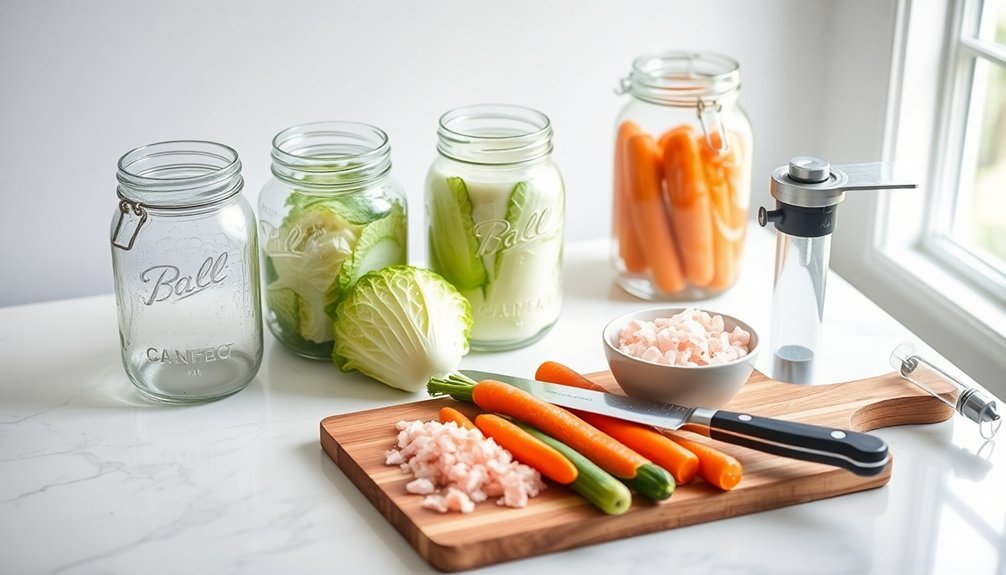
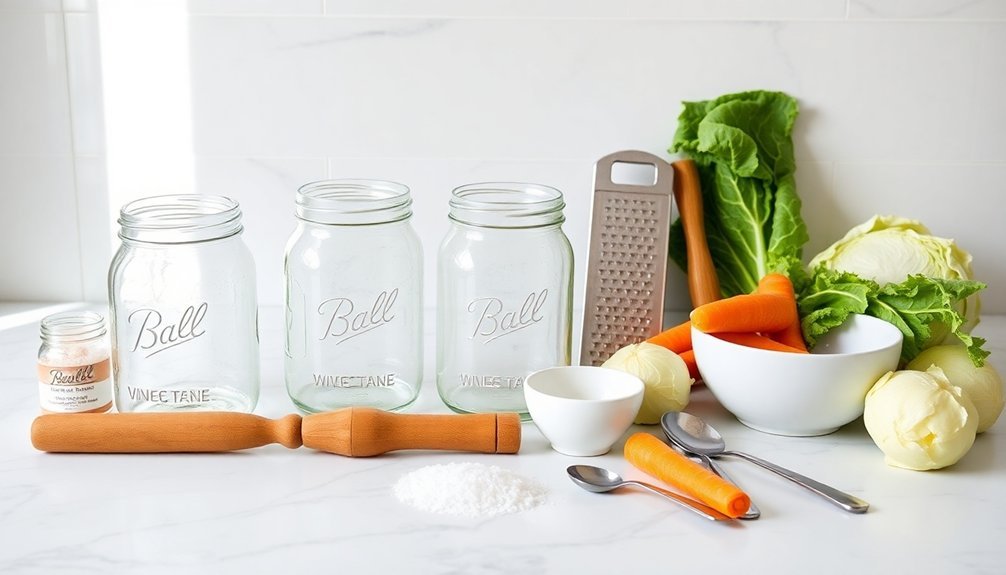
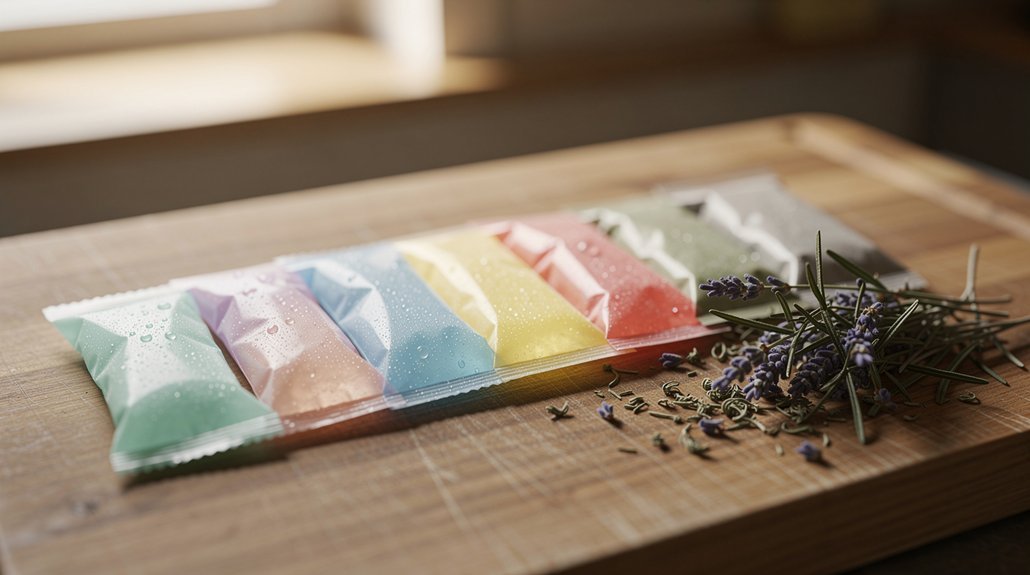
You'll need just a few basic tools to start fermenting vegetables at home today. Essential items include wide-mouth mason jars or glass containers, fermentation weights to keep vegetables submerged, and airlocks to release built-up CO2. You'll also want basic kitchen equipment like a reliable scale, sharp knives for chopping, and a sturdy tamper for packing vegetables. Don't forget pH test strips to monitor acidity levels and guarantee food safety. While these basics will get you started, understanding the right equipment combinations and proper techniques will help you achieve consistent, flavorful results.
Why Start Fermenting Vegetables
Up until recently, many people overlooked the powerful health benefits of fermented vegetables, but now they're gaining popularity for good reason.
When you incorporate fermented vegetables into your daily diet, you'll boost your immune system, improve your digestive health, and reduce your risk of chronic diseases like diabetes and cardiovascular disease.
You'll find that fermented vegetables are easier to digest because beneficial bacteria break down complex molecules into simpler forms. These beneficial bacteria also produce antioxidants, synthesize vitamins, and help your body absorb nutrients more effectively. They can even neutralize toxic substances like phytates and saponins that might otherwise interfere with nutrient absorption. The ideal temperature of 50-65 degrees Fahrenheit helps create perfect fermentation conditions.
What's particularly appealing about fermenting vegetables is how simple it's to get started. You can ferment almost any vegetable using basic equipment you likely already have at home.
You'll have complete control over the flavors and salt content, and you can experiment with different combinations to find what works best for you. Plus, it's a safe and effective way to preserve your vegetables while creating delicious, probiotic-rich foods that support your overall health and well-being.
Basic Fermentation Containers
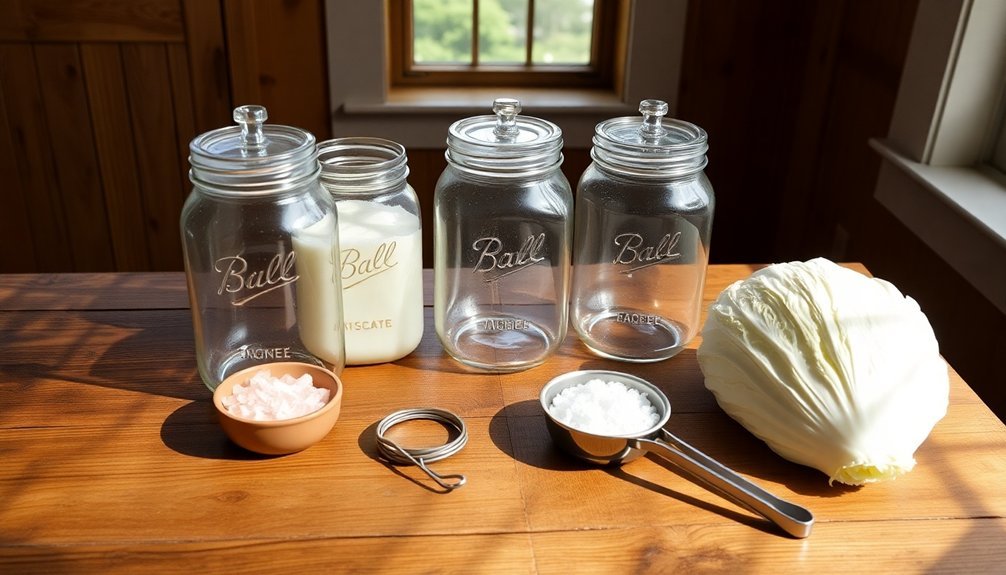
Mason jars serve as your ideal entry point into vegetable fermentation, offering an affordable and readily available option for first-time fermenters.
Wide-mouth glass containers make the process easier by allowing you to pack vegetables efficiently while monitoring the fermentation's progress through the transparent sides. Salt ratios must follow the 2% salt rule to ensure proper fermentation.
Traditional fermentation crocks, though pricier, provide the perfect environment for larger batches and maintain consistent temperatures throughout the fermentation process.
Mason Jars For Beginners
Clear glass mason jars serve as the cornerstone of beginner fermentation projects, offering an ideal entry point for home fermenters. You'll want to start with quart or half-gallon sized wide-mouth jars from trusted brands like Ball, Kerr, or Bernardin. Most fermentation kits include a 24 oz wide-mouth jar that's perfect for small batches.
The transparent glass allows you to monitor your fermentation progress easily, while plastic lids prevent the rust contamination that metal lids can cause.
To properly outfit your mason jars, you'll need several essential accessories. An airlock or fermenting lid will safely release built-up CO2, while fermentation weights keep your vegetables submerged in the brine.
Don't forget a plastic spatula for removing air bubbles and a measuring cup for preparing your salt solution. It's also wise to place your jars on a tray to catch any potential overflow.
When fermenting in mason jars, maintain temperatures between 60-75°F and keep them away from direct sunlight. Always leave 1-2 inches of headspace to prevent overflow.
If you're using regular lids instead of specialized fermenting lids, you'll need to burp your jars regularly to release pressure. For added convenience, consider investing in easy fermenter lids or a complete fermentation kit.
Wide-Mouth Glass Container Benefits
Building on the basics of mason jar fermentation, wide-mouth glass containers offer specific advantages that make them ideal for both novice and experienced fermenters. Their generous opening makes them exceptionally practical for handling vegetables, allowing you to easily fill, empty, and clean the containers without struggling. The anaerobic environment created by these containers is perfect for growing beneficial bacteria during fermentation.
You'll find these containers particularly valuable when working with larger vegetables or when you need to pack multiple ingredients tightly.
When it comes to the fermentation process itself, wide-mouth containers excel at creating ideal conditions. They're compatible with various accessories that enhance your fermentation success:
- Fermentation weights fit perfectly through the wide opening, ensuring your vegetables stay submerged in brine
- Airlock systems attach easily to these containers, helping control the fermentation environment
- Standard canning lids and rings provide a secure seal while allowing gases to escape
You'll appreciate how these containers make monitoring your ferments straightforward – you can easily check progress, taste-test, and make adjustments as needed. Wide-mouth containers are also cost-effective and readily available in various sizes, from small half-pint jars for experimental batches to larger half-gallon containers for bigger projects.
Crocks: Traditional Fermentation Vessels
Traditional fermentation crocks stand as time-tested workhorses in the art of vegetable fermentation. You'll find these dark, glazed ceramic vessels particularly effective due to their water-sealed rim design, creating an ideal anaerobic environment for your ferments. The German-style water-seal crocks offer a nearly carefree experience, requiring only occasional checks of the water level in the moat. Open-style crocks can be a more economical option as they are less expensive and easier to clean.
| Feature | Benefit | Consideration |
|---|---|---|
| Water-seal moat | Creates airtight environment | Check water levels regularly |
| Thick stoneware walls | Maintains stable temperature | Available in 1-10+ gallon sizes |
| Weighted stones | Keeps vegetables submerged | Must be cleaned thoroughly |
| Glazed interior | Resists fermentation acids | Food-safe materials only |
The design allows carbon dioxide to escape while preventing outside contaminants from entering. You'll need approximately 1 gallon of space for every 5 pounds of vegetables you're fermenting. These crocks have evolved from traditional German stoneware to modern designs with food-safe glazes, but they maintain their superior functionality. Their thick walls create stable temperatures, resulting in deeper flavors during fermentation. When using a crock, you'll even hear the satisfying "plop, plop" of fermentation without any escaping odors.
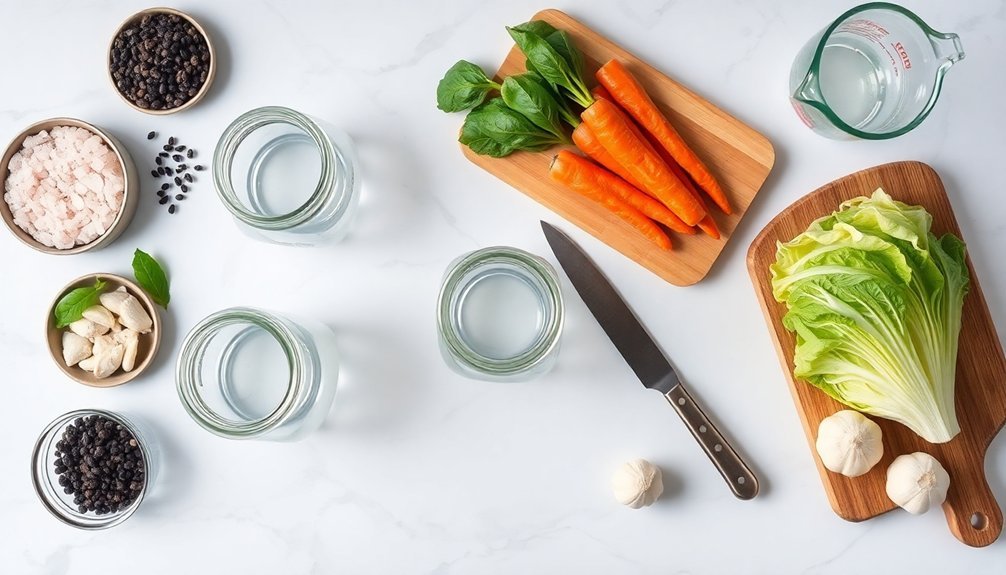
Must-Have Kitchen Tools
To successfully ferment vegetables at home, you'll need several essential kitchen tools that create the proper environment for fermentation. These tools help create conditions where beneficial bacteria can thrive, leading to properly fermented foods with enhanced nutritional value. Start with a reliable kitchen scale to measure ingredients precisely, guaranteeing consistent results in your fermentation projects.
You'll also want a good set of chopping knives for preparing your vegetables and a sturdy vegetable tamper to pack them tightly into your containers.
For safe and effective fermentation monitoring, you'll need:
- pH test strips to check acidity levels and guarantee food safety
- A reliable thermometer to maintain the best fermentation temperatures
- A tracking system to monitor fermentation stages and timing
Don't forget about accessories that make the process easier and more efficient. A canning funnel will help you pack vegetables into jars without making a mess, while specialized tools like pickle packers work with both wide and regular mouth Mason jars.
If you're just starting out, consider investing in a fermentation kit that includes multiple tools and recipes. These kits often come with pickle pebbles and pipes that simplify the process and help maintain proper anaerobic conditions.
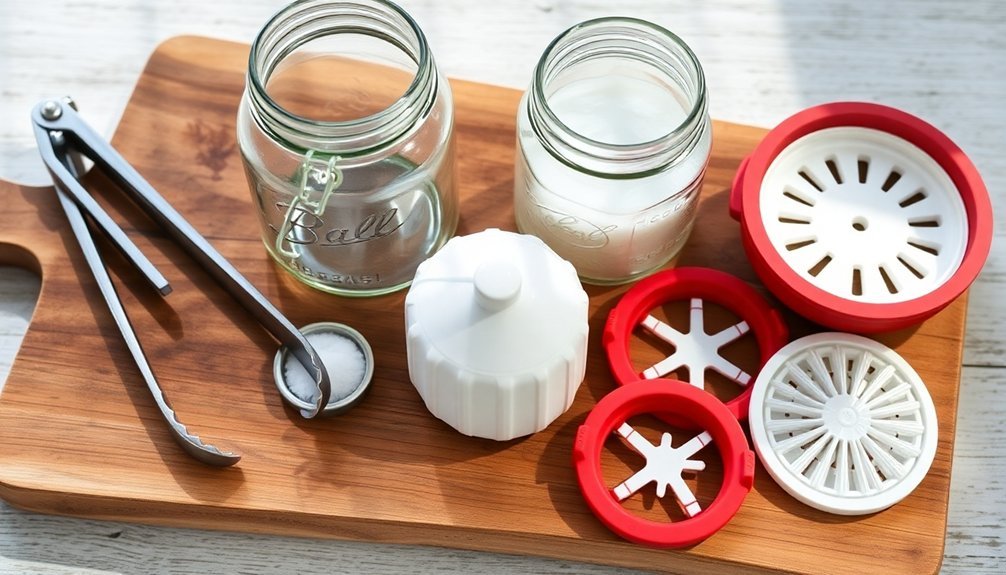
Airlocks and Fermentation Weights
Beyond the basic kitchen tools, successful fermentation requires effective airlock systems and proper weights to create ideal conditions for your vegetables. Airlocks play a vital role by allowing carbon dioxide to escape while keeping oxygen out, which helps prevent mold and Kahm yeast formation. You'll find various options, from S-shaped bubblers to silicone pickle pipes that fit mason jar rings. The ideal room temperature range of 15-25°C ensures optimal fermentation conditions when using these tools.
Fermentation weights are equally important, keeping your vegetables submerged beneath the brine to maintain an oxygen-free environment. You can choose from purpose-made ceramic or glass weights, or even use large cabbage leaves as natural alternatives.
| Type | Purpose | Maintenance |
|---|---|---|
| S-shaped Airlock | Releases CO2, blocks oxygen | Requires thorough cleaning |
| Silicone Pickle Pipe | One-way gas release | Easy to clean and store |
| Three-piece Airlock | Customizable pressure control | Separates for thorough cleaning |
| Ceramic Weights | Keeps vegetables submerged | Sanitize after each use |
| Glass Weights | Maintains anaerobic environment | Dishwasher safe |
To maximize your fermentation success, combine airlocks with weights. Clean both thoroughly after each use and sanitize before reuse to guarantee consistent, high-quality results.
Temperature Control Equipment
Maintaining precise temperature control stands at the heart of successful vegetable fermentation. You'll find the ideal temperature range falls between 60°F and 70°F, with 65°F being the sweet spot for best results. Modern DIY methods like wet towels and ice baths offer simple solutions for temperature management.
When temperatures climb above 72°F, you'll get faster fermentation but risk unwanted flavors and textures, while temperatures below 58°F can slow the process and invite harmful bacteria.
To achieve consistent results, you'll need appropriate temperature control equipment based on your setup's size and requirements. For home fermentation, basic thermometers like ThermoPro work well for monitoring, while larger operations might require more sophisticated solutions like circulating temperature control units or the HakkoBako Pro fermentation chamber.
Here are three key factors to take into account when choosing your temperature control equipment:
- Your fermentation vessel size and process volume
- Required heating and cooling capacity
- Whether you need remote monitoring capabilities
Remember to check your fermentation temperature regularly and adjust your process time accordingly. You can compensate for varying ambient temperatures by modifying fermentation duration or salt content, ensuring you achieve the perfect balance of flavor and texture in your fermented vegetables.
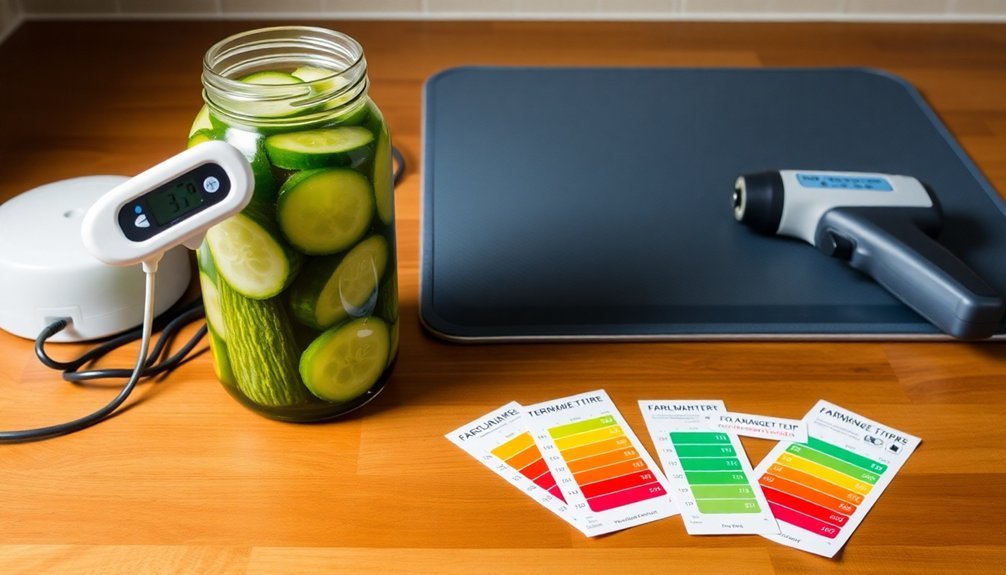
Measuring and Testing Tools
You'll need three essential measuring tools to guarantee successful vegetable fermentation: pH strips to monitor acidity levels for safety, a reliable kitchen scale for precise ingredient ratios, and a temperature gauge to maintain ideal fermentation conditions.
Your pH strips should read below 4.0 for safe preservation. This is crucial because a pH of 4.6 or lower is generally considered safe for fermented vegetables, indicating that the fermentation is likely free from harmful bacteria.
Your scale helps maintain correct salt percentages for different vegetables, ranging from 2% for cucumbers to 3.5% for beets. For example, a 2% salt concentration is ideal for softer vegetables like cucumbers and zucchini, while a 2.5% concentration works well for a broad range of vegetables like carrots, cauliflower, and peppers. A higher concentration of 3.5% is best for firmer vegetables like beets or other root vegetables.
A temperature monitor lets you track and adjust conditions to keep your ferments within the ideal 65-75°F range for proper bacterial growth. This temperature range is critical for the optimal fermentation process.
Ph Strips for Safety
Safety in vegetable fermentation comes down to achieving and maintaining proper acidity levels, which is why pH strips are an essential tool in your fermentation kit. You'll need to make certain your ferments reach a pH of 4.6 or lower to prevent harmful bacteria and botulism from developing.
Testing is straightforward: extract a small amount of brine with a clean dropper, apply it to the strip, wait 30 seconds, and match the color to the provided chart.
For successful pH testing of your ferments, follow these key steps:
- Start testing early in the fermentation process to monitor the pH decline, as reaching 4.6 or lower is vital for food safety.
- Use clean utensils every time you test, and avoid dipping the strips directly into your fermentation vessel to prevent contamination.
- Record your measurements with dates to track the fermentation progress and maintain consistent results.
Your fermented vegetables will typically reach a final pH between 2.5 and 3.5, depending on your flavor preference. Remember that proper pH levels not only ensure safety but also contribute to the ideal texture and taste of your fermented vegetables.
Kitchen Scale Basics
A kitchen scale brings mathematical precision to your fermentation projects, much like pH strips guarantee proper acidity. You'll need this essential tool to achieve the perfect 2.2% brine ratio that professional fermenters use for consistent, safe results.
To use your scale effectively, start by weighing your empty fermentation jar. Then, fill it with your chosen vegetables and water, and weigh it again. The difference between these weights tells you the total mass of water and vegetables.
From there, you'll calculate 2.2% of this total weight to determine how much salt you need for proper fermentation.
Don't forget to use the tare function when measuring ingredients – it'll reset the scale to zero, allowing for accurate measurements of each component. You'll want to measure in grams for the most precise results. Whether you're dry salting or creating a brine solution, your kitchen scale confirms you're using the exact amount of salt needed.
Remember to clean and calibrate your scale regularly to maintain accuracy. A reliable scale is your best friend in achieving consistent fermentation results, as different vegetables have varying densities that affect the salt-to-vegetable ratio.
Temperature Monitoring Essentials
While mastering fermentation requires attention to many variables, temperature control stands as one of the most critical factors for success. You'll need reliable temperature monitoring tools to guarantee your ferments maintain ideal conditions, typically between 15-25°C for vegetable fermentation.
For home fermentation, you'll find several practical options that can help you maintain consistent results.
Basic monitoring tools like sticker thermometers offer a simple yet effective solution, allowing you to track temperature changes directly on your fermentation vessel.
For more precise control, digital thermometers provide instant readings and help you make quick adjustments when needed. If you're serious about fermentation, consider investing in a temperature-controlled chamber that maintains stable conditions.
Here are three essential temperature monitoring approaches for successful fermentation:
- Adhesive strip thermometers: Provide continuous monitoring without opening containers
- Digital instant-read thermometers: Offer precise readings when spot-checking ferments
- Temperature-controlled chambers: Deliver consistent conditions for multiple ferments simultaneously
Remember that maintaining stable temperatures is vital – fluctuations can lead to inconsistent results or unwanted flavors in your fermented vegetables.
Starter Kits Worth Buying
For those starting their fermentation journey, quality starter kits provide essential tools at a reasonable price point. At $39.99, you'll get pH test strips, glass weights, silicone airlocks, and an extensive recipe book that covers everything from sauerkraut to hot sauce.
These kits are designed with versatility in mind, working with various jar sizes to accommodate both small and large batches. You'll find essential equipment like airlock fermentation lids with date timers, reusable glass weights for keeping vegetables submerged, and silicone airlocks to guarantee successful fermentation.
The included recipe book helps you create the perfect anaerobic environment by properly packing your vegetables. Whether you're interested in fermenting vegetables, dairy, fruits, or grains, there's a kit that matches your needs.
You'll get detailed guides covering equipment use, safety protocols, and troubleshooting tips. Top brands like Cultures for Health and others offer these thorough packages, guaranteeing you're well-equipped for your fermentation projects. Plus, you'll have access to community resources and expert guidance when you need additional support.
The kits prioritize both safety and customization, letting you experiment confidently with different recipes and techniques.
Safety Equipment and Supplies
Safety stands at the forefront of successful vegetable fermentation, requiring specific equipment and supplies to prevent contamination and guarantee the best results. You'll need food-grade glass containers, ceramic crocks, or porcelain vessels that won't react with the acids produced during fermentation.
Avoid using metal containers, particularly aluminum, iron, or copper, as they can create harmful chemical reactions.
Essential safety supplies include:
- Fermentation weights to keep vegetables submerged under brine, preventing mold growth
- Airlocks or breathable covers that allow CO2 to escape while blocking contaminants
- pH testing equipment to monitor acidity levels and guarantee food safety
Don't forget to thoroughly clean all equipment with hot soapy water before use, and consider sterilizing your tools by boiling or using food-grade sanitizer.
You'll want to keep fine mesh strainers handy for handling fermented materials, and use plastic lids instead of metal ones to prevent rust.
Remember to wear gloves when handling spicy ingredients, and always use clean, contaminant-free water for your brines.
Regular monitoring of your ferments will help you catch any potential issues early.
Storage Solutions and Methods
Proper storage solutions play a vital role in maintaining the quality and safety of your fermented vegetables. You'll want to keep your ferments in cool locations below 12°C (53F), such as refrigerators, basements, root cellars, or cool kitchen corners.
While fermentation continues at slower rates in these conditions, refrigeration at 4°C (39F) helps preserve the best aroma and texture.
For containers, you've got several reliable options: glass jars, food-grade plastic containers, and stone crocks. If you're using non-food-grade plastics, make sure to line them with food-grade plastic bags. While Mason jars work, they might result in higher spoilage rates.
Whatever container you choose, clean it thoroughly with hot, soapy water before use.
You'll need to keep your vegetables submerged 1-2 inches under brine throughout fermentation. Use weights like dinner plates, glass pie plates, or brine-filled plastic bags to hold everything down.
When combining batches to save space, top off the brine and tighten lids carefully. Don't open jars during fermentation unless necessary, and opt for plastic lids over metal ones to prevent rust from salt exposure.
Frequently Asked Questions
Can I Reuse Fermentation Brine for New Batches of Vegetables?
Yes, you can reuse your fermentation brine for new batches. Add 1/2 cup for quart jars or 1 cup for gallon jars. The beneficial bacteria will speed up fermentation, but store it properly and check for spoilage.
How Long Do Homemade Fermented Vegetables Last Before Going Bad?
Your homemade fermented vegetables can last 6-12 months when stored properly in the refrigerator. You'll get the best flavor within 3-6 months, but always check for mold or off-smells before eating.
What Are the Signs That a Fermentation Batch Has Gone Wrong?
You'll know your fermentation has gone wrong if you spot mold growth, detect a putrid smell, notice mushy vegetables, or find off-flavors. A properly fermented batch should smell pleasantly sour and remain crisp.
Can I Mix Different Vegetables in the Same Fermentation Container?
Yes, you can mix different vegetables in the same container. Combine complementary items like cabbage with carrots, or cauliflower with celeriac. Just make certain they're cut similarly and completely submerged in the brine.
Should I Remove the White Film That Forms on Top While Fermenting?
If it's just kahm yeast (thin, white layer), you can safely scrape it off and continue fermenting. However, if you spot fuzzy patches or odd colors, that's mold – discard the ferment immediately.
In Summary
Now you're equipped with all the essential tools to begin your fermentation journey! Start with simple equipment like mason jars and weights, then expand your toolkit as you gain confidence. Remember to prioritize safety supplies and proper storage solutions. Whether you're making kimchi, sauerkraut, or pickled vegetables, you'll find that investing in these basic tools will set you up for fermentation success.
Leave a Reply