Salt box curing transforms fresh meat into delicious aged delicacies through a carefully controlled process. You'll need to maintain temperatures between 32°-40°F and cure your meat for about 7 days per inch of thickness. Using food-grade containers and proper salt concentrations (2-3% of meat weight), you'll rotate the meat every other day until it stops releasing liquid. Your setup should include reliable thermometers, hygrometers, and non-reactive containers with airtight lids. While traditional recipes vary by region, from maple-enhanced to rosemary-infused cures, success depends on consistent monitoring and proper technique. The journey from fresh cut to perfectly cured meat holds many time-tested secrets.
The Art of Salt Box Curing
You'll need to maintain a temperature between 32°-40°F throughout the process.
Plan for about seven days of curing per inch of thickness, though this can vary depending on your meat type.
As you cure, you'll want to rotate the meat every other day and watch for liquid extraction.
When the meat stops releasing liquid, you've reached the end of your curing phase.
The process creates an environment where beneficial molds can develop, contributing to the meat's unique flavor profile.
Essential Equipment and Tools
You'll need a dedicated salt box with proper sealing capabilities to start your meat curing journey, along with basic temperature and humidity monitoring tools to guarantee safe preservation.
Your salt box setup must include food-grade containers that can hold both the curing mixture and the meat while keeping out contaminants and maintaining consistent conditions. Our stainless steel Pan & Lid containers provide ideal marinating solutions for proper curing.
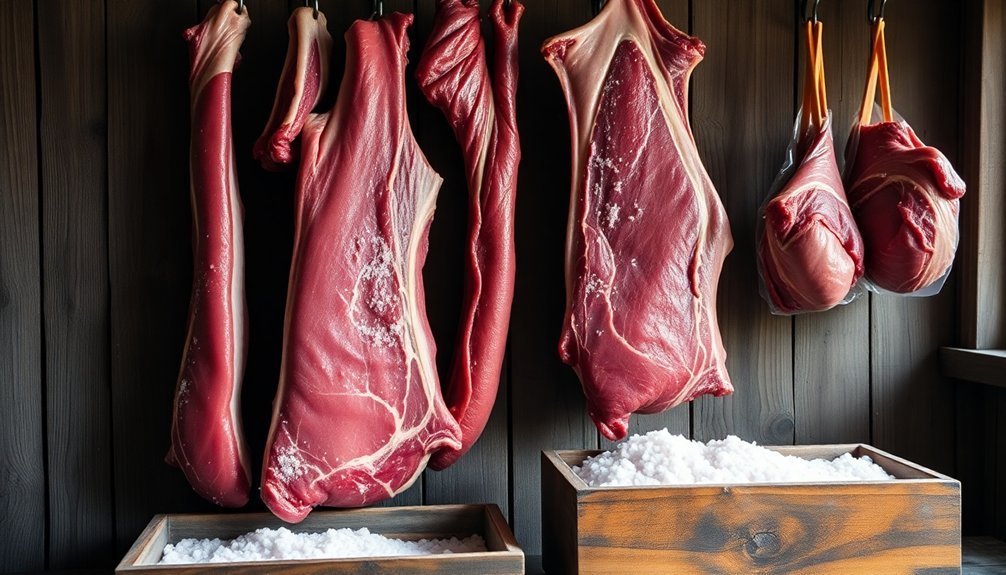
Essential storage tools include stainless steel hooks for hanging, muslin cloth for covering, and vacuum-sealed bags to protect your cured meats during the aging process.
Basic Curing Box Setup
When setting up a basic meat curing box, several essential tools and equipment must be in place for successful preservation.
You'll need to start with a large, non-corrosive container made of plastic or glass that includes a tight-fitting lid and drainage capability. Make sure your container can fit comfortably in your refrigerator, as you'll need to maintain a consistent temperature between 36-40°F throughout the curing process.
For your curing ingredients, you'll want to stock non-iodized salt, such as kosher salt or specialized curing salt, along with nitrates and nitrites for proper preservation. You can include sugar to balance the salt's harshness and add complementary spices like celery seed and black pepper for flavor. A properly cured piece of meat will experience a 35-40% weight loss during the process.
To monitor the process effectively, you'll need a reliable thermometer or hygrometer to track temperature and humidity levels.
When applying the cure, you can either use the dry method by covering the meat completely in salt, or opt for equilibrium curing using a vacuum sealer. If you're using a brine solution, you'll need proper injection equipment.
Remember to set up a system for monitoring weight loss, as this indicates when your meat has finished curing.
Safe Storage Tools Required
Once the curing box is properly set up, proper storage tools become the next key focus for successful meat preservation.
You'll need airtight containers with plastic or wax coating to protect your cured meats from oxygen exposure. Vacuum-sealed packaging offers the best protection and maximizes shelf life, while insulated containers work well for specific products like jerky and salumi.
You'll require reliable thermometers to maintain temperatures between 32°F and 40°F (0°C to 5°C), as this range is vital for safe storage. Your storage area should include adjustable shelving to maximize space and guarantee proper air circulation.
Don't forget to stock up on sanitizing supplies, including food-grade cleaners and separate cutting boards for different meats.
Important monitoring tools include labels and dating systems to track storage duration, along with humidity meters to maintain ideal conditions. You'll also want to keep a logbook nearby to record temperature checks and rotation schedules.
Make sure you have multiple clean, sanitized utensils dedicated solely to handling cured meats, and invest in proper cleaning tools to maintain strict sanitation protocols in your storage area to prevent contamination risks.
Selecting Your Meat Cuts
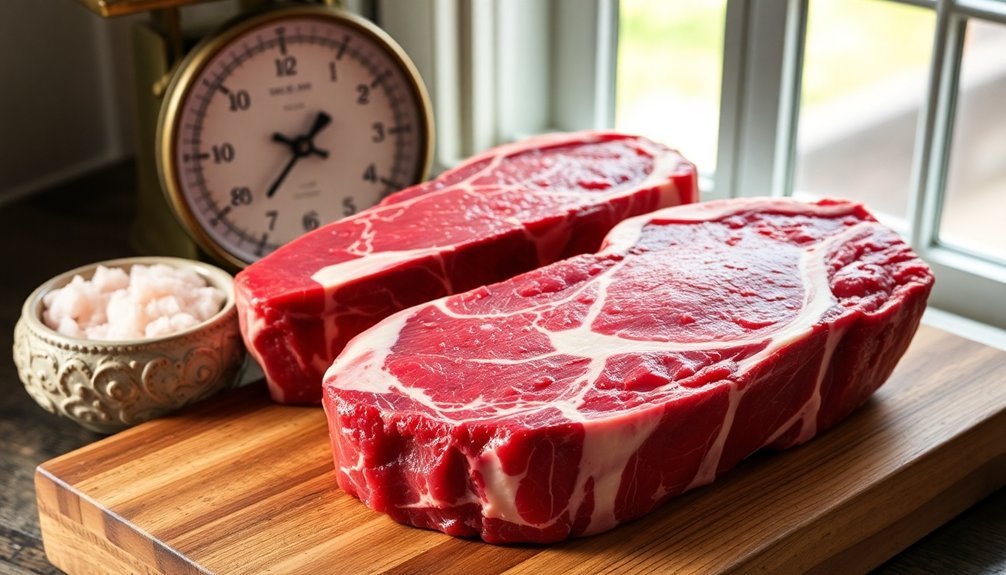
Selecting the right meat cuts stands as the foundation of successful salt box curing. You'll want to focus on lean cuts, as they're more suitable for the dry-curing process and less prone to spoilage. Pork belly for bacon and smaller hams are excellent choices to start with, though you can also work with beef, lamb, or game meats.
When choosing your cuts, pay close attention to thickness and size. Thinner pieces will cure more quickly and evenly, while thicker cuts require up to two weeks of curing time. You'll need to adjust your salt quantities and drying duration accordingly. Remember that fat content plays a vital role – while some fat adds flavor, excessive amounts can lead to spoilage issues during the curing process.
Always start with fresh meat that's been properly handled and stored. You'll need to weigh your cuts accurately before beginning, as this helps you determine the correct amount of salt needed and allows you to track the curing progress.
Don't use meat that's been stored for extended periods, and make certain you're working with cuts that have even fat distribution for consistent results.
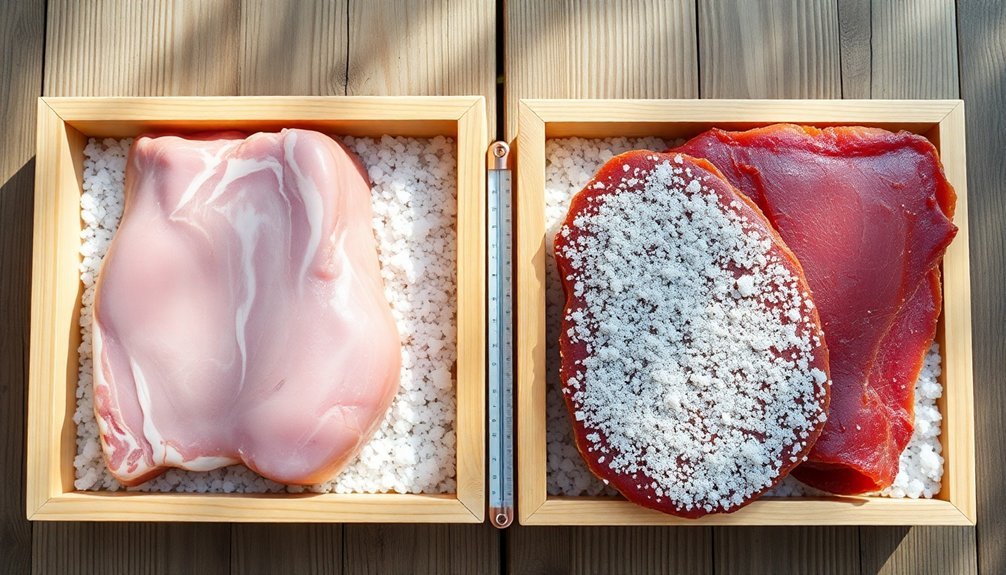
Understanding Salt Box Properties
Now that you've chosen your meat cuts, understanding the properties of your curing salt becomes the next key step in successful salt box curing.
You'll need to select pure, non-iodized salt without any anti-caking agents or added minerals. Canning salt or non-iodized salt from the spice section works perfectly, maintaining a 2-3% concentration in your final product for ideal preservation and flavor.
The science behind salt's effectiveness lies in its ability to create osmotic pressure. When you apply salt to meat, it draws out moisture through osmosis, creating an environment where harmful bacteria can't thrive. This dehydration process also contributes to the development of flavor and proper texture in your cured meat.
Key factors for successful salt box curing:
- Use only pure salt without additives to guarantee proper curing and prevent interference with the process
- Maintain consistent cold temperatures between 36-40°F during curing
- Allow adequate time based on meat thickness (approximately 7 days per inch)
- Monitor the meat's firmness and rigidity to determine when curing is complete
Understanding these salt properties helps you create a controlled environment that transforms your fresh cuts into properly preserved meat.
Traditional Curing Methods

Traditional meat curing breaks down into three primary methods: dry curing, brine curing, and combination curing. Each approach offers distinct advantages and requires specific techniques for success.
In dry curing, you'll apply the cure mix directly to your meat, either covering it completely in salt or using a precise 3% ratio for equilibrium curing. You'll need to seal the meat in a container or food storage bag and refrigerate it for several days to weeks, depending on the cut's size.
Brine curing, also known as sweet pickle cure, requires you to create a salt solution where you'll either soak or inject your meat. This method keeps your product moist and provides more cooking flexibility. You'll need to guarantee the meat stays fully submerged throughout the process.
The combination method uses both dry rub and brine injections, making it especially effective for hams. You'll need to apply multiple rubbings every three to five days while keeping the meat refrigerated. This technique reduces spoilage risk by treating both the meat's interior and exterior.
In all methods, you can enhance flavor and preservation by adding regulated amounts of nitrates, nitrites, and sugar to your cure mixture.
Safety and Temperature Control
When you're curing meat in a salt box, you'll need to maintain temperatures between 36-40°F to prevent dangerous bacterial growth while allowing the curing process to proceed effectively.
You must also keep humidity levels around 60-70% with proper airflow to support beneficial bacteria growth and prevent the meat from drying too quickly.
Before starting your curing project, thoroughly clean and sanitize all equipment and work surfaces to avoid cross-contamination that could compromise your meat's safety.
Temperature Danger Zone Basics
Safe meat curing's most essential requirement is understanding and managing the temperature danger zone – the range between 41°F and 135°F where harmful bacteria thrive and multiply rapidly.
When you're curing meat, you'll need to either keep temperatures below or above this range to prevent bacterial growth that can spoil your product or cause serious foodborne illness.
- Foods left in the danger zone for over 2 hours can become unsafe to eat
- Bacteria multiply fastest between 70°F and 120°F
- You must use a calibrated thermometer to monitor temperatures accurately
- Temperature violations can ruin an entire batch of cured meat
You'll need to cool your cured meats quickly through the danger zone, following a two-stage process.
First, cool from 135°F to 70°F within two hours, then continue cooling to reach 41°F or below within a total of six hours.
If you're reheating cured meats for consumption, bring them to at least 165°F for 15 seconds to confirm safety.
Remember that proper temperature control isn't just about food safety – it's also important for achieving the right texture and quality in your cured meats.
Monitoring Humidity Levels
Precision in humidity control stands as a cornerstone of successful meat curing. You'll need to maintain humidity levels between 60-80% RH throughout the curing process to achieve ideal results. This range prevents case hardening while limiting unwanted mold growth.
You can effectively manage humidity using a water pan, with or without a 33% salt solution. When you're starting the curing process, you'll notice higher humidity levels due to the meat's moisture content. As more meat enters your chamber, humidity naturally increases, requiring careful monitoring and adjustment.
To track these changes accurately, you'll want to employ digital controllers or monitoring systems. A Raspberry PI setup can provide continuous data tracking, helping you spot trends and make necessary adjustments. You'll find that humidity levels fluctuate based on the amount and moisture content of the meat in your chamber.
Start by running your chamber empty to understand its natural humidity patterns. Then, adjust your water pan size and humidity control methods according to your meat load. Remember to check levels regularly and record your data – this information becomes invaluable for predicting when your meat has reached its safe consumption point.
Sanitizing Your Equipment
Maintaining a sterile environment through proper equipment sanitization forms the foundation of safe meat curing. Before beginning your sanitization process, confirm all equipment is unplugged and properly tagged out.
You'll need to follow strict lockout procedures to protect yourself and others during the cleaning process.
- Hot water temperature should be high enough to require protective gloves
- Use separate brushes for floor drains versus equipment surfaces
- Always allow equipment to air dry when possible
- Never use high-pressure water that could spread contaminants
Start by removing all visible food particles and debris from your curing equipment. Pre-rinse with hot water to loosen any remaining residue, being careful not to splash contaminated water onto clean surfaces.
Next, apply foam detergent thoroughly to all surfaces, including equipment, tables, walls, and floors. You'll need to scrub every component meticulously to confirm proper sanitation.
Complete the process with a flood rinse using hot water to remove all cleaning agents. Let your equipment air dry naturally, or use lint-free towels if time is limited.
Conduct a final inspection to verify all surfaces are properly sanitized before resuming your curing operations.
Curing Times and Techniques
The art of salt box curing demands careful attention to timing and method for ideal results. You'll need to calculate curing duration based on your meat's thickness, following the standard rule of 7 days per inch. For instance, if you're curing bacon, expect 7-14 days, while a 5-inch thick ham requires about 35 days.
You'll want to maintain temperatures between 32°F-40°F throughout the process. Place your meat in a non-corrosive container that allows drainage, and remember to turn it every other day for even curing.
When using the salt box method, you'll layer your meat with cure mix and apply pressure to draw out liquids.
Once your meat has completed its curing time, you'll need to rinse it thoroughly to remove excess salt. If it's too salty, soak it in cold water for an hour. Then, scrub off all remaining cure and allow proper air circulation under refrigeration.
For raw consumption products, you'll need to continue drying until the meat loses 30% of its original weight. Place it on wire racks or hang it in your cooler during this final phase.
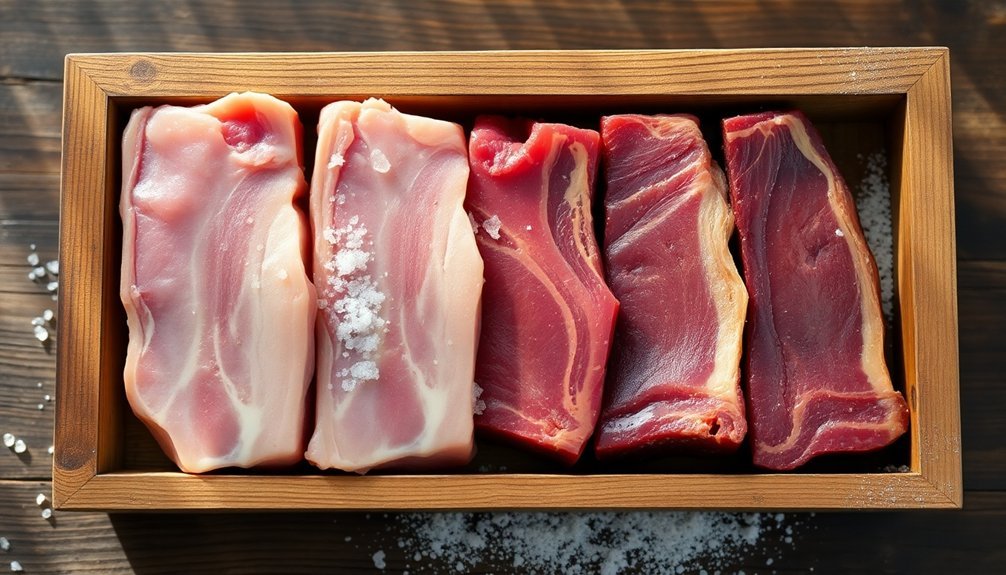
Salt Box Preparation Steps
You'll want to choose a non-reactive container made of food-grade plastic or glass for your salt box, as metal containers can interfere with the curing process.
The box needs to be large enough to fully accommodate your meat cuts while allowing for complete salt coverage on all sides.
Make sure your container has an airtight lid that seals completely to maintain proper humidity levels and prevent any unwanted odors from entering or escaping during the curing process.
Box Material Selection
Selecting appropriate materials for your salt box stands as a vital first step in successful meat curing. Your choice will greatly impact the quality and safety of your cured meats, as the container must withstand salt exposure while maintaining proper conditions throughout the process.
- Food-grade plastic containers offer excellent durability and easy cleaning.
- Traditional wooden boxes provide natural moisture control and ventilation.
- Ceramic vessels maintain consistent temperatures and resist corrosion.
- Glass containers allow for visual monitoring but require careful handling.
You'll want to make sure your chosen container is moisture-tight yet allows for proper brine drainage. It's important to select non-reactive materials that won't compromise your meat's quality or safety. The container should be large enough to accommodate both your meat cuts and the necessary amount of salt, with additional space for proper layering.
Be certain it's easily cleanable to maintain proper sanitation throughout the curing process.
When selecting your container, consider its ability to be kept in a cool environment, typically between 32-40°F for meat. The material should also protect your curing meat from direct sunlight while allowing adequate ventilation to prevent unwanted bacterial growth.
Proper Box Sealing Methods
Proper sealing of your salt box represents a critical step in guaranteeing safe and effective meat curing. You'll need to create an environment that maintains consistent humidity while preventing unwanted air exposure, which could lead to contamination or improper curing.
Start by selecting a container that you can seal tightly and that's large enough to comfortably accommodate both your meat and salt. Make sure it's completely clean and dry before use. If you're using a plastic food storage bag instead of a traditional box, check that it's free from tears and can be properly sealed.
After you've placed your meat in the container and covered it completely with salt, seal the container immediately. You'll want to guarantee there's no air trapped inside that could affect the curing process.
Label your container with the date and expected completion time to track the curing progress accurately.
Store your sealed container in the refrigerator at 36-40°F, and check it regularly for any signs of spoilage. If you notice unusual odors when opening the container for inspection, you'll need to assess whether the meat is still safe to continue curing.
Common Problems and Solutions
When curing meat in a salt box, several common issues can arise that affect the final product's quality and safety. Understanding these challenges and their solutions will help you achieve better results in your curing process.
- Rancidity from oxidation and bacterial growth
- Color inconsistencies and incomplete curing
- Off-flavors and unpleasant odors
- Nitrate-related problems and improper curing
You'll need to maintain proper salt levels to prevent bacterial growth that can cause musty or sour flavors. If you're experiencing rancidity issues, check your salt quality for metal impurities and verify your packaging is airtight. Consider using phosphates to counteract pro-oxidant metals.
Color problems often indicate incomplete curing or poor nitrite distribution. Keep your curing temperature between 35°F-38°F and use cure accelerators like ascorbate when needed. Don't exceed 156 ppm for combined nitrates and nitrites in hams or 120 ppm for bellies.
To prevent these issues, you'll want to focus on proper sanitation, maintain consistent temperatures, and verify even distribution of curing ingredients.
Using quality packaging materials and protecting your meat from light exposure will also help maintain product integrity throughout the curing process.
Storage and Aging Process
Having addressed common curing problems, successful meat preservation hinges on mastering the storage and aging process. You'll need to maintain temperatures between 32°- 40°F (0°- 5°C) in a well-ventilated, dark area with controlled humidity. For equilibrium curing, you can use your refrigerator as the primary storage space.
Your curing duration depends on the meat's thickness, typically requiring 7 days per inch. A side of bacon needs 7-14 days, while larger cuts like hams may take 30-40 days. You'll want to monitor the process until the meat loses 30-40% of its original weight.
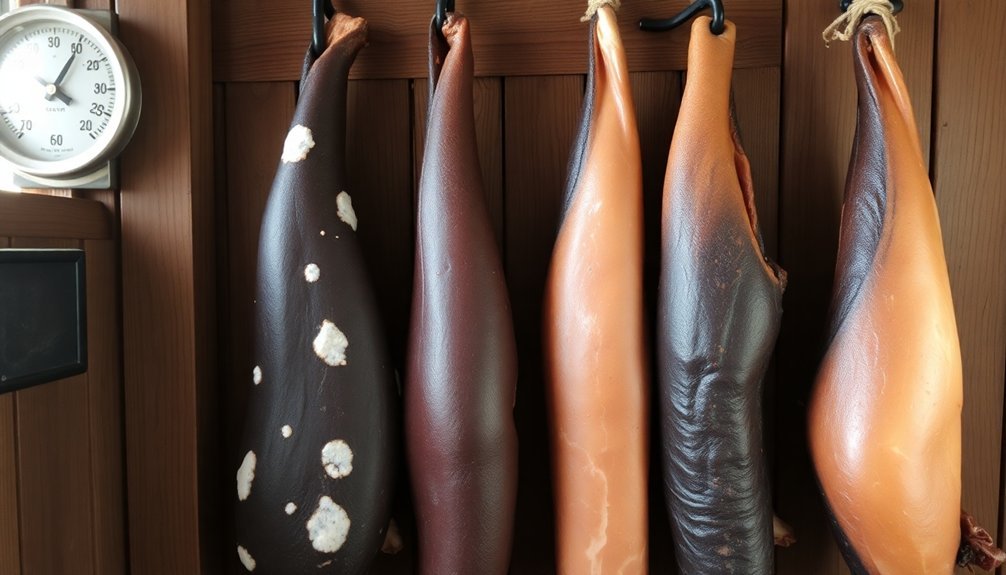
During aging, place your meat on wire racks or hang it from hooks to guarantee proper air circulation. Keep the temperature steady at 40°F (4°C), especially for hams that can age up to 6 months or even years.
You'll notice significant weight loss during this phase, with hams losing 8-12% of their mass.
Once aging's complete, rinse the meat to remove excess salt, and soak larger cuts in cold water for an hour. After patting dry, wrap in cheesecloth or tie with kitchen twine to maintain shape while allowing continued air flow.
Regional Salt Box Recipes

Traditional salt box recipes vary considerably across regions, reflecting local customs and available ingredients. You'll find that while the basic salt concentration remains consistent at 2-3% of the meat's weight, regional variations emerge through distinctive spice and flavor combinations.
- Maple-enhanced cures are popular in northeastern regions, where local maple sugar adds sweetness.
- Rosemary-infused mixtures dominate Mediterranean-inspired curing traditions.
- Boysenberry-accented recipes create unique flavor profiles in Pacific coastal areas.
- Traditional European-style cures often incorporate precise ratios of sodium nitrate and nitrite.
When you're exploring regional recipes, you'll notice two primary approaches: the equilibrium method and the excess salt method. The equilibrium method requires careful measurement to achieve the perfect salt balance, while the excess method relies on the meat's natural absorption limits.
In modern adaptations, you'll find pre-mixed curing blends that reflect these regional preferences, though many craftsmen still prefer to mix their own. The standard formula of 8 pounds salt, 3 pounds sugar, and prescribed amounts of sodium nitrate and nitrite serves as a base, but you can modify it with regional spices while maintaining these core ratios.
Frequently Asked Questions
Can I Reuse the Same Salt Mixture for Multiple Batches?
You shouldn't reuse curing salt mixtures. It's unsafe due to contamination risks, inconsistent salt concentration, and potential flavor transfer. Always use fresh curing salt for each batch to guarantee food safety and quality results.
Does Meat Curing Affect the Nutritional Value of the Final Product?
While you'll lose some moisture content, curing actually preserves many nutrients and can enhance certain elements. You'll retain beneficial fatty acids, and the process can even increase zinc and magnesium content in your meat.
What Alternatives Exist for People Following Low-Sodium Diets?
You can try celery juice powder, herb-based cures, or reduced-sodium recipes. Be aware you'll still need some salt for safety – consider smaller portions of cured meats instead of low-sodium alternatives.
How Do Different Wood Types Affect the Flavor During Smoking?
You'll find each wood type creates distinct flavors: oak offers mild versatility, hickory provides sweet bacon notes, maple delivers mellow sweetness, and mesquite gives intense flavor. Temperature and exposure time also affect taste considerably.
Can I Cure Fish and Poultry Using the Same Salt Box?
You shouldn't use the same salt box for fish and poultry. They require different curing times and salt concentrations, plus there's a risk of cross-contamination. It's best to maintain separate boxes for each.
In Summary
You've now learned the essential techniques of salt box meat curing, from choosing the right cuts to mastering the aging process. With proper tools, quality salt, and attention to temperature and humidity, you'll be ready to create flavorful cured meats at home. Remember to maintain cleanliness and patience throughout the process. As you practice, you'll develop an understanding of timing and salt ratios that'll make your curing consistently successful.


Leave a Reply