
Mennonite canning traditions combine sacred rituals with practical food preservation techniques you'll find invaluable. You'll need to start with proper equipment, including jar lifters, funnels, and bubble poppers, while maintaining strict cleanliness standards. Through generations, families have passed down essential safety measures like correct headspace, processing times, and sterilization methods. You'll discover the importance of selecting peak-season produce and mastering both dry and wet meat preservation techniques. At the heart of these practices lies a strong sense of community service, with methods that have helped feed millions worldwide. These time-tested secrets await your exploration.
The Sacred Art of Preservation

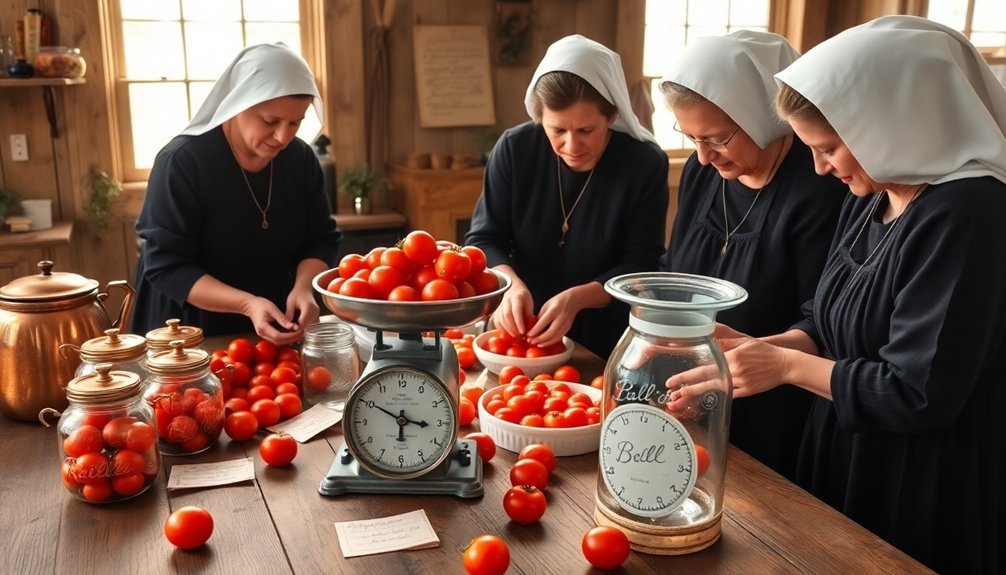
Anyone who's witnessed traditional Mennonite canning knows it's more than just a method of food preservation – it's a sacred ritual passed down through generations.
As you explore this time-honored practice, you'll discover distinct methods for different food types: high-acid foods like fruits and tomatoes require the boiling water bath method, while low-acid foods such as meats and vegetables demand pressure canning to guarantee safety. Many families utilize propane-powered stoves to maintain consistent temperatures throughout the lengthy canning process.
You'll find that natural preservatives play a significant role in this traditional art. Honey, with its unique properties including low moisture content and high sugar concentration, serves as a powerful antibacterial agent. Its acidic pH and hydrogen peroxide production make it an invaluable preservative in many family recipes.
Safety remains paramount in this sacred practice. You must follow precise procedures to prevent food-borne illnesses, particularly when handling low-acid foods where botulism poses a risk.
It's important to use correct pressure settings and processing times, verify proper jar sealing, and maintain careful storage conditions. Through ceramic crocks for fermentation and strategic use of salt blocks and wood shavings for humidity control, you're participating in a tradition that's both an art and a science.
Essential Equipment for Family Canning
You'll need a well-organized collection of basic canning tools, including jar lifters, funnels, and bubble poppers, to start your family's preservation tradition.
The Morton Pickling Salt works best for preserving vegetables, as it contains no anti-caking agents that could cloud your brine.
When working with a pressure canner, always inspect the gauge and safety valve before use, and never attempt to open the lid until the pressure has completely dropped to zero.
Before each canning session, examine your jars for chips or cracks, and sterilize them along with the lids in hot water to guarantee safe preservation of your family's harvest.
Basic Canning Tool Kit
In addition to time-honored recipes, successful home canning requires a well-equipped workspace with essential tools and equipment.
You'll need a water bath canner or large pot deep enough to cover your jars with 1-2 inches of boiling water, along with a canning rack to protect them from direct bottom contact. Clean kitchen towels are vital for wiping jar rims and handling equipment safely.
Your basic tool kit should include a jar lifter for safe handling of hot jars, a lid wand for managing lids, and potholders for general heat protection.
Don't forget measuring cups for both liquid and dry ingredients, plus a funnel and ladle for mess-free jar filling. You'll also need a bubble remover to release trapped air pockets.
Mason jars with two-piece self-sealing lids form the foundation of your canning supplies.
Always use new lids for each session, though you can reuse the ring bands if they're in good condition.
A timer, permanent marker, and headspace measuring tool will help guarantee consistency and safety.
For budget-conscious canners, you can substitute a cake cooling rack or connected ring bands for a traditional canning rack, and a trivet can work in place of a specialized jar rack.
Pressure Canner Safety Tips
Proper safety protocols form the backbone of successful pressure canning.
You'll want to start by verifying your pressure canner is in top condition, with all components securely attached and functioning correctly. Check the vent pipe for blockages, verify the safety valves are operational, and confirm both the weighted gauge and pressure dial are working accurately.
Your pressure canner's compatibility with your stove is vital for safe operation. Center it carefully on the burner, and if you're using a smooth-top electric stove, verify that your canner doesn't exceed the stove's weight restrictions.
For safe pressure canning, follow these important steps:
- Fill the canner with no more than two inches of water from the bottom, regardless of how many jars you're processing.
- Verify your jars maintain proper headspace – typically one inch – using a measuring tool for accuracy.
- Monitor pressure levels constantly, adjusting for your altitude to ascertain safe processing temperatures.
Remember to inspect your canner's safety features before each use, including the gasket, safety valves, and pressure regulators.
Store your canner with crumpled paper towels inside to prevent moisture buildup and maintain its condition between uses.
Traditional Jar Preparation Methods
Building on our safety foundation, successful canning starts with selecting and preparing the right jars. You'll want to begin with quart-sized canning jars or other sizes specific to your recipe, making sure they're free from any cracks or nicks.
While you can recycle quality jars like those from store-bought spaghetti sauce, you must verify they'll properly re-seal.
Before you start filling your jars, you'll need to sterilize them thoroughly. You can do this by either boiling them in water or running them through your dishwasher's heat dry cycle.
While the jars are sterilizing, prepare your snap lids by covering them with water and bringing them to a boil. Keep them hot until you're ready to use them.
When you're ready to fill the jars, use a wide-mouth funnel to reduce mess. Fill each jar with your prepared food, maintaining proper headspace.
Don't forget to remove air bubbles using a bubble popper. Center the snap lid on the clean jar rim and secure the screw band until it's fingertip tight – not too loose, not too tight. This allows oxygen to escape during the sealing process.
Time-Tested Safety Measures

Through generations of practice, Mennonite families have refined essential safety protocols that guarantee their canned goods remain wholesome and safe for consumption. You'll find their methods are meticulous, focusing on cleanliness and precise preparation to prevent contamination.
Start with thoroughly cleaned and sterilized jars, confirming there aren't any cracks or chips that could compromise the seal. You'll need to boil your tools and jars before use, and don't forget to sterilize the lids in boiling water to create a secure seal.
When it comes to processing, safety measures include:
- Maintaining proper headspace in each jar to allow for expansion during processing
- Adding acidic ingredients like lemon juice when necessary to confirm safe preservation
- Processing jars for the full recommended time without shortcuts, especially for meats which require three hours
During storage, you'll want to keep your canned goods in a cool, dark cellar and check them regularly for signs of spoilage.
Don't disturb the jars unnecessarily, and maintain the rings on the jars to protect the seal. If you notice any signs of compromise, don't take chances – dispose of affected jars immediately.
Community Canning Event Traditions
Regularly throughout the year, Mennonite communities gather for large-scale canning events that bring multiple families together in a coordinated effort. Local churches, like the Emmaus Mennonite Church, often organize these events, coordinating with farms and slaughterhouses to secure meat and produce for canning.
You'll find a well-organized system where volunteers take on specific roles throughout the process, from butchering and cleaning to the actual canning and packaging. The community shares specialized equipment, including mobile canneries, pressure cookers, and patented grinders, making the operation more efficient.
Whether you're participating in a small church-based event or a larger community gathering, you'll experience traditions that date back to World War II. These events showcase the Mennonite values of community service and helping those in need.
You'll work alongside both young and experienced canners, learning time-tested shortcuts and improvements that have evolved over generations.
The canned goods you help produce don't just stay local – they're often distributed globally to assist communities in need, continuing a legacy of service that's been central to Mennonite culture for decades.
Seasonal Produce Selection Guidelines
You'll get the best canning results by selecting fruits and vegetables at their peak harvest time, which typically occurs during summer and early fall months for most produce.
To test for ripeness, you can gently squeeze fruits for slight give, check vegetables for rich coloring, and smell produce near the stem for sweet, fresh aromas.
When choosing produce for storage, look for unblemished items free from soft spots, ensuring they're firm and heavy for their size with no signs of mold or insect damage.
Peak Harvest Timing Tips
Successful canning begins with selecting produce at the peak of its natural harvest season, when fruits and vegetables offer their best flavor and highest nutritional value.
You'll want to time your canning projects to align with regional harvest periods, ensuring you're working with the freshest ingredients possible.
For ideal results, plan your canning schedule around these key harvest windows:
- Spring's bounty arrives with strawberries (April-June in California), asparagus, and artichokes, making it the perfect time to prepare preserves and pickled vegetables.
- Summer brings an abundance of berries in June-July, followed by stone fruits from May-October, while tomatoes reach their peak from July through October.
- Fall harvests provide apples and pears from August through November, along with an array of root vegetables perfect for storage and canning.
Don't overlook winter's offerings – it's prime time for citrus fruits and hearty greens.
You'll find oranges and mandarins at their peak from November through June, while root vegetables maintain their quality through the cold months.
Remember that regional variations can shift these timeframes, so you'll want to consult local farming calendars for precise timing in your area.
Ripeness Testing Methods
Once you've identified the ideal harvest timing for your produce, knowing how to test for ripeness becomes your next valuable skill. For perfect canning peaches, you'll need to master three essential testing methods that Mennonite families have relied on for generations.
Start with a visual inspection, looking for peaches that show rich color and no green around the stem. You'll want fruit that's free from bruises and soft spots.
Next, test the texture by gently pressing the peach – it should yield slightly but maintain overall firmness. If it's too soft, it won't hold up during canning, while overly firm peaches aren't ripe enough.
Your nose is another reliable testing tool. A ripe peach will release a sweet, pleasant aroma. If you can't smell anything, the peach isn't ready, and if you detect sour or fermented notes, it's past its prime.
When you've selected peaches that pass these tests, they're ready for blanching. Remember that firmer peaches need slightly longer in hot water, and always use an ice bath afterward to make peeling easier.
This careful selection process guarantees your canned peaches will maintain their quality throughout storage.
Storage-Ready Produce Selection
The foundation of successful canning starts with selecting produce at its peak storage-readiness. You'll want to choose vegetables that are firm, unblemished, and show ideal ripeness for preservation.
When selecting leafy greens and cruciferous vegetables, look for crisp leaves and tight flower heads without any signs of yellowing or wilting.
For root vegetables and bulbs, your selection criteria should focus on firmness and structural integrity. Choose potatoes and sweet potatoes that feel heavy for their size, avoiding any with soft spots or sprouting eyes.
Onions, garlic, and shallots should have dry, papery skins and feel solid when gently squeezed.
Here's what to look for when selecting summer vegetables for canning:
- Cucumbers and squash should be firm with vibrant color, avoiding those that are oversized or have soft spots.
- Tomatoes need to be ripe but still firm, with no cracks or bruises that could compromise preservation.
- Eggplants should feel heavy for their size, with glossy skin and no brown spots.
Remember to handle your selected produce gently to prevent bruising that could affect storage quality before canning.
Secret Family Syrup Recipes
Secret family syrup recipes have remained treasured heirlooms within Mennonite communities, passed down through generations and carefully guarded by those who make them. You'll find these recipes often feature traditional ingredients like Roger's Golden Syrup, chokecherries, and pure maple syrup, each requiring specific ratios and preparation methods.
| Syrup Type | Key Ingredients | Processing Time |
|---|---|---|
| Chokecherry | Berries, Sugar | 15-min boil |
| Maple | Pure Sap | Until 219°F |
| Watermelon | Juice, Sugar | Slow simmer |
To create these cherished syrups, you'll need to master the art of proper canning techniques. Start by sterilizing your jars and lids in boiling water, then prepare your syrup using time-tested ratios – for chokecherry syrup, use one cup less sugar than juice. Heat your mixture to a rolling boil, maintaining careful temperature control throughout the process.
You'll know you're following authentic Mennonite traditions when you're using these syrups in classic recipes like Syrup Platz or as toppings for morning pancakes. Don't forget to leave proper headspace when canning, and store your finished products in a cool, dark place to preserve their distinct flavors.
Meat Preservation Methods

Moving beyond sweet preserves, Mennonite families maintain strict standards for meat preservation that have sustained their communities through generations.
You'll find that pressure canning is the cornerstone of safe meat storage, requiring precise temperature control above 240°F to eliminate harmful bacteria. When properly sealed, these jars keep meat fresh for up to 18 months.
For those seeking traditional methods, curing and smoking offer time-tested alternatives. You'll want to master both dry and wet curing techniques, as each serves a specific purpose in preserving different cuts of meat.
Smoking, often combined with curing, creates a protective barrier while adding rich, complex flavors through carefully selected wood chips.
Here are three essential steps for successful meat preservation:
- Always use a pressure canner for raw meat, maintaining consistent pressure throughout the process.
- When curing, calculate salt ratios precisely – too little won't preserve, too much ruins the meat.
- For smoking, keep temperatures low and steady, using quality hardwoods like hickory or apple wood.
You can also explore drying techniques or lard preservation, which work particularly well for long-term storage without modern refrigeration.
Proper Jar Preparation Steps
Your first step in safe jar preparation is to fully sterilize all canning jars and lids in hot water for a minimum of 15 minutes, especially if your processing time will be under 10 minutes.
You'll need to inspect each jar and lid carefully for chips, cracks, or other damage that could prevent a proper seal.
Once sterilized, you'll remove one jar at a time with clean tongs or a jar lifter, keeping the rest in hot water until needed to maintain their sterile condition.
Sterilizing Before First Use
Proper sterilization begins with a thorough inspection and cleaning of all canning equipment. You'll need to carefully examine your jars, lids, and bands for any defects that could compromise your preservation efforts.
Once you've confirmed they're in good condition, wash everything thoroughly in hot, soapy water and rinse well.
For effective sterilization, follow these critical steps:
- Place your clean jars on the canner rack and fill with enough water to cover them by 1-2 inches. Bring the water to a simmer over medium heat, keeping the jars hot until you're ready to use them.
- Prepare the lids separately by placing them in a saucepan with water and bringing them to a low simmer. Don't let them boil, as this can damage the sealing compound.
- Add filtered water or a splash of vinegar to your water bath canner to prevent mineral deposits from forming on your jars during processing.
When handling hot jars, always use proper canning tongs or hot pads to avoid burns.
You'll want to maintain the temperature of both jars and lids until you're ready to fill them, preventing thermal shock that could lead to breakage during the canning process.
Safety Through Proper Sealing
Once your jars and equipment are sterilized, attaining a secure seal becomes the cornerstone of safe food preservation. Start by carefully inspecting each jar for cracks, nicks, or uneven rims that could compromise the seal.
Don't forget to check your lids for scratches or incomplete sealing compound, and verify your bands fit properly.
Fill your jars one at a time using a ladle and canning funnel, maintaining the recipe's recommended headspace. You'll need to remove any air bubbles with a nonmetallic spatula or plastic knife – these pockets can interfere with proper sealing.
Wipe the jar rims and threads with a clean, damp cloth to remove any food particles that might prevent a tight seal.
Center your lids carefully on the jars, making sure the sealing compound makes full contact with the rim. Apply the bands to fingertip tightness – don't overtighten.
After processing, let the jars cool undisturbed for 24 hours before checking the seals. You'll know you've succeeded when the lids don't flex when pressed.
If any jars haven't sealed properly, refrigerate them for immediate use or reprocess them following the same steps.
Mother-Daughter Teaching Moments

Every Mennonite mother knows that teaching her daughter to can food isn't just about preserving fruits and vegetables – it's about preserving a way of life. As daughters work alongside their mothers in the kitchen, they're learning more than just practical skills; they're absorbing generations of wisdom and tradition.
These teaching moments typically follow a time-tested progression:
- Young girls start by observing and helping with simple tasks like washing jars and sorting produce.
- Mothers demonstrate proper techniques for chopping, seasoning, and preparing foods for preservation.
- Daughters gradually take on more responsibility until they're ready to manage their own canning.
You'll find these mother-daughter pairs working together at propane-powered stoves, carefully monitoring pressure canners, and sharing family recipes passed down through generations.
The process builds confidence as daughters master essential skills while learning the importance of food safety and proper preservation techniques.
It's during these shared moments that mothers also convey the deeper meaning of canning – it's about providing security for your family, being prepared for unexpected guests, and maintaining the strong community bonds that define Mennonite life.
Mobile Cannery Legacy
Transforming lives through mobile outreach, the Mennonite Central Committee's mobile cannery has been a cornerstone of humanitarian aid since 1945. When the Shenandoa Equipment Company created the first 28-foot trailer, they couldn't have imagined its global impact.
What started as a response to post-World War II refugee hunger has evolved into a massive operation helping hundreds of thousands worldwide.
You'll find this remarkable operation engaging over 30,000 volunteers annually across the U.S. and Canada. Whether you're in a fire hall, church fellowship room, or meat processing plant, you'll see dedicated workers filling, weighing, and labeling cans of turkey, beef, chicken, and pork.
The project's switched from glass jars to metal cans, making transportation safer and more efficient.
Today's 42-foot mobile cannery, introduced in 2015, features computerized boiler controls and streamlined processes that'll impress you with their precision.
You're looking at an operation that ships over 600,000 pounds of meat annually to places like Chad, Ukraine, and Zambia.
It's a legacy that continues to adapt and grow, bringing hope one can at a time to those facing emergency needs worldwide.
Frequently Asked Questions
How Do Mennonites Handle Power Outages During Critical Canning Processes?
You'll rely on propane stoves, wood-fired heat sources, and traditional non-electric methods. You can also use generators when needed, while working with your community members to share resources and complete canning processes safely.
What Traditional Prayers or Blessings Accompany Mennonite Canning Activities?
You'll hear simple prayers expressing gratitude for the harvest and seeking blessings for preserved food. These often include communal "breath prayers," spontaneous thanks, and traditional blessings that emphasize service to others and community bonds.
How Do Mennonite Families Determine Fair Distribution of Communally Canned Goods?
You'll find families distribute communal canning based on household size, need, and contribution levels. They'll track who provided ingredients, labor, and equipment, then divide goods fairly through community consensus and elder guidance.
Which Modern Canning Innovations Have Mennonite Communities Chosen to Embrace?
You'll find they've embraced pressure canners with safety gauges, BPA-free lids, propane-powered stoves, and online canning resources. They utilize modern sterilization techniques while maintaining traditional recipes and community-based canning operations.
How Do Mennonite Families Manage Canning Activities During Travel or Relocation?
You'll plan canning before trips, pack portable equipment like kerosene stoves and pressure cookers, and coordinate with local communities at your destination. During relocation, you'll adapt practices while maintaining traditional methods and recipes.
In Summary
You'll find these time-honored Mennonite canning traditions are more than just food preservation – they're about nurturing connections across generations. Whether you're learning from your mother's expertise or teaching your own daughter, you're carrying forward a sacred legacy. Keep these methods alive, share them with others, and remember that each sealed jar represents both physical sustenance and the preservation of cherished family bonds.


Leave a Reply