To prevent mold during fermentation, you'll need to create an environment where it can't survive. Start by using clean equipment and fresh ingredients, then maintain a proper salt concentration (2-3% for most vegetables) in your brine. Keep all ingredients fully submerged under the brine using weights, and use an airlock system to prevent oxygen from entering while letting CO2 escape. Store your ferments at cool temperatures between 60-70°F (16-21°C), and check them daily to verify everything stays below the brine. Following these key principles will help you master the art of mold-free fermentation.
Choosing Your Fermentation Equipment
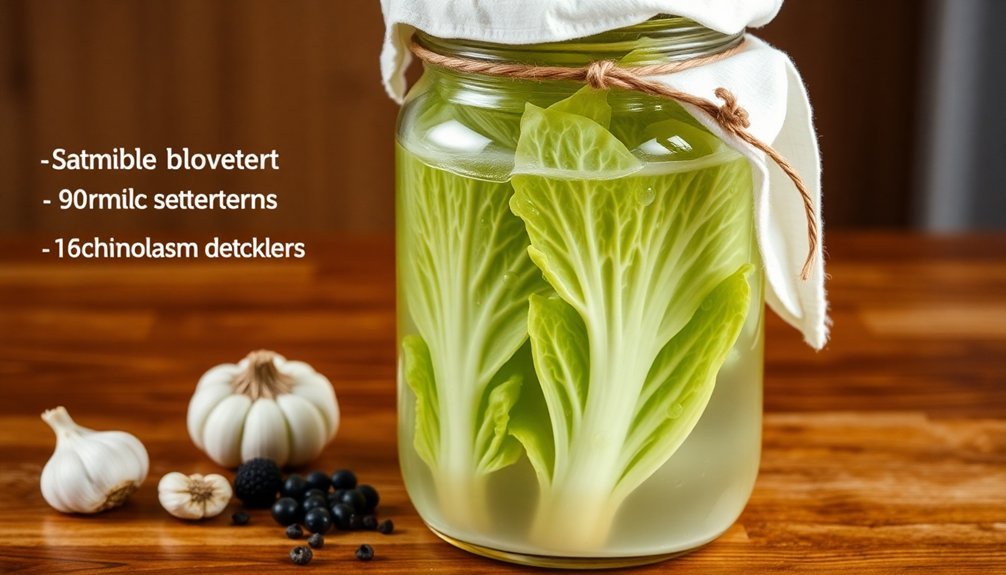
Anyone starting their fermentation journey needs the right equipment to prevent mold growth. Your first priority should be selecting vessels made from non-reactive materials like glass or ceramic, which won't interfere with the fermentation process.
Choose jars sized appropriately for your batch to minimize excess airspace where mold could develop. Cool temperatures between 65°F and 80°F provide optimal conditions for fermentation while minimizing mold risk.
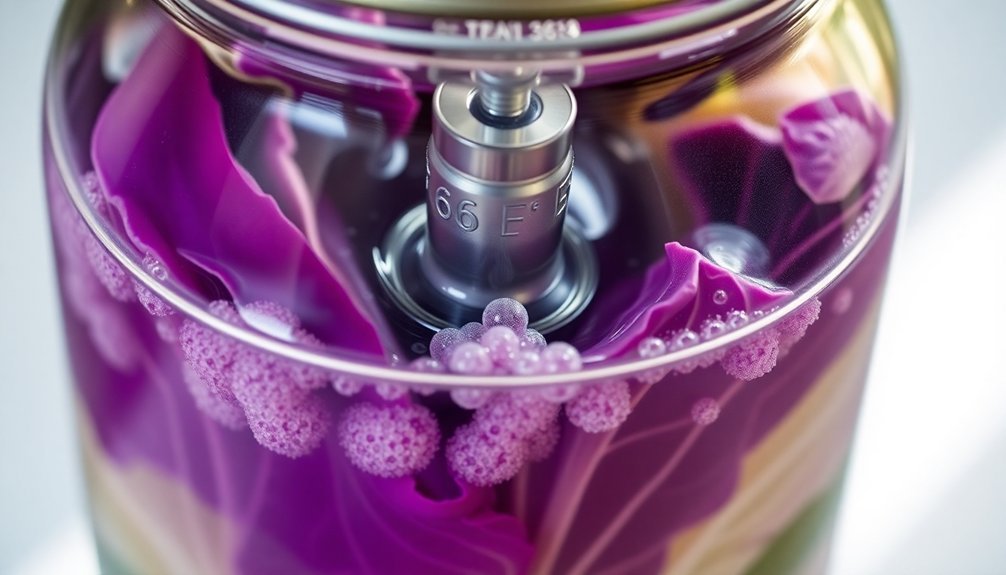
You'll need an effective airlock system to create an anaerobic environment. Options include pickle pipes, fermentation locks, or crocks with water seals. These systems prevent oxygen from entering while allowing fermentation gases to escape.
Don't forget to invest in proper weight systems like pickle pebbles or fermentation stones to keep vegetables fully submerged under the brine.
For ideal results, select fermentation vessels with thick walls that provide better insulation against temperature fluctuations. If you're planning multiple fermentation projects, get separate equipment for each batch to avoid cross-contamination.
Before using any equipment, guarantee thorough cleaning and sanitization. Regular inspection of your vessels and their contents will help you catch potential issues early.
Remember that proper equipment selection is your first line of defense against mold contamination in your fermented foods.
Salt Types and Proper Ratios
You'll need to start with the right salt – unrefined sea salt or Himalayan salt without additives – to guarantee successful fermentation.
For most vegetable ferments, you'll want to maintain a 2-3% salt concentration, though cucumbers need 3-4% and olives require up to 10%.
Whether you're dry salting or using a brine solution, carefully measure your salt ratios by weight to prevent both mold growth (from too little salt) and halted fermentation (from too much salt). Salt helps promote beneficial bacteria while inhibiting harmful microorganisms that could spoil your ferments.
Salt Percentages For Success
Salt serves as the cornerstone of successful fermentation, acting as both a preservative and a selective growth promoter for beneficial bacteria. When you're fermenting vegetables, following the correct salt percentages guarantees the best conditions for beneficial bacteria while keeping unwanted microorganisms at bay. The osmotic pressure from salt helps maintain the vegetable's texture throughout fermentation.
Most vegetables require a 2-5% salt concentration by weight, though specific foods have their own ideal ratios.
- 2% salt for common vegetables like cabbage, carrots, and garlic
- 3-4% salt for cucumbers, peppers, and squash
- 10% salt for olives and umeboshi plums
- 1 tablespoon salt per 1.5 pounds of vegetables for dry salting
- 4 tablespoons salt per 4 cups of water for pre-brining
Don't be tempted to reduce salt concentrations below recommended levels, as this can compromise food safety and invite mold growth. While lower salt levels might speed up fermentation, they won't provide adequate protection against harmful bacteria.
Conversely, excessive salt can inhibit beneficial bacteria growth and slow down the fermentation process. For consistent results, measure your salt precisely and distribute it evenly throughout your ferment.
Best Salt For Fermenting
When starting a fermentation project, selecting the right type of salt makes a significant difference in your success. You'll want to avoid salts containing additives like iodine, which can inhibit fermentation and lead to unwanted results.
Your best options include kosher salt, which dissolves easily and offers precise control for brining, and Himalayan pink salt, which contains beneficial trace minerals and provides a more subtle taste. A 2-3% salt concentration typically works best for most vegetable ferments.
If you're making pickles specifically, pickling salt works well due to its pure sodium chloride composition, but you'll need to use it sparingly due to its strength.
While sea salt can work for fermentation, you'll want to choose flaked rather than crystalline varieties for better dissolution. Be cautious with wet sea salts, as they may contain modern pollutants that could affect your ferment.
For ideal mold prevention, stick with mineral-rich dry salts like Himalayan pink salt or pure options like kosher salt. They'll create the ideal environment for beneficial bacteria while inhibiting harmful pathogens.
Remember that proper salt concentration isn't just about taste – it's essential for controlling microbial growth and preventing unwanted mold development in your ferments.
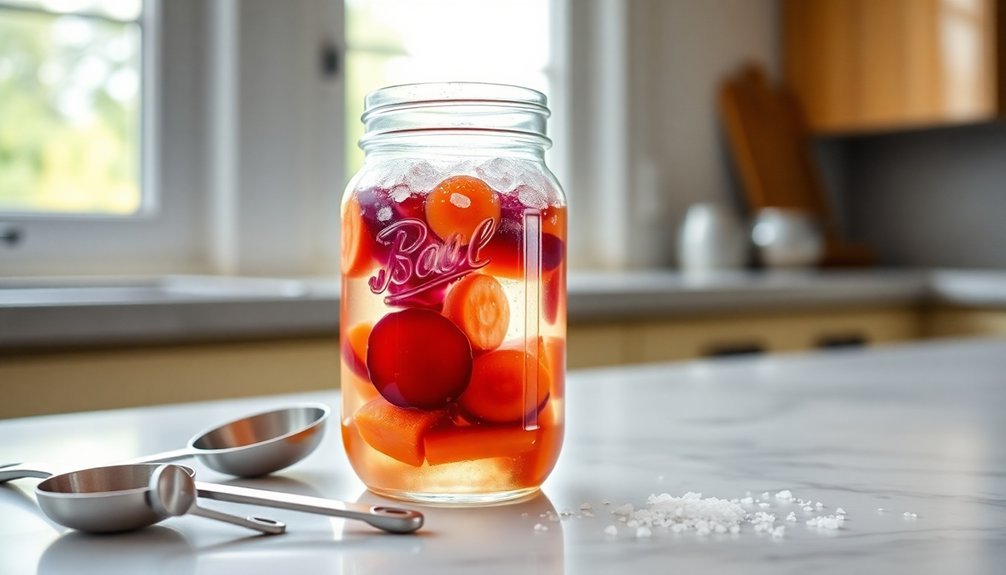
Mixing Salt With Vegetables
Properly mixing salt with vegetables creates the foundation for successful fermentation. You'll want to aim for a 2% salt concentration for most vegetables, though some, like cucumbers and olives, require higher concentrations between 3-10%. The ideal temperature range of 70-80 degrees Fahrenheit provides optimal conditions for healthy bacterial growth during fermentation.
For consistent results, weigh your vegetables and water together, then multiply by 0.025 to determine the correct amount of salt for a 2.5% ratio.
When mixing salt with your vegetables, guarantee even distribution by following these essential steps:
- Dissolve salt completely in your purified or distilled water before adding vegetables
- Calculate salt based on the combined weight of vegetables and water
- Use fine, high-quality sea salt instead of iodized or table salt
- Mix thoroughly to create uniform salt distribution throughout
- Keep all vegetables submerged under the brine solution
Remember that proper salt concentration serves multiple purposes: it inhibits harmful bacteria, draws moisture from vegetables to create brine, and helps maintain texture.
Too little salt can result in mushy vegetables and increase mold risk, while proper mixing guarantees the salt can effectively preserve your ferment.
For example, if you're fermenting 756 grams of total ingredients, you'll need 18.9 grams of salt for ideal results.
Clean Ingredients Matter Most
Clean ingredients serve as the foundation for successful fermentation and mold prevention. When you're selecting vegetables for fermentation, choose fresh, crisp produce that's free from soft spots or signs of decay. Old or rotting ingredients can introduce unwanted mold spores into your fermentation, substantially increasing the risk of contamination.
You'll want to use organic or chemical-free produce whenever possible. Pesticides and herbicides can interfere with the natural fermentation process by disrupting beneficial bacteria and yeast activity.
The water you use is equally important – tap water containing chlorine or fluoride can harm the good bacteria essential for fermentation. Instead, opt for filtered or distilled water to create an ideal environment for beneficial microorganisms. Adding natural mineral drops to filtered water can help restore beneficial minerals needed for fermentation.
Before you begin, clean all your ingredients and tools thoroughly with hot, soapy water. While sterilization isn't always necessary, maintaining proper cleanliness is vital, especially if you're fermenting in a hot, humid climate.
Remember to wash your hands well before handling ingredients, and clean your vegetables carefully to remove any dirt or debris that could introduce harmful bacteria into your ferment.
Managing Temperature During Fermentation
Temperature control stands as one of the most critical factors in preventing mold during fermentation. You'll need to maintain temperatures between 65°F and 80°F for ideal results, with 72°F being ideal for most vegetable ferments.
When temperatures rise above 80°F, you're risking mold growth and off-flavors that can ruin your batch. Pack tightly in your fermentation vessels to eliminate air pockets that could lead to contamination.
To maintain proper temperature control during fermentation, you should:
- Store your ferments in naturally cool locations like basements or root cellars
- Use insulated containers or coolers to buffer against temperature fluctuations
- Monitor temperatures daily with a reliable thermometer
- Implement water seals in your fermentation vessels
- Move ferments to cooler spots if you notice rising temperatures
Remember that microorganisms are highly sensitive to temperature changes. If you let temperatures fluctuate too much, you'll slow down or even stop the beneficial microbial activity that's essential for successful fermentation.
While higher temperatures might speed up the process, they often lead to unwanted outcomes. By maintaining consistent temperatures within the ideal range, you're not only preventing mold but also ensuring the safety, quality, and flavor of your fermented foods.
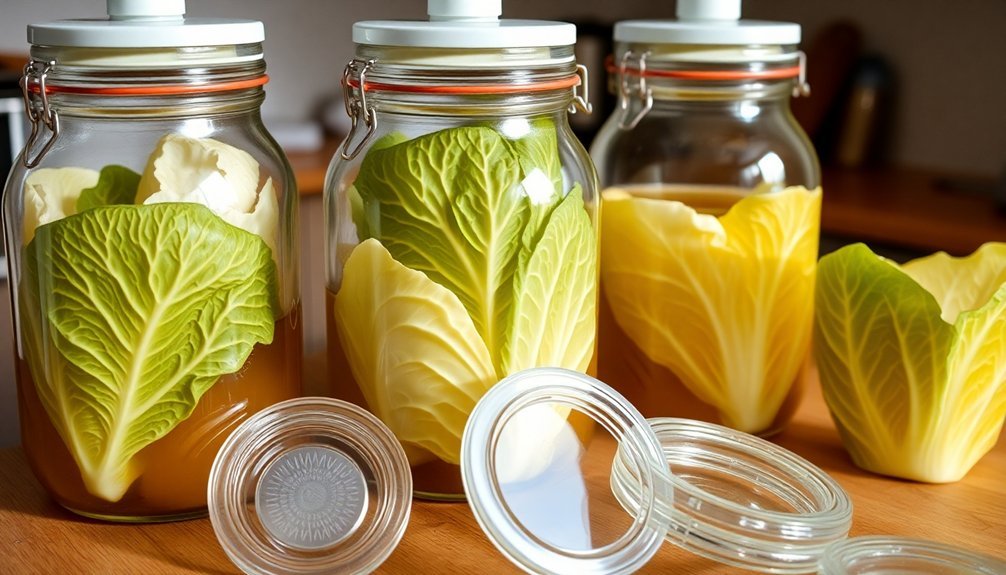
Creating Oxygen-Free Environments
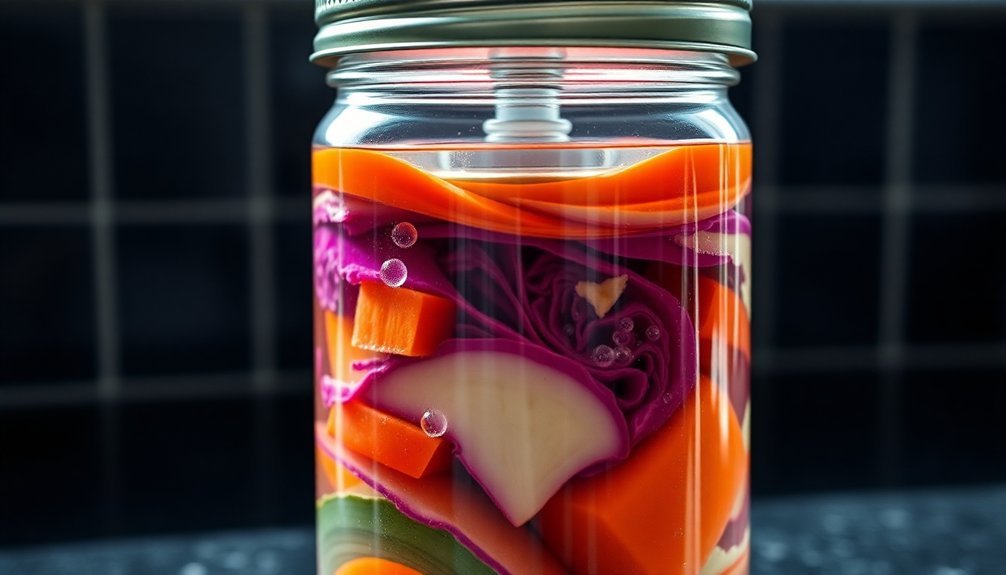
Beyond temperature control, creating an oxygen-free environment stands as your next line of defense against mold in fermentation. You'll need to focus on keeping your vegetables completely submerged under brine, as this naturally creates an anaerobic environment where beneficial bacteria thrive while mold can't survive.
Start by tightly packing your vegetables and using fermentation weights to keep everything below the brine level. You'll want to eliminate any air pockets by compressing the mixture thoroughly. Lactic acid bacteria will convert the sugars into preservative compounds during fermentation.
For added protection, use containers equipped with airlock lids or water seals, which allow carbon dioxide to escape while preventing oxygen from entering.
Don't forget to maintain proper hygiene throughout the process. Clean your tools and containers with hot, soapy water, and handle ingredients gently to avoid introducing oxygen through splashing.
When you're filling your fermentation vessels, make certain of even salt distribution throughout the brine and vegetables.
Regular monitoring is essential – check your airlocks, seals, and water levels frequently. If you're using a fermentation crock with a water seal, make sure it's properly maintained to keep oxygen out while letting fermentation gases escape.
Understanding Kahm Yeast Vs Mold
In the midst of fermentation, you'll likely encounter either kahm yeast or mold at some point, and knowing the difference is crucial for food safety.
While kahm yeast appears as a thin, white or cream-colored film with a smooth texture, mold presents itself as fuzzy, powdery patches in various colors like green, blue, or black.
When you spot kahm yeast, you can safely remove it and continue your fermentation process, though you'll want to address the underlying causes.
However, if you notice any mold, you must discard the entire batch immediately to protect your health.
To help you distinguish between the two and take appropriate action, keep these key points in mind:
- Kahm yeast forms a smooth film that's easily disturbed when you tilt the container
- Mold always has a fuzzy, cotton-like appearance and can spread rapidly
- Kahm yeast typically appears due to oxygen exposure or weak starter cultures
- Mold indicates contamination from unclean equipment or poor environmental control
- Regular monitoring helps you catch and address issues before they worsen
Remember to maintain proper hygiene, use airlocks, and minimize headspace in your fermentation vessels to prevent both issues from occurring.
Daily Monitoring Best Practices
You'll need to check your ferments' brine levels every day to guarantee vegetables remain fully submerged beneath the liquid surface.
Your daily monitoring should include a careful inspection of the ferment's surface for any unusual growth, particularly focusing on spots that might indicate mold formation.
Keep a close eye on areas where vegetables may have floated up or where air pockets could have formed, as these are common trouble spots that need immediate attention.
Check Brine Levels Daily
Monitoring brine levels daily stands as one of the most critical tasks in successful fermentation. During the first 7-10 days, you'll notice fluctuations in your brine levels, which is perfectly normal due to initial bacterial activity and temperature variations.
To maintain an ideal fermentation environment, you'll need to guarantee your vegetables remain completely submerged beneath the brine to prevent unwanted mold growth.
- Check your brine levels at the same time each day to establish a consistent monitoring routine
- Watch for any exposed surfaces that might need adjusting beneath the brine
- Note any significant changes in brine levels that could indicate temperature fluctuations
- Resist the urge to top up with extra brine, as this can dilute flavors
- Guarantee your fermentation vessel maintains an airtight seal
Your daily checks serve multiple purposes beyond mold prevention. They help you track fermentation progress, maintain proper salt concentration, and guarantee the pH drops to 4.6 within 48 hours at room temperature.
Keep in mind that consistent temperatures help stabilize brine levels, so store your ferments in a location with minimal temperature variation. Remember, proper brine management is your first line of defense against mold formation.
Monitor Surface For Growth
Beyond maintaining proper brine levels, daily surface checks form the backbone of successful fermentation monitoring. You'll need to inspect your ferment's surface every day for signs of mold or kahm yeast, which can appear as fuzzy patches or white film. When you spot anything suspicious, take immediate action to prevent contamination from spreading.
| Surface Check | Required Action |
|---|---|
| Floating Vegetables | Push below brine surface |
| White Film Formation | Skim off and stir surface |
| Colored Spots | Remove if above brine, discard if penetrated |
| Air Pockets | Pack vegetables tighter |
| Brine Level Changes | Top up with fresh brine |
During your daily checks, you'll want to stir the surface gently to disrupt any potential mold formation. If you're using an airlock lid, make certain it's properly sealed and functioning. When you notice vegetables rising above the brine, use clean hands or utensils to push them back down. Remember that early detection through consistent monitoring helps prevent major contamination issues. If you spot heavy mold growth or find mold that has penetrated deeply into your ferment, it's safer to discard the batch and start fresh.
Essential Tools and Supplies
Successful fermentation begins with having the right tools and supplies at your disposal. You'll need proper containers that create an oxygen-free environment, as this is vital for preventing mold growth. Glass jars with airlock lids and fermentation crocks with water seals are your best options, as they allow carbon dioxide to escape while keeping oxygen out.
To maintain an ideal fermentation environment, you'll want to gather these essential items:
- Unrefined sea salt or Himalayan salt for creating the proper brine concentration
- Fermentation weights or clean stones to keep vegetables fully submerged
- Clean, sanitized tools and utensils to prevent contamination
- Purified water free from chlorine and other harmful chemicals
- Fresh, organic vegetables to minimize the risk of pathogens
Don't forget to take into account the containers' size and shape – they should accommodate your vegetables without overcrowding, which can create unwanted air pockets.
If you're just starting, it's worth investing in proper fermentation weights rather than using makeshift solutions. Remember, the right tools will substantially improve your chances of successful, mold-free fermentation while making the process more manageable and reliable.
Frequently Asked Questions
Can I Continue Fermenting if I Removed Mold From Just One Spot?
You can continue if it's a salt-brined ferment (2%+ salt) and mold's confined to one spot. However, you'll need to remove affected parts completely. If you're unsure or it's not salt-brined, discard it.
Why Do Some Vegetables Float More Than Others During Fermentation?
You'll notice vegetables float differently because of their varying water content and density. Those with higher water content and lower density naturally rise more in the brine during your fermentation process.
Does Artificial Lighting Affect the Fermentation Process and Mold Growth?
Yes, artificial lighting can impact your fermentation. You'll want to avoid fluorescent lights that promote mold growth, but UV lighting can help control it. Natural sunlight's the best option for preventing mold formation.
How Long Can I Store Unused Brine Solution for Future Fermentations?
You can store unused brine solution in the refrigerator for up to 6 months. Make sure you're using air-tight containers, label the date, and regularly check for signs of contamination before reuse.
Should I Stir My Ferments if I Notice Bubbles Collecting on Vegetables?
Yes, you'll want to gently stir your ferments when bubbles collect on vegetables. It helps distribute the fermentation activity and keeps vegetables properly submerged in the brine, preventing potential mold growth.
In Summary
You'll successfully prevent mold during fermentation by following proper techniques: using the right salt ratios, maintaining clean equipment, keeping temperatures stable, and creating an anaerobic environment. Don't skip daily monitoring – it's your best defense against unwanted growth. With these preventive measures and the right tools, you're well-equipped to create safe, mold-free fermented foods in your home kitchen.


Leave a Reply