
Wood ash fermentation offers you a time-tested method for preserving food while enhancing its nutritional value. You'll find this traditional technique particularly effective with vegetables, grains, and even some dairy products. By combining carefully sifted hardwood ash with water and maintaining proper pH levels, you can create an environment that naturally preserves food for months. The process taps into wood ash's rich mineral content, including calcium and potassium, while its alkaline properties protect against harmful bacteria. You'll be amazed at how this ancient preservation method aligns perfectly with modern sustainable living practices. The secrets of this remarkable technique are just beginning to unfold.
Understanding Wood Ash Properties

While wood ash may seem like a simple byproduct of burning trees, it's actually a complex material with diverse chemical and physical properties.
You'll find that wood ash contains significant amounts of essential plant nutrients, with calcium making up 20% or more of its content, while potassium contributes up to 5%. You'll also discover smaller but important concentrations of magnesium, phosphorus, and sulfur.
What makes wood ash particularly valuable is its ability to modify soil pH. You'll want to maintain annual application limits of 15-20 pounds per 1000 square feet to prevent overuse. You can use about four cups of wood ash to replace one pound of agricultural lime when neutralizing acidic soil. However, you should note that wood ash's lime equivalent (CCE) ranges from 25% to 60%, making it roughly half as effective as commercial lime products.
You'll need to take into account that wood ash composition isn't uniform. The type of wood, burning temperature, and even geographical location affect its properties.
When you're working with wood ash, remember that while it's beneficial, it can contain trace amounts of heavy metals. You'll want to conduct proper soil tests before application to avoid raising soil pH too drastically, which could harm your plants.
Historical Preservation Methods
Throughout history, people across different cultures turned to wood ash for preserving their food supplies. From indigenous Kenyan farmers to Cherokee communities, wood ash proved to be a versatile preservation method that didn't require modern technology or chemicals.
You'll find that indigenous Kenyan farmers used wood ash to preserve their seeds, taking advantage of its high pH and sterile properties to create an environment where pests and molds couldn't thrive. The farmers found this method particularly valuable since pest damage caused significant losses to their stored produce.
In Cherokee culture, you'd see hickory ash being used to preserve and flavor meat, often buried in ash-filled holes or stored in stoneware pots.
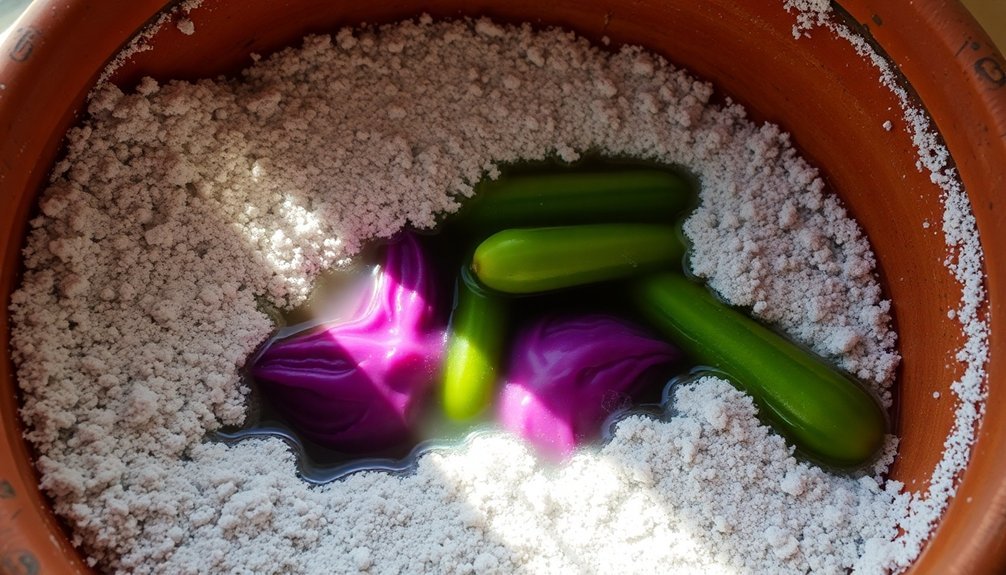
If you were making hard cheese like Gruyere, you'd surround it with sifted wood ash in stoneware containers, allowing a new protective rind to form while preserving the inner cheese for months. You couldn't use this method with soft cheeses, though, as their high moisture content made them unsuitable.
In African farming communities, you'd discover tomatoes preserved in wood ash, stored in earthenware crockery or ash-filled holes.
The combination of ash's protective properties and cool, dark storage conditions guaranteed your produce would last markedly longer.
Harvesting Clean Wood Ash

Producing clean wood ash requires careful attention to both the burning process and collection methods. You'll want to choose a dry, windless day and set up your burning site on a cement slab to prevent contamination. Select hardwoods like Sugar Maple, Beech, or Hickory for best results, and avoid using iron grates that could taint the ash.
When you're burning the wood, guarantee complete combustion by raking unburnt pieces to the center. You'll know the process is complete when you see fine gray ash. Make sure to store the ash in a covered metal container to prevent any live embers from causing fires, as they can remain hot for weeks.
Once it's cool, you'll need to sieve the ash through a half-inch mesh to remove larger debris, followed by a finer mesh for powder consistency.
Don't forget to protect yourself during handling – wear a dust mask, eye protection, gloves, and protective clothing, as wood ash is caustic.
You'll need to wash the ash in water until it runs clear, then dry it thoroughly in bisque-fired or plaster bowls. Store your cleaned ash in a metal container on a concrete surface, keeping it dry to preserve its nutrients.
If rain's in the forecast, make sure to cover the ash to prevent nutrient leaching.
Preparing The Ash Solution
You'll need to sift your collected wood ash through a fine-mesh strainer to remove any unburned bits and guarantee only pure ash remains.
For best fermentation results, mix your sifted ash with cold water at a ratio of one part ash to three parts water.
After thoroughly combining the ash and water, you're ready to begin pH adjustments for the fermentation process.
Sifting For Pure Ash
An essential first step in wood ash fermentation is properly sifting the ash to remove unwanted debris and guarantee a pure solution.
You'll want to start with high-quality hardwood ash from species like Sugar Maple, Beech, Hickory, or Buckeye, as they're richer in potassium and beneficial minerals. Avoid softwood ash from Pine or Fir, which contains unwanted resins.
Once you've gathered your cold ash, you'll need to remove all metal pieces using a magnetic approach. Place a magnet in a plastic bag and drag it through the ash, or use a magnetic floor sweeper for more efficient metal removal. Pass your shovel under the sweeper for a final check.
Set up your sifting station using a five-gallon bucket with drainage holes and a mesh screen. You can double and offset the screens to catch more debris. Secure the mesh between the bucket and outside circle using a wedge.
Shovel and shake the ash to loosen debris, then sift it through multiple passes. This thorough process guarantees you'll have pure, debris-free ash that's ready for the fermentation process.
Water-To-Ash Mixing Ratios
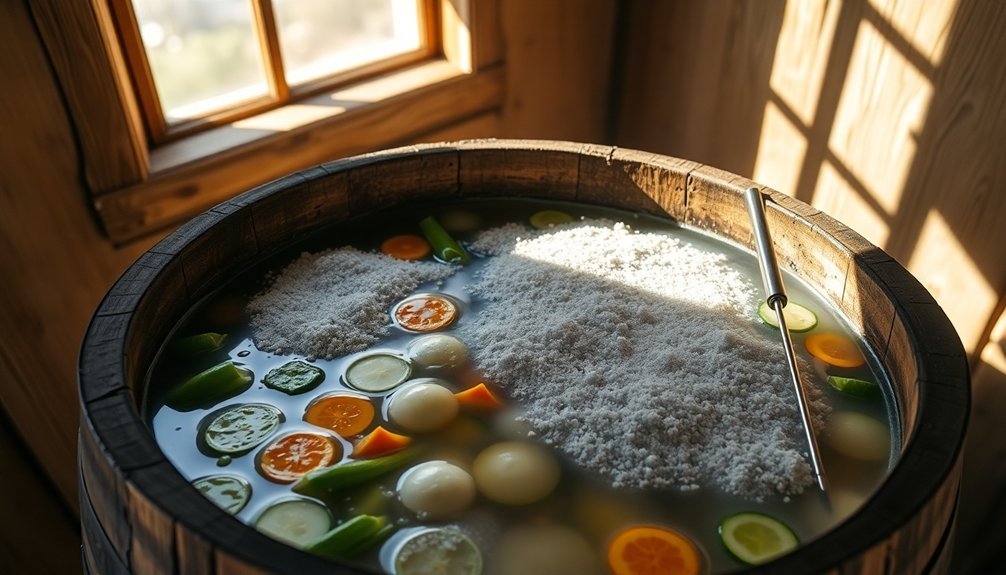
Once you've sifted your ash to perfection, the next step involves mixing it with water to create the fermentation solution. For best results, you'll want to combine one part ash with five parts water by weight, though this ratio can vary based on your specific ash type.
If you're using hardwood ash, you'll need less water due to its higher potassium content compared to softwood ash.
Pour distilled water slowly into your ash using a watering can while stirring continuously to prevent lumps. You're aiming for a consistency similar to a thin milkshake.
For some applications, you might prefer using 95 parts wood ash with 5% water by weight. Remember to adjust these ratios based on your ash's porosity and trapped air content.
Let your mixture settle for several hours or overnight. You can then separate the clear liquid from the sediment using a siphon tube or careful pouring.
If needed, strain the solution through an old t-shirt to remove any remaining particles. For a more concentrated solution, you can boil the liquid to reduce water content.
Keep in mind that hardwood ash will produce a stronger potash mixture.
Fermentation Process Fundamentals
The traditional wood ash fermentation process begins with careful preparation of ash and precise pH adjustment.
You'll need to sift your wood ash thoroughly to remove any unburnt chunks, ensuring only the fine white ash remains. Mix this ash with just enough water to create a dough-like consistency before introducing your acidic solution.
You'll want to adjust the pH to below 4 using a citric acid solution at pH 3. This acidic environment is essential as it helps break down the ash components and extract important nutrients.
Once you've achieved the proper pH, you're ready for the fermentation phase.
The fermentation process takes approximately one month, during which several significant changes occur.
You'll notice the mixture gradually transforming as inhibitors like furan and phenolic compounds are reduced. The inorganic components from your wood ash will enhance the fermentation process by providing important nutrients.
When the month-long fermentation is complete, strain the mixture to obtain your finished fertilizer.
This fermented product will be rich in calcium and other alkaline elements, making it an excellent slow-release fertilizer that can improve soil health and boost crop growth.
Optimal Storage Conditions
You'll want to maintain storage temperatures between 15-20°C when fermenting wood ash, as higher temperatures can considerably reduce the quality of your final product.
For ideal results, keep relative humidity levels at 30-45% and use sealed containers that prevent moisture absorption while allowing controlled airflow.
Your choice of container material is essential – opt for non-reactive materials like glass or food-grade plastic that won't interfere with the fermentation process or compromise the ash's properties.
Temperature Range Guidelines
Proper temperature control throughout wood ash fermentation plays an essential role in both preparation and storage phases.
You'll need to prepare your wood ash by first heating wood to 500°C in a closed container, followed by burning the residual char at 350°C. When preparing the ash, avoid temperatures above 900°C, as this will trigger unwanted volatilization of potassium and sulfur compounds.
For ideal fermentation results, you'll want to maintain storage temperatures between 70°F-75°F (21°C-23°C), which allows for complete fermentation within three to four weeks.
If your storage area runs cooler, between 55°F-65°F (12°C-18°C), you'll need to extend the fermentation period to five to six weeks.
Don't let temperatures exceed 80°F (26°C), as this can lead to softening and spoilage of your preserved foods.
Store your ash-preserved tomatoes in a cool, dry environment at ambient temperature.
You won't need to heat the ash during the storage phase, as the preservation method relies on the ash's natural properties to manage humidity and protect against decay.
Remember to monitor your fermentation regularly and remove any scum or mold that may develop.
Humidity Control Methods
Building on temperature management, maintaining perfect humidity levels requires careful attention to both storage location and covering methods.
You'll need to select a storage space that protects your wood ash from excessive moisture while maintaining enough humidity for proper aging. Indoor storage is your best option, but if you're storing outdoors, place your ash on packed soil with a protective berm and make sure it's properly covered.
You'll want to avoid handling the ash on extremely dry days, as higher relative humidity improves its handling characteristics.
To enhance the aging process, you can add water during storage, which helps convert CaO to CaCO3. However, you'll need to strike a careful balance – add enough water for conversion but not so much that it causes leaching.
For best results, you should turn your ash heaps regularly and cover them with breathable, water-tight sheets.
If you're working with different ash types, you can mix crushed bottom ashes with coarse fly ashes, but make sure to store them in closed containers or under a roofed area.
Remember to screen the ash to particles smaller than 1.0 cm before use to guarantee uniform consistency.
Container Material Selection
When selecting containers for wood ash fermentation, material choice plays a critical role in maintaining ideal conditions and preventing contamination.
You'll want to focus on materials that support beneficial bacteria growth while avoiding those that could compromise your ferment's quality.
Ceramic containers are your best option, as they're non-porous and feature non-toxic glazes that won't interact with your ferment.
If you're looking for a durable alternative, stainless steel vessels work well since they don't harbor bacteria and are easy to clean.
For wooden containers, cypress is a reliable choice in the US, while larch and Douglas fir are common in Scotland.
Avoid pine and spruce, as they contain turpentine and can sterilize water. Similarly, stay away from black ash, which will discolor your ferment.
If you opt for wood, remember it needs constant moisture to remain serviceable and prevent cracking.
Don't use standard plastic containers, as they're oxygen-permeable and can trap bacteria.
While specialized fermentation-grade plastics like Speidel exist, they still aren't ideal for traditional wood ash fermentation.
Whatever material you choose, verify it's easy to clean and maintain to prevent contamination over time.
Benefits Of Wood Ash Treatment

Wood ash treatment offers a wealth of benefits for both soil health and plant growth. When you're working with acidic soil, wood ash acts as a natural pH balancer, working twice as fast as limestone to create ideal growing conditions. You'll find it particularly effective for vegetables that need a pH between 6.5 and 7.0.
| Benefit Category | Primary Effects | Secondary Effects |
|---|---|---|
| Soil Chemistry | pH correction | Better nutrient uptake |
| Plant Nutrition | High potassium | Enhanced flowering |
| Disease Control | Club root prevention | Increased resistance |
You'll get the most nutritional value using ash from hardwoods like oak and maple, especially from younger branches. The material's rich potassium content promotes flowering and fruiting, while its phosphorous and micronutrients support overall plant health. If you're growing tomatoes, you can create a nutrient-rich "tea" from the ash to boost their development.
When applying wood ash, timing and quantity matter. You'll want to spread it in late winter at 50-70g per square meter, but don't use it around acid-loving plants like blueberries or in potato-growing areas. Keep your ash dry until use, as its water-soluble nutrients can easily leach away in rain.
Common Mistakes To Avoid
You'll want to avoid selecting ash from softwoods, painted lumber, or treated materials since these can introduce harmful chemicals into your fermentation process.
When mixing water with your ash, don't eyeball the ratios – you need precise measurements to achieve proper pH levels and mineral concentration for effective fermentation.
Rushing the settling period is another critical mistake, as the ash needs adequate time to release its beneficial compounds and reach a stable state before use.
Incorrect Ash Selection Methods
Selecting the wrong type of ash can derail your entire fermentation process and potentially create hazardous conditions.
You'll want to avoid using ash from softwoods like pine or fir, as they don't provide the proper chemical composition needed for successful fermentation. Additionally, never use ash from pressure-treated lumber, charcoal briquettes, or any wood that might contain synthetic materials or contaminants.
When selecting wood ash for fermentation, you should focus on these vital factors:
- Source material – Use only hardwoods like sugar maple, beech, or hickory that haven't been treated with chemicals or preservatives.
- Processing requirements – Sift the ash thoroughly to remove chunks, confirm it's completely cold, and verify it's free from metal, glass, or other debris.
- Quality indicators – Check that the ash is properly dried, stored away from moisture, and maintains a consistent composition throughout.
Your ash selection process should include careful identification of the wood source and proper examination of the ash's physical characteristics.
Don't rush this essential step – taking time to select the right ash will directly impact your fermentation's success and guarantee the safety of your preserved foods.
Improper Water Mixing Ratios
After identifying the right wood ash source, the next major challenge lies in achieving proper water mixing ratios. You'll want to use about half a bucket's capacity of water for your initial mix, preferably using distilled or rain water rather than tap water. The solution should have a consistency similar to a thin milkshake to guarantee proper absorption of the ash.
When mixing, don't use boiling water directly, as this can cause excessive bubbling and loss of valuable alkali. Instead, use hot water and pour it slowly while continuously stirring to achieve even distribution.
You'll need to monitor the mixture carefully – if it's too concentrated, you won't get effective leaching of the alkali from the wood ash, while too much water will make the solution ineffective.
Let the mixture settle for several hours or overnight. The final solution should resemble apple juice in color. If you notice sediment at the bottom, you'll need to squeeze out any remaining liquid to maximize your lye yield.
Remember that consistency checks are vital – if the solution's too thick or thin, it won't be effective for fermentation purposes.
Rushed Settling Time
One of the most vital mistakes in wood ash fermentation is rushing the settling time. When you don't allow proper settling, you're compromising the entire preservation process. The ash needs sufficient time to create an even, protective layer around your items, much like the careful layering you'd achieve in proper storage conditions.
For successful ash fermentation, you'll want to follow these essential settling guidelines:
- Allow your sifted ash to settle completely around the items – this guarantees uniform distribution and prevents gaps that could lead to spoilage.
- Maintain the recommended 1-1.5 inch ash depth during the settling period, as this creates the ideal preservation environment.
- Don't disturb the containers during settling, as this can disrupt the protective ash barrier and expose items to air.
When you rush the settling time, you're risking uneven preservation and potential contamination. The ash needs time to work its way into all spaces, creating a consistent environment that controls humidity and prevents decay.
Safety Considerations And Precautions

The safe handling of wood ash during fermentation requires strict adherence to protective measures and protocols.
You'll need to wear proper protective equipment, including safety goggles, appropriate gloves (neoprene, butyl, or nitrile for wet ash), and a NIOSH-approved dust mask. Don't forget to protect your skin with barrier cream and long-sleeved clothing when working in dusty conditions.
When handling wood ash, you must maintain a minimum distance of 50 feet from water sources, extending to 100 feet in highly erodible areas. Keep the ash dry during storage to prevent corrosivity, and never enter confined storage spaces due to suffocation risks.
If you're working with fresh ash, be mindful of hot coals that could pose fire hazards.
If you experience skin contact with wet ash, immediately wash the affected area with cool water and pH-neutral soap. Don't apply ash to areas with standing water or before heavy rainfall, as this can lead to environmental contamination.
When using pneumatic systems, make certain they're properly grounded to prevent static discharge. Remember to watch your step around deep ash accumulations, as they can retain heat unexpectedly.
Traditional Equipment And Tools
With proper safety measures in place, you'll need the right collection of traditional tools and equipment to begin wood ash fermentation. The process requires specific vessels and containers, with stoneware pots, ceramic containers, and glass jars being the most commonly used options.
You'll want to store these in a cellar to maintain ideal preservation conditions.
For handling wood ash and creating lye solutions, you'll need protective gear like gloves and goggles, along with basic tools such as a flour sifter, mixing spoon, and watering can.
Don't forget to have coffee filters or old t-shirts on hand for straining the lye water.
For successful fermentation, you'll need:
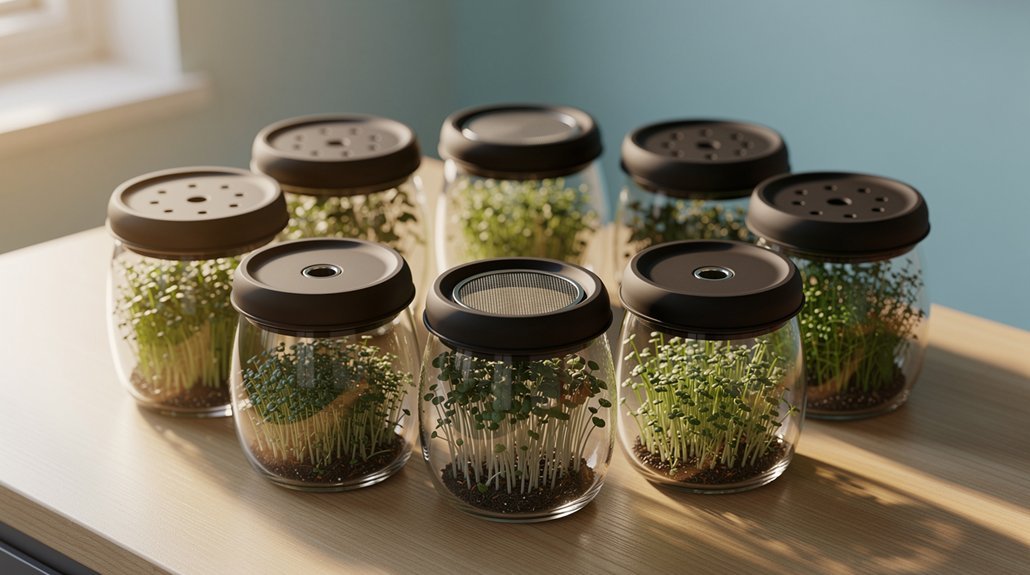
- Fermentation weights and airlock lids to keep food submerged and allow gases to escape while preventing oxygen from entering
- Essential kitchen tools like mandolines, fine-mesh colanders, and wooden spoons for food preparation and handling
- Measuring and filtering equipment, including kitchen scales, cheesecloth, and butter muslin for precise portions and proper straining
All these tools work together to guarantee proper fermentation and preservation while maintaining traditional methods that have been proven effective over generations.
Measuring Success In Preservation

Successfully measuring preservation outcomes in wood ash fermentation requires monitoring several key indicators.
You'll want to check the fermentability enhancement of your products by observing reduced levels of fermentation inhibitors like furan and phenolic compounds. When you're using wood ash treatment, you should see better results compared to traditional alkaline treatments like Ca(OH)2 or NaOH.
Look for signs of proper microbial activity in your ferments, which is essential for successful preservation. You can monitor the nutrient ratio (C:N:P) to guarantee advantageous conditions.
If you're storing your preserved foods long-term, check for NH4+-N volatilization levels and maintain consistent temperatures, especially when using traditional methods like ground storage. You'll know your preservation is successful when there's no pathogen contamination and the food maintains stability over time.
For integrated preservation techniques, measure the effectiveness of combined methods. When you're using wood ash fermentation alongside smoking, salting, or brining, assess each component's contribution to the final product's stability.
Remember to test for proper pH levels and monitor storage conditions regularly to confirm your preserved foods remain safe and stable.
Environmental Impact And Sustainability
Modern wood ash fermentation practices face significant environmental challenges that require careful consideration.
You'll need to understand that traditional wood ash disposal methods can release dangerous toxins into living spaces and farmland, containing harmful heavy metals like arsenic, mercury, and lead. The environmental impact is substantial, with sub-Saharan Africa alone producing 19 megatonnes of contaminated ash annually.
To address these challenges sustainably, you can focus on three key approaches:
- Implement carbonation processes that transform wood ash into stable calcium carbonate, achieving 14-17% sequestration efficiency while creating useful fertilizer.
- Utilize proper waste management techniques that prevent toxic fly ash from contaminating soil and water systems.
- Apply carbonated wood ash as a soil amendment only after confirming it meets legal thresholds for toxic metal content.
When you're working with wood ash fermentation, it's essential to recognize that hardwood ash generally contains higher nutrient levels than conifer ash.
Modern Applications And Adaptations
Traditional wood ash fermentation has evolved into diverse industrial and agricultural applications that extend far beyond its historical uses.
You'll find that wood ash now serves as a valuable soil amendment, particularly for acidic soils where it can replace up to one ton of agricultural lime per ton of ash.
In modern farming, you can apply wood ash to greatly boost crop yields, especially for barley, oats, and alfalfa.
When you're working with wood ash, you'll get 25-70 pounds of potash and about 30 pounds of phosphate per ton, with hardwoods providing higher quality ash than softwoods.
You won't see harmful effects even at application rates up to 20 tons per acre.
If you're involved in industrial processes, you'll be interested to know that wood ash treatment improves wood hydrolysate fermentability by reducing inhibitors like furan and phenolic compounds.
While it's not directly used in traditional food fermentation anymore, you can find wood ash in various industrial applications, from concrete additives to water filtration.
When handling wood ash, you'll need to manage its dusty nature by adding water before spreading and using proper storage techniques.
Frequently Asked Questions
Can Wood Ash From Different Tree Species Affect Fermentation Results Differently?
Yes, you'll find that hardwood ash typically provides better fermentation results due to its higher mineral content and alkalinity, while softwood ash contains fewer nutrients and may be less effective in fermentation processes.
How Long Does Wood Ash Maintain Its Effectiveness When Stored?
If you store wood ash properly in a covered metal container, it'll maintain its effectiveness for several months to a year. You'll get the best results by keeping it dry and away from combustible materials.
Does Combining Wood Ash With Other Natural Preservatives Enhance Preservation?
Yes, you'll find wood ash works well with other natural preservatives. It's particularly effective when combined with organic matter, but don't mix it with nitrogen-based preservatives as this can create harmful ammonia gas.
Can Wood Ash Fermentation Methods Be Applied to Non-Vegetable Foods?
You can effectively use wood ash to preserve meats, hard cheeses, and eggs. It'll work by absorbing moisture and creating an alkaline environment that prevents spoilage, though you'll need specific storage methods for each food type.
What Role Does Ambient Humidity Play in Wood Ash Preservation Success?
You'll find that ambient humidity greatly affects wood ash preservation by controlling dust, preventing over-drying, and maintaining ideal moisture levels. It's crucial to store and apply ash when humidity's moderate for best results.
In Summary
You'll find that wood ash fermentation connects you deeply to ancestral food preservation while offering a sustainable modern solution. Whether you're fermenting vegetables or creating alkaline solutions, you're participating in a time-tested tradition that's both practical and environmentally sound. By mastering these techniques, you're not just preserving food—you're preserving knowledge that bridges past and present while reducing your carbon footprint.

Leave a Reply