
You can harvest and store winter ice by monitoring conditions between January and March when ice reaches 10-14 inches thick. Start by clearing snow from the surface and marking your cutting grid. Use ice saws, picks, and tongs to cut and handle blocks, keeping them under 50 pounds for safe lifting. Transport your ice blocks to a well-insulated storage area, stacking them no higher than 2.2 meters. Maintain storage temperatures between -4°C and -2°C, and wrap blocks with insulating materials like towels and aluminum foil. With proper preparation and management techniques, you'll discover how this traditional method can provide reliable off-grid cooling year-round.
Planning Your Ice Harvest
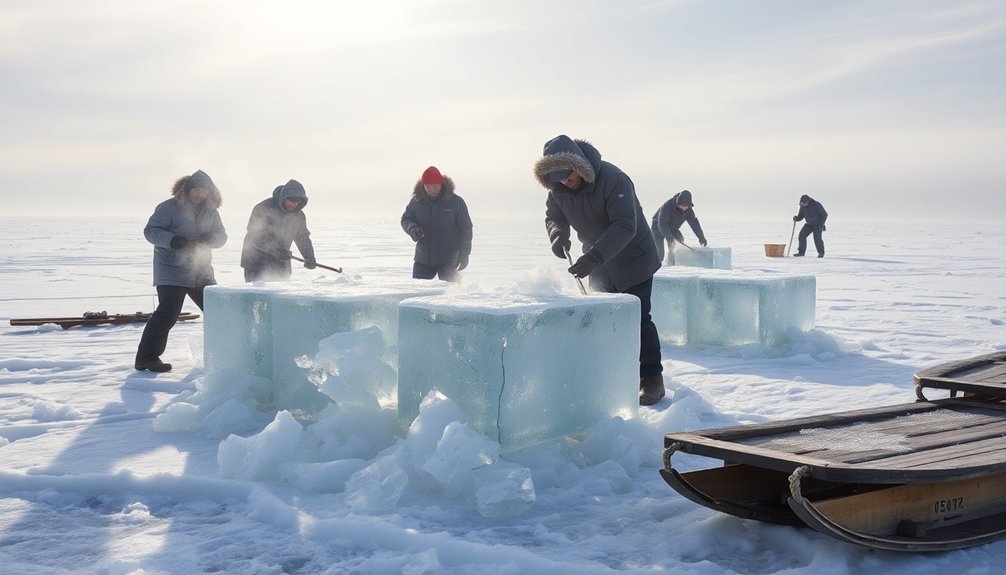
Success in winter ice harvesting depends on careful planning and precise timing. You'll need to monitor ice conditions closely throughout the winter months, particularly from January through March in New England. Regular measurements using an auger and measuring rod will help you determine when the ice reaches ideal thickness of 10-14 inches.
Before you begin, verify your ice field is properly prepared. Remove all snow, as it can slow down ice formation, and clear any weeds or debris from the water source. You'll want fresh, clear water to produce high-quality ice. An experienced ice sawyer can cut through approximately 75 feet of ice in a single hour.
Once the field is ready, plough it into long rows to facilitate cutting.
Safety must be your top priority during planning. Your ice needs to be at least 2 inches thick to support a person, 4 inches for a horse, and 5 inches for a horse with equipment.
Keep track of weather forecasts, as warm temperatures can compromise ice quality and worker safety. Plan to outfit your horses with spiked shoes and your workers with corked boots to prevent dangerous slips.
Remember that timing can vary by region, so adjust your harvest schedule based on local conditions and weather patterns.
Essential Ice Harvesting Tools
You'll need a reliable set of ice cutting tools to begin your harvest, including saws, picks, and chisels that enable clean, precise cuts through thick winter ice.
Your essential safety equipment must include sturdy ice tongs for secure handling, along with measuring tools to verify ice thickness before stepping onto any frozen surface.
Protective gear such as ice cleats, warm waterproof clothing, and safety ropes are vital to prevent accidents while working on slippery ice surfaces. For optimal ice harvesting results, a mix of hand and power tools will help you complete projects efficiently.
Core Ice Cutting Equipment
Winter ice harvesting depends on four essential categories of cutting equipment: ice saws, breaking bars, measuring tools, and handling implements.
You'll need an ice saw with coarse teeth that cut on the down stroke to create manageable strips. Modern ice cutting operations require power requirements of 135kW for industrial-scale harvesting equipment. With its perpendicular handles for two-handed operation, you can cut 75 feet of ice per hour at 15 strokes per minute. You'll want to create strips that are either 22 or 33 inches wide, with pre-grooved markings for easier cutting.
To split these strips into standard ice cakes (22 x 32 inches), you'll use breaking bars with wedge-shaped blades. Position these bars on a bar bridge and apply twisting force to achieve clean breaks along the grooves.
Before cutting, you must check ice thickness using augers and graduated measuring rods. You'll need 10-14 inches for ideal harvesting, though ice as thin as 2 inches can support a person.
For moving the heavy ice cakes (282-319 pounds), you'll require fork bars with two to four prongs. Transport the cakes using horse teams and farm equipment, moving them carefully to minimize damage during transfer to storage facilities.
Safety Tools and Protection
Beyond the core cutting equipment, safety gear stands as your first line of defense during ice harvesting operations. You'll need a foam life jacket or flotation suit to prevent drowning and maintain body heat if you fall through the ice. Keep ice picks readily accessible on your person – they're essential for self-rescue situations where you need to pull yourself out of the water.
Always carry ice thickness checking tools, including a spud bar or chisel, to verify ice stability as you work. You should continually test the ice ahead of you, especially during early and late seasons when conditions can be unpredictable.
| Safety Item | Primary Function |
|---|---|
| Ice Picks | Self-rescue from water |
| Life Jacket | Flotation and insulation |
| Ice Cleats | Prevent slips and falls |
| Cell Phone | Emergency communication |
In emergency situations, remember to turn toward the direction you came from, as that ice has already proven strong enough to support your weight. Once you've pulled yourself out using ice picks, roll away from the compromised area to distribute your weight evenly. Don't forget to file a float plan with someone who can alert authorities if you don't return on time.
Preparing The Ice Surface
You'll need to clear all snow from the ice surface using steady, even movements with a shovel or scraper before beginning the harvesting process.
Once you've removed the snow, carefully mark out your cutting grid on the exposed ice using chalk or another visible marker.
Score the ice surface lightly with your ice saw to create guide lines that you'll follow for the full-depth cuts later.
Surface Snow Removal
Effective snow removal serves as the foundation for maintaining quality ice surfaces throughout winter storage. You'll need to systematically clear snow using both manual and mechanical methods while protecting the underlying ice surface. Start by using plastic or rubber-edged shovels to prevent scratching, and push rather than lift the snow from the center outward.
For larger areas, you'll find snow blowers particularly efficient, but make certain you set the blades high enough to avoid direct contact with the ice. When dealing with stubborn patches, apply deicing agents sparingly, preferring calcium chloride over sodium chloride to minimize surface damage.
| Method | Best For | Key Considerations |
|---|---|---|
| Manual Shoveling | Small areas, light snow | Use plastic/rubber edges, push don't lift |
| Snow Blowers | Large areas, heavy snow | Keep blades elevated, maintain steady pace |
| Deicing Agents | Ice patches, prevention | Use sparingly, choose calcium chloride |
Remember to clean up any remaining chemical residue after snow removal. If you're dealing with ice buildup, use ice choppers at an angle rather than striking directly downward. Consistent maintenance and proper technique will help preserve your ice surface's integrity throughout the storage period.
Ice Layer Scoring Guide
The ice surface's quality directly impacts a skater's performance scores, making proper preparation vital for competitive events. You'll need to understand how judges evaluate skating elements to maintain ideal ice conditions that support high scores.
When preparing the ice surface, focus on factors that affect both Technical Element Scores (TES) and Program Component Scores (PCS). You'll want to guarantee the surface is smooth and consistent, as it directly influences a skater's ability to execute jumps, spins, and step sequences that comprise their base values.
Just as in dry ice blasting, you're aiming for a clean, non-abrasive finish that allows for precise edge control and fluid movement.
Your ice maintenance should support skaters' abilities to earn positive Grade of Execution (GOE) marks, which can increase their base scores by up to 10% in singles and pairs, or 16% in ice dance.
Remove any surface contaminants, including snow and ice shavings, that could affect skating skills or presentation scores. Remember that falls due to poor ice conditions result in deductions from the Total Segment Score (TSS), so maintaining consistent surface quality throughout both program segments is essential.
Safe Ice Cutting Techniques
Safe ice cutting requires a methodical approach and proper preparation to prevent accidents and achieve clean results.
Start by setting up your workspace on a clean, level surface using a sawhorse to hold the ice block securely. Keep the area free of obstacles and verify you're wearing appropriate safety gear, including eye protection, gloves, and protective clothing.
Select tools specifically designed for ice cutting, such as specialized ice picks, chisels, and ice-specific chainsaws. Don't use regular chainsaws, as they aren't made for this purpose. You'll get the best results using a Japanese ice saw or hotwire technique for precise cuts.
Before cutting, mark your ice block clearly to guide your cuts, and always work from the middle to minimize fracturing.
When cutting, maintain steady pressure and use variable speed controls on power tools to match the ice's density. If you're using manual tools, apply gentle, consistent pressure to avoid breaking the ice.
Keep your ice cool throughout the process to reduce melting and maintain stability. If the ice isn't splitting cleanly, consider tempering it to improve your cutting results.
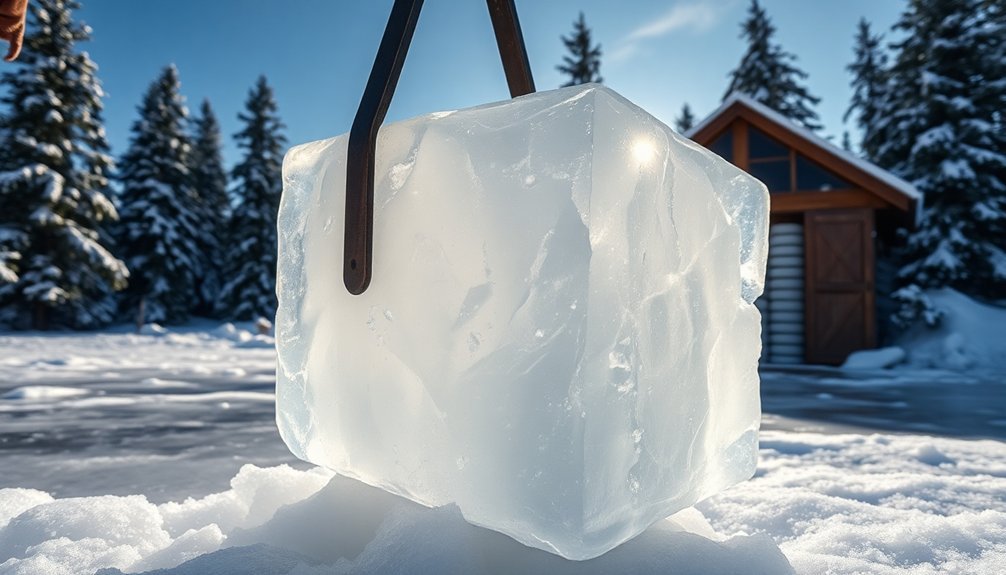
Block Size and Weight Guidelines

Standard block ice sizes range from 10 to 12 pounds for typical storage needs, while special-order blocks can weigh up to 35 pounds for larger applications.
You'll want to select blocks that you can safely lift and maneuver, keeping in mind that a 10-pound block measures roughly 5 x 5 x 11 inches.
When planning your storage space, consider that block ice is more compact than cubed ice, allowing you to maximize your cooler capacity while maintaining the recommended 2:1 ice-to-goods ratio.
Standardized Block Dimensions
Modern ice storage relies on standardized block dimensions to guarantee efficient handling and storage.
You'll find that common solid blocks range from 10 to 12 pounds, with dimensions varying slightly based on weight. A standard 10-pound block measures 5 x 5 x 11 inches, while an 11-pound block is slightly larger at 5 1/4 x 5 1/4 x 11 1/2 inches.
If you're working with compressed blocks, you'll need to account for different dimensions. A 10-pound compressed block typically measures 6 x 6 x 10 inches.
For larger operations, shot blocks weigh 35 pounds and measure 29 x 14 x 5 1/2 inches. When planning your storage space, take into account that a cubic foot of ice weighs approximately 57.4 pounds.
For specialized applications, you might want to explore reusable options like Yukon Ice Blocks. These 5-pound blocks measure 11"H x 8.6"W x 1.9"D and freeze at 28°F.
Historical industrial applications used much larger blocks, such as those for refrigerator cars, which measured 11" x 22" x 44" and occupied 6.16 cubic feet of space.
Safe Handling Weights
When handling ice blocks, you'll need to follow specific weight guidelines to prevent injury and guarantee worker safety. For blocks weighing over 50 pounds, always use two or more people to lift, or better yet, employ mechanical aids like hand trucks or forklifts.
You'll want to rotate workers between lifting and non-lifting tasks to reduce strain and fatigue.
Before moving any blocks, check that your path is clear of obstacles and slippery areas. Position yourself correctly by keeping the load between mid-thigh and mid-chest height. You should always test the block's weight and stability before attempting to carry it, and use proper protective equipment, including gloves for better grip.
To minimize physical strain, you'll find it helpful to use mechanical devices whenever possible. Consider breaking larger blocks into smaller, more manageable sizes, and utilize ramps for moving ice between different levels.
Don't forget to tag loads with their weight information to alert other workers. If you're handling blocks regularly, arrange your workspace so materials are easily accessible and stored at convenient heights to reduce reaching and bending movements.
Maximizing Storage Space
Beyond safe handling practices, proper storage space optimization directly impacts your ice block preservation success.
You'll want to select larger blocks when possible, as they melt more slowly due to their lower surface area-to-volume ratio. Plan your storage area to accommodate 2-3 cubic meters per ton of block ice stored, and include an extra 10-20% capacity to manage accumulation effectively.
When stacking blocks, don't exceed 2.2 meters in height to prevent crushing lower layers. You'll need to use wooden battens between blocks to prevent them from fusing together.
If you're working with standard sizes, like 11-pound blocks (5 1/4 x 5 1/4 x 11 1/2 inches) or 35-pound shot blocks (29 x 14 x 5 1/2 inches), arrange them efficiently to maximize your space while maintaining accessibility.
Keep your storage temperature between -4°C and -2°C to preserve ice quality.
Remember that while larger blocks require mechanical assistance for stacking, they'll reduce how often you need to replenish your supply. Design your layout with clear access paths for easy block removal without risking damage to either the ice or your storage structure.
Moving Ice From Water
Through carefully planned waterways, ice blocks are guided from their cutting location using specialized tools and techniques. You'll need sharp-hooked tongs or long pitchforks to maneuver the blocks through the water channels. These channels serve as pathways to transport your ice either to an elevator system or directly to your storage facility.
To efficiently move ice blocks from water to transport, you'll want to follow these critical steps:
- Position your ropes and pulleys along the pre-prepared channels to maintain control of the ice blocks' movement.
- Guide the blocks using ice hooks toward your designated loading area, where they'll be lifted onto wagons or sleds.
- Push the blocks up the prepared ramps using consistent force to avoid breakage or slipping.
Your horse teams will be essential for the final transport phase, pulling loaded wagons or sleds to your icehouse. Make sure your ramps are sturdy and well-positioned to ease the shift from water to land transport.
The key is maintaining a smooth, continuous flow from the cutting site through the channels and onto your transport vehicles.
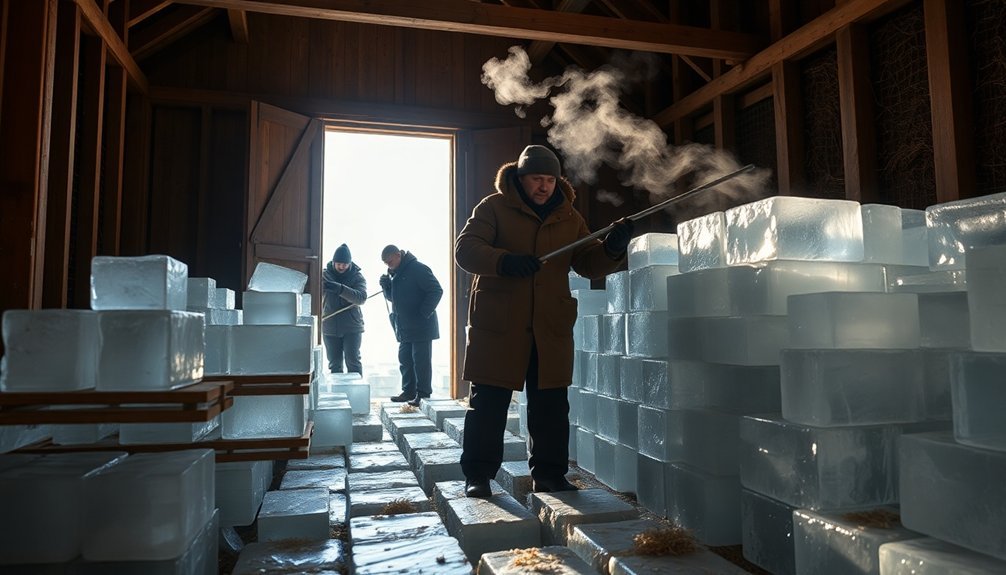
Building The Perfect Icehouse

A properly constructed icehouse's success depends entirely on careful planning and precise execution. You'll need to start by sketching a detailed plan that includes measurements for walls, roof, and door placement, while considering local building permits. Choose a location with dry, porous soil and verify your design incorporates adequate space for insulation and ventilation.
Begin construction with a solid foundation using concrete slab or piers. Frame your walls with two ranges of upright joists, creating space for insulation between them. You'll want to mortice these joists into cross-beams to support the upper floor.
When building walls, fill cavities with insulation materials like wet tan, sawdust, or fiberglass, then line them with rough boarding or plywood. Your roof should have a considerable pitch to prevent water accumulation, with broad, overhanging eaves to reduce heat gain. Cover it with shingles or metal sheets for waterproofing.
Don't forget to install lattice windows at the gable ends and add vents or a small exhaust fan to regulate temperature and moisture. For above-ground structures, use double partitions with non-conducting material between them to maximize insulation efficiency.
Insulation Methods That Work
Effective ice storage relies heavily on choosing the right insulation methods and materials. You'll want to combine multiple layers of insulation to create a robust barrier against heat transfer. Start with reflective materials like tin foil, which effectively bounces radiant heat away from your ice storage area.
For the best results, layer your insulation materials in this order:
- Place a base layer of cardboard to create an initial thermal barrier and protect against ground heat.
- Add a middle layer of polystyrene or cotton wool, which trap air and slow heat transfer.
- Finish with a reflective foil layer to deflect ambient heat.
You can test your insulation combination's effectiveness using the ice cube method before scaling up to larger quantities. Simply wrap different material combinations around ice cubes and measure their melting times compared to a control group.
Don't overlook the importance of proper installation – even small gaps can greatly reduce insulation effectiveness. When you're packing your ice storage, remember to incorporate newspaper between layers for additional insulation.
This multi-layered approach will help maintain lower temperatures and reduce energy costs in your ice house.
Stacking Ice For Maximum Storage

Proper stacking techniques make all the difference when you're storing large quantities of ice blocks. You'll need to limit your stack height to 2.2 meters to prevent crushing the bottom layers.
Place wooden battens between blocks to keep them from fusing together and guarantee they remain stable and accessible.
When planning your storage space, calculate based on 2-3 cubic meters per ton of ice. You'll find that most block ice stores are designed for 150, 300, 600, or 1,500 tons.
If you're handling smaller 25-kg blocks, you can stack them manually, but larger blocks require lifts or inclined conveyors.
You'll want to use specialized equipment for safe handling. Grab your ice tongs to position blocks after lifting them with machinery.
Consider installing control platforms to oversee the stacking process, and protect your walls and floors with timber planking.
Don't forget to implement a rotation system – either first in-first out or first in-last out – to prevent stale ice buildup.
Keep the storage area well-insulated and cooled to maintain dry conditions, and regularly check for and remove any ice buildup on the walls.
Natural Ice Block Preservation
Successfully preserving ice blocks naturally requires mastering both formation and insulation techniques. You'll need to focus on creating clear, dense blocks while protecting them from environmental factors that accelerate melting.
Start by using a hard-sided plastic cooler or large metal tub, and freeze your water from top down to push air bubbles toward the bottom for clearer ice.
To maximize your ice block's longevity, implement these critical preservation steps:
- Create an effective insulation barrier by wrapping your storage container with layers – first a towel, then packaging material, and finally aluminum foil to reflect heat.
- Position your ice storage in the coolest, most shaded location available, ensuring proper airflow while keeping it away from heat sources.
- Use block ice rather than crushed ice, as larger pieces melt more slowly due to their reduced surface area relative to volume.
When accessing your stored ice, minimize container opening time and place a cold, damp towel over the contents to maintain the thermal barrier.
If you're making new blocks, consider using boiled water and adding salt to achieve a slower, clearer freeze that'll last longer in storage.
Root Cellar Temperature Control
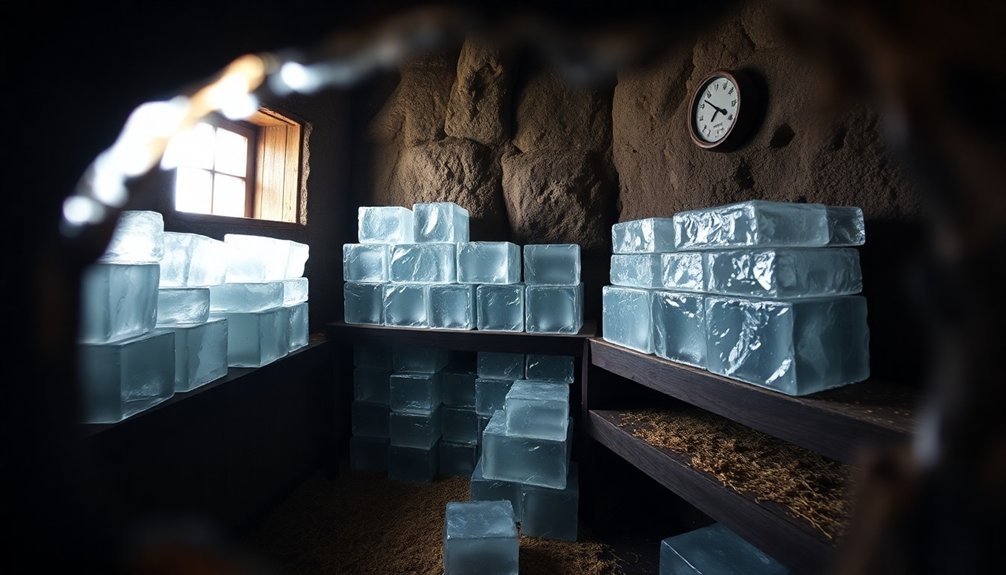
Temperature control in root cellars requires striking a delicate balance between 32-40°F (0-4°C) to preserve your stored vegetables.
You'll need to monitor this range carefully, as temperatures below freezing can damage your produce, while warmer conditions accelerate spoilage and sprouting.
To maintain ideal temperatures, you'll want to focus on both ventilation and circulation.
Install two ventilation pipes – one near the floor and another near the ceiling – to create natural airflow. If this isn't sufficient, add small fans to guarantee consistent air movement throughout your cellar.
This circulation prevents ethylene gas buildup and helps distribute cool air evenly.
You'll also need to manage humidity levels between 85-95% to prevent your vegetables from drying out.
In dry climates, consider using porous materials soaked in water to increase moisture without adding heat.
Keep a hygrometer handy to monitor humidity levels and adjust as needed.
Check your cellar's conditions daily using reliable thermometers and hygrometers.
When you spot temperature fluctuations, adjust your vents accordingly – opening them at night to let in cool air and closing them during warmer periods.
Remove any spoiled produce immediately to protect your remaining stores.
Year Round Storage Solutions
Once you've established your root cellar's temperature control system, expanding to year-round storage solutions can enhance your preservation capabilities.
You'll want to set up a thorough ice storage system using durable containers like Rubbermaid bins or commercial buckets placed on pallets. Make sure your storage area includes proper drainage for inevitable melt water.
For ideal year-round performance, you'll need to integrate your ice storage with existing systems.
Consider these essential steps:
- Install a thermal energy storage system using heat pumps and cooling liquids like brine to maintain consistent temperatures.
- Sink ice storage tanks into the ground to take advantage of natural heat exchange properties.
- Set up a drip irrigation system or frost-free hydrant for efficient ice making during winter months.
You can greatly reduce energy costs by producing ice during winter for summer cooling needs.
This natural cooling method not only supports temperature control for root vegetables but also provides reliable backup cooling.
If you're managing a larger operation, consider using multiple barrels on pallets and implementing a climate-controlled storage unit for sensitive items that require specific temperature ranges.
Off Grid Cooling Benefits
Off-grid cooling systems deliver three notable advantages: energy independence, environmental sustainability, and cost savings over time. By integrating renewable energy sources like solar power, you'll reduce your dependence on fossil fuels while lowering your carbon footprint.
These systems also free you from traditional utility services, giving you control over your cooling needs.
You'll find that off-grid cooling solutions adapt well to your local climate. In dry regions, you can use evaporative coolers that consume power comparable to fans while providing AC-like cooling. For mild weather areas, dual-purpose heat pumps offer efficient year-round comfort.
By incorporating natural ventilation and solar shading devices, you'll further reduce your cooling requirements.
While initial costs may be higher, you'll benefit from reduced energy expenses over time, especially with solar-powered systems.
Consider your region's specific conditions when choosing a solution – humidity levels and water availability notably impact system effectiveness.
Though some options like air coolers need more frequent maintenance, the long-term environmental and economic benefits make off-grid cooling an attractive investment that aligns with sustainable living practices.
Frequently Asked Questions
How Do You Determine if Lake Ice Is Thick Enough to Walk On?
You'll need at least 4 inches of clear ice to walk safely. Use an ice auger, drill, or ice screw to check thickness in multiple spots. Remember, white ice needs to be twice as thick.
What Happens if Sawdust Gets Wet Between Ice Blocks?
When sawdust gets wet between ice blocks, you'll notice it loses some insulating properties but still works. It'll compact more densely and remain effective, though not as efficient as dry sawdust for slowing ice melt.
Can River Ice Be Harvested as Effectively as Lake Ice?
You'll find river ice harder to harvest than lake ice due to currents affecting thickness and clarity. While both sources work, rivers present more challenges and often produce less uniform, less stable ice blocks.
How Many People Are Typically Needed for a Successful Ice Harvest?
You'll need anywhere from 12 to 75 workers for a successful ice harvest, depending on your operation's size. Small harvests can manage with a dozen men, while larger commercial operations require 60-75 workers.
What Alternatives Can Replace Sawdust if It's Not Readily Available?
You can use sand, wood pellets, or kitty litter instead of sawdust. They'll provide similar insulating properties and traction. Beet juice and various brines work too, though they're better for melting than insulation.
In Summary
Throughout the year, you'll appreciate having your own natural ice supply for off-grid cooling needs. By following proper harvesting techniques, maintaining safe storage conditions, and managing your root cellar's temperature, you're able to preserve winter ice well into summer months. It's a sustainable practice that reduces energy costs while connecting you to historical food preservation methods. With the right tools and planning, you've got reliable cold storage at your fingertips.


Leave a Reply