
Your outdoor food drying rack needs five essential design elements for maximum durability and efficiency. Start with weather-resistant materials like stainless steel or treated lumber to prevent corrosion and rot. Design a multi-layer ventilation system with proper spacing between shelves and strategically placed vents for ideal airflow. Integrate pest-resistant mesh using food-safe materials and sealed edges to keep insects out. Build a portable frame with bolted joints and diagonal bracing for stability and easy assembly. Finally, implement regular cleaning routines to maintain food safety and extend your rack's lifespan. These fundamentals will set you up for successful food preservation projects.
Choosing Weather-Proof Building Materials

When building an outdoor food drying rack, selecting weather-proof materials forms the foundation of a durable and long-lasting structure.
You'll want to focus on corrosion-resistant metals like stainless steel or galvanized steel for the frame, as these materials won't rust or deteriorate when exposed to the elements. Early warning signs of material failure can help you catch and address issues before they worsen. If you're incorporating wood elements, make certain to use treated lumber that resists rot, warping, and pest infestation.
For the drying surfaces, opt for food-safe screens and tightly woven mesh that allow proper moisture movement while keeping insects away.
You'll need to protect these surfaces with water-repellent finishes to prevent staining and deterioration. Consider using composite materials for areas that'll face constant moisture exposure, as they're particularly resistant to temperature fluctuations and weather damage.
Don't forget to incorporate proper waterproofing and sealants at all joints and connection points.
Apply appropriate sealants to prevent water infiltration, which could compromise the structure's integrity over time.
For added stability, especially in windy locations, include leg bracing using treated wood or metal fence T-posts.
This combination of materials will guarantee your drying rack remains sturdy and functional throughout various weather conditions.
Multi-Layer Ventilation System Design
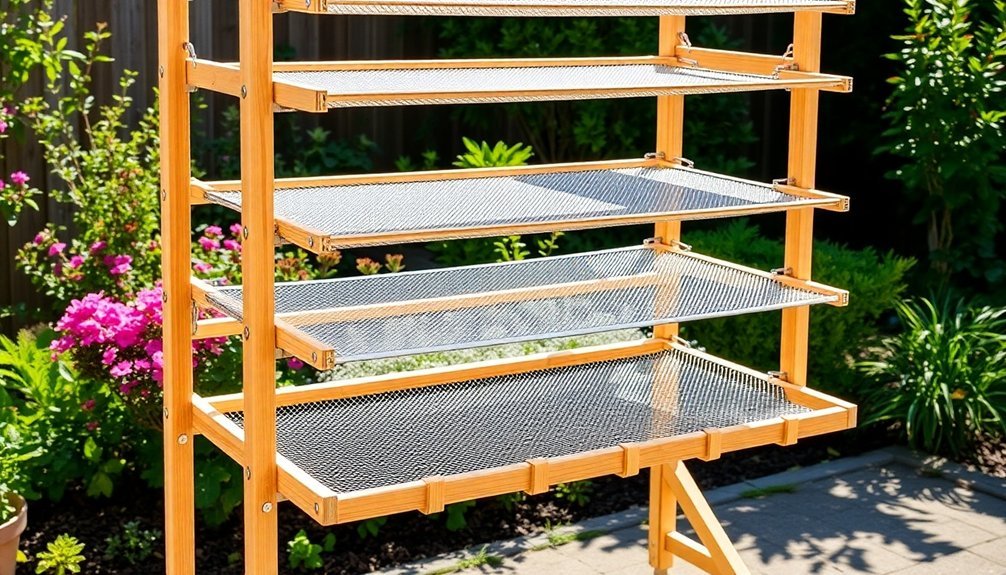
Every successful outdoor food drying rack requires a well-planned multi-layer ventilation system to affirm proper dehydration. You'll want to position air intake vents near the bottom on both sides, with a larger outlet vent at the top of the back wall. This setup creates natural convection, allowing warm air to rise through your drying racks while removing moisture efficiently. The UV-resistant materials help protect your food from harmful sun exposure while drying.
When designing your rack spacing, maintain 2-3 inches between shelves using perforated aluminum sheets sized 12×18 inches. You'll need to make certain your racks are properly supported along the edges and back, with reinforced front edges for stability.
To enhance airflow and prevent food from cooking instead of drying, consider these essential ventilation features:
- Install adjustable air dampers and exhaust fans for enhanced airflow control
- Cover all ventilation openings with insect screening to keep pests out
- Add a thermometer to monitor temperatures between 90-200°F
For maximum efficiency, angle your dehydrator's roof 12-15 degrees toward the sun, and consider adding a reflective back wall for increased solar gain. Shield the east and west sides to prevent excessive cooling from cross-winds, and use glazing to protect against rain while maintaining ideal drying conditions.
Pest-Resistant Mesh Integration
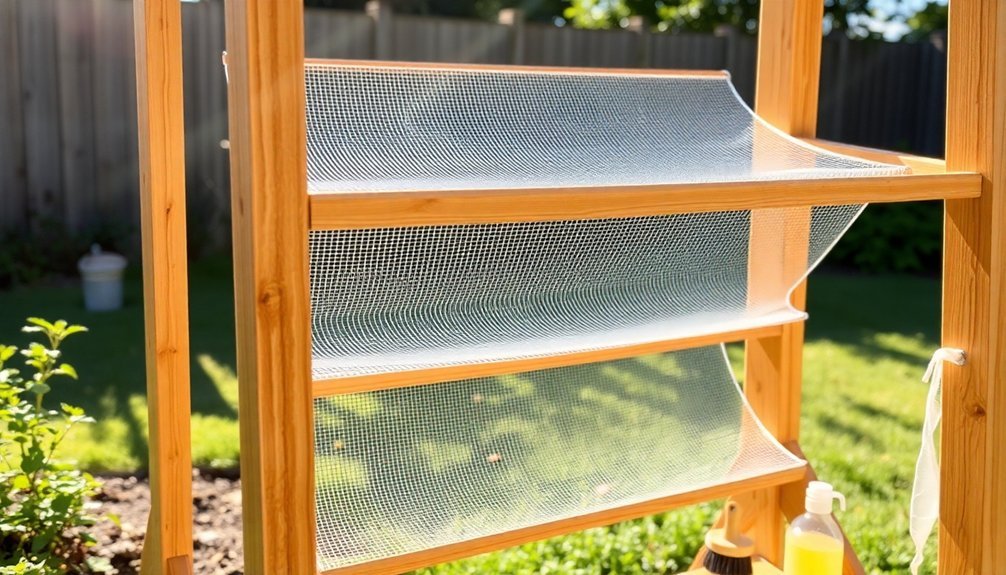
Building on your ventilation system, proper pest-resistant mesh integration forms an impenetrable barrier against unwanted visitors while maintaining perfect airflow.
You'll need to select food-safe materials like stainless steel or food-grade polypropylene mesh, avoiding standard window screens. Choose mesh with a wire diameter of 0.018 inches and high density to prevent even the smallest pests from entering while allowing moisture to escape. The three-layer mesh design provides superior protection against even the most persistent insects.
Install the mesh by recessing it from the frame's outer edge to prevent damage and apply food-grade silicone caulk to seal gaps where food particles might collect.
When integrating with other components, combine the mesh with glazing and black surfaces to enhance drying efficiency. You'll want to incorporate it into your corrugated, galvanized metal roofing system for maximum airflow and protection.
For long-term durability, verify your mesh installation is easily cleanable and weather-resistant. Use heavy-duty zippers for access points and regularly inspect the mesh for wear.
Remember to design adjustable slopes into your system to accommodate seasonal sun changes while maintaining the mesh's protective qualities. This attention to detail will confirm your drying rack remains both functional and pest-free.
Portable Frame Construction Techniques
A sturdy portable frame starts with precise load calculations and strategic material selection. You'll need to regard both dead loads from the frame's weight and live loads from the food items you'll dry. For ideal portability while maintaining structural integrity, use lightweight yet strong materials like aluminum or galvanized steel tubing with appropriate slenderness ratios.
When constructing your portable drying rack, focus on these critical stability elements:
- Design your connections using bolted joints that can be easily assembled and disassembled while maintaining moment resistance capacity.
- Incorporate diagonal bracing at corners to prevent lateral sway and maintain stability during use.
- Position your frame spacing at 6-meter intervals maximum to prevent sagging while supporting the mesh and food items.
Your frame's stability depends heavily on proper bracing and connection design. Confirm all joints are properly secured with appropriate bolt sizes, and think about using lock washers to prevent loosening during transport.
When designing the frame's dimensions, account for both the intended load capacity and ease of movement. Remember to include adequate cross-bracing in both vertical and horizontal planes to resist wind loads and maintain structural integrity while in use.
Maintenance and Cleaning Methods
Once you've constructed your portable drying rack, proper maintenance will determine its longevity and food safety performance.
You'll need to establish daily cleaning habits, starting with a warm, soapy water rinse after each use, paying special attention to areas where water collects.
For routine cleaning, use mild solutions like dish soap or a vinegar-water mixture.
Don't use harsh cleaners or abrasive pads, as they'll damage the surface. When you encounter stubborn stains or early signs of rust, create a baking soda paste and gently scrub the affected areas.
For rust spots, you can carefully use fine-grit sandpaper with light pressure.
You'll want to prevent rust and bacterial growth by keeping your rack thoroughly dry after cleaning.
Apply metal protectants to shield the surface from moisture and weather elements.
Every one to two months, perform a deep clean using natural agents like vinegar or lemon for sanitization.
Don't forget to check drainage areas regularly for clogs and buildup.
After each cleaning session, whether it's a quick rinse or deep clean, dry the rack completely with a towel to prevent moisture accumulation that could lead to rust or bacterial growth.
Frequently Asked Questions
How Long Does Food Typically Take to Dry on an Outdoor Rack?
You'll need several days to a week for proper food drying outdoors, depending on your weather. Fruits take 3-7 days to reach a leathery texture, but you shouldn't dry vegetables outside due to spoilage risks.
Can Multiple Types of Food Be Dried Simultaneously Without Flavor Transfer?
You'll need to separate different foods carefully when drying them together. Using horizontal spacing and maintaining good airflow between items will help prevent flavor transfer. It's safer to dry similar foods together.
What Is the Ideal Height Placement for Optimal Sun Exposure?
You'll want to position your solar dehydrator at a 54-degree angle from vertical in Stillwater, OK. Place it where there's unobstructed sunlight, and you can adjust the height with shims for ideal exposure.
How Do You Prevent Color Fading of Light-Sensitive Foods While Drying?
You'll need to protect light-sensitive foods by drying them in a shaded area. Cover your drying rack with a light-blocking cloth or use indoor drying methods to prevent color loss during preservation.
Should the Rack Be Brought Indoors During Nighttime or Only During Rain?
You should bring your rack indoors nightly to protect it from moisture, pests, and temperature changes. However, if that's not practical, at least bring it in during rain to prevent water damage.
In Summary
You'll get years of reliable use from your outdoor food drying rack by following these design guidelines. Remember to check the mesh regularly for tears, tighten any loose joints, and clean the surfaces after each use. When winter comes, store your rack in a covered area to protect it from harsh weather. With proper care and maintenance, your DIY drying rack will serve as a valuable food preservation tool.


Leave a Reply