
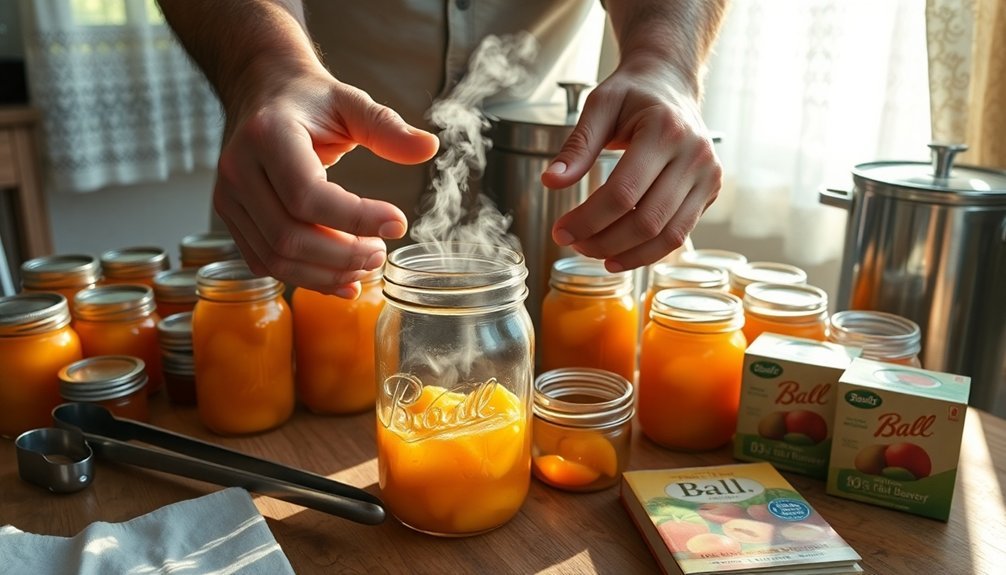
From your grandmother's 1950s kitchen come these time-tested canning secrets you'll want to remember. Always select perfectly ripe, unblemished produce at its peak season. Sterilize your jars in boiling water for 10 minutes, adding an extra minute per 1,000 feet of altitude. Keep your canning space immaculately clean and organized. Test jar seals with the satisfying "ping" method – if the lid doesn't spring back, you've got a good seal. Store your preserved goods between 50°F and 70°F in a dark, dry place. Process high-acid foods in a water bath and low-acid foods in a pressure canner. These foundational tips are just the beginning of your preservation journey.
Perfect Produce Selection Tips
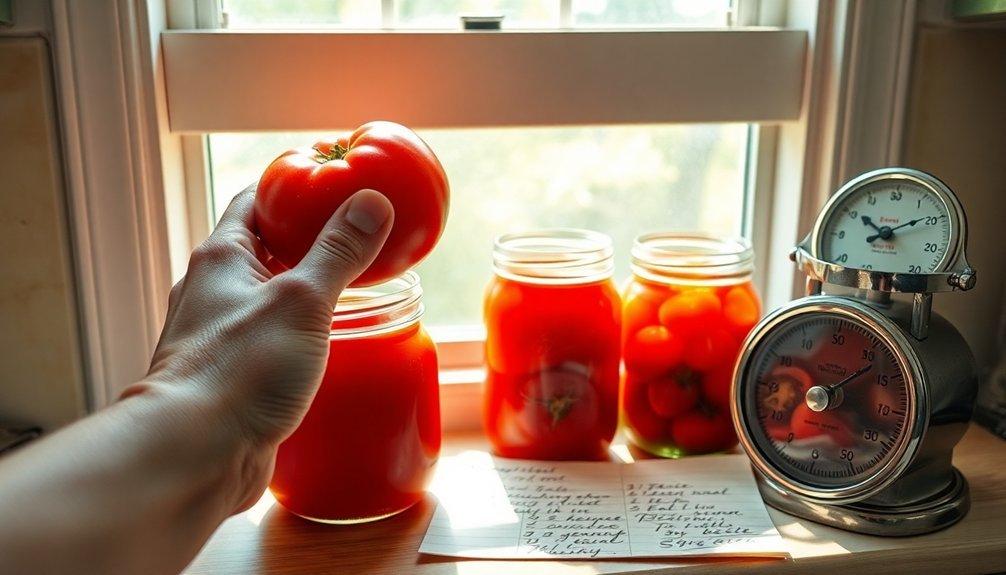
Selecting the right produce for canning makes all the difference between mediocre and exceptional results. You'll want to focus on fruits and vegetables during their peak seasons when they're bursting with flavor and ideal texture.
Look for produce that's free from bruises, rot spots, or any signs of insect damage, as these imperfections can compromise your entire batch. Many canneries in the early days actually developed fruit cocktail products to make use of bruised fruits.
When you're choosing fruits, make sure they're at the perfect stage of ripeness – not too firm and not too soft. You'll find that certain varieties are particularly well-suited for canning. For example, if you're canning peaches, you'll want freestone varieties that separate easily from their pits.
Handle your produce with care from the moment you select it, as bruising can lead to faster deterioration.
Remember to take into account how your chosen fruits will react to the canning process. You'll need produce with the right acidity levels for safe preservation, and fruits that maintain their shape and texture when heated.
Traditional canning varieties have stood the test of time for good reason – they've proven their ability to maintain flavor and quality during preservation.
Essential Sterilization Steps
You'll need to start with impeccably clean jars and give them a thorough sterilization in boiling water or a hot dishwasher cycle before any canning begins.
Each tool that touches your produce must go through the same careful sterilization process, including your ladles, tongs, and other utensils. Using non-reactive materials like stainless steel or glass ensures no unwanted chemical reactions occur during preservation.
Once everything's sterilized, you'll process your filled jars in hot water according to your recipe's timing, making sure the water level stays at least 1-1/2 inches above the jar tops.
Clean Jars Every Time
Proper sterilization of canning jars stands as the cornerstone of safe food preservation.
You'll want to start by washing your jars thoroughly in hot soapy water, then soak them with vinegar to remove any stubborn residue or hard water spots. A gentle 30-minute soak in apple cider vinegar works best for eliminating musty smells. Remember, bleach isn't your friend here – it'll leave your jars slippery and won't effectively tackle those tough deposits.
Once your jars are clean, you've got several reliable sterilization methods at your disposal:
- Run them through your dishwasher on a heat dry cycle
- Submerge them in boiling water for five minutes
- Heat them in your oven at 250-275°F for 10-30 minutes
- Keep the lids in boiling water for five minutes separately
After sterilization, you'll need to verify the jars' warmth until you're ready to fill them – this prevents thermal shock that could crack your jars.
Don't forget to inspect each jar for rust spots or damage before use, and confirm the lids fit properly without signs of wear.
When you're done, store your jars with the rings removed from the lids – this way, you can easily monitor for any seal failures or spoilage.
Sterilize Tools Thoroughly
When it comes to safe food preservation, sterilizing your canning tools deserves the same careful attention as preparing your jars. You'll need to choose from several proven sterilization methods that have stood the test of time.
If you're using the boiling water method, submerge your tools in rolling water for 10 minutes. Don't forget to use a jar lifter to safely remove them, and let them air dry on a clean towel without wiping.
For oven sterilization, place your tools on the middle rack at 250°F for at least 10 minutes, being careful to preheat first to prevent cracking.
Your dishwasher can be a handy sterilization tool if it has a sanitize setting that reaches 150°F. Place tools facing downward and keep them in the steamy environment until you're ready to use them.
Remember to adjust your sterilization time if you're at a higher altitude – add one minute for every 1,000 feet above sea level.
Before any sterilization method, inspect your tools carefully for damage and thoroughly wash them with hot, soapy water. Rinse completely to remove all soap residue, as any remaining soap can compromise your preservation efforts.
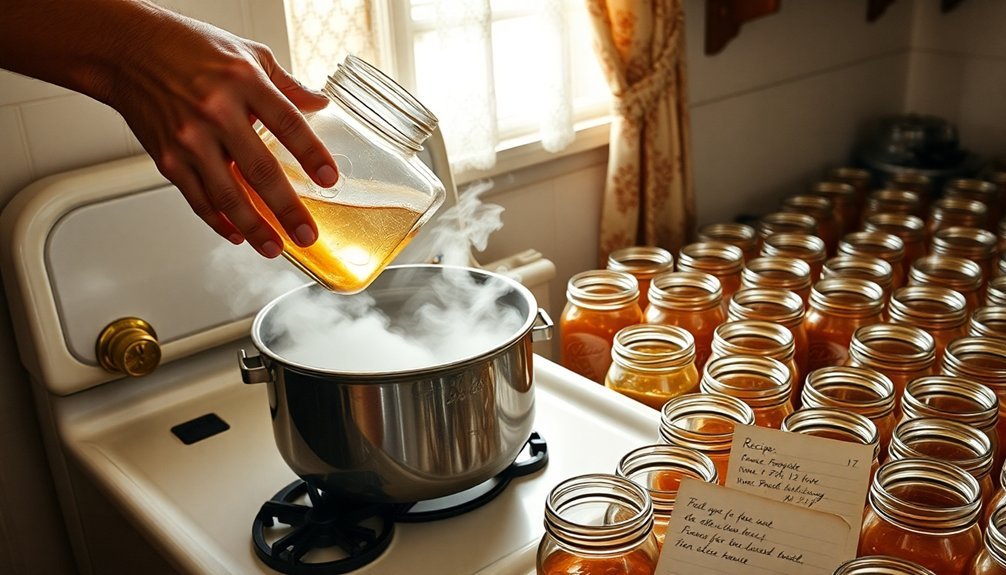
Hot Water Processing Steps
Now that your tools are sterilized, the hot water processing steps form the backbone of safe home canning.
You'll need to carefully monitor water levels and temperatures throughout the process to guarantee your preserved foods remain safe for consumption. The water bath method requires precise timing and attention to detail, just as grandma insisted in her kitchen decades ago.
1. Fill your water bath canner halfway with water and bring it to a simmer.
You'll want the temperature to match your jars and food to prevent thermal shock.
2. Load your sterilized jars into the canner using a jar lifter, making sure there's 1-2 inches of water above the jar tops.
The water level is essential for proper heat distribution.
3. Cover the canner with its lid and bring the water to a rolling boil.
Start your timer only when the water reaches a full boil – this isn't a step you can rush.
4. Process the jars for the exact time specified in your recipe, adjusting for altitude if necessary.
After processing, let the jars rest in the water for 5 minutes before removing them carefully.
Water Bath Process Mastery
Mastering the water bath process stands at the heart of successful home canning. You'll need to start by having the right equipment on hand: glass jars with proper lids and rings, a water bath canner with a rack, and essential tools like canning tongs for safe jar handling.
Before you begin, sterilize your jars by boiling them for 10 minutes if you're below 1,000 feet elevation. For higher altitudes, add an extra minute per 1,000 feet.
While your jars are sterilizing, fill your canner halfway with water and bring it to a simmer.
Once you've filled your jars with prepared food and secured the lids, you'll place them in your canner. Make sure they're covered by at least an inch of water – or two inches if you're processing for 30 minutes or longer. Bring the water to a rolling boil before starting your timer.
After processing, let the jars rest in the water for 5 minutes. Then, using your canning tongs, transfer them to a towel-lined surface.
Don't disturb them for 24 hours while they seal. Once cooled, remove the bands, label your jars, and store them without the rings.
Pressure Canning Safety Rules
You'll need to check your pressure gauge regularly and have it tested annually at your local extension office to guarantee accurate readings.
When you're done canning, let your pressure cooker cool naturally – never force it to depressurize with cold water or by opening the vent too early.
Keep your canner's internal temperature steady throughout the process by maintaining consistent heat and adjusting for altitude to prevent unsafe temperature fluctuations that could compromise food safety.
Pressure Gauge Maintenance Tips
The safe operation of pressure canners depends heavily on properly maintained pressure gauges. If you're using a dial-gauge canner, you'll need to have it tested annually to guarantee accurate pressure readings. This testing becomes especially vital if your gauge has been bumped or dropped.
While weighted gauges don't require testing, they can't be adjusted as precisely for higher altitudes, so you'll need to follow specific elevation adjustments in your canning instructions.
Here's what you need to know about pressure gauge care and maintenance:
- Test your dial gauge before first use and annually thereafter by comparing it to a master gauge at your local extension office.
- Don't submerge your dial-gauge canner lid in water, as this can cause rust and affect accuracy.
- Keep your canner level during use to prevent gauge damage and guarantee accurate readings.
- Check elevation adjustments carefully, as internal canner pressures are lower at higher altitudes.
When venting your canner, let steam escape continuously for 10 minutes before pressurization. This step is essential regardless of gauge type, as trapped air can lead to underprocessing and unsafe food preservation.
Safe Cooker Release Methods
Properly cooling down your pressure canner stands as one of the most critical safety steps in home canning. When you've completed the processing time, turn off the heat source completely and move your canner to a cool burner.
Don't attempt to speed up the cooling process by moving the canner to a cold surface or running water over it.
You'll need to wait patiently until the pressure gauge reads zero and all pressure has naturally dissipated. This typically takes 30-45 minutes, depending on your canner's size and the ambient temperature.
Once the pressure's completely gone, remove the weight or pressure regulator from the vent pipe and wait an additional 10 minutes.
When you're ready to open the lid, tilt it away from you to direct any remaining steam away from your face and body.
Using your jar lifter, remove the jars while keeping them upright, and place them on a towel-covered counter or cooling rack.
Don't disturb the bands during the 12-24 hour cooling period. After cooling, check each jar's seal before storing them in a cool, dark place.
Essential Temperature Control Steps
Successful pressure canning hinges on precise temperature control throughout the entire process.
You'll need to master the art of venting your pressure canner properly and maintaining consistent pressure levels to guarantee safe, properly processed food. When you're starting out, let steam escape through the vent pipe for a full 10 minutes to remove trapped air that could compromise processing temperatures.
Temperature control doesn't stop at venting. You'll need to adjust your heat source carefully to maintain steady pressure – between 240°F and 250°F for low-acid foods.
If you're using a weighted gauge, listen for that gentle rock or jiggle two to three times per minute. For dial gauges, keep your eye on maintaining the recommended pressure without fluctuation.
- Never attempt to speed up pressure reduction by lifting weights or opening vents
- Restart processing time if pressure drops below recommended levels
- Adjust processing pressure based on your elevation above sea level
- Monitor internal temperature continuously, especially during the critical first few minutes of pressurization
Syrup Making Secrets
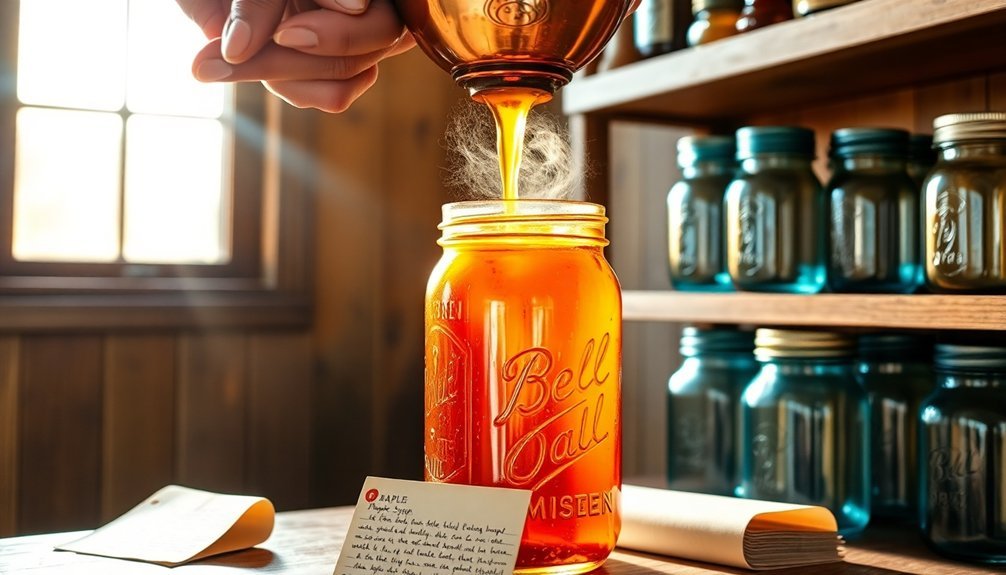
Making delicious maple syrup starts with understanding time-tested collection and boiling methods. You'll need to carefully tap your maple trees using proper spouts – while traditional wooden spouts were once common, modern metal or plastic versions work best. Collect your sap in clean containers or through a tubing system for efficiency.
When you're ready to boil, use a large metal pan with maximum surface area for faster evaporation. You'll want to maintain a steady boil, continuously adding fresh sap as the liquid reduces. Keep boiling until your syrup reaches exactly 7½°F above water's boiling point.
For better control and energy efficiency, you might consider using reverse osmosis technology before the final boil.
Don't skip the vital finishing steps. You'll need to filter your syrup twice through specialized felt filters to remove any "maple sand" and impurities.
While bottling, maintain your syrup at 180°F minimum to prevent contamination. Pour the hot syrup into sterile jars immediately for proper preservation.
Remember to grade your syrup by color before storage – this guarantees you're meeting proper quality standards and helps track your batches.
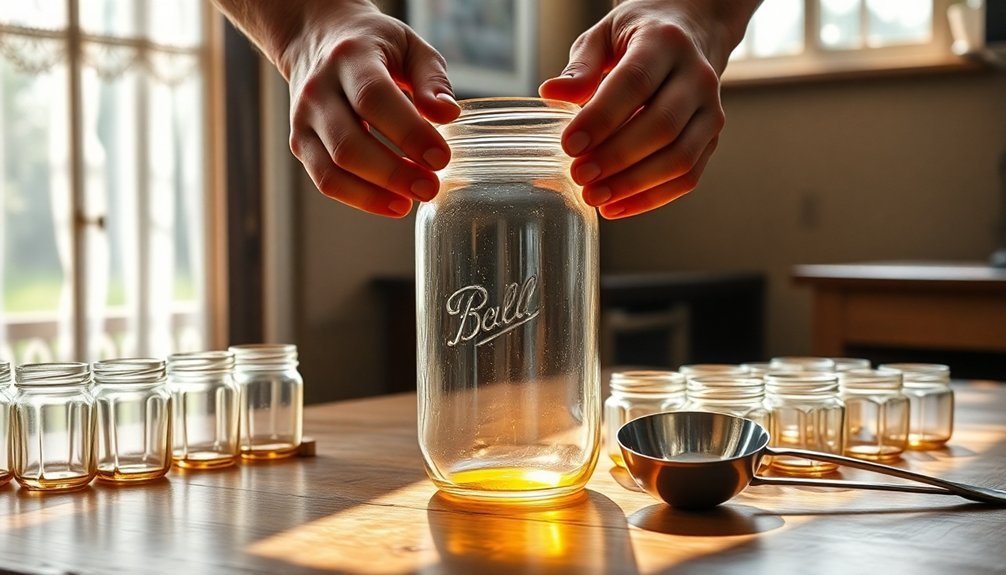
Jar Testing and Inspection
Before you start canning, you'll need to inspect each jar by checking for chips, cracks, and signs of damage, especially along the bottom edge where seals are critical.
You can test the quality of jar seals by pressing down on the lid's center and listening for a distinct "ping" sound that indicates proper vacuum formation.
Take a close look at the rim's surface to guarantee it's smooth and free from any nicks that could prevent a reliable seal during processing.
Visual Checks Before Use
For safe and reliable canning, proper jar inspection stands as your first line of defense against potential failures. You'll need to carefully examine each jar for nicks, cracks, or chips, particularly around the sealing edge where proper closure is critical.
Don't take chances with damaged jars – they'll compromise your food's safety and preservation.
Before you begin canning, check for mineral deposits and hard water film that can interfere with proper sealing. You can easily remove these deposits by boiling the jars in a solution of cream of tartar and water, or by soaking them in a vinegar-water mixture.
- Run your finger around the rim to detect any chips or rough spots that might prevent proper sealing
- Hold the jar up to bright light to spot hairline cracks or subtle damage
- Look for a bluish or rainbow-like film indicating hard water deposits
- Check the jar's overall condition for signs of age-related wear
Testing Lid Seal Quality
Three reliable methods help you confirm whether your canned goods are properly sealed and safe for storage.
Before testing, let your jars cool undisturbed for 12-24 hours at room temperature, and don't tighten the bands during cooling, as this can interfere with the sealing process.
Start with the press test by removing the screw bands and pressing down on the lid's center. If it doesn't spring back, you've got a good seal. If there's any bounce or movement, the jar hasn't sealed properly.
Next, try the spoon tap method by gently tapping the lid with a metal spoon. You're looking for a clear, high-pitched ring – a dull sound means either the seal failed or food is touching the lid.
Finally, inspect the lid's shape. A properly sealed lid curves downward in the center, creating a noticeable concave surface. You can verify this by picking up the jar by the lid alone – it should hold firmly without coming loose.
Don't forget that it's normal to see some content reduction after cooling. If any jar fails these tests, refrigerate it immediately and use the contents soon.
Examine Bottom Edge Integrity
Careful inspection of your jar's bottom edge plays an essential role in ensuring safe food preservation. You'll want to examine each jar thoroughly before filling it with your precious preserves. When you're checking the bottom edge, pay special attention to any irregularities that could compromise the seal or lead to jar failure during processing.
- Place each jar on a flat surface and run your finger along the bottom edge to detect any chips, cracks, or rough spots that might affect the jar's stability in the canner.
- Hold the jar up to a bright light to inspect for hairline cracks that mightn't be immediately visible to the naked eye.
- Check for any unevenness in the bottom surface that could cause the jar to wobble or tip during processing.
- Examine the change point where the bottom meets the jar's sidewall for any manufacturing defects.
If you discover any imperfections in the bottom edge, don't take chances – set that jar aside for non-canning purposes.
Remember to handle your jars carefully when placing them in the canner, using a proper jar lifter positioned below the screw band to prevent damage to the edges.
Mason Jar Packing Techniques
Successful mason jar packing begins with proper preparation and the right tools. You'll want to start with sterilized wide-mouth jars that have been thoroughly checked for cracks or nicks. Before filling, wash your jars in the dishwasher or boil them in your canner to guarantee they're completely sterile.
When you're ready to pack, use a large spoon or ladle to fill the jars with your ingredients. Add your seasonings and spices first, then pack the main ingredients tightly to guarantee proper heating throughout. You'll find that wide-mouth jars make this process much easier, especially when dealing with bulky items like pickles.
Don't forget to use your colander to strain liquids or wash fruits before filling.
Once you've filled your jars, use a headspace ruler or bubble popper to remove any trapped air bubbles. Clean the jar rim with vinegar before adding your lid – this guarantees a proper seal.
Remember to fill the jars to the appropriate level, as this allows for even heating during the canning process. Use only new lids with intact rubber seals to ensure your preserved foods will stay fresh.
Headspace Measurement Guidelines
After mastering proper jar packing, understanding headspace measurement becomes your next vital key to canning success.
Headspace, that empty gap between your food and the jar's lid, plays an essential role in guaranteeing your preserves seal properly and stay fresh. You'll need to be precise with measurements, as too little space can cause food to bubble out, while too much can lead to discoloration and sealing failures.
To measure headspace accurately, you'll want to use a ruler or specialized headspace tool. Always measure after removing bubbles and adjusting liquid levels. For standard Mason jars, you can use the neck as a reference point – it's designed with specific measurements in mind.
Here's what you need to remember for different foods:
- ¼ inch – Perfect for jams, jellies, and fruit preserves
- ½ inch – Ideal for tomatoes, pickles, and water bath canned fruits
- 1 inch – Required for most pressure-canned, low-acid foods
- 1¼ to 1½ inches – Necessary for specific vegetables and meats
Getting your headspace right isn't just about aesthetics – it's about food safety. Proper headspace prevents botulism risks and guarantees your preserved foods maintain their quality throughout storage.
Two-Piece Lid Sealing Method
In the world of home canning, the two-piece lid sealing method stands as the gold standard for preserving food safely.
You'll need two essential components: a flat metal lid with an enamel coating and sealing compound, plus a metal screw band that holds everything in place during processing.
When you're canning, the sealing compound softens with heat, allowing air to escape from the jar's headspace.
As the jar cools, this compound hardens to create an airtight seal that's vital for food safety.
You'll know you've achieved a proper seal when you hear that satisfying "ping" sound and see the lid's center pulled downward.
Storage Temperature Best Practices
Once your jars are properly sealed, maintaining the right storage temperature becomes your next priority.
You'll want to store your canned goods between 50°F and 70°F to guarantee ideal preservation and prevent spoilage. Don't let temperatures exceed 75°F, as this will greatly reduce your food's storage life and quality.
Choose a storage location that's clean, cool, dark, and dry. You'll need to avoid placing your jars near heat sources like hot pipes, ranges, or furnaces.
Never store your canned goods in an uninsulated attic or where they'll receive direct sunlight, as these conditions can compromise food safety.
Here's what you need to check for proper storage temperature management:
- Install a thermometer in your storage area to monitor temperature fluctuations
- Keep jars elevated off the floor using shelves or racks for better air circulation
- Maintain consistent temperatures by avoiding areas with variable conditions
- Check regularly for ideal temperature range, especially during seasonal changes
Remember to inspect your stored goods periodically for signs of spoilage, such as rust, dents, or bulging lids.
If you notice any of these warning signs, it's best to discard the affected items rather than risk consuming compromised food.
Frequently Asked Questions
How Did Grandma Prevent Fruit From Floating to Top of Jars?
You'll prevent fruit floating by hot-packing it first, selecting firm ripe fruit, packing jars tightly without crushing, removing air bubbles, and using the "seatbelting" method to secure fruit in place while processing.
What's the Secret to Keeping Pickles Crisp Like They Made Them?
You'll get crisp pickles by removing the blossom end, soaking them in ice water for 3 hours, using pickle crisp or grape leaves, and choosing fresh pickling cucumbers under 2 inches in diameter.
Why Did Grandma Add a Penny to the Pot When Making Jelly?
You're referring to a practice that's not actually documented in traditional jelly making. While some grandmothers had unique methods, adding a penny wasn't a standard technique and could've been unsafe for food preparation.
How Did They Preserve Food Colors Without Modern Additives?
You'll preserve food colors naturally by using sugar as a stabilizer, storing in dark places, and adding natural colorants like saffron, turmeric, or berries. Avoid reactive metals and use proper pickling salt.
What Household Items Did Grandma Use Instead of Modern Canning Tools?
You'll find kitchen towels work great as jar holders, wooden spoons for bubble removal, and soup ladles for filling jars. Don't forget clothes pins can test lid tightness and coins can check seal quality.
In Summary
You've now mastered the time-honored canning techniques that grandmothers relied on in the 1950s. These tried-and-true methods guarantee your preserved foods will stay fresh and safe for months to come. Whether you're canning fruits, vegetables, or jams, following these traditional secrets will help you create delicious home-preserved foods your family will enjoy. Keep practicing these techniques, and you'll develop the same confident expertise as generations before.


Leave a Reply