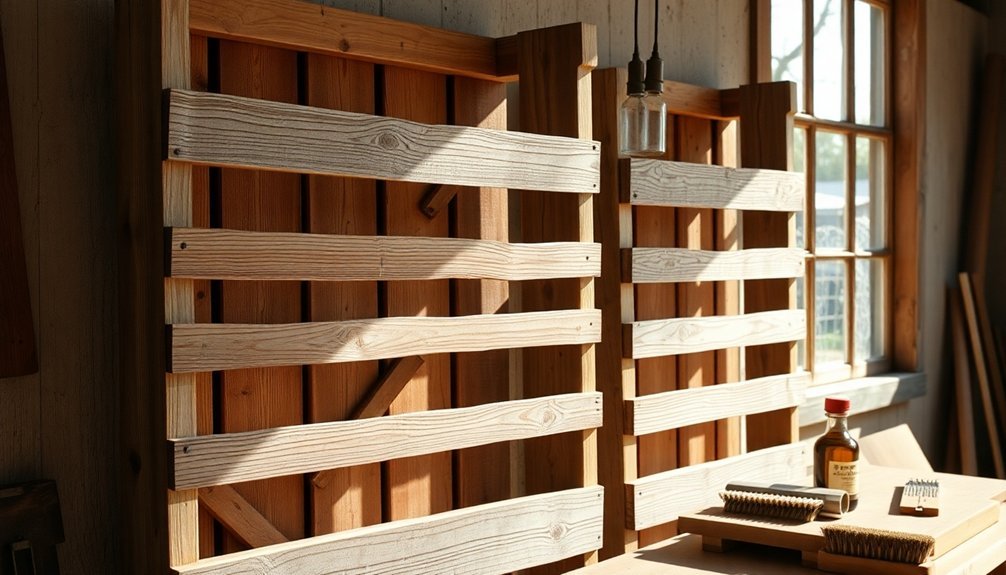
Start your apple rack restoration by thoroughly cleaning and sanitizing the wooden surfaces with a bleach solution to guarantee food safety. You'll need to repair any loose joints using hot hide glue or Swell Lock, reinforcing them with cloth if necessary. Don't skip restoring the original finish – remove old wax, apply wood dye for even coloring, and protect with furniture wax. Replace missing support pieces with matching materials for structural integrity, and weatherproof your rack using moisture-resistant materials and proper ventilation. These five essential steps will transform your vintage apple rack, and there's plenty more to discover about each technique.
Clean and Sanitize Wooden Racks

Before restoring apple racks back to their former glory, you'll need to thoroughly clean and sanitize them. Start by scraping off any old grease and dried apple bits from the wooden surface. Keep the racks off the ground while cleaning to avoid contamination. Use a scrub brush with warm water and add a small amount of dish soap if needed to remove stubborn residue.
Once you've cleared the visible debris, rinse the racks thoroughly with clean, potable water. You'll want to use a soft-bristled brush to avoid damaging the wood while ensuring all surfaces are completely clean. Don't use abrasive materials that could harm the wooden surface.
Create a sanitizing solution by mixing one tablespoon of bleach per gallon of lukewarm water. Apply this solution to all surfaces that come into contact with cider. For particularly dirty racks, consider using a combination of pressure washing, cleaning agent, and sanitizer.
If you're dealing with wooden racks specifically, try a chlorinated dump tank treatment followed by hot water.
After sanitizing, let the racks air-dry in a clean, well-ventilated area away from potential contaminants like flies. Store them in a dry environment to prevent recontamination and inspect them regularly for signs of dirt or microbial growth.
Repair Loose Joints
Once your apple racks are clean and sanitized, you'll need to address any loose joints that compromise their stability.
Start by carefully disassembling joints that are loose enough to work with, and thoroughly clean them to remove all traces of old adhesive, dirt, and debris. Make certain you're using appropriate solvents and tools that won't damage the wood surfaces during cleaning. Regular monitoring of joint stability helps prevent serious damage over time.
For ideal repairs, you'll want to use hot hide glue instead of modern alternatives like epoxy or PVA. Hide glue is particularly suitable for antique pieces as it's reversible, bonds well to itself, and accommodates seasonal wood movement.
If you can't disassemble the joints, apply Swell Lock to saturate and expand the wood fibers.
Here are three key steps to guarantee successful joint repair:
- Add a single layer of cotton or linen cloth saturated with hide glue to reinforce well-fitting joints.
- Position the rack carefully when applying adhesive to guarantee proper flow into the joint.
- Allow joints to dry completely before testing stability or using the rack.
Remember to wipe away excess adhesive and confirm joints are properly pressed together during reassembly for the strongest possible bond.
Restore Original Wood Finish

The original wood finish on antique apple racks tells a story of craftsmanship and time.
To preserve this history while restoring the piece, you'll first need to identify the finish type. Test a small, hidden area with denatured alcohol and lacquer thinner – if it softens with alcohol, it's shellac; if it turns white but softens with lacquer thinner, it's lacquer; if neither affects it, you're dealing with varnish or oil.
Before restoring the finish, remove all hardware and clean the surface thoroughly with turpentine to eliminate dirt and old wax. Always work in a well-ventilated area to avoid inhaling harmful fumes during the restoration process.
Use 000 steel wool with the appropriate solvent, working with the wood grain. For shellac finishes, apply denatured alcohol to soften and smooth the surface. If you're working with lacquer, use lacquer thinner in the same way.
Once you've restored the base finish, you might need to apply wood dye to even out sun-bleached areas. Follow with boiled linseed oil to nourish the wood, letting it penetrate completely before wiping away excess.
Finally, protect your work by applying a thin coat of furniture wax and buffing in the grain direction. Plan to rewax every three months to maintain the finish.
Replace Missing Support Pieces
After restoring the wood finish, your apple rack may still need structural repairs to function properly. Start by evaluating the damage, identifying missing support pieces, and taking precise measurements of the areas that need attention.
You'll want to document these details carefully to guarantee you purchase the correct replacement materials.
When sourcing new support pieces, choose materials that match the original structure while considering durability and weather resistance. Visit local hardware stores or browse online retailers to find the best quality materials at competitive prices.
Make sure the replacement pieces match the exact dimensions you measured earlier.
Before installation, clear the work area and remove any debris that could interfere with the repair process. If needed, set up temporary supports to maintain structural integrity while you work.
Here are essential steps for a successful installation:
- Position the new support piece carefully, ensuring perfect alignment with existing components
- Use appropriate fasteners that match the original hardware for consistency
- Test the stability of each newly installed piece by checking levels and securing all connection points
Remember to follow safety guidelines throughout the process, especially when using power tools or working with heavy materials.
Weatherproof Your Apple Rack

Protecting your apple rack from harsh weather conditions requires careful material selection and proper construction techniques. Choose weather-resistant materials like fiberglass or galvanized metal for the frame, and install gasketed lids to prevent water from seeping in. You'll want to guarantee your rack can withstand rain, temperature fluctuations, and heavy loads.
Proper ventilation is essential for preserving your apples. Install vents with rain shields and screens to maintain air circulation while keeping moisture at bay. Don't completely seal all gaps, especially at the top, as this allows moist air to escape naturally. Consider using mesh or perforated panels in your design to enhance airflow.
To protect against pests, cover your rack with six mil mesh and seal potential entry points with solid pieces of wood or metal. Apply caulk or foam gap filler to close any remaining cracks where rodents might squeeze through. Make certain to regularly inspect these protective measures.
Maintain your weatherproofed rack by cleaning it regularly and checking for wear. Apply protective coatings to enhance weather resistance, and promptly replace any damaged parts.
During extreme weather, store your rack in a sheltered location to extend its lifespan.
Frequently Asked Questions
How Do I Identify the Original Model and Manufacturing Date of My Rack?
You can find your model by checking "About This Mac" or using the serial number on the device's underside. To determine manufacturing date, decode the serial number's 4th and 5th characters for year and week.
Can I Use Modern Materials to Reinforce Vintage Apple Racks?
Yes, you can reinforce vintage apple racks with modern materials. Use dimensional lumber, metal screws, and modern adhesives that match original dimensions. Just make certain you pre-drill holes and choose materials that complement the rack's aesthetic.
What Tools Are Essential for Restoring Multiple Racks Simultaneously?
You'll need a Cambrionix ThunderSync3 rack mount hub, multiple docking stations, reliable external drives, and an extensive set of data recovery tools like R-Studio or UFS Explorer for simultaneous system restorations.
How Much Should I Expect to Spend on Professional Rack Restoration?
You'll typically spend between $500-$1,500 per rack for professional restoration, depending on its condition and needed repairs. Labor costs at $80/hour and replacement parts can greatly impact the total price.
Are Restored Vintage Apple Racks Safe for Storing Modern Electronic Equipment?
You'll need to carefully evaluate each vintage rack's safety. While restoration can help, older racks may not meet modern standards for power, cooling, and structural support required by today's electronic equipment.
In Summary
You'll find restoring vintage apple racks isn't as challenging as it seems. With proper cleaning, joint repairs, finish restoration, replacement of missing pieces, and weatherproofing, you can bring these functional pieces back to their former glory. Whether you're preserving family heirlooms or refurbishing flea market finds, following these steps will guarantee your apple rack serves for many more harvests to come.

Leave a Reply