Cold pack pickling is safe and simple when you follow key preparation steps. You'll need proper equipment like nonreactive containers, clean jars with matching lids, and accurate measuring tools. Start with fresh, blemish-free produce and use vinegar with at least 5% acidity for food safety. Always maintain strict cleanliness by sanitizing your equipment and washing your hands thoroughly. The right ratio of vinegar to water (1:1) and precise salt measurements are vital for success. Proper storage in a cool, dark place guarantees your pickles stay fresh for up to a year. There's much more to explore about creating perfect pickles through the cold pack method.
Essential Equipment For Cold Pack Pickling
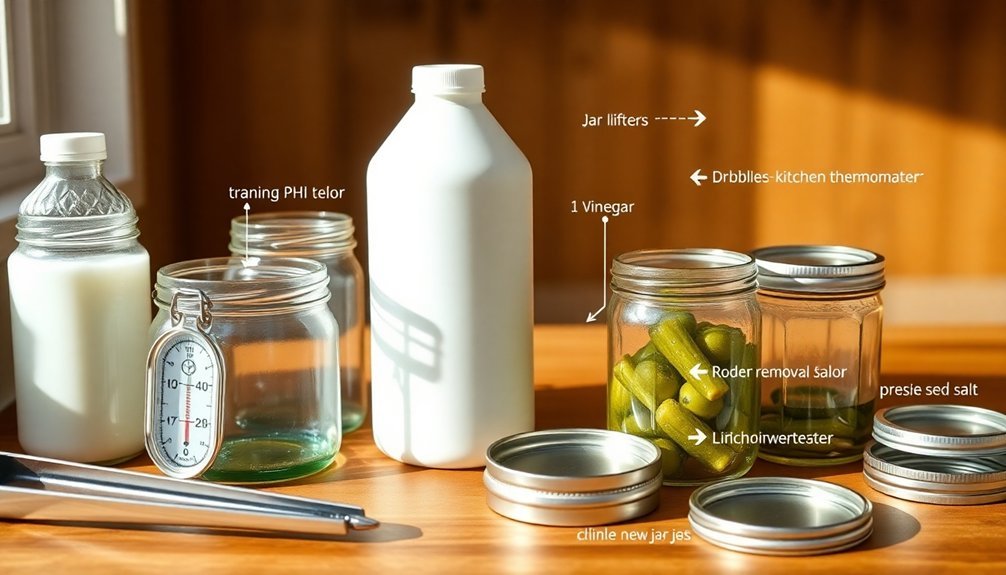
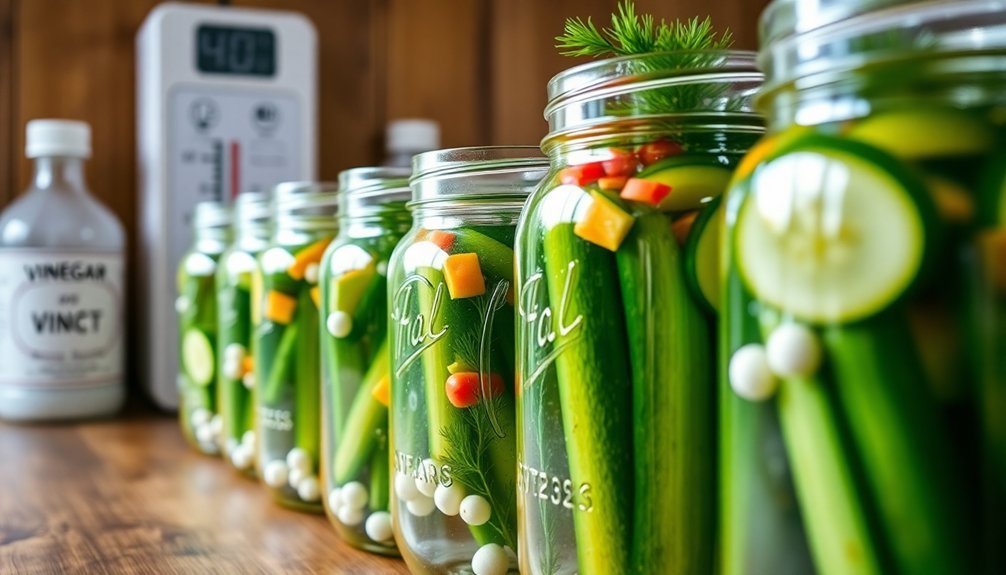
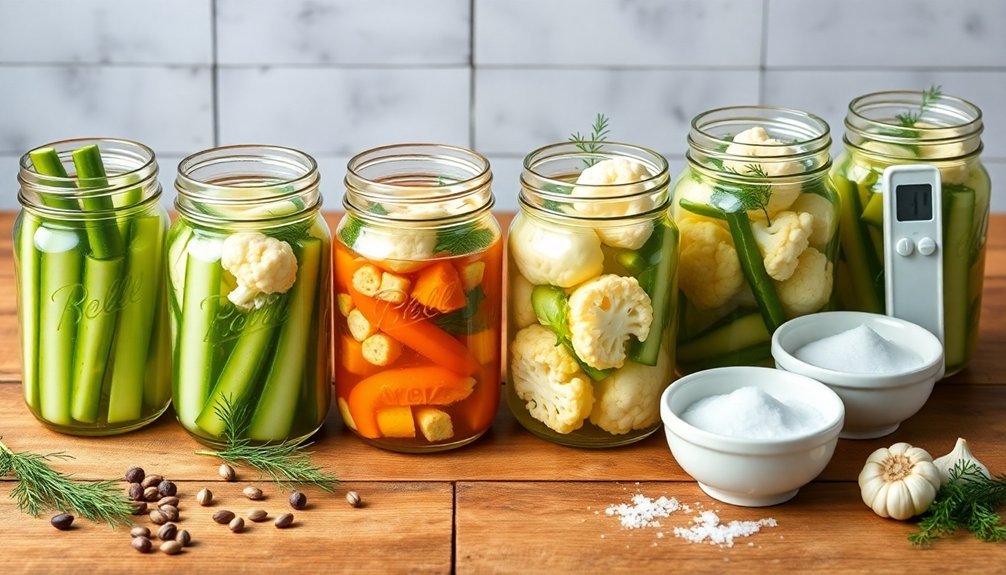
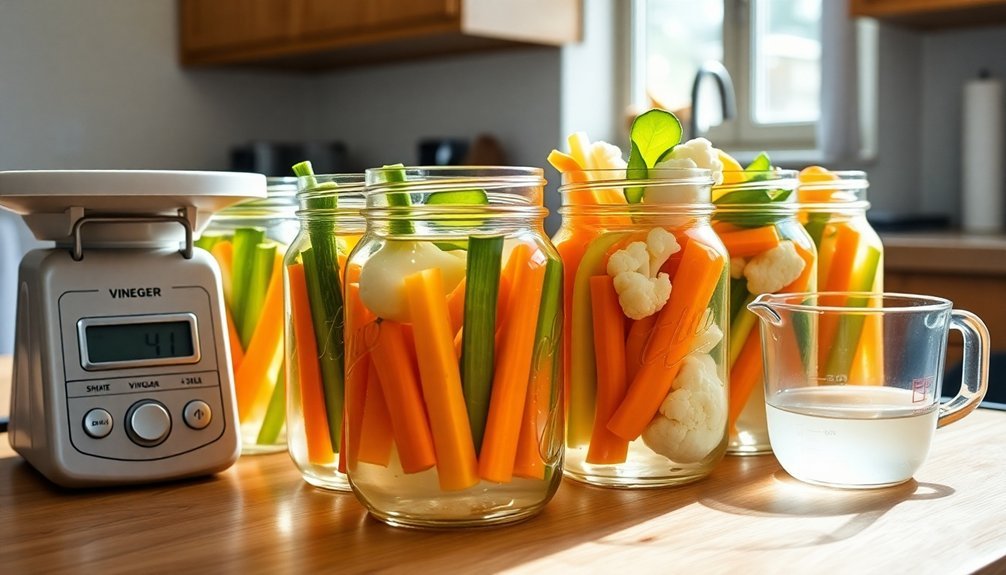
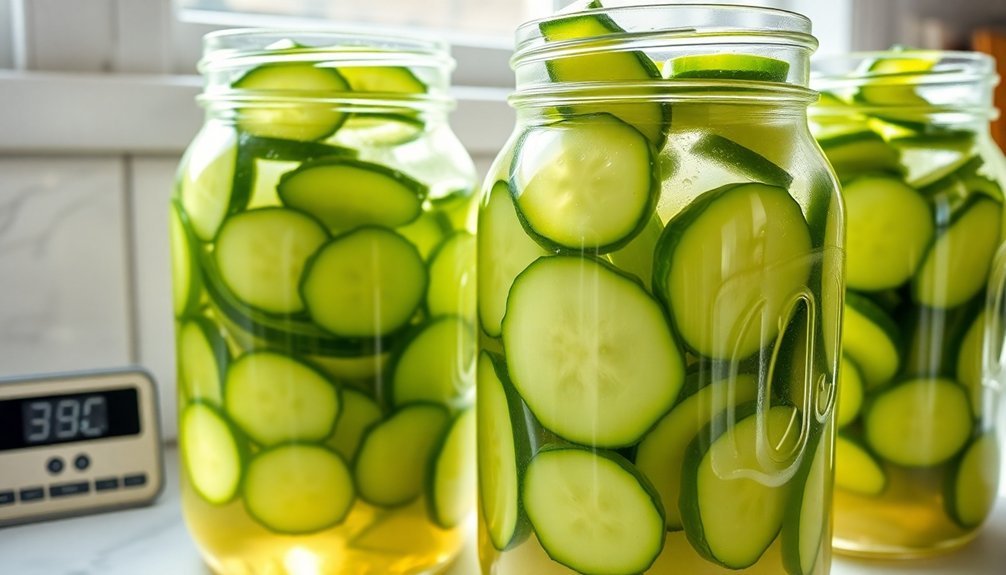
Every successful cold pack pickling project starts with the right equipment. You'll need nonreactive containers, specifically glass, stainless steel, food-grade plastic, or silicone materials. Canning jars with matching lids are ideal for cold pack pickling, as they're designed to create and maintain the proper pickling environment.
For heating your brine solution, you'll want to use pots made of stainless steel, glass, ceramic, or Teflon. It's essential to avoid containers or utensils made of tin, copper, brass, iron, or galvanized materials, as these can react with the acidic pickling solution and compromise your results. Those who plan to process larger batches may want to consider upgrading to a canning kettle with rack for better efficiency.
You'll also need a large pot with a lid for water-bath canning, plus a rack or folded kitchen towel to place at the bottom. This setup protects your jars from direct heat and potential breakage. Make sure your pot is deep enough to cover the jars with at least one inch of water.
Don't forget to include measuring tools and a whisk for preparing your brine solution, and consider adding weights or plates to keep vegetables submerged during the pickling process.
Selecting Fresh Produce For Pickling
When you're selecting produce for cold pack pickling, you'll need to carefully inspect each piece for blemishes, bruising, or signs of mold to guarantee the best possible results.
Timing your harvest or purchase is vital, as you should use produce within 24 hours and pick cucumbers early in the day to prevent bitter flavors.
Your selected fruits and vegetables must meet specific size requirements for different pickle styles, such as 1-1/2 inches for gherkins or 4 inches for dills, guaranteeing consistent pickling results. Choose cucumber varieties like Model or Chipper for the best pickling outcomes.
Inspect Before You Buy
Selecting fresh produce for pickling requires careful attention to detail and quality. When you're at the market, inspect each piece of produce thoroughly to guarantee it's free from mold, bruises, soft spots, and any signs of decay.
You'll want to look for tender vegetables and firm, ripe fruits, though pears and peaches can be slightly underripe.
For cucumbers specifically, you'll need to choose varieties that are labeled as pickling cucumbers, such as Model, Chipper, Explorer, Carolina, Ashley, Poinsett, or Gherkin.
Don't select wax-coated cucumbers from the vegetable counter, as they won't pickle properly. You'll also want to check that the cucumbers are the right size and shape for your intended pickling method.
Maintaining proper acidic levels through vinegar selection is crucial for safe preservation. Once you've selected your produce, handle it gently to avoid bruising. Store everything in a cool, dry place until you're ready to begin pickling.
For cucumbers, you can maintain their firmness by soaking them in ice water for 4 to 5 hours. Don't forget to remove the blossom end of cucumbers, as this step helps prevent soft pickles.
Always use clean, sterile equipment during preparation to guarantee food safety.
Optimal Harvest Timing Matters
The perfect timing of your harvest can make or break your pickling success. When you're planning to pickle cucumbers, you'll need to monitor your garden daily since these vegetables grow rapidly and can quickly become oversized.
For pickling varieties, harvest when they reach 3 to 4 inches long, while gherkins should be picked at 2 inches. You'll know your cucumbers are ready when they're firm to the touch and display a deep green color.
Watch for female flowers opening, as this signals that ripe fruit will follow in 8 to 10 days. Cucumbers typically mature 50 to 70 days after planting, with harvest season running from late July through September.
Don't wait too long to harvest – oversized cucumbers develop bitter flavors and tough seeds. You'll want to pick them regularly to encourage continued production and maintain plant health.
If you're growing multiple varieties, remember that each type has specific size requirements: slicing cucumbers are best at 6 to 9 inches, while pickling varieties need to be smaller.
For consistent harvesting, consider planting your cucumbers in sequential batches throughout the growing season.
Size and Shape Standards
Success in pickling begins with choosing cucumbers that meet precise size and shape requirements. You'll need to select the right size based on your intended pickle style – petites measure 19mm or less, while dill pickles should be about 4 inches long. For small gherkins, look for cucumbers up to 2.4cm in diameter, and large gherkins shouldn't exceed 2.7cm.
When examining shape, choose cucumbers that are straight or only slightly curved. Avoid those bent at angles greater than 60 degrees, as they'll be harder to pack uniformly. You'll want to leave a 1/4-inch stem on whole cucumbers intended for brining, but always remove the blossom end to prevent softening during the pickling process.
Select pickling-specific varieties like Model, Chipper, or Carolina for best results. Don't use wax-coated cucumbers, as they're unsuitable for pickling.
Match your cucumber count to your container size – for example, if you're making petites, you'll need at least 67 per quart or 270 per gallon. Remember to choose cucumbers of uniform size and shape within each batch to guarantee even pickling and attractive presentation.
Vinegar Types And Acidity Requirements
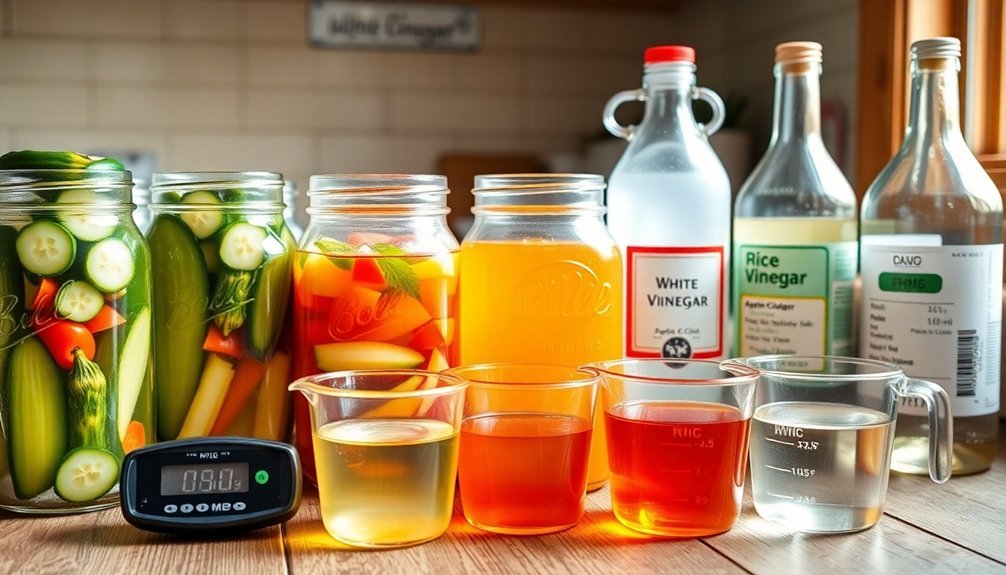
Proper vinegar selection and acidity levels form the foundation of safe cold pack pickling. You'll need vinegar with at least 5% acidity (50 grain) to guarantee your pickled products are safe from harmful bacteria and spoilage. Don't guess about the acidity – always check the label before you start.
You've got several vinegar options for your pickling projects. White vinegar works best for light-colored vegetables and won't affect their appearance. If you're looking for a mellower taste, apple cider vinegar is an excellent choice, though it may darken your pickles slightly.
While you can use balsamic or red wine vinegar, remember they'll contribute stronger flavors. Don't use rice wine vinegar, as it typically doesn't meet the required 5% acidity standard.
Always stick to tested recipes and don't alter the vinegar-to-water ratios. You're putting safety at risk if you modify these proportions. Use fresh spices and high-grade vinegar in the recommended amounts – typically a 1:1 ratio of vinegar to water.
Store your finished pickles in a cool, dark place to maintain their quality and guarantee they remain safe to eat.
Preparing Clean Work Environment
You'll need to start by clearing your counter space and sanitizing all tools and equipment with a proper cleaning solution to prevent contamination.
Before handling any pickling ingredients, it's essential to wash your hands thoroughly with soap and warm water for at least 20 seconds.
Clean and sanitize your jars, lids, and equipment in boiling water, ensuring they're completely dry before use.
Sanitize Tools and Equipment
A clean workspace is the foundation of safe pickling. To guarantee your tools and equipment are properly sanitized, you'll need to follow specific methods based on your materials. For glass and metal implements, boil them in water for 5 minutes. If you're sanitizing a single jar, fill it with boiling water, secure the lid, and let it sit for 5 minutes.
Select the right tools for your pickling process. You'll want a long-handled stainless-steel spoon, wide-mouth funnel, and jar lifters for handling hot containers. Don't use iron, copper, brass, or galvanized utensils, as they'll react with acidic pickling solutions. Instead, stick to food-grade plastic and glass containers.
Before sanitizing, clean all surfaces and tools thoroughly. Remove debris, wash with detergent, and rinse with clean water. You can use commercial sanitizers or bleach solutions for hard surfaces, but remember that boiling water isn't suitable for plastic or wooden items.
When handling sanitizers, wear protective gear like gloves and goggles, and guarantee proper ventilation. Let all items air dry completely before use, and you'll be ready to start your cold pack pickling process safely.
Clear Counter Space First
Before diving into cold pack pickling, clear and sanitize your counter space completely. Remove all appliances, canisters, and items that aren't essential for the pickling process. Store these items away from your work area to prevent contamination and guarantee you've got enough room to work efficiently.
Start by wiping down your counter with a dampened paper towel to remove visible crumbs and debris. Follow up with a thorough cleaning using either Clorox Free & Clear Compostable Cleaning Wipes or a multi-surface spray cleaner. Don't rely solely on a wet sponge, as it won't effectively eliminate bacteria and viruses.
Once cleaned, disinfect your counter using chemical sprays or wipes that don't require rinsing. Let the disinfectant remain wet on the surface for the recommended time – 6 minutes for bleach solutions or 2 minutes for bleach-free alternatives.
Allow the counter to air dry completely before setting up your pickling supplies. You'll want to maintain separate areas for different tasks to prevent cross-contamination, especially when handling raw ingredients.
Keep your workspace organized and clean throughout the pickling process to guarantee food safety.
Essential Hand Hygiene Steps
Proper hand hygiene forms the foundation of safe cold pack pickling. Before you begin handling any ingredients or equipment, you'll need to thoroughly wash your hands following the correct procedure. Start by wetting your hands with clean running water, then apply enough soap to cover all surfaces. Vigorously scrub your hands, fingertips, fingernails, and wrists for at least 10-20 seconds before rinsing thoroughly and drying with a clean towel.
You'll need to wash your hands multiple times throughout the pickling process: when you first enter your workspace, before handling any fresh produce, after touching raw vegetables, and after any interruptions such as taking breaks or handling waste.
If you're using disposable gloves, remember they don't replace proper handwashing – you'll still need to wash your hands before putting them on and after taking them off.
Consider keeping a hand sanitizer nearby as an extra precaution, but don't use it as a substitute for proper handwashing. This attention to hand hygiene prevents harmful bacteria from contaminating your pickled products and helps guarantee your preserves remain safe for consumption.
Salt Selection And Measurement
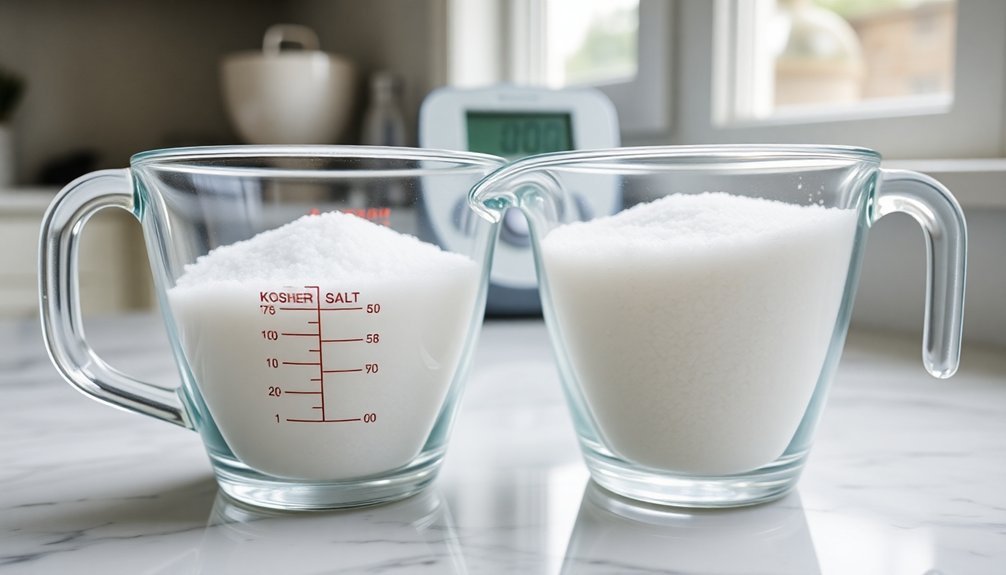
Selecting the right salt is essential for successful cold pack pickling. You'll want to use canning or pickling salt for the clearest brine, though kosher or sea salt without additives can work well too. Avoid using flake salt, as its varying density can make measurements unreliable.
While you can use table salt, be aware that anti-caking agents may cloud your brine.
The salt concentration in your brine must be at least 5% to guarantee proper preservation and flavor development. You'll need to measure your salt precisely according to your recipe – don't estimate or modify these amounts, as proper salt levels are critical for food safety.
Key points to remember about salt in cold pack pickling:
- Always use the same type of salt throughout your recipe to maintain consistency
- Sprinkle salt evenly over your vegetables before brining
- Don't substitute reduced-sodium salt in your recipes unless specifically tested
When measuring salt, stick to the exact amounts in your tested recipe. Proper salt concentration creates an environment that inhibits harmful bacteria while promoting the good bacteria needed for successful pickling.
This balance is essential for both safety and flavor in your finished pickles.
Sterilizing Jars And Utensils
You'll need to properly sterilize all your canning jars and equipment before starting the cold pack pickling process.
To sterilize jars using the boiling water method, submerge them in hot water one inch above their tops and boil for 10 minutes (adding an extra minute per 1,000 feet of elevation).
While your jars are sterilizing, sanitize your lids and utensils in a separate pan of boiling water for 10 minutes to guarantee a safe pickling environment.
Boiling Water Bath Steps
Starting the cold pack pickling process calls for meticulously sterilized equipment to confirm food safety. You'll need to wash your jars and lids in hot soapy water, then place them upright in your water bath canner. Fill the canner with hot water until it's at least an inch above the jar tops and boil for 10 minutes, adding an extra minute for each 1,000 feet above sea level.
When you're ready to process your filled jars, verify your canner has enough hot water to cover them by one inch. You can use the same water from sterilizing if it's still hot. Place your filled jars on the canner rack, maintaining proper water coverage throughout the process.
Key safety measures to remember:
- Always check jar rims for chips or cracks before using
- Release trapped air bubbles with a plastic spatula before sealing
- Clean jar rims with a damp paper towel before adding lids
Once your jars are loaded, cover the canner and bring the water to a vigorous boil. Start your timer according to your recipe's processing time, maintaining a gentle boil throughout.
When done, remove the jars and let them cool undisturbed.
Equipment Heat Sanitization Methods
Before beginning the pickling process, proper sterilization of your equipment stands as the foundation for safe food preservation.
You'll need to start by washing your jars in warm, soapy water and removing any labels or residue. Make certain they're completely clean and dry before moving on to sterilization.
You can choose from several effective sterilization methods. For oven sterilization, heat your oven to 275°F and place jars on doubled newspaper, keeping them separated. Let them sterilize for at least 20 minutes.
If you prefer the boiling water method, place your jars on a rack in a water-filled canner, guaranteeing water covers them by 1 inch. Boil for 10 minutes at elevations under 1,000 ft, adding an extra minute per 1,000 ft above that.
For convenience, you can use your dishwasher's high-temperature or steam cycle, or try the microwave method by heating slightly wet jars for 30-45 seconds.
Don't microwave Kilner-style jars or metal lids. Remember to handle sterilized jars with clean tea towels or oven mitts, and always use new, undamaged lids to guarantee proper sealing.
Spice Combinations For Cold Packing
The art of cold pack pickling relies on five essential spice combinations that form the foundation of most recipes.
You'll want to start with mustard seeds, black peppercorns, and allspice berries as your base, then add coriander seeds and bay leaves to create a well-rounded flavor profile. For every 4 cups of brine, you'll need 1-4 tablespoons of your spice blend, depending on how intense you'd like the flavor to be.
To customize your pickling blend, consider these aromatic additions that'll enhance your vegetables:
- Combine dill seeds with celery seeds for a classic pickle flavor
- Mix red pepper flakes with whole cloves for a sweet-heat combination
- Add cumin seeds and fennel for an earthy, distinctive taste
You can further experiment with optional spices like star anise, cardamom, or juniper berries to create unique flavor combinations.
Remember that your homemade spice blend will stay fresh for up to a year when stored properly. Be sure to adjust your ratios based on the vegetables you're pickling – stronger flavored produce like beets might need more spices than delicate items like cucumbers.
Safe Brine Mixing Methods
Safety stands at the heart of successful cold pack pickling, especially when mixing your brine. You'll need to start with the right ingredients: distilled white vinegar with at least 5% acidity, pickling salt without anti-caking agents, and filtered water.
Using a non-reactive saucepan, combine these ingredients in a 1:1 ratio of vinegar to water to maintain proper acidity levels.
Heat your mixture in a stainless steel or ceramic pot until the salt and sugar completely dissolve. If you're adding spices, you can contain them in a cheesecloth or tea bag for easy removal later.
Don't use reactive metals like cast iron or aluminum, as they'll affect your brine's flavor and safety.
Before adding the brine to your produce, verify your jars are properly sterilized by boiling them for 10 minutes. When filling jars, leave proper headspace and remove any air bubbles.
For quick pickles, store them in the refrigerator for up to 6 weeks. If you're canning, follow proper processing guidelines for long-term storage.
You can keep extra brine refrigerated for future use.
Proper Food To Vinegar Ratios
Precise food-to-vinegar ratios form the backbone of successful pickling, whether you're making quick refrigerator pickles or shelf-stable preserves.
You'll need to maintain proper acidity levels to guarantee your pickles are both safe and delicious. For reliable results, stick to tested recipes that use commercially produced vinegars with 5% acidity.
When mixing your brine, you'll find several proven ratios that work consistently:
- 1:1 vinegar to water ratio with additional salt and sugar for balanced flavor
- 3:2:1 method using three parts vinegar, two parts water, and one part sugar
- 100% vinegar, 50% water, 25% sugar, and 12.5% kosher salt by weight
You'll want to choose your vinegar based on your produce type. White vinegar offers a sharp taste and preserves produce color, while apple cider vinegar provides a mellower flavor but may darken your vegetables.
Rice vinegar and white wine vinegar work well for delicate produce. Remember to weigh your ingredients rather than rely on volume measurements – this guarantees you're maintaining the exact ratios needed for both safety and flavor.
Storage Requirements After Pickling
Proper storage practices make the difference between long-lasting pickles and spoiled produce. You'll need to maintain temperatures between 50-70°F and choose a clean, dark, dry location away from heat sources like stoves or hot pipes. Don't store your pickles in direct sunlight or damp areas, as this can compromise the jar seals and cause metal lids to corrode.
| Storage Type | Temperature | Duration |
|---|---|---|
| Shelf-stable | 50-70°F | Up to 1 year |
| Quick Process | 50-70°F | 4-5 weeks minimum |
| Refrigerated | 34-40°F | 2-3 months |
After your jars have sealed, remove the screw bands to prevent moisture and food particles from getting trapped in the threads. You'll want to label each jar with its contents and date, then store the cleaned and dried screw bands separately. For fermented pickles, you must refrigerate them to maintain their probiotic benefits and crispness. Quick-process pickles need 4-5 weeks of storage to develop their ideal flavor. If you notice any jars haven't sealed properly, move them to the refrigerator immediately. Remember to use only nonreactive containers made of glass, stainless steel, or food-grade plastic for storage.
Signs Of Successful Preservation
Recognizing successful pickle preservation involves multiple visual and sensory indicators that confirm your batch is safe to consume. When you examine your preserved pickles, check for properly sealed lids with indented centers, and avoid retightening the screw bands, as this can compromise the seal. You'll want to store your jars in a cool, dark place to maintain quality.
Before consuming your pickles, look for these critical safety indicators:
- Clear pickling syrup without sediment, along with uniform color and no signs of mold
- Firm, crisp texture that breaks when bent, rather than becoming soft or slimy
- No unpleasant odors or liquid spurting when opening the jar
Your pickles will develop their best flavor after 4-5 weeks of curing. They should maintain a translucent olive-green color for fermented varieties and stay consistently crisp, especially if you've used low-temperature pasteurization or pickle crisp products.
If you notice any unsealed jars or signs of spoilage, don't take chances – either reprocess them immediately or refrigerate for quick consumption. The flavor should be well-balanced with the expected tanginess, and you shouldn't detect any bitter or off-putting tastes.
Common Cold Pack Mistakes
During the cold pack pickling process, even experienced canners can make mistakes that compromise their pickles' quality and safety. One of the most critical errors you'll want to avoid is using incorrect brine strength. If your brine's too weak, you'll end up with soft, slippery pickles, while an overly strong brine will cause shriveling.
You'll need to pay close attention to temperature and timing. Don't let cucumbers sit more than 24 hours before starting the pickling process, and maintain fermentation temperatures between 70-75°F. Remove any hollow cucumbers that float during washing, and don't use oversized ones, as they often lead to hollow pickles.
When it comes to processing, you must use a boiling-water canner to eliminate harmful microorganisms. Make sure you're using the right tools – avoid brass, copper, zinc, or iron utensils in favor of unchipped enamelware, glass, stainless steel, or stoneware.
Don't forget to remove blossom ends to prevent bitterness and spoilage, and always use fresh spices and pickling salt instead of iodized salt or salt substitutes. Proper jar sealing is essential, so use new, clean lids and appropriate band tightness.
Frequently Asked Questions
Can Pickled Vegetables Be Frozen Instead of Processed in a Water Bath?
Yes, you can safely freeze pickled vegetables instead of using a water bath. While some may become softer, it's a convenient alternative to canning. Just make certain you're using freezer-safe containers with proper headspace.
How Long Should I Wait Before Tasting My Cold-Packed Pickles?
You'll want to wait at least 2 weeks before tasting your cold-packed pickles. They'll develop better flavor the longer you wait, but don't exceed 3-4 months, or they'll lose their crunch.
Why Do Some Recipes Require Grape Leaves in the Pickling Jar?
You'll want grape leaves in your pickling jar because they release tannins that keep your vegetables crisp and help maintain texture. They'll also guarantee your vegetables stay submerged in the brine during fermentation.
Can I Reuse the Brine From a Previous Batch of Pickles?
You can safely reuse pickle brine for refrigerator pickles, but don't use it for canning. Add fresh vinegar for better flavor, and always keep reused brine refrigerated. Watch for any signs of spoilage.
What Causes Pickles to Float to the Top of the Jar?
Your pickles float due to trapped air pockets inside the cucumbers and loose packing in the jar. You'll notice this happens when there's too much space between pickles or when air bubbles aren't released properly.
In Summary
You'll find cold pack pickling is safe and simple when you follow proper ratios, use the right vinegar acidity, and maintain clean equipment. By checking for proper seals, storing jars in cool dark spaces, and watching for any signs of spoilage, you're ensuring food safety. Remember, success comes from fresh ingredients, accurate measurements, and attention to detail in the preservation process.


Leave a Reply