To preserve your garden vegetables in oil, you'll need clean, dry vegetables and high-quality oil for best results. Start by thoroughly washing and cutting your vegetables into uniform pieces, then blanch or roast them until just tender. Let them cool completely before submerging in oil mixed with vinegar or lemon juice for proper acidification. Store your preserved vegetables in sterile, airtight containers and refrigerate immediately. You'll want to use homemade mixtures within 4 days unless frozen, and always watch for signs of spoilage like cloudiness or unusual odors. Proper preparation and storage techniques will reveal endless possibilities for your preserved garden bounty.
Why Preserve Vegetables in Oil

Preserving vegetables in oil offers a practical way to maintain their nutritional value while extending their shelf life. When you store vegetables in oil, you're creating a protective barrier that prevents oxidation and maintains the food's original nutrients, flavor, and texture. This preservation method guarantees your vegetables stay healthy and nutritious over time, while protecting them from spoilage. Ancient Mediterranean cultures relied heavily on olive oil preservation techniques to sustain their food supplies.
You'll appreciate the ability to enjoy your garden's bounty throughout the year, regardless of seasonal availability. By preserving vegetables in oil, you're reducing your dependency on seasonal produce and maintaining a consistent food supply during off-seasons. This method also helps you minimize food waste by extending the usability of vegetables that might otherwise spoil.
The preservation process enhances food safety when proper refrigeration is maintained to prevent bacterial growth, particularly Clostridium botulinum.
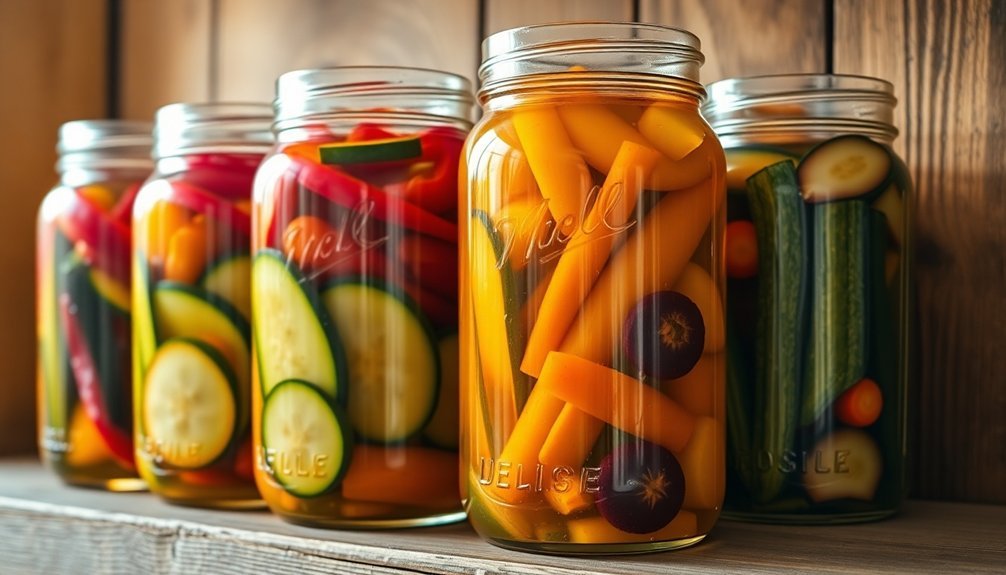
You'll find it convenient to store preserved vegetables in glass jars or cans, making them easily accessible for various dishes. Whether you're adding them to salads, pasta, or sandwiches, you'll have ready-to-use vegetables that maintain their quality and nutritional benefits for extended periods.
Essential Equipment and Supplies
To effectively preserve vegetables in oil, you'll need specific tools and equipment that guarantee safety and quality throughout the process.
Start with high-quality storage containers, preferably food-grade 304 stainless steel cans or high-density polyethylene containers with watertight seals and silicone gaskets to prevent leaks and contamination. Cold pressed oils are ideal for vegetable preservation due to their superior nutrient retention and natural flavors.
You'll need proper filtration equipment to ascertain your oil stays pure.
Install filtering grids in your containers and use quality filters to remove any solids or impurities. For safety, invest in containers with double tank designs that offer leak prevention and proper ventilation for easy pouring.
Quality control tools are essential for monitoring your preserved vegetables.
Get a pH meter to check acidity levels and ascertain food safety. For the preparation process, you'll need cleaning equipment like screens to remove debris from your vegetables before preservation.
Don't forget about safety equipment – keep fire extinguishers nearby and wear appropriate safety gear during the preservation process.
If you're planning large-batch preservation, consider getting heating and cooling systems to maintain ideal temperatures during the preservation process.
Store your preserved vegetables in containers with proper mechanical and chemical seals to maintain freshness.
Selecting the Right Vegetables

Vegetable selection serves as the cornerstone of successful oil preservation. You'll want to focus on vegetables that maintain their texture and flavor when preserved in oil, while avoiding those that can compromise food safety. Bell peppers, zucchini, beets, and mushrooms are excellent candidates, as they retain their integrity when properly prepared. Remember to store in sterile jars to prevent contamination during the preservation process.
Before preserving, you'll need to prepare your vegetables according to their specific requirements. Most need cooking, whether through roasting, grilling, or blanching. Remember that acidification is essential for safety – add vinegar or lemon juice, especially when preserving chilies and capsicums.
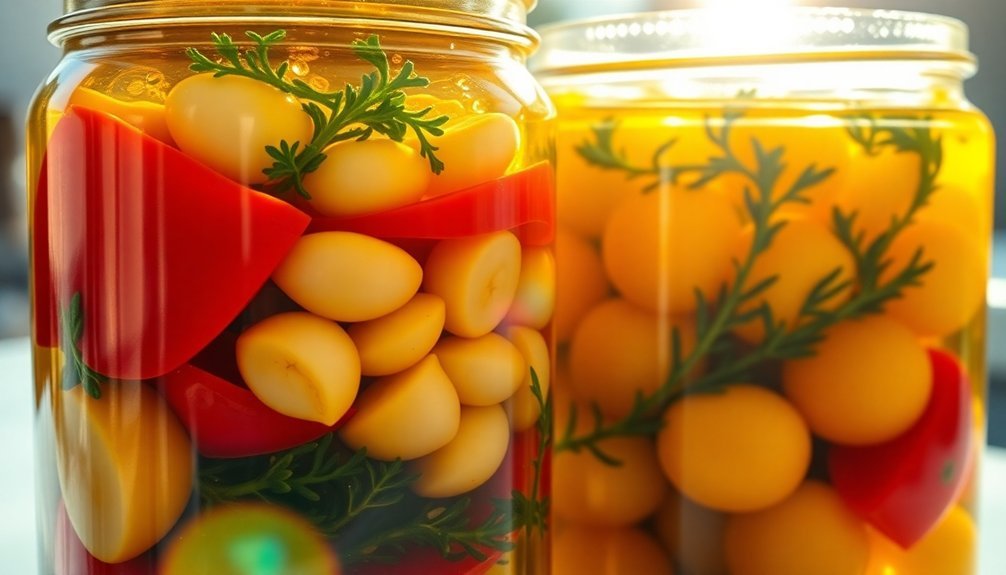
Some vegetables create stunning preserved displays:
- Colorful layers of red and yellow bell peppers
- Deep purple strips of roasted eggplant
- Golden-brown mushrooms with sprigs of thyme
- Vibrant green beans nestled among garlic cloves
Not all vegetables are suitable for oil preservation. Avoid potatoes, onions, sweet corn, and winter squash – these are better stored using traditional methods.
When selecting your produce, choose vegetables at their peak season, and make certain they're free from blemishes or soft spots. You'll get the best results by combining complementary flavors and textures in your preserved mixtures.
Preparing Your Vegetables
Before you begin preserving your vegetables in oil, you'll need to thoroughly clean and cut them into uniform pieces.
Next, cook your vegetables until they're just tender using your preferred method – roasting, grilling, or blanching depending on the type.
Once cooked, let your vegetables cool completely before adding them to your marinade to guarantee the best preservation results.
Clean and Cut First
Proper preparation of your vegetables serves as the foundation for successful oil preservation. You'll want to select fresh, firm vegetables that are ideal for oil preservation, such as beets, tomatoes, zucchini, peppers, and eggplant. Make certain they're free from any signs of spoilage and aren't overly ripe.
Start by thoroughly washing your vegetables under cold running water to remove dirt, debris, and pesticides. You'll need to peel certain vegetables like beets and potatoes, while others may only require trimming. Remove seeds, cores, and any damaged parts that could lead to spoilage during preservation.
When it comes to cutting, consistency is key. Use sharp knives to create clean, uniform pieces that will preserve and cook evenly. Here's what proper cutting looks like:
- Peppers sliced into long, colorful strips
- Eggplant cut into thick, moon-shaped crescents
- Mushrooms quartered or halved, depending on size
- Green beans trimmed at both ends, left whole
Remember to maximize surface area for better marinade absorption, and ascertain all cuts are smooth to prevent bacterial growth.
Keep your workspace clean and organized throughout the preparation process.
Cook Until Just Tender
Getting your vegetables to the perfect tenderness sets the stage for successful oil preservation. You'll need to choose from several effective cooking methods, including roasting at 350°F, grilling until lightly charred, steaming, blanching, or slow-roasting in olive oil. Each method helps maintain the vegetable's integrity while ensuring proper texture for preservation.
Your cooking times will vary considerably based on the vegetable type. When roasting, beets require 45-60 minutes, while zucchini and summer squash need just 20-30 minutes. Eggplant and peppers take 30-40 minutes, and mushrooms cook in 15-30 minutes. For blanching green beans, you'll only need 3-5 minutes.
To achieve ideal tenderness, you'll want to monitor your vegetables closely during cooking. Cover your baking dish with foil to maintain moisture, and test doneness by inserting a fork – it should meet slight resistance but enter easily.
Once cooked, let your vegetables stand for 15 minutes before adding marinade. You'll need to submerge them completely in the remaining oil and vinegar mixture, remove any air bubbles, and add your chosen flavorings. Don't forget to refrigerate immediately after marinating.
Cool Before Marinating
Safety demands that your cooked vegetables cool completely to room temperature before marinating. This essential step prevents bacterial growth and unwanted condensation in your storage jars.
You'll need to spread your vegetables in a single layer on a wire rack or tray, allowing proper air circulation around each piece. Don't rush this process by sealing warm vegetables in containers, as trapped heat can create ideal conditions for harmful microorganisms.
While your vegetables are cooling, you'll notice these visual indicators of readiness:
- No visible steam rising from the vegetables
- Surface feels cool to the touch, not warm
- Colors appear vibrant and settled
- Texture is firm but tender, not mushy
Once cooled, you can safely proceed with the marinating process. Remember that any moisture trapped in warm vegetables can dilute your oil-based marinade and compromise preservation.
If you're planning to add raw ingredients like garlic or fresh herbs, you'll need to adjust your storage timeline. For long-term storage, either cook these additions beforehand or omit them entirely. This guarantees your preserved vegetables remain safe and flavorful throughout their shelf life.
Oil and Marinade Basics
The fundamental combination of oil and vinegar creates the perfect preservation medium for garden vegetables.
You'll want to maintain a ratio of 2 parts olive oil to 1 part vinegar for your marinade, ensuring the acidic component prevents harmful bacteria growth. You can choose from various vinegars, including balsamic, white, apple cider, or red wine vinegar.
Select your vegetables carefully – beets, tomatoes, zucchini, eggplant, peppers, and mushrooms work exceptionally well.
You'll need to prepare them properly before marinating: slow-roast them in olive oil, grill, or steam until tender. For beets, roast at 400°F with rosemary and olive oil, then peel and slice after cooling.
Enhance your marinade's flavor by adding garlic, lemon zest, fresh chilies, shallots, and herb sprigs like rosemary, thyme, and sage.
You can store your marinated vegetables for up to a month in the refrigerator, ensuring they're completely covered by the marinade.
When you're ready to serve, let them sit at room temperature for 15 minutes to liquefy the oil.
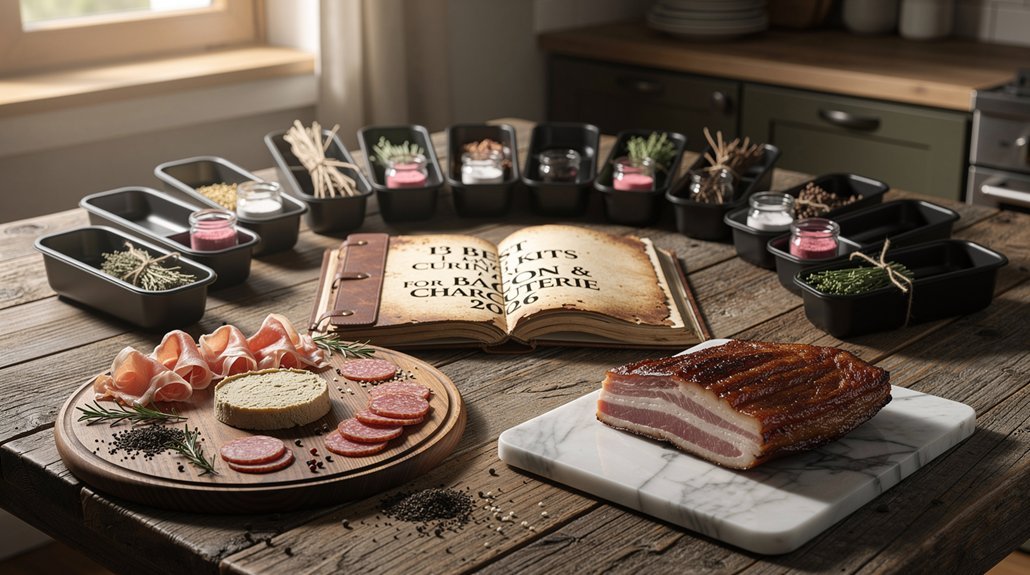
They're perfect for salads, pasta dishes, sandwiches, or charcuterie boards.
Safe Storage Methods
Proper storage methods can make the difference between safely preserved vegetables and potentially harmful food. When you're ready to store your oil-preserved vegetables, you'll need to follow specific safety guidelines to prevent bacterial growth and maintain quality.
Always refrigerate your preserved vegetables immediately after preparation, and don't keep them for more than four days before using, discarding, or freezing them. You'll need to use clean, sterile containers with tight-fitting lids, ensuring your vegetables remain completely submerged in the oil-vinegar mixture.
For successful storage, make sure you:
- Label each container with both the preparation date and use-by date
- Keep vegetables fully submerged in the oil mixture at all times
- Remove all air bubbles using a clean skewer
- Store containers in the coldest part of your refrigerator
If you're planning for long-term storage, you can freeze your preserved vegetables after the initial refrigeration period. Use airtight containers to prevent freezer burn, and remember to thaw them completely before use.
Don't worry if the olive oil hardens in the refrigerator – this actually indicates your vegetables are being stored at the proper temperature.
Signs of Spoilage

Your preserved vegetables in oil can quickly become unsafe if you don't spot spoilage signs early.
Watch for visual changes like cloudiness or darkening, and trust your nose to detect unpleasant, rancid, or paint-like odors that signal deterioration.
Before consuming, you'll want to perform a quick safety test by checking the texture for sliminess, ensuring there's no foamy film on top, and verifying that the oil hasn't become unusually thick.
Physical Changes to Watch
Successful preservation in oil requires vigilant monitoring of physical changes that signal spoilage. You'll want to regularly inspect your preserved vegetables and the surrounding oil for any concerning alterations in appearance, texture, or consistency.
When examining your preserves, look for obvious changes that deviate from the oil's original state.
Watch for these critical indicators:
- A cloudy or murky appearance instead of the clear, translucent quality your oil had when fresh
- Unnatural color changes, particularly darkening or the development of unusual hues
- Formation of foam or a slimy film on the oil's surface
- Visible separation into distinct layers or settlement at the bottom
If you notice the oil becoming thicker or developing a grainy consistency, these are red flags that shouldn't be ignored.
Pay special attention to any sediment accumulation or small deposits forming either on the surface or at the container's bottom.
When you're checking the texture, the oil shouldn't feel slimy or abnormally viscous to the touch.
Remember that any significant departure from the oil's initial appearance or texture warrants immediate disposal of the entire preserved batch.
Smell and Taste Warning
A trained nose and palate serve as your first line of defense against spoiled preserved vegetables in oil. When checking your preserved vegetables, you'll want to detect any unpleasant odors like sour, musty, or rancid smells that indicate spoilage. Pay special attention to oils that haven't been used frequently or those stored near strong-smelling foods.
Your taste buds can also alert you to spoilage. If you notice bitter flavors, off-tastes, or significant changes from the original flavor profile, don't use the preserved vegetables. When both smell and taste seem off, especially after exposure to sunlight or high temperatures, it's time to discard the product.
| Warning Sign | What It Means |
|---|---|
| Sour Odor | Active bacterial growth |
| Rancid Smell | Oil has oxidized |
| Bitter Taste | Chemical breakdown |
| Unusual Flavors | Cross-contamination |
Using spoiled preserved vegetables can lead to serious health concerns. You're risking exposure to harmful compounds like free radicals, and regular consumption of deteriorated products may cause foodborne illnesses. Don't take chances with your health – when in doubt, throw it out.
Safety Testing Methods
Beyond smell and taste tests, effective safety testing starts with a thorough visual inspection of your preserved vegetables in oil. Hold the jar up to natural light and examine the contents carefully. You'll want to check for any cloudiness, unusual color changes, or sediment accumulation at the bottom of the container.
Next, verify your storage practices to guarantee safety. Your preserved vegetables should've been kept in a cool, dark place, in tightly sealed dark glass containers. If you've stored them near strong-smelling items or heat sources, they may have deteriorated faster than expected.
For vegetables preserved in oil, watch for these vital signs of spoilage:
- Slimy or unusually thick texture on the vegetables or in the oil
- Murky appearance or unnatural darkening of the oil
- Visible particles floating or settling at the bottom
- Any signs of bubbles or fermentation
Remember that timing is essential for safety. You'll need to use homemade herb or vegetable-in-oil mixtures within 4 days unless frozen.
If you're working with low-acid vegetables like garlic or mushrooms, they must be properly acidified and refrigerated to prevent dangerous bacterial growth, particularly Clostridium botulinum.
Creative Ways to Use
Preserved vegetables in oil offer endless possibilities for elevating everyday dishes and creating memorable meals. You'll find these versatile ingredients can transform simple recipes into gourmet experiences, whether you're tossing them into salads or incorporating them into pasta dishes.
The flavored oil itself becomes a valuable ingredient in your kitchen. Use it to create flavorful vinaigrettes, enhance marinades, or drizzle over roasted vegetables. You can even incorporate it into homemade pesto for an extra depth of flavor.
| Usage Category | Quick Ideas | Advanced Applications |
|---|---|---|
| Appetizers | Bruschetta toppings, cheese boards | Complex antipasti platters, mezze spreads |
| Main Dishes | Pasta tosses, sandwiches | Mediterranean stews, gourmet pizzas |
| Condiments | Simple dips, basic dressings | Custom vinaigrettes, infused sauces |
For entertaining, your preserved vegetables can become the star of charcuterie boards or mezze platters. They're perfect for creating quick appetizers like crostini or adding to grilled cheese sandwiches. Don't forget to experiment with the oil in soups and stir-fries for an extra layer of flavor that'll make your dishes stand out.
Freezing for Extended Life

While enjoying preserved vegetables throughout the year adds versatility to your cooking, freezing offers another reliable method for extending their shelf life.
You'll get the best results by harvesting your vegetables during peak flavor times – early morning or evening – and ensuring they're free from blemishes. Don't harvest after watering or rain, as this can dilute the vegetables' natural flavors.
Most vegetables require blanching before freezing, which helps retain nutrients and texture. Simply plunge them into boiling water briefly, then immediately transfer to cold water to stop the cooking process.
However, some vegetables like peppers and herbs can skip this step, though blanching may extend their storage life.
For ideal freezing results, remember these key steps:
- Spread vegetables in a single layer on a tray to freeze individually before packaging
- Use airtight containers or freezer bags, removing as much air as possible
- Leave ½" to 1" headspace for expansion during freezing
- Label everything with contents and date
Store your frozen vegetables at 0°F or below, and they'll maintain quality for up to a year.
When cooking, use minimal water to preserve nutrients.
Frequently Asked Questions
Can I Reuse the Oil After the Vegetables Are Finished?
Yes, you can reuse the oil after eating the vegetables, but you'll need to refrigerate it promptly. Be sure it's free from food particles and hasn't turned rancid before using it again.
What Happens if Oil Solidifies in the Refrigerator?
Don't worry if your oil solidifies in the fridge – it's completely normal. When you're ready to use it, simply let it warm to room temperature or place the bottle in hot water.
Should Vegetables Be Hot or Cold When Adding the Oil?
You should let your vegetables cool before adding oil. If you add oil while they're hot, it'll affect the oil's quality and increase bacterial growth risk. Cold vegetables help maintain proper preservation.
Can I Mix Different Types of Vegetables in the Same Jar?
Yes, you can mix different vegetables in the same jar, but make certain they're all cooked and cooled first. Choose vegetables with similar water content and guarantee they're fully submerged in the oil-vinegar mixture.
Is It Necessary to Sterilize Jar Lids if Using Immediately?
Yes, you'll still need to sterilize your jar lids even for immediate use. Boil them for 5 minutes to kill bacteria and guarantee a proper seal. Unsterilized lids can lead to contamination.
In Summary
Now you're ready to preserve your garden vegetables in oil safely and creatively. You've learned proper preparation techniques, storage methods, and how to spot spoilage. Remember to always use sterile equipment and follow food safety guidelines. Whether you're storing herbs, peppers, or sun-dried tomatoes, you'll enjoy your garden's bounty year-round. Don't forget to experiment with different oil blends and marinades to create unique flavors.


Leave a Reply