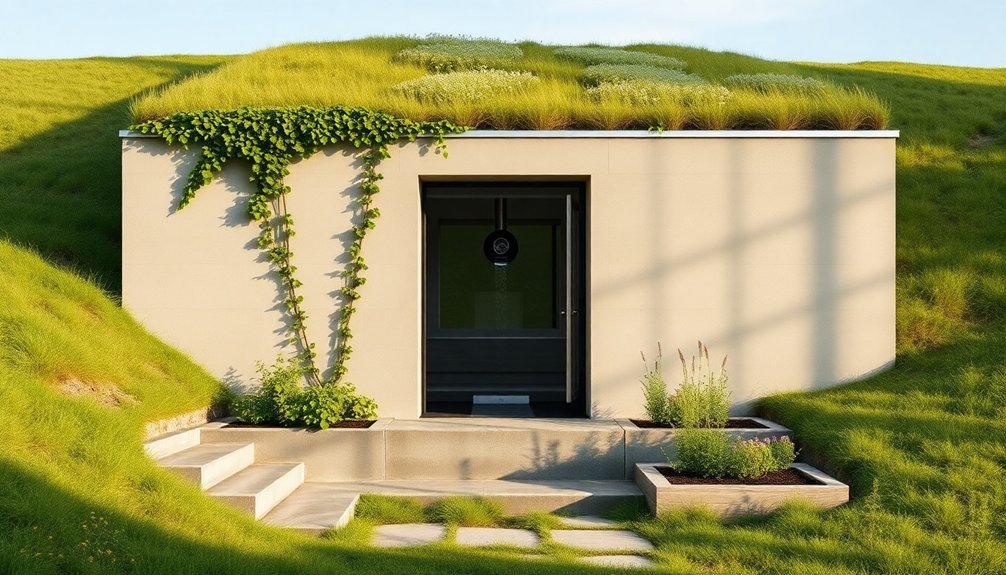
Building a spring house starts with selecting an accessible location near your water source that's protected from severe weather and has proper drainage. You'll need to test your water quality for bacteria, chemicals, and minerals before starting construction. Begin with a solid foundation using durable materials like limestone or granite, then build walls using concrete blocks or traditional stone with weather-resistant mortar. Install a balanced ventilation system and implement natural cooling through strategic positioning and thermal mass principles. Don't forget proper waterproofing with high-quality membranes and drainage systems. The success of your spring house project depends on following each essential step in the right sequence.
Selecting Your Spring House Location

Choosing the right location for your spring house comes down to balancing practical necessities with long-term sustainability. You'll need to evaluate your property's accessibility, natural environment, and safety factors before breaking ground.
First, assess your land's connection to essential infrastructure. You'll want your spring house to be easily accessible from your main residence while maintaining proximity to water sources and utility connections. Setting up near community resources can enhance your homesteading experience. Reflect on how you'll transport supplies and produce to and from the structure throughout the year.
Look for a spot that's naturally protected from severe weather patterns while taking advantage of the local climate. You'll want adequate sunlight for temperature regulation, but also sufficient shade to maintain cooler conditions inside. The location should be elevated enough to prevent flooding but not so high that it's difficult to access.
Don't forget to evaluate safety factors. Confirm the area has proper drainage, is well-lit, and remains visible from your main dwelling.
You'll also want to take into account emergency vehicle access and maintain clear pathways year-round. Check local emergency response times and verify that your chosen location won't interfere with existing utility lines.
Testing Water Source Quality
Before establishing your spring house, you'll need to thoroughly evaluate your water source's quality through extensive testing. Testing guarantees your spring water is safe for consumption and helps identify potential treatment needs. You'll want to partner with a state-certified laboratory that can provide proper sampling containers and detailed analysis of your water's characteristics.
- Start with bacteriological testing to check for total coliform, fecal coliform, and E. coli. If contamination is found, you'll need to implement corrective measures and retest until results are acceptable. A minimum yield of 2 gallons per minute is necessary to ensure adequate drinking water supply.
- Test for chemical and mineral content, including calcium, magnesium, nitrates, and heavy metals. Pay special attention to levels of arsenic, lead, and mercury, as these can be particularly harmful.
- Evaluate physical parameters like turbidity, pH, and total dissolved solids. These factors affect both water safety and aesthetic quality.
- Monitor seasonal variations by testing during both pre- and post-monsoon periods, as phosphate, ammonia, and dissolved oxygen levels can fluctuate considerably with seasonal changes.
Consider using the Water Quality Index (WQI) to get a standardized measure of your spring's overall quality, which will help you track changes over time.
Planning Foundation and Drainage
Before breaking ground on your spring house, you'll need to thoroughly assess the site's soil composition and load-bearing capacity to determine the appropriate foundation type.
Professional inspections are essential before and during foundation construction to ensure compliance with local building codes and prevent future structural issues.
You'll want to establish a robust drainage system that includes gravel-filled trenches and proper slope gradients to manage water flow away from the structure.
For the foundation itself, select materials that can withstand constant moisture exposure, such as mortarless concrete blocks or stone-filled foundation trenches, which provide both stability and natural drainage pathways.
Site Assessment Before Digging
A successful spring house project starts with a thorough site assessment. Before you break ground, you'll need to evaluate multiple factors to guarantee your spring house will be structurally sound and properly positioned. Your primary focus should be on understanding the site's natural characteristics and how they'll affect your building's longevity.
1. Check the soil composition by conducting basic tests or hiring a professional. You'll want to identify the ratio of sand, silt, and clay, as this affects drainage and foundation stability.
Don't forget to test pH levels and nutrient content, which can impact building materials over time.
2. Study the landform and topography carefully, mapping elevation changes and natural water flow patterns. You'll need this information to prevent water damage and guarantee proper drainage away from your structure.
3. Evaluate the climate patterns, particularly noting prevailing winds and seasonal changes. Understanding sun exposure and shadow patterns will help you position your spring house effectively.
4. Assess the foundation requirements by identifying stable ground areas and avoiding spots prone to flooding or erosion.
You'll need to determine appropriate foundation depth based on soil stability and frost line considerations.
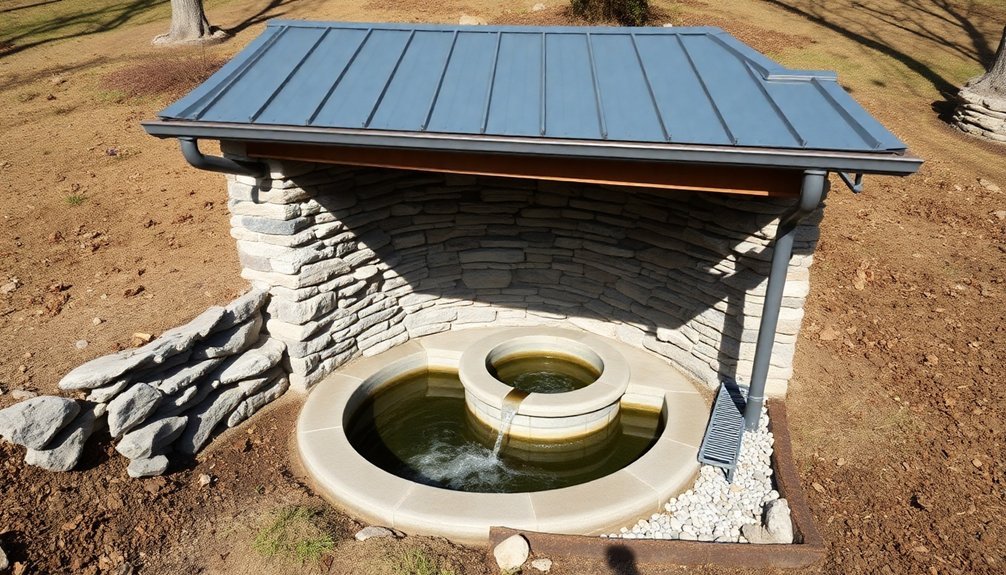
Water Flow Management Systems
With your site properly assessed, effective water flow management becomes the next major focus of your spring house project.
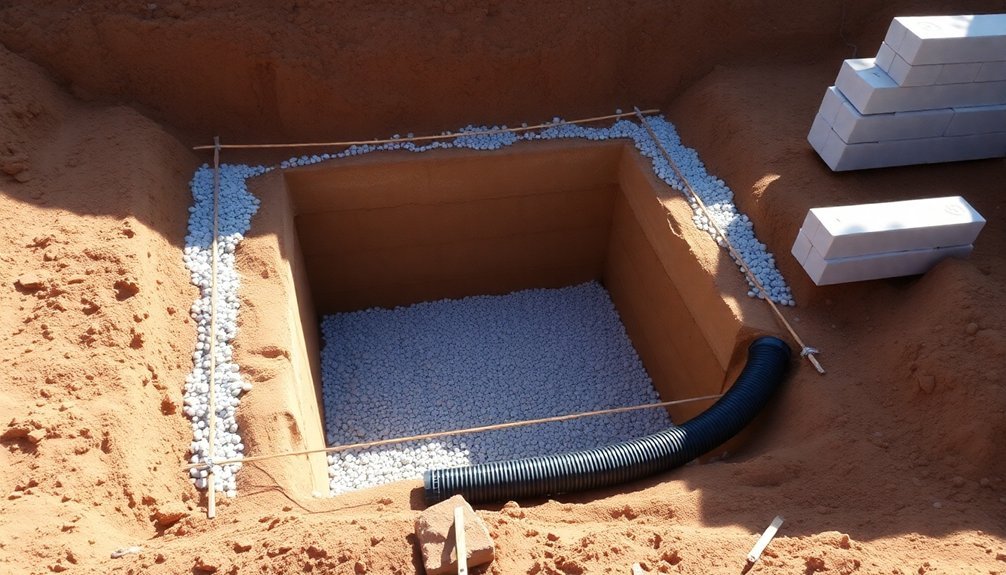
You'll need to excavate upslope from the spring discharge until you've exposed three feet of flowing water. Install a rock bed to create an interception reservoir, followed by a concrete or plastic collecting wall that directs water flow without causing backup.
Your collection system should extend 4-6 feet beyond the seepage area, connecting to a pipe that leads to your spring box. Position the box inlet below the collector tile's elevation to guarantee proper flow.
You'll want to surround the collection tile with gravel to enhance drainage and prevent clogging.
Install both overflow and outlet pipes in your spring box, making sure they're properly sized for heavy rainfall periods.
You'll need to divert surface water away from the collection area and implement a drainage system that allows for easy maintenance.
Keep the entire system at least 100 feet away from any activities that could contaminate the water supply, and fence off the area to prevent animal access.
Regular inspection of these components will guarantee your water flow management system operates efficiently.
Foundation Material Selection
Selecting the right foundation materials for your spring house requires careful consideration of both site conditions and local climate factors. For a spring house that will endure moisture exposure, you'll want to focus on materials that offer superior water resistance and structural stability while preventing water infiltration into your stored goods.
- Start with low water-cement ratio concrete for your foundation, incorporating a superplasticizer additive to minimize porosity. This creates a dense, highly resistant base that'll withstand constant moisture exposure.
- Install reinforced concrete footers below the frost line, using steel rebar for enhanced structural integrity. These footers will help distribute weight evenly and prevent settling issues.
- Consider using cinder blocks for the walls above the footers, as they're excellent for creating a stable structure that allows for proper ventilation while maintaining cool temperatures.
- Layer your foundation materials with proper drainage integration, including a capillary break layer of polyethylene and geotextile fabric, followed by compacted layers of 3/4-inch coarse aggregate and sand. This combination guarantees water moves away from your structure while maintaining foundation stability.
Your foundation's success depends on choosing materials that work together to create a moisture-resistant, stable structure that'll serve your homesteading needs for years to come.
Essential Building Materials
Your spring house's success depends on choosing the right foundation stones and base materials, with limestone and granite offering excellent durability for ground-level construction.
For the walls, you'll want to use a combination of concrete blocks, natural stone, or brick to guarantee proper insulation and moisture control.
The roof structure requires weather-resistant materials like metal or asphalt shingles, while timber elements can be incorporated for doors, shelving, and decorative features.
Foundation and Base Stones
A solid foundation forms the literal bedrock of any successful spring house project. You'll need to choose between three main foundation types: slab-on-grade for level ground, crawl space for easy utility access, or full basement for maximum functionality.
Each option requires careful evaluation of drainage systems and moisture barriers to protect your structure.
When selecting base materials for your spring house, you'll want to reflect on both durability and local availability. Traditional stone offers excellent insulation and temperature regulation, while concrete blocks provide modern convenience and stability.
Here's what you need to know about choosing your foundation and base materials:
- If you're building into a hillside, opt for stone walls 1-2 feet thick to maximize natural insulation and temperature control.
- Contemplate urbanite (recycled concrete) as an eco-friendly alternative that's both free and durable.
- Install a proper drainage system with perforated pipes and coarse aggregate, regardless of your foundation type.
- Verify your chosen base material can support adequate moisture barriers and ventilation systems.
Remember to slope the ground away from your structure and incorporate appropriate waterproofing measures to protect your investment for years to come.
Wall Construction Materials
In accordance with modern homesteading principles, wall construction materials must balance durability, insulation, and moisture control.
You'll want to focus on time-tested materials like concrete blocks, stone, or brick, which provide excellent structural integrity while managing temperature and moisture effectively.
For your spring house walls, you'll need to incorporate proper insulation and moisture barriers.
Consider using plastic barriers beneath concrete slabs and weather-resistant coatings on exterior surfaces. You can add parging to smooth out wall surfaces and apply sealants to fill any gaps, guaranteeing your structure remains weather-tight and well-insulated.
When selecting materials, prioritize local sources to reduce costs and support your community's economy.
You'll find that traditional materials like stone or brick, while initially more expensive, offer superior long-term value through their durability and low maintenance requirements.
If you're working with a tighter budget, concrete blocks provide a cost-effective alternative without sacrificing quality.
Remember to layer your wall construction with appropriate moisture control elements.
You'll need to install proper vapor barriers and guarantee adequate ventilation to prevent dampness from compromising your spring house's functionality.
Roofing and Timber Options
Moving upward from the walls, selecting the right roofing materials will determine your spring house's longevity and energy efficiency. You'll find various options that balance durability, sustainability, and cost-effectiveness.
While asphalt shingles offer an affordable starting point, consider innovative alternatives like solar shingles or synthetic slate tiles that provide additional benefits beyond basic protection.
For modern homesteading, you'll want to focus on materials that complement your self-sufficient lifestyle. Cool roofs and green roofing systems can greatly reduce your energy consumption while creating a more sustainable living environment.
- Choose self-healing shingles if you're looking to minimize maintenance – their advanced thermoplastic composition repairs minor damage automatically under sunlight.
- Consider metal roofing for maximum longevity and energy efficiency, despite higher upfront costs.
- Explore eco-friendly options like green roofs if you're interested in creating wildlife habitats and reducing stormwater runoff.
- Select appropriate timber supports, such as traditional lumber or innovative T-studs, to guarantee proper structural integrity.
Remember that your roofing choice impacts both immediate comfort and long-term sustainability, so consider factors like local climate, maintenance requirements, and energy efficiency when making your decision.
Natural Cooling System Design

Designing an effective natural cooling system starts with understanding how air, water, and earth work together in harmony. You'll need to position your spring house to capture prevailing winds and utilize the natural cooling properties of underground springs.
Start by orienting windows and doors to maximize cross-ventilation, placing larger openings on the windward side and smaller exits on the leeward side. Install screens on all openings to maintain airflow while keeping insects out. Create high windows or vents to leverage the stack effect, allowing hot air to escape naturally.
| Element | Function | Implementation |
|---|---|---|
| Air | Cross-ventilation | Strategic window placement |
| Water | Natural cooling | Spring proximity and circulation |
| Earth | Thermal mass | Hillside integration or stone walls |
Build your structure into a hillside if possible, using the earth's constant temperature to your advantage. Position the building near a natural spring, allowing its cooling properties to regulate interior temperatures. Use thick stone or concrete walls to absorb heat during the day and release it at night. You'll save considerably on energy costs by incorporating these passive cooling strategies during the initial design phase rather than retrofitting later.
Wall Construction Methods
When you're building your spring house walls with stone, start by laying the largest stones at the base and work your way up in gradually decreasing sizes to create a stable structure.
You'll want to choose a weather-resistant mortar mix that includes portland cement, hydrated lime, and clean sand in a 1:1:6 ratio for ideal durability in damp conditions.
Make sure you're staggering the joints between stones and filling all gaps completely with mortar to prevent water infiltration and maintain the wall's structural integrity.
Stone Layering Techniques
A successful stone wall begins with meticulous layering techniques that guarantee both stability and longevity.
You'll need to start by establishing a solid foundation, digging below the frost line and creating a properly compacted base of ¾-inch stone layers. Once your foundation's ready, focus on setting your cornerstone markers and working inward with face stones along both sides.
When building up your wall, you'll want to follow these essential layering principles:
- Stagger all vertical joints between stones, ensuring each stone bridges two stones beneath it, much like building with brick.
- Place stones in their natural position, fitting them together like puzzle pieces while maintaining level tops across each course.
- Build the entire wall length simultaneously, maintaining consistent height and applying mortar between courses for traditional walls.
- Create a slight backward lean (batter) of 9-15 degrees, depending on wall height, to enhance stability.
For the finishing touches, install flat capstones with a slight overhang to direct water away from the wall.
If you're building a retaining wall, don't forget to incorporate weep holes for proper drainage throughout the structure.
Weather-Resistant Mortar Selection
Because spring house walls face constant moisture exposure, selecting the right weather-resistant mortar plays an essential role in your structure's longevity. For your spring house project, you'll want to use Type S mortar, which offers superior weather resistance and a high compressive strength of 1,800 psi. Mix it using two parts cement, one part lime, and nine parts sand to achieve ideal durability.
To enhance your spring house's water resistance, consider using SPEC MIX IWR mortar, which considerably reduces water penetration and efflorescence. This specialized mortar has demonstrated impressive performance in wind-driven rain tests, showing no signs of dampness or water penetration.
You'll benefit from its 7-day compressive strength of 1,600 psi, which increases to 2,040 psi after 28 days.
When you're applying the mortar, you'll notice improved workability since the materials are preblended. The IWR mortar's compatibility with water-repellent masonry units makes it particularly suitable for spring house construction.
Its flexural bond strength exceeds standard mortars with liquid admixtures by 40%, ensuring your walls remain sturdy and water-resistant in high-moisture conditions.
Storage Layout and Organization
Planning out an effective storage layout can transform your spring house from cluttered chaos into a well-organized homesteading hub. You'll want to maximize every inch of space while keeping your preserved foods, supplies, and equipment easily accessible.
Start by categorizing your storage needs and implementing custom solutions that work with your spring house's natural flow.
To create an efficient storage system, follow these key steps:
- Install adjustable shelving units along the walls, using standardized containers to store dry goods and preserved foods uniformly.
- Utilize vertical space by adding built-in cabinetry from floor to ceiling, incorporating labels for quick identification.
- Convert unused corners into storage areas with custom-designed solutions, such as pull-out bins or rotating shelves.
- Create designated zones for different categories of items, keeping similar products together.
Don't overlook unconventional storage opportunities in your spring house. The space above cabinets can house lesser-used items, while under-bench storage can accommodate seasonal equipment.
Remember to maintain proper temperature and humidity levels in all storage areas to preserve your goods effectively. Regular organization and maintenance of your storage system will guarantee your spring house remains functional year-round.
Ventilation and Air Flow
The proper ventilation system in your spring house plays an essential role in maintaining food preservation and preventing moisture-related issues.
You'll need to implement a balanced ventilation system that manages both incoming fresh air and outgoing stale air effectively while maintaining consistent temperatures.
Install demand-controlled exhaust fans (80 CFM) near moisture-prone areas, and position supply vents at least 6 inches above grade to prevent contamination.
Make certain you're placing air intakes at least 10 feet away from potential contaminant sources and above snow or flood lines.
You'll want to integrate motorized dampers with quiet, no-leak seals to control unwanted air and humidity effectively.
For peak performance, consider installing a heat recovery ventilation (HRV) system if you're in a colder climate, as it'll help conserve energy by recovering heat from exhaust air.
If you're in a warm, humid climate, opt for an energy recovery ventilator (ERV) instead.
Don't forget to include pressure relief mechanisms like undercut doors or jumper ducts to guarantee proper airflow throughout your spring house.
Balance your airflows using dampers, and verify that pressure differences across closed doors remain below three pascals.
Waterproofing Your Spring House
Keeping water out of your spring house requires a detailed approach to waterproofing from both inside and out. You'll need to implement multiple waterproofing methods to guarantee your structure remains dry and functional throughout the seasons.
Start with exterior waterproofing by applying high-quality membranes made from polymer-modified or rubberized asphalt to create a protective barrier against moisture infiltration.
For interior protection, install a thorough drainage system and apply cementitious waterproofing coatings to your walls and floor. Don't forget to add a vapor barrier to prevent ground moisture from rising up through the foundation.
Here's your essential waterproofing checklist:
- Excavate around the foundation and apply external waterproofing membranes, ensuring proper grading slopes away from the structure.
- Install interior French drains with gravel beds and perforated pipes to collect and redirect water effectively.
- Apply cementitious waterproofing coatings to interior surfaces and seal all cracks or gaps around windows and doors.
- Set up a smart sump pump system with sensors for automated water management and monitoring.
Remember to maintain your drainage systems regularly by clearing debris from window wells and storm drains to prevent water accumulation around your spring house.
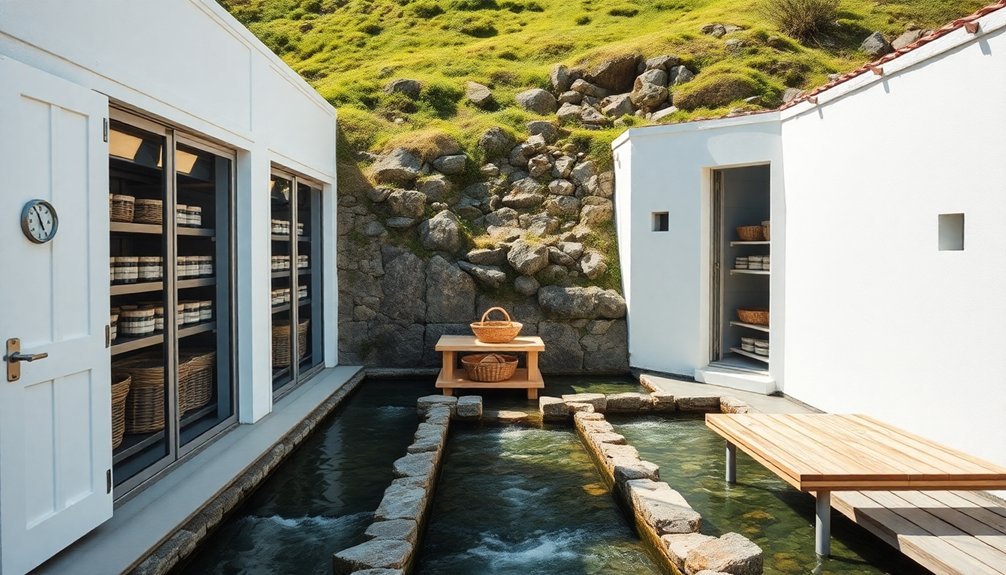
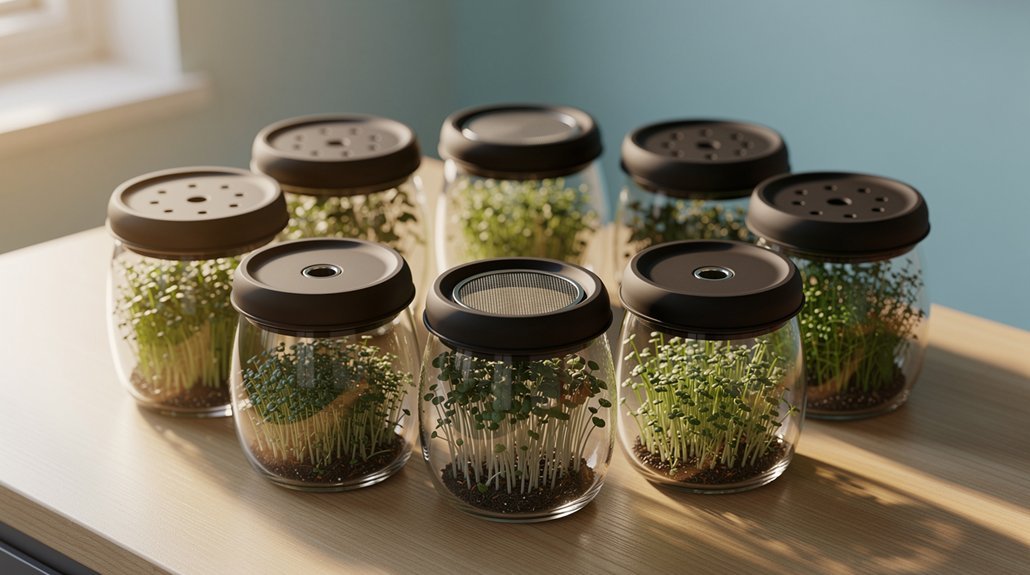
Food Preservation Zones
Organizing your spring house into distinct food preservation zones maximizes its functionality and assures ideal storage conditions for different types of goods.
Start by designating a cool storage area that maintains temperatures in the mid-50°F range, using stone-lined channels and natural earth insulation. You'll want to install sturdy shelving for milk pans and hooks on the rafters for hanging meat and dairy containers.
Set up your dairy processing zone near the water source, where you'll handle milk cooling, churning, and butter preparation. Include dedicated shelving for the creaming process and ascertain there's adequate workspace for these essential tasks.
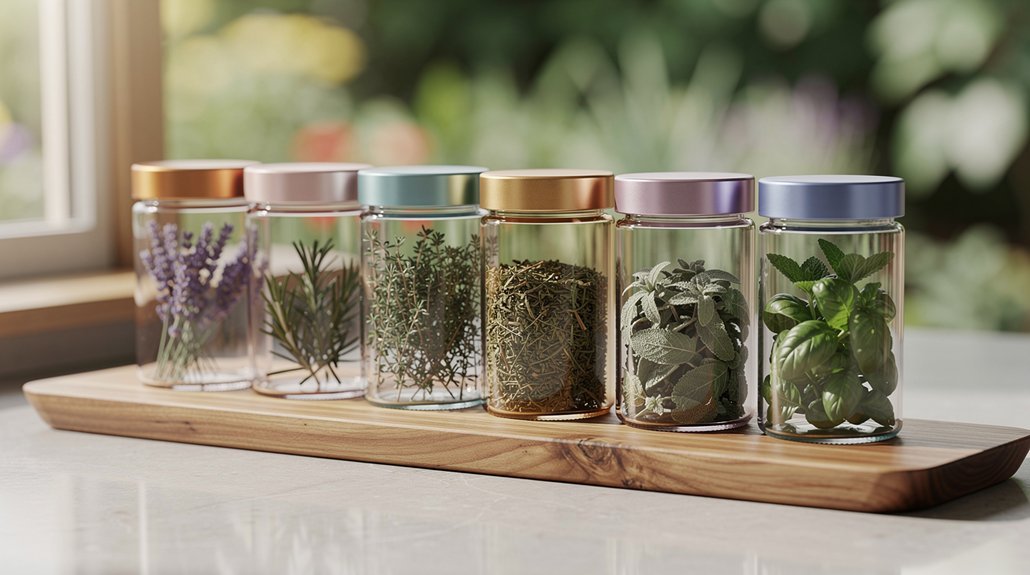
In the fermentation and pickling area, arrange space for your mason jars, crocks, and containers used in preserving vegetables and fruits through fermentation or vinegar-based pickling.
Establish a general food storage zone with varied storage solutions – shelves for canned goods, hooks for hanging items, and designated areas for root vegetables in damp sand.
You'll want to position this zone away from direct water flow while maintaining the cool environment. Incorporate built-in shelving and organize items based on preservation method and frequency of access.
Seasonal Maintenance Schedule

Maintaining your spring house throughout the year requires a well-planned schedule that aligns with nature's rhythms. Your spring house's longevity depends on consistent attention to interior, exterior, and system maintenance tasks that protect your investment and guarantee peak functionality.
1. Start each spring by inspecting your HVAC system and changing air filters to maintain efficient air circulation.
Check window screens for damage, and examine your basement and crawl spaces for moisture issues that could lead to costly repairs.
2. Don't neglect your spring house's exterior. Clear gutters and downspouts of debris, trim trees and shrubs that could damage siding or windows, and inspect wooden decks and railings for rot.
You'll want to pressure wash outdoor surfaces to prevent mold growth.
3. Pay special attention to your water systems. Test all exterior faucets, inspect the irrigation system, and verify your sump pump's functionality.
Check the water main shutoff valve and look for leaks around plumbing fixtures.
4. Make safety your priority by regularly inspecting the roof for storm damage, checking fire extinguishers, and examining the foundation for cracks.
Don't forget to clean your dryer vent to prevent fire hazards.
Frequently Asked Questions
How Long Does It Take to Build a Spring House From Start to Finish?
You'll need 7-11 months to build a spring house, accounting for weather, permits, and site preparation. Your location matters – it's faster in the South and slower in the Northeast due to seasonal variations.
Can a Spring House Be Converted Into a Guest Cabin Later?
Yes, you can convert your spring house into a guest cabin! You'll need to assess the structure, upgrade utilities, add insulation, and obtain proper permits. The existing foundation and walls provide a great starting point.
What Permits Are Typically Required Before Building a Spring House?
You'll need building permits, zoning approvals, access permits for heavy equipment, and environmental clearances. Don't forget to obtain specialized permits for electrical and plumbing work if you're planning those installations.
How Much Does It Cost to Build an Average-Sized Spring House?
You'll typically spend between $15,000 to $30,000 to build a 150-200 square foot spring house at average construction rates of $100-$150 per square foot, plus permit fees and material costs.
Can Solar Panels Be Integrated Into a Traditional Spring House Design?
Yes, you can integrate solar panels into your spring house design. They'll work best on south-facing roofs, and you can use sleek, low-profile panels to maintain traditional aesthetics while generating power for your needs.
In Summary
Building your own spring house isn't just about creating storage – it's about connecting to a time-honored tradition of natural food preservation. With careful planning and regular maintenance, you'll have a sustainable cooling system that doesn't rely on electricity. Remember to monitor water quality, check seals, and adjust ventilation seasonally. You've now got the knowledge to build a modern spring house that'll serve your homestead for years to come.

Leave a Reply