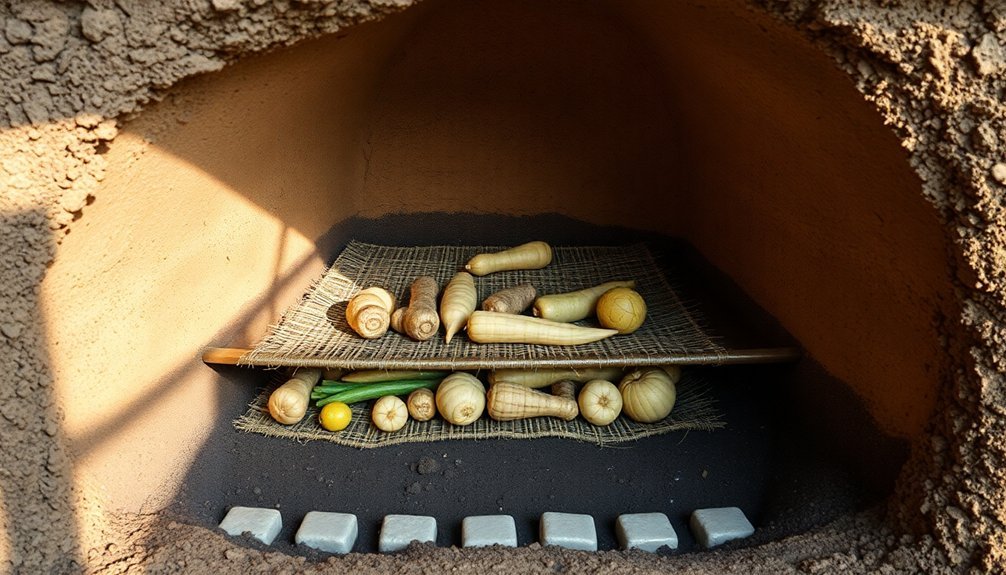
Underground food pits last for decades because they tap into nature's own preservation methods. You'll find these pits work through a combination of steady cool temperatures, limited oxygen exposure, and controlled moisture levels. Ancient builders used smart material choices like clay-rich soil and stone slabs to create stable, water-resistant structures that could withstand time and pressure. They enhanced preservation further by incorporating natural sealing techniques and strategic drainage systems. When you construct them properly with flared walls, proper ventilation, and regular maintenance, these pits can preserve food for generations. Understanding these time-tested principles opens up a world of sustainable food storage possibilities.
Ancient Engineering Wisdom

Early civilizations mastered food preservation through ingenious engineering methods that we still learn from today. You'll find that these ancient societies understood the critical balance between environmental factors and food storage, particularly in their development of underground storage pits.
When you examine their techniques, you'll notice they didn't rely on a single preservation method but combined several approaches. They'd dig deep pits that naturally maintained cooler temperatures, similar to modern root cellars. These underground chambers worked like natural refrigerators, keeping food at consistently low temperatures while blocking out oxygen. Ancient cultures like the Romans and medievals relied heavily on these preservation methods.
You can see this wisdom in how they often lined these pits with materials that created acidic environments, much like the preservative effects found in peat bogs.
What's remarkable is how they'd integrate other preservation methods into these underground systems. They'd often smoke or dry food before storing it underground, creating multiple barriers against spoilage.
The engineering behind these pits wasn't just about digging holes – it was about understanding air flow, moisture control, and temperature regulation. These structures proved so effective that they could preserve food for months or even years, demonstrating an impressive grasp of preservation science.
Location Selection Secrets
Building effective underground food storage isn't just about the pit's construction – selecting the right location can make or break your storage system.
You'll need to focus on elevation, soil conditions, and accessibility to create a lasting storage solution.
Choose a site at the highest point in your local landscape to guarantee water flows away rather than seeping into your pit. You'll want slightly elevated ground with good drainage, particularly in sandy soil areas.
The soil type is essential – clay or conglomerate soil offers ideal stability and water-shedding capabilities, allowing for nearly vertical pit sides without collapse. Long-keeping vegetables can be stored effectively in these conditions, particularly when using the trench silo method.
You'll need to guarantee year-round vehicle access to your pit while maintaining distance from other storage pits to prevent water seepage between them. Place your pit near grain production areas, but don't compromise on the "high and dry" requirement.
Remember to mark your pit's location with stakes, especially if you're in an area that experiences snow.
Don't overlook environmental factors – avoid areas near pine forests or places with extensive tree root systems that could pose fire risks.
The site you select should accommodate local weather patterns and climate conditions while minimizing environmental impact during construction and use.
Essential Construction Materials
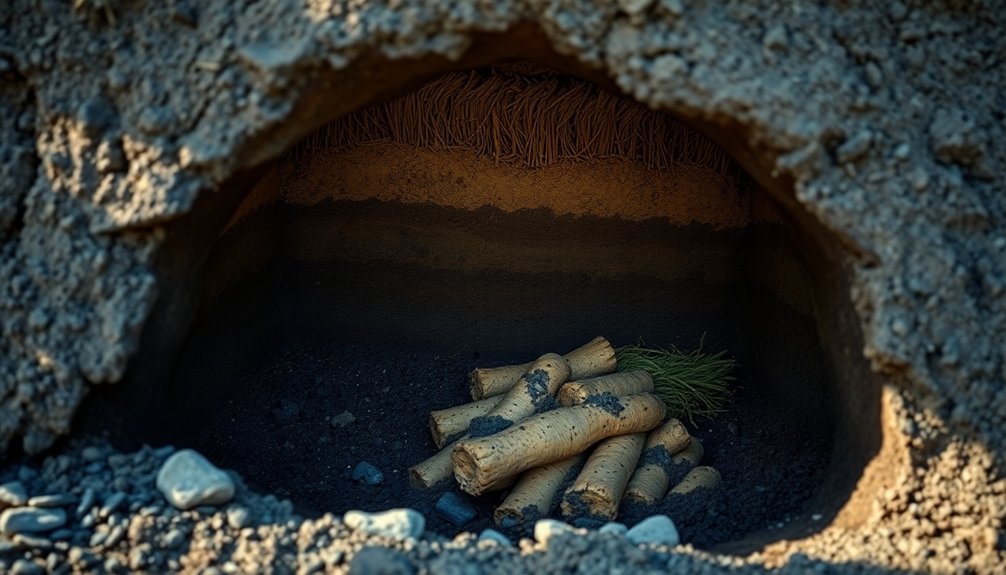
You'll need sturdy stones and rock slabs for building a reliable underground food pit that can withstand soil pressure and prevent collapse.
Place your rocks in loosened bottom soil to create a stable foundation that won't shift over time.
Natural sealing materials like packed earth and sand help create an airtight environment that preserves your stored food while regulating moisture levels.
To protect against weather damage, you should line your pit with water-resistant materials such as flat rocks or cinder blocks, ensuring proper drainage and long-term durability.
Stone For Structural Support
Deep beneath the earth's surface, stone materials serve as the backbone of underground food storage pits, providing essential structural integrity and thermal benefits.
You'll find that stones and rocks, often sourced directly from the excavation process or nearby areas, create a robust framework that can withstand significant pressure from surrounding soil while maintaining structural stability for decades.
When you're constructing an underground food pit, stone's remarkable thermal properties work to your advantage. The high thermal mass helps regulate internal temperatures, creating an ideal environment for food preservation.
You'll notice that as you dig deeper, the combination of soil and stone layers naturally contributes to temperature stabilization, reducing the need for artificial cooling systems.
- Stone walls can effectively resist moisture infiltration, protecting your stored food from dampness
- The material's durability means you won't need frequent repairs or maintenance
- Natural stone's thermal properties help maintain consistent temperatures year-round
- Local availability makes stone a practical choice for construction in most regions
The combination of stone with other materials like clay enhances the structure's overall durability, ensuring your underground food pit remains functional for generations to come.
Natural Sealing Materials
While stone provides structural support, natural sealing materials form the protective barrier that keeps your underground food pit secure and functional. Clay stands out as your primary sealant, offering excellent impermeability that blocks unwanted insects and rodents. You'll find it's easy to obtain and work with, making it an ideal choice for sealing your pit's walls and floor.
Natural materials like clay and straw work together to maintain the high humidity levels your stored produce needs. These materials create an environment that promotes proper wound healing in root vegetables through the formation of protective barriers. You'll notice this especially in crops like malanga, which naturally forms cork cells to prevent water loss.
When you're sealing your pit, you'll want to combine these natural materials strategically. The clay provides waterproofing and pest resistance, while organic materials help regulate moisture.
Your stored produce will develop suberized cell layers and phellem, natural protective mechanisms that help heal cuts and prevent dehydration. This combination of sealing materials doesn't just protect your food – it creates the perfect environment for long-term storage by working with your produce's natural preservation processes.
Weather-Resistant Pit Linings
Selecting the right weather-resistant pit lining is essential for maintaining a reliable underground food storage system. You'll want to focus on materials that offer both durability and chemical resistance, particularly HDPE and polypropylene, which can last up to 40 years with proper installation. These materials provide excellent protection against moisture, temperature fluctuations, and ground chemicals that could compromise your food storage.
When installing your pit lining, you'll need to prepare the sub-grade carefully to prevent damage to the material. The liner should be at least 60 mil (1.5 mm) thick for peak performance, and you might consider adding a secondary waterproofing layer using expanding bentonite clay.
- HDPE offers superior tensile strength and UV resistance, making it ideal for long-term underground storage.
- Polypropylene provides excellent chemical resistance and can withstand various environmental conditions.
- Reinforced LLDPE with tri-directional grids gives enhanced puncture and tear resistance.
- Multiple layers, including a non-woven geotextile base, create a more reliable barrier system.
For the best results, you'll need to guarantee proper installation with no wrinkles or folds, and select materials that comply with local environmental regulations. Regular maintenance checks will help extend your pit lining's lifespan.
Ground Preparation Steps
You'll need to select a soil type that drains well and isn't too rocky, as clayey or excessively sandy soils can compromise your pit's stability.
Start by testing your chosen location's drainage by digging a small test hole and filling it with water to see how quickly it drains.
Once you've confirmed suitable soil conditions, install a layer of gravel or crushed stone at the bottom of your pit to create proper drainage and prevent water accumulation.
Soil Type Selection
Before digging your underground food pit, proper soil type selection is vital for long-term success. You'll need to reflect on infiltration rates, stability, moisture retention, and ground conditions to guarantee your pit remains functional for decades. Sandy soils offer excellent drainage but might require additional structural support, while clay soils provide stability but can create moisture problems.
You should conduct soil borings or test pits to determine your site's infiltration capacity and avoid costly surprises during construction. Don't forget to check the depth to groundwater and bedrock, as these factors will influence your pit's design and placement. It's important to dig below the frost line to protect your structure from freezing damage.
Key soil characteristics to evaluate:
- Infiltration rate and drainage capacity to prevent water accumulation
- Structural stability to prevent cave-ins and maintain pit integrity
- Natural moisture retention for ideal food preservation conditions
- Temperature consistency throughout seasonal changes
Reflect that stable soil temperatures and appropriate moisture levels are vital for food storage.
You'll want to avoid areas with excessive wetness or peat soils, as they can compromise both the structure and stored contents. Rocky terrain may require specialized equipment but often provides excellent stability for long-term storage.
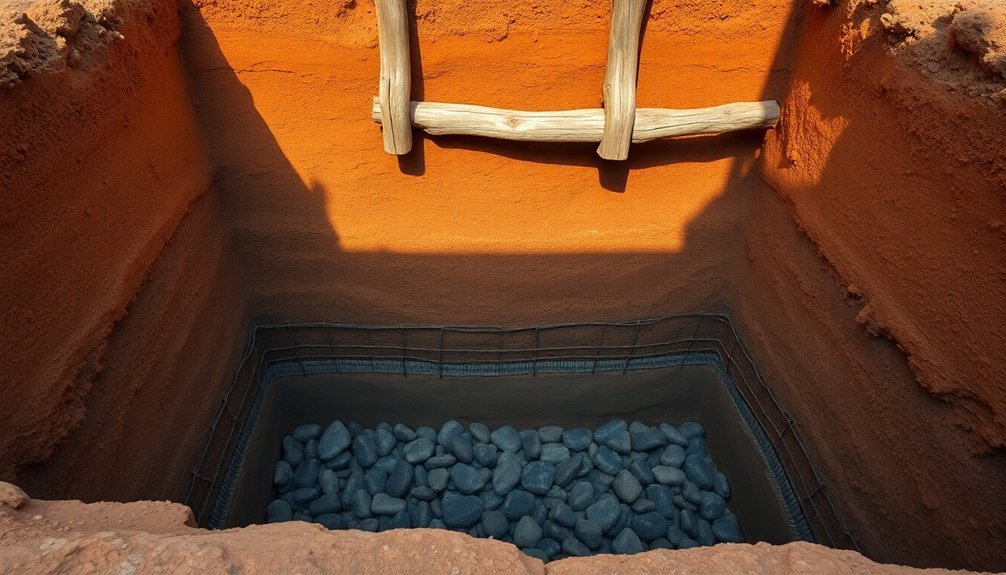
Drainage Layer Installation
Along the path to creating an effective underground food pit, proper drainage layer installation forms the foundation of your storage system.
You'll need to dig a trench approximately 3-4 feet deep, ensuring the walls remain stable to prevent collapse. Map out your drainage path using marking flags, following the natural slope of the terrain to direct water away from your storage area.
Start by laying a 2-3 inch base layer of washed gravel at the bottom of your trench. Install a 4-6 inch perforated drain pipe, positioning it centrally and maintaining a slight downward slope for ideal water flow. If you're connecting multiple sections, use T or Y connectors to join the pipes effectively.
Don't forget to cap the uphill end to prevent debris from entering the system. Cover the pipe with additional gravel, ensuring it's evenly distributed around all sides. This layer serves dual purposes: it promotes water flow and prevents soil from clogging the pipe's perforations.
In areas with less permeable soil, you'll want to use washed sand or smaller diameter gravel for the backfill. Complete the installation by tamping down the soil firmly but carefully to prevent future settling.
Moisture Control Methods
Effective moisture control stands as a critical factor in maintaining a successful underground food pit. You'll need to implement both active and passive measures to keep your stored food safe from moisture damage.
Start with exterior waterproofing by applying water barriers to the outside walls and installing French drains to divert groundwater. Inside, coat the walls with waterproof materials like DryLok and lay plastic sheeting over gravel floors.
To maintain ideal moisture levels, you'll want to:
- Use dehumidifiers during humid seasons and monitor relative humidity levels with hygrometers to keep the environment between 30-40%
- Install proper ventilation systems to prevent mold growth and remove ethylene gas while avoiding warm air introduction
- Apply moisture-resistant packaging and oxygen absorbers to protect stored foods
- Integrate rain gutters on the topside structure to reduce soil moisture around the pit walls
Regular monitoring with thermometers and humidity gauges helps you adjust ventilation as needed.
Don't forget to leave doors open periodically and use fans to remove existing moisture. Through consistent moisture control, you'll create an environment that preserves your stored food for decades.
Temperature Regulation Techniques
Managing ideal temperatures in underground food pits requires a thorough approach to sealing, insulation, and airflow control. You'll need to seal the edges and top of your pit thoroughly, using soil as insulation to prevent heat from escaping.
It's essential to eliminate any gaps where smoke might randomly escape, as these can cause inconsistent cooking temperatures.
To maintain steady temperatures, you'll want to control airflow precisely. Make sure air moves consistently through the pit and exits via the smoke stack. You can adjust the stack opening to optimize smoke flow, and in windy conditions, you might need to use rocks to manage airflow effectively.
When it comes to fuel, you'll need to maintain a consistent heat source using a combination of coals and wood. Soaking wood chips overnight helps create the smoldering smoke you're looking for.
For long-term temperature control, you'll need to regularly check your pit's sealing and insulation. Clear out ashes and debris after each use, and monitor temperature changes carefully when adding or removing food.
Consider adding separate sections for coals and meat to improve your cooking efficiency and temperature management.
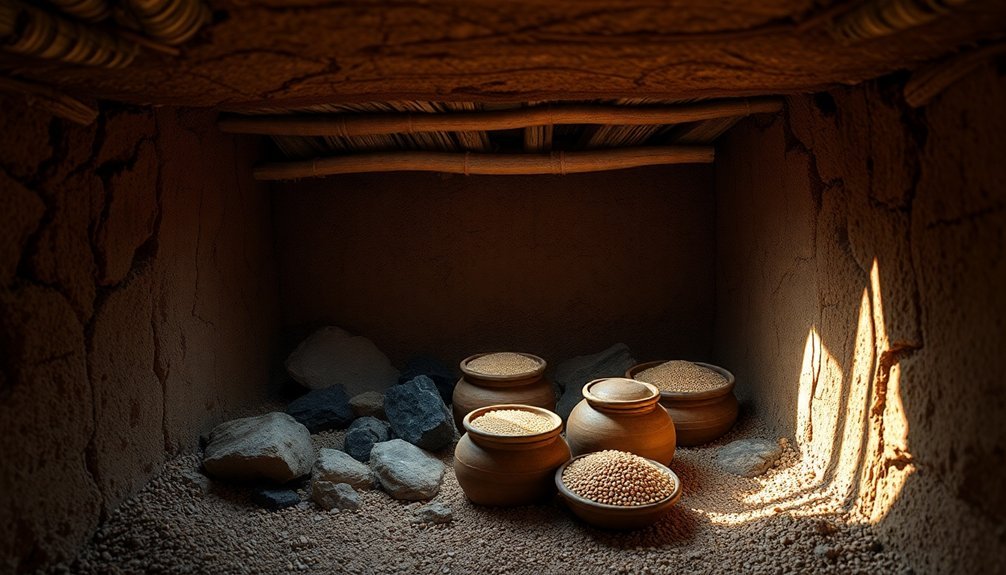
Natural Pest Defense Systems

Beyond managing temperatures, protecting your stored food from pests requires sophisticated defense systems that work naturally with the environment.
Underground food pits excel at this through their inherent hermetic sealing properties, creating modified atmospheres that naturally defend against unwanted invaders. When you properly seal these structures, they'll generate hypoxic conditions that are lethal to pest arthropods without requiring chemical interventions.
The multi-layered design of underground storage pits creates several natural barriers that work together to protect your stored goods:
- Gas-tight sealing prevents oxygen from re-entering while maintaining modified atmospheric conditions
- Physical barriers block pest immigration through multiple protective layers
- Natural underground positioning creates an additional shield against rodents and surface-dwelling insects
- Modified atmosphere generation occurs naturally as stored goods and existing microorganisms consume available oxygen
You'll find these natural defense mechanisms particularly effective when combined with proper structural design elements, such as reinforced walls and strategic entrance points.
The pit's ability to maintain these protective conditions can last for several months, often extending up to seven months without any sign of pest infestation, making it an exceptionally reliable storage solution.
Air Circulation Management
Proper air circulation in your underground food pit requires a strategic balance of intake and outlet placement. You'll want to position the air intake low, typically at the bottom of your cellar, to draw in cool air while placing the outlet high to release warm air. For ideal circulation, install these vents on opposite sides of your storage space, though a single high outlet might suffice in smaller pits.
To enhance airflow, you'll need to elevate your storage crates and maintain gaps between shelves and walls. If you're dealing with a larger pit, installing fans can greatly improve air movement and help remove unwanted odors and ethylene gas from stored foods.
During winter months, you'll need to adjust your ventilation strategy to prevent condensation buildup and maintain consistent air quality.
Your maintenance approach should focus on accessibility and efficiency. Wall-mounted fans are easier to clean and maintain than pit fans, potentially reducing emissions by 10-20%.
You'll need to monitor your ventilation system regularly and adjust air intake and outlet positions to maintain ideal temperature and humidity levels for food preservation.
Structural Support Design
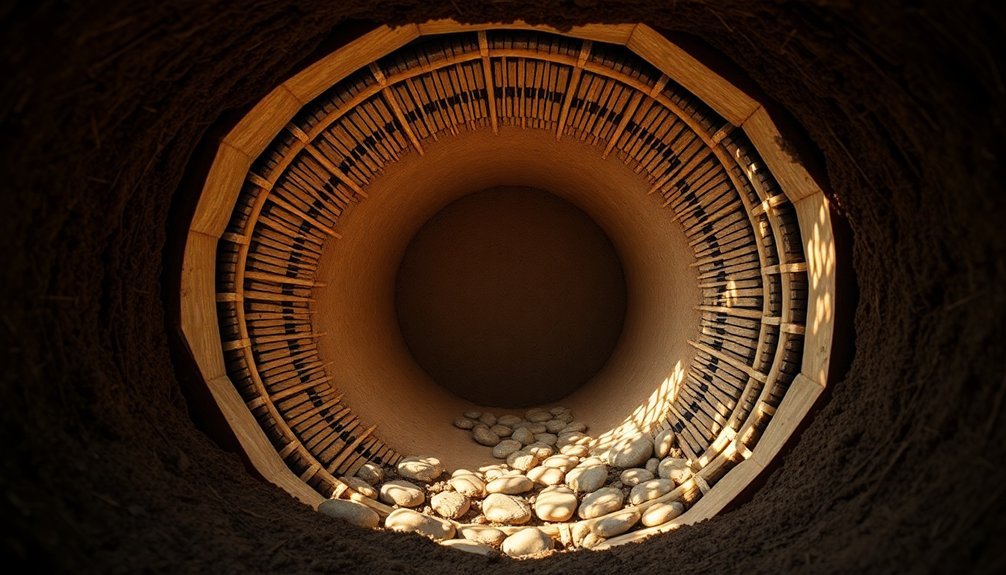
You'll need to reinforce your pit walls with flared sides and proper support materials to prevent cave-ins, especially in lighter soils.
To distribute the weight load effectively, install steel skid rails or pipes along the base while avoiding timber supports that could attract white ants.
The pit's structural integrity depends on creating a stable mound cover and maintaining nearly vertical walls in clay or conglomerate soils, ensuring the entire system can withstand both ground pressure and the weight of stored grain.
Reinforced Wall Construction Methods
When constructing underground food storage pits, reinforced wall design serves as the cornerstone of structural integrity and longevity.
You'll need to combine multiple materials and techniques to create walls that withstand soil pressure while maintaining proper insulation. Concrete forms the primary structure, providing excellent waterproofing and thermal properties, while stone materials can be added as protective coating layers.
For deeper storage pits, you'll want to take into account diaphragm walls installed vertically into the subsoil, or soldier pile walls with steel profiles for enhanced structural support.
These can be further strengthened using grouted anchors and timber infill between steel girders. The choice of construction method depends heavily on your site's specific geological conditions and groundwater levels.
- Use concrete as your primary wall material, reinforced with steel profiles for maximum stability
- Install drainage systems using French drains or rock-filled channels to manage water accumulation
- Incorporate organic materials like straw between wall layers for additional insulation
- Add ventilation screens and protective barriers to prevent rodent intrusion while maintaining airflow
The combination of these materials and techniques creates a robust structure that can maintain stable temperatures and protect stored food for decades.
Load-Bearing Design Elements
Building upon the reinforced wall design, structural support elements must be carefully engineered to handle the immense pressures of underground storage. You'll need to focus on the container's monocoque structure, where corner frames carry most of the load. It's crucial to reinforce these corners with additional steel supports and verify they're properly aligned to distribute ground pressure effectively.
| Load Point | Reinforcement Needed | Purpose |
|---|---|---|
| Corner Posts | Steel I-beams | Primary weight distribution |
| Roof Structure | Square tubes/bars | Prevent cave-in from soil weight |
| Wall Sections | Gabion cages | Distribute lateral pressure |
| Floor Support | Steel cross-members | Stabilize base structure |
To maximize your pit's longevity, you'll want to install steel beams along the roof and periphery, welding them securely to create a robust framework. Consider burying the container upside down, as the floor's thicker construction serves better as a roof. When managing soil pressure, maintain at least six feet of earth coverage and use gabion cages filled with stones to create a protective barrier around the structure. This combination of reinforcements guarantees your underground food pit can withstand decades of ground pressure and soil movement.
Pressure Distribution Systems
Despite common misconceptions about pressure systems in underground storage, structural support for food pits doesn't require complex pressure distribution mechanisms. Unlike septic systems that need precise pressure control for effluent distribution, food pits rely on simpler structural elements and natural soil properties for stability and preservation.
The structural integrity of your food pit depends on proper load distribution through materials like concrete, stones, and organic components rather than pressurized systems. You'll find that soil acts primarily as a thermal insulator, helping maintain consistent temperatures inside the pit while providing natural compressive support.
- Traditional pit designs focus on passive structural elements that don't require mechanical components or pumps.
- Load-bearing walls and reinforced corners distribute weight naturally through the surrounding soil.
- Proper material selection guarantees long-term stability without the need for pressure regulation.
- Strategic placement of support beams and crossbeams helps manage structural loads effectively.
When you're planning your food pit's construction, remember that its longevity comes from sound structural engineering principles rather than pressure distribution systems. The key lies in using appropriate building materials and understanding how they work with the natural properties of the surrounding soil.
Long Term Maintenance Practices
The success of underground food pits depends heavily on consistent maintenance routines. You'll need to establish regular inspection schedules to check for signs of water infiltration, pest infestation, or structural damage.
When you notice any cracks in the pit walls, immediately seal them with clay mud reinforced with fiber and dung to maintain the pit's integrity.
To guarantee your underground storage system's longevity, you shouldn't partially unload the pit, as this compromises the air-tight environment and encourages mold growth. Instead, plan to empty the entire pit in one operation.
You'll want to maintain proper drainage around the site by regularly clearing any debris that might redirect rainfall toward the pit.
Keep the top seal in good condition by reapplying mud or cow dung as needed, especially after periods of heavy rain or extreme weather.
If you're using polyethylene sheets for wall lining, inspect them periodically for tears or degradation.
You should also maintain clear vehicle access paths to the pit for efficient grain handling and emergency maintenance.
When you've emptied the pit, thoroughly clean and reseal it before the next use to prevent cross-contamination between storage cycles.
Climate Adaptation Strategies
In light of changing weather patterns, your underground food pit's effectiveness will depend on implementing smart climate adaptation strategies.
You'll need to adjust your storage practices based on shifting temperature and precipitation patterns in your region. Consider relocating your pit to higher ground if you're in an area experiencing increased flooding, or deeper into the earth where temperature fluctuations are less extreme.
Technological innovations and traditional knowledge can work together to enhance your pit's resilience.
You'll want to incorporate climate-smart features like improved drainage systems, enhanced sealing methods, and moisture-control mechanisms that adapt to varying conditions.
- Install temperature monitoring devices to track seasonal changes and adjust pit depth accordingly
- Implement multiple layers of natural insulation that can be added or removed based on weather patterns
- Use drought-resistant indigenous materials for pit construction that can withstand extreme conditions
- Create backup ventilation systems that can be modified during periods of high humidity or excessive dryness
Remember to regularly assess local climate data and adjust your pit's design and maintenance schedule to match evolving environmental conditions.
This adaptive approach guarantees your underground storage remains effective despite climate uncertainties.
Frequently Asked Questions
How Did Ancient Civilizations Determine the Optimal Depth for Storage Pits?
You'll find ancient peoples determined pit depths by considering their soil type, water table levels, ease of access, and storage needs. They'd dig deeper in stable ground but shallower where bedrock or moisture posed issues.
Were Storage Pits Ever Used for Purposes Other Than Food Preservation?
Yes, you'll find storage pits were used to hide valuable items, store seeds for future planting, and even served ritual purposes. Archaeological evidence shows they've contained human remains and artifacts like sling stones.
What Happened to Storage Pits During Natural Disasters Like Floods?
If your storage pit gets flooded, you'll face complete grain loss, structural damage, and mold growth. Water can collapse pit walls, destroy food supplies, and make any surviving grain unsafe for consumption.
How Did Communities Mark or Remember the Locations of Hidden Pits?
You'll find communities used natural landmarks, oral traditions, and physical markers to remember pit locations. They'd place subtle signs like stones, align with prominent trees, and pass down knowledge through generations of storytellers.
Could Different Types of Food Be Stored in the Same Pit?
You'd need to keep different foods separate in storage pits to prevent cross-contamination and varying moisture levels. It's best to dedicate each pit to a single type of dried food for ideal preservation.
In Summary
Your ancient food pit's longevity depends on mastering essential engineering elements. You'll need proper site selection, effective moisture barriers, and solid structural support to create a lasting storage system. When you combine traditional wisdom with modern materials and maintain regular upkeep, you're able to preserve food underground for decades. Remember, it's the attention to climate adaptation and airflow management that makes the difference.


Leave a Reply