
Start by selecting fresh tropical fish with bright eyes, firm flesh, and shiny scales. You'll need to clean and gut the fish thoroughly, then score thicker portions to help with salt penetration. Apply your chosen salt treatment – either dry salting with a 1:3 ratio or soaking in an 8-12% brine solution for 24-48 hours. Set up your drying area in a well-ventilated space using raised mesh racks, maintaining temperatures below 45°C. Monitor the fish every few hours, turning them for even drying, and check for proper dryness using the break test. Our detailed process guarantees your dried fish stays preserved for months to come.
Selecting Fresh Tropical Fish

When selecting fresh tropical fish for air-drying, you'll need to check both their physical condition and behavior. Look for fish with reflective, slightly bulging eyes and firm meat that springs back when pressed. The skin should have a bright, metallic sheen without any discoloration or dull spots. Make sure the scales are firmly attached to the body, and there aren't any visible wounds, damaged fins, or sunken bellies. It's best to start with 2-3 fish initially to ensure proper processing and quality control.
Observe the fish's behavior before making your selection. Healthy fish swim actively with erect fins and display natural schooling behavior. They should respond enthusiastically to food and show no signs of lethargy or unusual swimming patterns. Avoid fish that appear stressed or diseased.
When choosing schooling species like Zebra Danios, Harlequin Rasboras, or Cherry Barbs, you'll want to select fish from groups of at least five or more. These species are typically hardy and can adapt to various water conditions, making them ideal candidates for processing.
They're also non-aggressive, which means they'll likely be free from injuries caused by fighting. Check that the fish you select have been kept in appropriate water temperatures for their species type.
Cleaning and Fish Preparation
Before air-drying your tropical fish, you'll need to prepare a spotlessly clean quarantine tank. Start by emptying all water and thoroughly rinsing with tap water to remove residue. Scrub any stubborn debris, then let the tank air-dry for 24 hours to eliminate parasites like ich and velvet.
While the tank dries, focus on cleaning your equipment. Turn off and unplug all electrical components before cleaning. Rinse filter media in tank water to preserve beneficial bacteria, and clean all tubing and water-contacting parts. Having alternative aeration methods ready during maintenance can help maintain oxygen levels for your fish.
| Cleaning Task | Frequency |
|---|---|
| Empty & rinse tank | Every use |
| Clean filter media | Monthly |
| Scrape algae | As needed |
| Test water quality | Weekly |
| Disinfect with vinegar | Quarterly |
Don't forget to remove algae from tank walls using a scraper or blade, and gently brush decorations with a clean toothbrush. Vacuum the substrate thoroughly to remove debris and excess nitrates. Once everything's clean, wipe the outside with aquarium-safe cleaner, and perform a water change using treated water. Test the water quality before introducing your fish to guarantee ideal conditions.
Salt Treatment Methods
You'll find two primary approaches to salt treatment when preparing tropical fish: dry salting and saltwater soaking.
For dry salting, you'll need to apply salt directly to the fish in a 1:3 to 1:10 ratio (salt to fish), stacking the pieces in layers with proper weight application for 24-48 hours. Using this traditional method helps create long shelf life similar to preserved cod.
If you're using the saltwater soaking method, you'll immerse your fish in an 8-12% salt brine solution, maintaining temperature below 10°C and stirring regularly for even distribution.
Dry Salt Application Process
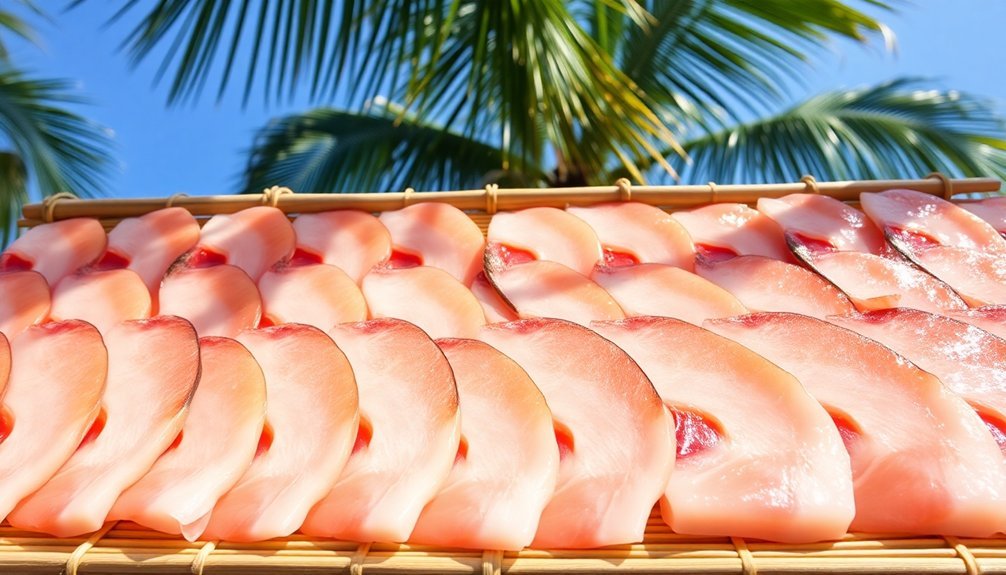
The proper application of dry salt is crucial for effectively preserving tropical fish. You'll need to start by preparing your fish correctly – gut it, remove the head, and split it open ventrally. After removing all viscera and washing the fish thoroughly, score thicker portions to guarantee better salt penetration.
When applying salt, use a mixture of both large and small grain sizes in a ratio between 1:3 and 1:10 (salt to fish), depending on your fish's size. While fine grain salt dissolves quickly, don't use it exclusively as it can cause 'salt burn' on the fish's surface. Instead, combine it with larger grains for best results.
Stack your salted fish in clean cement tanks or suitable containers, creating alternating layers of fish and salt. You'll want to apply weight on top to enhance salt penetration. Keep the fish in this state for 24-48 hours.
After this period, wash the fish in brine to remove excess salt and drain it well. Finally, dry the fish hygienically until it reaches about 25% moisture content. You can expect a yield of 35-40% of the original weight, and your preserved fish should last up to three months at room temperature.
Saltwater Soaking Techniques
Along with dry salting methods, saltwater soaking offers a gentler approach to treating tropical fish.
You'll need to prepare a salt solution using pure salt without additives, ensuring it's properly dissolved in dechlorinated water that matches your tank's temperature and pH.
For effective salt treatment, follow these concentration guidelines:
- For quick dips, mix 5-10 tablespoons of salt per gallon (1.5-3% salinity), and monitor your fish for 5-30 minutes.
- For longer baths, use 1-5 teaspoons per gallon (0.1-0.5% salinity), which can be maintained for up to three weeks.
- Dissolve 114 grams of salt per gallon of water for precise measurements, using warm water if needed for coarse salt.
- Remove fish immediately if they show signs of distress, such as rolling over or inability to maintain balance.
After treatment, transfer your fish to a recovery tank with matching water parameters and an air stone.
You'll likely notice your fish expelling ammonia and shedding its slime coat, so be prepared to perform a small water change to maintain water quality.
Setting Up Drying Area
Proper setup of your drying area serves as the foundation for successfully preserving tropical fish. You'll need to choose appropriate drying equipment like cabinets, kilns, or solar tents that offer precise temperature and air speed control.
Look for machines with PLC display screens that allow you to monitor and adjust drying stages effectively. Set up your drying space indoors to protect against weather variations and maintain consistent conditions.
You'll want to keep temperatures below 45°C for tropical marine fish while using desiccant dehumidifiers to manage moisture levels. Position your equipment to guarantee even air distribution and easy access for maintenance.
Install stainless steel drying trays and organize your space to accommodate different drying stages. You'll need to maintain strict hygiene standards by keeping the area clean and free from potential contaminants.
Use separate tools for your drying operations to prevent cross-contamination, and implement regular cleaning schedules. Ascertain your heated-air systems provide controlled airflow throughout the space.
Monitor relative humidity levels constantly to achieve proper moisture equilibrium, and maintain good air circulation to prevent moisture buildup that could compromise your fish quality.
The Drying Process
After you've arranged your drying area with proper ventilation and sun exposure, you'll need to monitor local weather conditions closely to guarantee ideal drying conditions.
You should check your fish every few hours, turning them when they're two-thirds dry to promote even moisture loss throughout the flesh.
Keep a close eye on humidity levels and temperature changes, as these factors will greatly impact your drying time and the final quality of your preserved fish.
Setting Up Drying Area
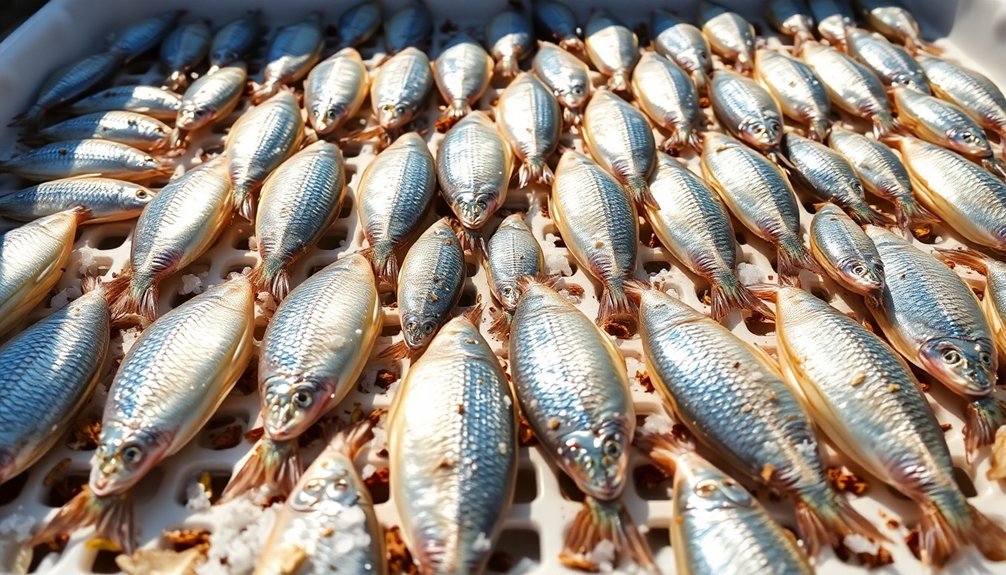
Setting up an effective drying area is essential for successfully air-drying tropical fish. You'll want to choose a well-ventilated location that's protected from rain and excessive humidity. The ideal spot should have consistent airflow with winds below 10°C/50°F, while staying away from areas with high insect activity.
Your drying setup needs proper equipment to guarantee the fish dry evenly and safely. Install mesh racks or lattice structures that are raised off the ground to promote air circulation and prevent moisture buildup. You can hang fish by their tails or thread them onto strings, making sure they don't touch each other during the drying process.
For best results, maintain these specific conditions:
- Keep air temperature between 25°C and 30°C
- Maintain relative humidity at 45-55%
- Verify air velocity is at least 1 m/s
- Monitor temperatures to stay below 40°C
Remember to position your racks where you can easily check on the fish throughout the drying process. This allows you to adjust conditions as needed and guarantee your fish reaches the desired moisture levels without spoiling.
Monitoring Weather Conditions
Throughout the drying process, monitoring weather conditions plays an essential role in achieving high-quality dried tropical fish. You'll need to keep track of four key factors: temperature, humidity, air velocity, and insolation.
Monitor the air temperature inside your dryer, which should reach up to 40°C for effective drying of tropical fish. While 27°C is ideal in temperate zones, your dryer's temperature can safely exceed 40°C for about 8 hours daily.
Keep the relative humidity between 35-60%, as levels above this range will greatly slow down the drying process, while lower levels can cause fish hardening.
Ensure your air velocity stays at least 3 m/s to prevent skin hardening and maintain effective drying. If you're using a solar dryer, you'll want to achieve an insolation rate of about 20 MJ.m^-2.day^-1 for ideal performance.
Keep in mind that temperature variations within the dryer are normal, with higher temperatures typically occurring at the center and upper layers.
Don't forget to protect your drying fish from rain, insects, and dust, as these elements can compromise the final quality of your product.
Watch for unusual weather conditions that might affect the drying process.
Checking Fish Progress
The success of your air-dried tropical fish depends on three key progress indicators: moisture content, physical changes, and drying rate. You'll need to monitor these factors carefully throughout the drying process to achieve ideal results.
To effectively check moisture content, use an electronic digital balance to track weight loss. Your target moisture levels should be around 14% for catfish and 13% for tilapia in dry seasons, while slightly higher in wet seasons. The drying rate will be fastest at the start and gradually slow down.
Watch for these physical indicators to guarantee proper drying:
- Break test – The fish should snap easily at its thickest point when properly dried.
- Texture check – Look for a dry, brittle feel or leathery texture depending on the fish type.
- Visual inspection – Examine for even drying across all cuts and sections.
- Quality assessment – Check for any signs of spoilage or contamination.
Store your dried fish in HDPE or LDPE bags once it's reached the target moisture content.
Remember to maintain strict hygiene throughout the process and keep your storage area clean and dry to extend shelf life.
Monitoring and Testing Dryness
Monitoring dried fish's moisture content is essential for ensuring a high-quality, safe product. You'll need to check your fish's progress at key intervals during the drying process, focusing on temperature, humidity, and moisture levels.
Monitor temperatures inside and outside your dryer at 10 a.m., 1 p.m., and 4 p.m. You're aiming for internal temperatures between 30°C to 40°C, which provide ideal drying conditions. Check humidity levels regularly, as lower relative humidity speeds up the drying process and reduces spoilage risks.
| Parameter | Target Range | Testing Method |
|---|---|---|
| Temperature | 30-40°C | Thermometer readings 3x daily |
| Humidity | Low as possible | Hygrometer measurements |
| Moisture Content | Below 15% | Weight comparison |
To test for dryness, weigh samples before and after drying to calculate moisture loss. You'll know your fish is properly dried when it reaches a moisture content below 15%. Don't forget to conduct sensory evaluations – check the color, odor, and texture. If you notice any off-putting smells or unusual discoloration, you'll need to address these issues immediately to prevent product loss.
Storage and Shelf Life

Once you've confirmed your fish is properly dried, proper storage becomes your next priority. To maintain quality and prevent spoilage, store your dried fish in airtight containers like vacuum-sealed bags, clean glass jars, or plastic zipper bags.
Add silica gel packets or desiccants to maintain low moisture levels, and keep containers in a cool, dry place away from direct sunlight and heat sources.
For maximum shelf life, follow these essential storage practices:
- Package your dried fish in small portions to minimize moisture transfer when accessing the containers, and always label them with the date and contents.
- Use coarse-grain salt like pickling or sea salt instead of iodized table salt, which can cause discoloration.
- Store containers in a cold cellar or freezer to extend shelf life – freeze-dried fish can last up to two years when frozen.
- Check your stored fish regularly for any signs of mold or spoilage.
When transporting your dried fish, use insulated containers and keep them sealed to prevent moisture absorption.
With proper storage conditions, your air-dried tropical fish can last several months to a year at room temperature, or even longer when frozen.
Frequently Asked Questions
Can I Air-Dry Fish Indoors During Rainy Season?
Yes, you can air-dry fish indoors during rainy season, but you'll need proper ventilation and equipment like dehydrators or fans. Consider using salt marinades and mosquito netting to prevent spoilage and insect contamination.
What Signs Indicate the Fish Has Gone Bad During Drying?
You'll know your drying fish has spoiled if you notice a strong ammonia smell, milky-white slime, soft or mushy texture, grey discoloration, or any unusual odors. Don't consume fish with these signs.
How Does Air-Drying Affect the Omega-3 Content in Fish?
You'll retain omega-3 fatty acids better if you air-dry fish at lower temperatures (50-60°C). However, if you expose fish to higher temperatures above 70°C, you'll lose more of these beneficial nutrients.
Are Certain Tropical Fish Species Unsuitable for Air-Drying?
Yes, most tropical fish aren't suitable for air-drying due to their high moisture content and delicate flesh. You'll find they're prone to spoilage because they have thinner skin, less fat, and higher water content.
Can I Speed up Drying by Using an Electric Fan?
Yes, you can use an electric fan to speed up drying considerably. You'll get the best results with fan speeds between 1.5-3.5 m/s, which reduces moisture content faster than traditional sun drying methods.
In Summary
You'll find air-drying tropical fish is a straightforward but rewarding process. With proper fish selection, thorough cleaning, adequate salting, and careful monitoring during drying, you're ensuring a safe, tasty preserved product. Remember to store your dried fish in airtight containers in a cool, dry place. When done correctly, you can expect your air-dried tropical fish to last 3-6 months while maintaining its flavor and nutritional value.


Leave a Reply