Seven proven sugar glazing methods can help you preserve food for extended periods. You'll find success with the simple syrup coating method using a 1:1 sugar-water ratio, or try the candied crystallization process for a harder shell. Sugar crust formation creates a protective barrier, while cold pack preservation works well for fruits. The honey glaze dipping method offers natural antimicrobial properties, and molasses brushing adds nutrients while preserving. For dense foods, the hard shell sugar coating process provides maximum protection. Each technique requires specific temperature control and preparation methods, which you'll discover as you explore these time-tested preservation solutions.
Simple Syrup Coating Method
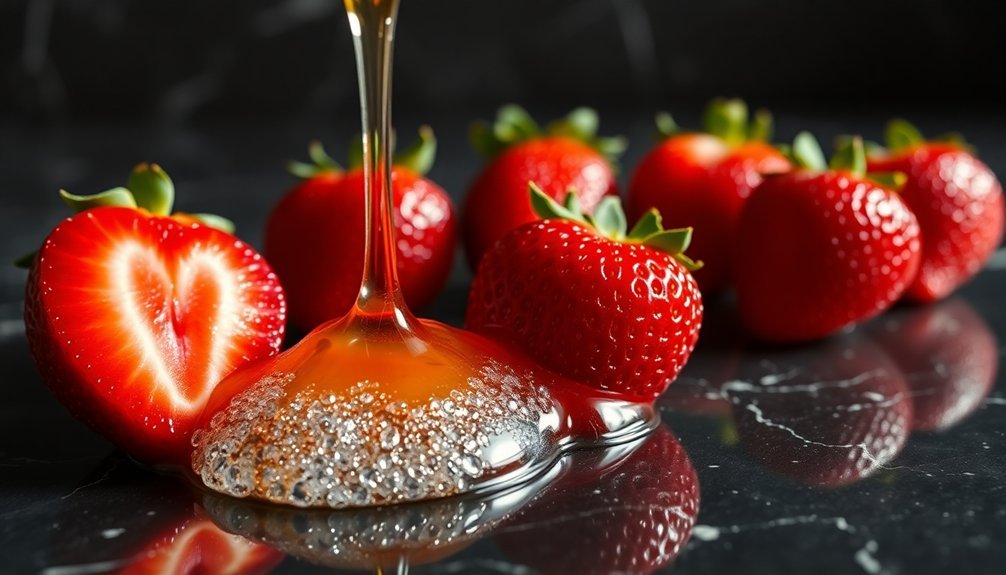
The simple syrup coating method provides an effective way to preserve food through a basic sugar-water solution.
You'll need to start with a 1:1 ratio of sugar to water, though you can adjust this ratio to create a thicker coating for better preservation. Using either granulated, raw, or brown sugar works effectively, as the type of sugar won't affect the preservation properties. Sugar has been used as a time-tested preservation technique for hundreds of years.
To create your coating, you'll need to dissolve the sugar completely in water, stirring thoroughly and allowing rest periods to guarantee full dissolution. For maximum preservation effect, you can increase the sugar content to achieve at least 50 brix, which reduces water availability to microorganisms.
You'll also want to take into account adding preservatives like sodium benzoate combined with citric acid to extend the coating's effectiveness.
For the best results, you should heat your syrup to 186 degrees for 6 seconds or 140 degrees for 10 minutes before application.
Apply the coating while it's still hot (at least 120 degrees) to create a negative pressure seal as it cools.
Remember to store your coated items in clean, appropriate containers and keep them refrigerated to maximize their shelf life.
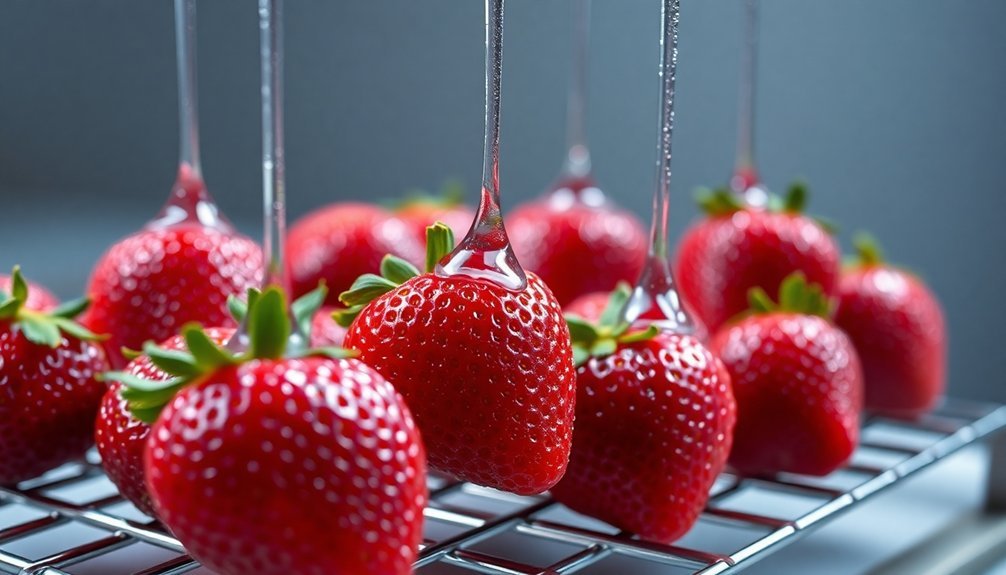
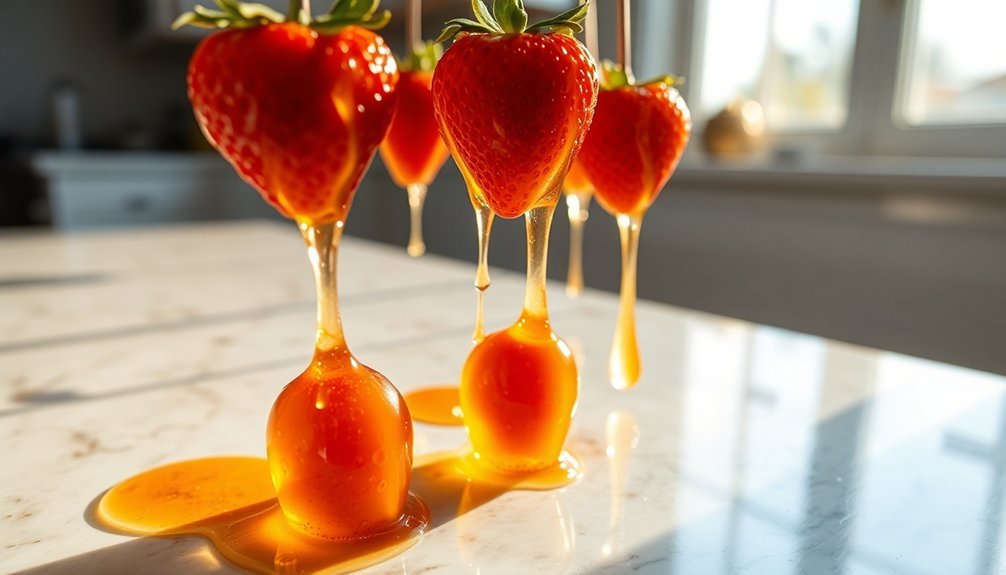
Candied Crystallization Process
To control sugar crystal formation while candying foods, you'll need to closely monitor both your syrup's temperature and the cooling rate throughout the process.
You can start by heating your sugar solution to 235°F (soft-ball stage) for a fine crystalline texture, or push to 250°F for a harder coating that's ideal for long-term preservation. The process creates a supersaturated solution as excess sugar dissolves in the boiling water.
For best results, you'll want to maintain a steady temperature during the dipping process and allow the coating to cool gradually, preventing the formation of large, unwanted crystals that could compromise your food's texture.
Controlling Crystal Formation Steps
Successfully controlling crystal formation during sugar glazing requires understanding four critical phases: supersaturation, nucleation, growth, and stabilization.
To begin, you'll need to create a supersaturated sugar solution, which provides the driving force for crystallization. You can achieve this by carefully heating your sugar solution until it reaches the proper concentration. The vacuum pan evaporation process is commonly used in industrial settings to achieve ideal supersaturation levels.
Once supersaturated, you'll want to add fine seed crystals to initiate controlled crystallization.
During the nucleation phase, you'll need to maintain proper agitation to encourage sugar molecules to join together. Be careful not to over-agitate, as this can result in numerous small crystals rather than the desired larger ones.
You can control unwanted nucleation by adding invert sugar syrup or stabilizers like pectin.
In the growth phase, you'll want to monitor the solution's viscosity and temperature. Your crystals will grow as sugar molecules continue adhering to the nuclei.
You can influence crystal size by adjusting the degree of supersaturation – higher levels create smaller, more numerous crystals.
Finally, during stabilization, you'll need to maintain consistent conditions until your crystals reach their desired size and the growth process naturally slows.
Optimal Temperature Sugar Settings
Properly controlling temperature settings stands as the cornerstone of successful sugar crystallization. You'll need to carefully manage temperatures throughout the entire process, as they directly affect sugar's solubility and crystal formation.
When you're heating your sugar solution, you can dissolve more sugar at higher temperatures, while cooling triggers crystallization.
You'll want to follow specific temperature ranges for different crystallization stages. Start with the simple syrup stage at 212°F, then progress through the thread stage (215-234°F) and soft ball stage (235-240°F). If you're aiming for harder candies, you'll need to heat above 240°F, but be careful not to exceed 310°F unless you're specifically seeking caramelization.
Your cooling rate considerably impacts the final texture. If you cool rapidly, you'll get smaller crystals, while slow cooling produces larger ones.
For smooth, pleasing textures, you must maintain precise temperature control throughout cooling. Remember that improper temperature management can result in unwanted grainy textures. By carefully monitoring and adjusting your temperature settings, you'll achieve the desired crystallization rate and ideal texture in your sugar-glazed preserves.
Sugar Crust Formation

The formation of a sugar crust serves as a powerful preservation technique that relies on creating a high-concentration sugar solution around food items. When you apply this method, you're fundamentally creating a protective barrier that draws moisture out of harmful microorganisms through osmosis, making the environment inhospitable for their growth.
The process works through three primary mechanisms:
- The sugar solution actively pulls water from bacteria and other microorganisms, effectively dehydrating them.
- It reduces water activity (aw) in the food, creating conditions where harmful microbes can't survive.
- The sugar coating acts as a physical barrier, preventing new bacterial contamination.
You'll find this preservation method particularly effective when you're working with fruits and vegetables. By packing your produce in crystalline sugar or a concentrated sugar solution, you're creating an environment where bacteria, molds, and yeasts simply can't thrive.
This technique isn't just theoretical – it's the same principle that makes your jams and jellies last for extended periods. When you apply the sugar crust correctly, you'll achieve stable preservation that maintains both food safety and quality.
Cold Pack Sugar Preservation
To successfully preserve your fruits using cold pack sugar methods, you'll need to start by preparing a medium syrup using 1¾ cups of sugar dissolved in 4 cups of water.
When selecting fruits for preservation, choose firm, ripe specimens that are free from blemishes and guarantee they're thoroughly cleaned before processing.
You'll want to completely submerge your fruit in the prepared syrup, using approximately ½ to ⅔ cup of syrup per pint of fruit for ideal preservation results.
Preparing Cold Sugar Syrup
Creating cold sugar syrup sets the foundation for effective food preservation through cold pack methods. You'll need to maintain precise control over the sugar concentration and preparation process to guarantee your syrup effectively preserves food. Start by using a minimum 50% sugar concentration by weight, as this reduces water availability for harmful microorganisms.
To achieve the best preservation results, follow these critical steps:
- Thoroughly dissolve your chosen sugar (table sugar, honey, or molasses) in water, ensuring there are no undissolved crystals that could harbor bacteria.
- Add citric acid or vinegar to lower the pH level, creating an inhospitable environment for microorganisms.
- Strain the mixture carefully to remove any particles or contaminants that could compromise preservation.
You can enhance your syrup's preservative properties by incorporating invert sugar – heat the mixture to 240 degrees and add cream of tartar or lemon juice.
If you're seeking extended shelf life, consider adding 15% alcohol to the mixture. Remember to store your finished syrup in airtight containers and label them with preparation dates.
For best results, keep unopened syrup in a cool, dark place for up to two years.
Fruit Selection Guidelines
Successful fruit preservation begins with selecting the right produce for cold pack sugar methods. You'll need to choose fruits that are fully ripe yet still firm, as they'll provide the perfect balance of natural sweetness while maintaining their structure during preservation.
Make sure your fruits are free from bruises, soft spots, or any signs of damage that could lead to spoilage. For the best results, you'll want to work with fruits that are in season and at their peak flavor.
Peaches, plums, pears, and apples are excellent choices for sugar preservation. Consider the fruit's natural acidity when planning your preservation process – you'll need to adjust your syrup concentration accordingly. Highly acidic fruits may require heavier syrups to balance their tartness, while mild-flavored fruits work better with lighter solutions.
Before processing, you must thoroughly clean your selected fruits and remove any stems, leaves, or pits. You can prepare them whole, sliced, or chopped depending on your preference and intended use.
Remember that proper fruit selection directly impacts your preservation's success, affecting both the final product's texture and flavor quality.
Honey Glaze Dipping

The honey glaze dipping process offers a proven method for both preserving and enhancing food items. You'll find that honey's natural preservative properties create an environment that inhibits microbial growth through osmosis, making it an exceptional choice for food preservation, especially in areas without refrigeration access.
To prepare your honey glaze, you'll need to combine honey with hot sauce and optional ingredients like butter or brown sugar. Choose a light, mild-flavored honey to maintain consistency in taste.
You can store your prepared glaze in an airtight glass container or mason jar in the refrigerator for up to:
- 1-2 weeks for ideal freshness
- 30 days maximum with proper storage
- No freezing, as it'll compromise the texture
When you're ready to use the glaze, reheat it gently on the stove or in 15-30 second microwave intervals, stirring between each session. Your glaze should be loose enough to drizzle or brush onto your chosen foods.
Molasses Brushing Technique
While many food preservation methods exist, molasses brushing stands out as a robust technique that combines nutritional benefits with effective preservation properties. You'll need to verify your molasses is fresh and properly stored before starting – look for any signs of mold, odd odors, or crystallization that might indicate spoilage.
To apply the molasses brushing technique effectively, you'll want to work in a cool, dry environment. You can brush the molasses directly onto fruits or vegetables, creating an osmotic effect that reduces water activity and prevents microbial growth.
It's vital that you store your preserved foods in airtight containers afterward to maintain the preservation effect.
You'll find this method particularly effective because molasses doesn't just preserve – it enriches your food with calcium, iron, and other essential nutrients. The sugar content creates an environment that's hostile to harmful pathogens, while the natural compounds in molasses help maintain food quality for up to six months.
Remember to keep your brushing consistent and thorough, guaranteeing complete coverage of the food surface. For best results, you should combine this technique with proper storage in a cool, dark place.
Hard Shell Sugar Coating
Creating a protective hard shell sugar coating requires precise control over both ingredients and process variables. You'll need an engrossing syrup made from corn syrup, sugar, water, and film-forming agents, mixed at a specific ratio of 3.3:1 to 6:1 corn syrup solids to sugar solids. The syrup's temperature should be maintained between 110 to 160°F while being applied.
The coating process follows three key steps:
- Apply engrossing syrup to food pieces at room temperature (64-74°F)
- Dust with 6X powdered sugar to form crystalline layers
- Finish with a polishing layer of Carnauba wax or shellac
You'll notice this method creates a thinner coating than traditional panning processes, typically comprising 25% or less of the final product.
For dense food pieces, you're aiming for a composition of 80-82% food piece, 3-4% engrossing syrup, and 14-17% confectioners sugar by weight. The resulting shell maintains a softer texture over time while effectively preserving the food by reducing water activity.
This coating won't lose integrity even when exposed to temperatures above the melting point of the food's internal fats.
Frequently Asked Questions
How Does Altitude Affect Sugar Glazing Temperatures and Setting Times?
You'll need to reduce glazing temperatures by 2°F per 1,000 feet elevation gain, as water boils faster at height. Your glaze will also set quicker due to faster evaporation at higher altitudes.
Can Sugar-Glazed Foods Be Safely Reheated Without Damaging the Preservation?
You can safely reheat sugar-glazed foods using gentle methods like steaming or low-temperature oven heating. Just keep temperatures moderate and cover the food to protect the glaze's preservative properties while reheating.
Which Fruits Should Never Be Sugar-Glazed Due to Their Chemical Composition?
You shouldn't sugar-glaze mangoes, grapes, bananas, pineapple, jackfruit, or chikku. Their naturally high sugar content and low fiber would create excessive sweetness and potential fermentation issues during the preservation process.
Does UV Exposure Affect the Longevity of Sugar-Glazed Preservation Methods?
Yes, UV exposure will harm your sugar-glazed preserves. You'll notice the glaze breaking down, becoming brittle, and losing its protective qualities. Keep your preserved items away from sunlight for the best longevity.
Can Sugar-Glazed Foods Be Stored in Vacuum-Sealed Bags Without Crystallization Issues?
Yes, you can safely store sugar-glazed foods in vacuum-sealed bags. You'll need to guarantee they're completely dry before sealing, and store them in a cool place to prevent moisture-induced crystallization issues.
In Summary
You've now learned seven reliable methods for preserving food with sugar glazing. Whether you're using simple syrup, crystallization, or hard shell coating, you'll find these techniques extend shelf life while adding sweetness. Don't hesitate to experiment with different glazing methods based on your specific food items. With proper application and storage, you'll enjoy your preserved treats for months to come.


Leave a Reply