
To build a traditional Nordic snow well, you'll need to select a consistently shaded location with well-draining soil. Start by clearing and leveling the ground, then construct sturdy walls using compacted snow layers for ideal insulation. Maintain storage temperatures between -4°F and 32°F (-20°C to 0°C) using natural cooling combined with straw or turf insulation barriers. You'll want to store preserved foods in sealed containers on elevated shelves, protected by hardware cloth against pests. Regular maintenance and temperature monitoring are essential for food safety. Discover how this ancient preservation technique can transform your winter food storage strategy.
Understanding Traditional Snow Well Design
In keeping with centuries-old Nordic traditions, snow wells serve as natural refrigerators through careful design and placement. You'll want to locate your snow well in a consistently shaded area where direct sunlight won't compromise the cold temperatures needed for food preservation.
Choose a spot that's sheltered from wind but still accessible for regular food storage and retrieval. Thorough climatological research of your specific location should guide your snow well placement and design.
When constructing your snow well, you'll need to focus on creating sturdy walls using compacted snow, avoiding areas where ice formation or snowmelt might occur. Don't use hardened snow or ice in the wall construction, as these materials won't provide proper insulation.
Instead, adapt quinzhee-style building techniques, which involve piling and hollowing out snow to create a stable structure.
You can enhance your snow well's effectiveness by incorporating different snow density layers for ideal insulation. Make sure you're building close enough to your water source or food storage area for convenience, but not so close that it affects the well's temperature.
Remember to include proper ventilation while keeping the structure sealed enough to maintain consistent cold temperatures.
Tools and Materials Required
Building a proper snow well requires a specific set of tools and materials to guarantee structural integrity and longevity.
You'll need basic snow construction tools, including a sturdy shovel for gathering and packing snow, and either a dedicated snow-cutting tool like the Brooks Range Igloo 35 or a robust saw for shaping your snow blocks. A bucket system is essential for creating uniform, compacted snow cylinders that'll form the well's walls. The modified double bucket design significantly improves the efficiency of creating snow blocks.
- Basic snow working tools: shovel, cutting implement, and bucket system
- Personal safety gear: cold-weather clothing, waterproof gloves, and protective eyewear
- Structural materials: compacted snow, water for binding, and roof materials
You'll want to verify you're properly equipped with cold-weather gear before starting construction. Layer your clothing to prevent sweating while working, and don't forget sun protection – snow glare can be intense.
For the well's structure itself, you'll need access to good-quality, packable snow that's slightly wet for better cohesion. Keep additional snow nearby for filling gaps between blocks, and have materials ready for the roof structure.
Remember to bring water for both construction needs and personal hydration throughout the building process.
Choosing the Perfect Location
Selecting an ideal location stands out as the most critical step when constructing a snow well for food preservation. You'll want to choose an upland area with well-draining soil that's flat enough to prevent erosion but allows proper water filtration. Your site shouldn't be near any water bodies or within a floodplain, as this could compromise food safety and environmental integrity.
Make certain you're building on soil that can effectively filter any meltwater, and consider adding mulch to enhance drainage and prevent ground compaction. Modern food safety awareness has made location selection increasingly important for preservation methods. You'll need to maintain a vegetated buffer between your snow well and any nearby water sources. Don't place your well in areas where groundwater contamination is possible, such as near wellhead protection zones.
Before construction, map out your site's natural drainage patterns to understand how snowmelt will flow. You can use earthen berms or silt fences to direct any runoff away from your food storage area.
Remember to clear any debris from the site before winter sets in, and make certain you've got enough flat space to accommodate your storage needs while maintaining proper drainage throughout the season.
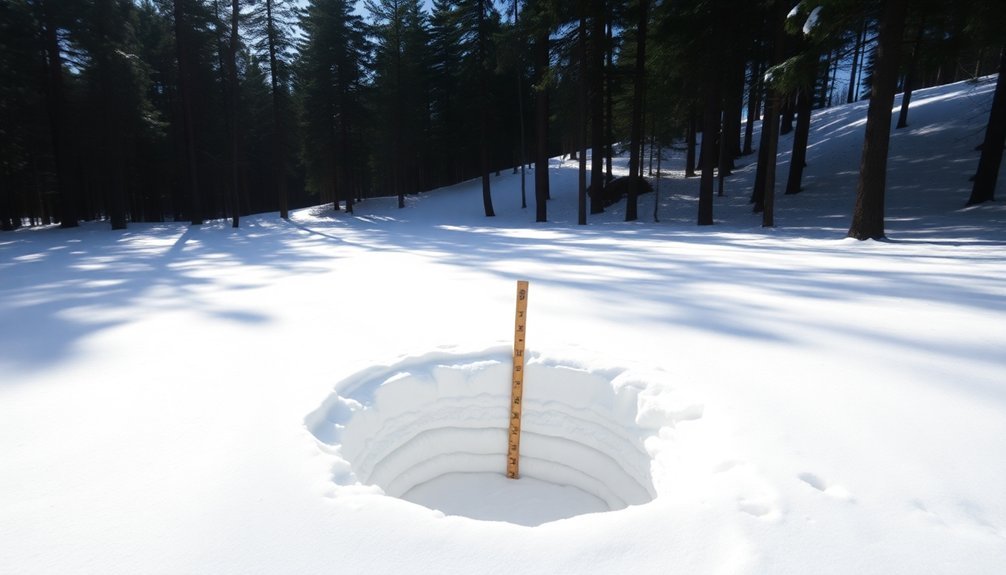
Ground Preparation and Excavation
Proper ground preparation and excavation create the foundation for a reliable snow well. You'll need to start by clearing all debris and vegetation from your marked site, then level the ground using shovels and rakes. Before digging, check the water table depth to guarantee you won't encounter water-saturated soil that could compromise your well's insulation.
When you're ready to excavate, follow these essential steps:
- Dig gradually in layers, using appropriate tools like shovels and pickaxes while monitoring soil stability.
- Install temporary supports if needed, particularly in unstable soil conditions.
- Ascertain even depth throughout the excavation for uniform snow storage.
As you work, pay close attention to drainage and soil stability. If your soil is prone to waterlogging, you'll want to implement a proper drainage system.
Consider using geotextiles to reinforce the soil and prevent erosion. Remember to slope the surrounding ground away from your snow well to prevent water accumulation.
Building Strong Foundation Layers

You'll need to start by selecting an elevated site with good drainage to prevent frost damage to your food storage cellar's foundation.
When building in Nordic climates, it's essential to compact each foundation layer thoroughly, beginning with a well-tamped gravel base followed by insulation and vapor barriers.
You can strengthen your cellar's frost protection by installing rigid foam insulation boards horizontally around the perimeter, extending at least 24 inches beyond the foundation walls.
Proper Site Selection Process
The foundation of a successful Nordic food preservation site begins with strategic location planning.
You'll want to select an upland location with flat slopes and well-drained soil to guarantee your snow well maintains its structural integrity throughout the seasons. When choosing your site, prioritize areas away from water bodies and above the groundwater table to prevent contamination and maintain food safety standards.
Consider these essential factors when selecting your snow well location:
- Choose a spot with natural drainage patterns that direct snowmelt away from your preserved food storage
- Look for areas that maintain stable snow conditions throughout the season
- Select a location that's easily accessible but protected from direct sunlight
Your site's preparation should account for the region's typical snowfall patterns and precipitation rates.
You'll need to calculate the snow storage capacity required for your preservation needs and guarantee the location can accommodate your expected volume. If you're planning a permanent installation, engineer the site with proper runoff control features like berms or settling basins.
Remember to evaluate the long-term environmental impact of your chosen location and implement regular maintenance procedures to keep your snow well functioning effectively.
Cold Weather Building Tips
Building strong foundations in frigid Nordic conditions demands careful attention to frost protection and insulation techniques.
You'll need to implement multiple layers of protection to guarantee your snow well's foundation remains stable throughout harsh winters.
Start by strewing straw across your building footprint before frost sets in, creating an insulating barrier that extends about one foot deep.
Once you've excavated, immediately protect the exposed ground and footings with additional straw.
You can maintain warmth by installing a pool liner filled with water or sand inside the foundation area.
For maximum frost protection, install rigid foam insulation around the foundation's perimeter.
Use extruded or expanded polystyrene boards with appropriate R-values for your climate zone.
Place a 6-mil plastic vapor barrier above the foam to prevent moisture issues.
The insulation should extend both vertically and horizontally from your foundation walls.
Secure your structure by using L-shaped rebar to connect block walls with the slab.
Cover exterior insulation with at least 10 inches of soil for protection and proper drainage.
During construction, use foundation blankets to protect concrete walls while they cure in cold temperatures.
Layer Compaction Techniques
When constructing snow foundations in Nordic regions, proper layer compaction serves as the cornerstone of structural stability. You'll achieve the finest results by working with snow temperatures between -5 to -15°C, where the snow's properties are ideal for compression.
Start by collecting snow from below the surface, as it typically offers higher density and better compaction characteristics.
For effective layer compaction, follow these essential steps:
- Work with thin, uniform layers, and verify each layer is thoroughly compacted before adding the next one.
- Mist each layer lightly with water to enhance cohesion, but avoid over-saturation that could lead to damaging ice expansion.
- Test compaction by placing a 200 lb weight on the surface – if it doesn't sink, you've achieved proper density.
Using a combination of compaction tools will give you the most reliable results. A modified vibratory plate compactor or sod roller works well for larger areas, while manual hydraulic presses can achieve pressures up to 6.87 MPa for creating high-strength sections.
Remember to allow for air escape during the process by using perforated surfaces or creating channels in your foundation layers.
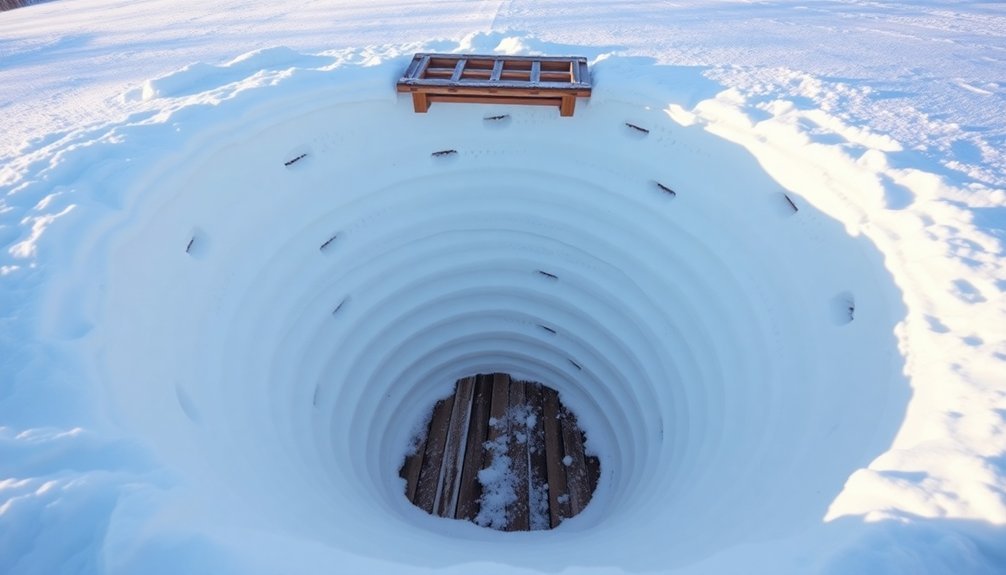
Constructing Insulated Walls
Successfully constructing insulated snow walls requires careful preparation and the right materials. You'll need a wooden panel or plywood to create your mold, a sturdy pole for bracing, and a shovel for packing snow. Start at a corner of your house or against a stable wall to guarantee proper support and alignment.
Begin by selecting an accessible location and clearing any obstacles from your work area. Position your wooden panel parallel to the house wall, securing it firmly with the pole. As you add snow between the panel and house wall, pack each layer thoroughly to prevent future settling. Maintain consistent thickness throughout the structure while extending it along your house's perimeter.
You'll need to monitor your snow wall regularly for signs of deterioration. Watch for melting or erosion, particularly during temperature fluctuations. Replace the entire structure annually before spring arrives.
When building, make certain you don't block any doors or windows, and consider how long snow typically lasts in your area. Pay special attention to moisture management, as melting snow shouldn't seep into your house foundation or walls.
Drainage System Installation
To protect your Nordic food storage area, you'll need to place gravel layers strategically around the foundation's perimeter, creating a natural filtration system for groundwater.
When laying out frost-free pipes, make certain they're installed below your region's frost line and maintain a consistent 1% slope away from the storage structure.
You'll want to surround these pipes with clean, crushed stone to prevent soil infiltration and maintain proper drainage throughout the freezing months.
Strategic Gravel Layer Placement
A proper gravel foundation forms the backbone of any effective drainage system. You'll need to start by laying a 6-inch layer of class 5 crushed rock, ensuring it's compacted and level with your footings or surrounding ground. Use either a hand tamper or mechanical compactor to achieve proper density, as this prevents future settling and promotes even drainage throughout your snow well's base.
When placing gravel around your snow well, begin with a 6-inch layer of washed 3/4-inch rounded stone at the bottom. Line the hole and trench with landscape fabric first, making strategic cuts where drain pipes will connect. You'll want to pack the stones tightly around the well to maintain efficiency.
Key points for ideal gravel placement:
- Create a 1% slope in your trench towards the snow well, ensuring the area near the well is slightly deeper.
- Pack gravel in layers, compacting each section thoroughly before adding the next.
- Maintain consistent depth of at least 6 inches throughout the base.
Remember to integrate your PVC pipes using proper couplings and waterproof connections. An overflow emitter at ground level will prevent flooding, while the surface drain inlet with a grate allows for easy maintenance and debris removal.
Frost-Free Pipe Layout
Installing frost-free drainage requires careful attention to pipe layout and slope calculations. You'll need to confirm each pipe has a consistent downward angle to prevent water from becoming trapped and freezing during winter months.
Position your main drainage valve inside the snow well's insulated area, where temperatures remain above freezing, similar to a frost-free hose bib's extended stem design.
When laying out your pipes, you'll want to measure the total distance from the interior valve to the exterior drainage point. Install the pipes with a minimum slope of 1/4 inch per foot to guarantee proper water flow and complete drainage when the system isn't in use.
Make sure there aren't any low points where water could collect and freeze. Include vacuum breakers at strategic points to prevent backflow contamination, particularly where the drainage system connects to your main water supply.
You'll need to verify that all pipe lengths accommodate your snow well's wall thickness and insulation requirements. Remember to pressure test the system before covering any pipes, and confirm all connections are properly sealed to prevent leaks that could compromise your food storage area's temperature stability.
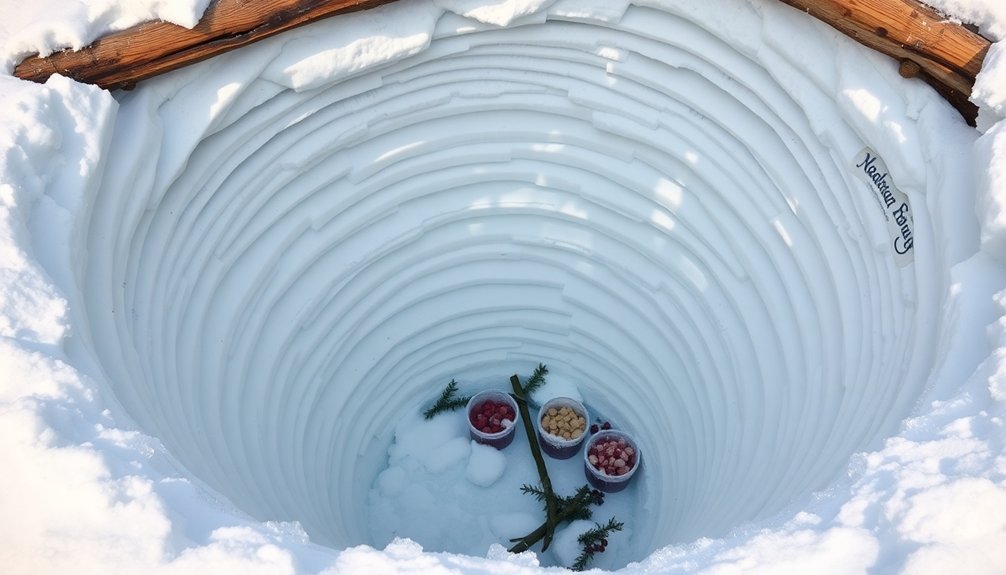
Creating the Storage Chamber
Success in creating your storage chamber begins with proper design and insulation. You'll need to maintain temperatures between -2°C and -10°C, so make certain your walls, floor, and ceiling are thoroughly insulated to prevent heat transfer.
Consider implementing a modular structure that can withstand the cold while supporting any overlying construction.
Your chamber's success depends heavily on its equipment configuration. Install specially adapted air conditioning units alongside snow machines that work in tandem to create and maintain the proper environment.
You'll want to include a freely configurable control panel that lets you monitor and adjust conditions easily.
- Set up energy-efficient systems by combining solar power with energy recovery methods to manage the high power demands
- Install your equipment in a configuration that allows for easy maintenance access and daily defrosting procedures
- Choose materials specifically rated for sub-zero temperatures to prevent structural degradation
Remember to size your system appropriately with sufficient power reserves for warmer days.
Train your staff thoroughly on operating the control panels and maintaining proper temperature levels. Regular performance monitoring will help make certain your storage chamber maintains ideal conditions year-round.
Adding Essential Ventilation
Proper ventilation complements your storage chamber's design by preventing unwanted ice formation and maintaining ideal snow conditions. Without adequate airflow, you'll face ice buildup at the bottom of your snow pile, which can accumulate up to a meter annually and compromise your food preservation efforts.
You'll need to incorporate breathable materials into your ventilation system, with sawdust proving to be the most effective option. Apply a 30-40 cm layer of sawdust to create a suitable barrier that allows necessary evaporation while minimizing heat absorption. This approach will keep your snow pile's temperature stable and reduce melting rates to just 10-13% at higher elevations.
While you might be tempted to use geotextile fabric for its easier application, it won't perform as well as traditional sawdust or wood chips. These natural materials enable vital evaporative cooling that maintains your snow pile's integrity.
Position your ventilation materials strategically to combat ground heat and promote consistent airflow throughout the storage space. Remember that proper ventilation isn't just about preventing melting—it's essential for maintaining the quality of your preserved food throughout the storage period.
Proper Food Storage Methods
To protect your preserved Nordic foods in underground storage, you'll need proper ventilation combined with consistent temperature monitoring between 35-45°F (2-7°C).
Your storage space must remain dry, so install moisture barriers along walls and floors while using desiccants to absorb excess humidity.
Keep preserved meats, fish, and fermented vegetables in sealed containers on elevated shelves to prevent ground moisture from compromising their quality.
Safe Underground Storage Tips
Underground food storage mastery requires careful attention to both construction and maintenance. You'll need to focus on creating a space that maintains high humidity (90-95%) while guaranteeing proper ventilation.
When building your storage area, consider using hardware cloth or chicken wire to protect against unwanted critters, and install tight-fitting lids on containers to keep pests out.
- Use buried metal drums with secure lids to prevent raccoon intrusion
- Position storage vessels where air can freely circulate
- Monitor the space regularly for signs of spoilage or pest activity
Your underground storage space should remain cool and dark to enhance natural preservation. While root cellars are ideal, you can also utilize unheated garages or adapt spaces under cabin floors for food storage.
Remember that these areas aren't suitable for storing fresh meat unless it's properly canned. You'll want to organize your food by expiration date and keep the area clean to prevent contamination.
If you're working with a smaller space, consider using tater holes or zeer pots, but don't forget to maintain proper moisture levels in evaporative cooling systems. Regular maintenance checks will help guarantee your stored food remains preserved and safe for consumption.
Temperature Control Essentials
Maintaining precise temperature control stands at the heart of successful food preservation in Nordic climates. You'll need to understand both traditional and modern methods to guarantee your food stays fresh throughout the year.
While modern refrigeration offers convenience, you can also utilize natural cooling techniques that have served Nordic communities for generations.
For underground storage, you'll want to maintain temperatures between -4°F and 32°F (-20°C to 0°C). You can achieve this by combining natural ground cooling with proper insulation techniques.
When you're building your storage space, incorporate layers of turf or straw for insulation, and monitor temperature fluctuations regularly using modern sensors or traditional thermometers.
Don't rely on a single preservation method. Instead, combine techniques like salting, smoking, and cool storage to maximize effectiveness.
If you're using modern refrigeration, guarantee your system has real-time monitoring capabilities. For traditional methods, you'll find that properly constructed snow wells and underground chambers can maintain stable temperatures naturally.
Remember to check your food regularly for signs of temperature variation, and adjust your storage conditions accordingly to prevent spoilage.
Moisture Prevention Techniques
Successful moisture control forms the foundation of Nordic food preservation, requiring a combination of time-tested techniques to protect your stored goods.
You'll need to master multiple approaches to effectively prevent moisture from compromising your food's longevity, starting with proper drying methods.
- Set up outdoor drying racks for fish, particularly cod, to create stockfish that'll last through harsh winters.
- Store your preserved items in wooden barrels, which help regulate moisture levels while protecting against external elements.
- Dig storage pits lined with protective materials to keep grains dry and safe from both moisture and vermin.
When you're preserving meats and fish, combine drying with salt curing to create an effective moisture barrier.
You'll want to use a mixture of salt, sugar, and seasonings, similar to traditional gravlax preparation.
For vegetables, fermentation isn't just about preservation – it'll create a natural barrier against moisture while enhancing nutritional value.
Don't forget to utilize natural cool storage options like underground icehouses with turf insulation, which help maintain consistent humidity levels.
These structures work particularly well when you need to store fermented and salted items for extended periods.
Seasonal Maintenance Tips

Proper seasonal upkeep of your well system is essential for maintaining safe, clean water throughout the Nordic climate's harsh conditions.
You'll need to protect your system against freezing by insulating pipes with foam jackets or heat tapes, and ensuring your pump house has adequate insulation. During extreme cold spells, let a small trickle of water run to prevent pipe freezing.
Test your well water at least annually, preferably before winter sets in. If you're in an area with heavy snowfall or quick thaws, increase your testing frequency.
You'll want to check for bacteria, nitrates, and harmful minerals, working with a water treatment specialist to implement the right purification solutions.
Keep the area around your well clear of snow accumulation by regularly shoveling.
Don't pile snow, mud, or debris near the wellhead, and inspect the well cap every couple of months for damage or loose seals.
In spring, check for pooling water and schedule a water quality test to identify any contamination from winter thaw.
Install a protective barrier to prevent snow and debris from entering the well, and monitor your water quality for any concerning changes.
Temperature Monitoring and Control
Just as you monitor your well system's integrity, temperature control plays a central role in Nordic food preservation. You'll need to maintain consistent temperatures between 0°C and -18°C to effectively halt enzyme activity and prevent microbial growth.
Using smart technology and real-time monitoring tools, you can track temperature fluctuations and guarantee your preserved foods remain safe throughout the storage period.
To maintain ideal temperature control in your snow well, implement these essential measures:
- Install adhesive thermometers on storage containers and walls to provide constant temperature readings that help you spot any concerning changes.
- Use advanced insulation systems to maintain stable temperatures and prevent unexpected fluctuations that could compromise food safety.
- Set up real-time monitoring devices that alert you when temperatures drift outside the safe range, allowing for quick corrective action.
You'll want to pay special attention to maintaining proper cold chain integrity during food transfer in and out of your snow well.
Remember that consistent temperature control isn't just about food safety—it's vital for preserving the taste, texture, and nutritional value of your stored foods.
Modern optical sensors and data-driven tools can help you achieve precise temperature management with minimal manual oversight.
Frequently Asked Questions
How Does Snow Well Preservation Compare to Modern Refrigeration in Energy Costs?
You'll find snow wells cost nothing in energy since they use natural snow, while your modern refrigerator will consume 100-200 kWh monthly, costing around $15-30 at typical electricity rates.
Can Multiple Families Share a Single Snow Well Effectively?
You can effectively share a snow well with multiple families if you establish clear schedules, maintenance duties, and storage protocols. It'll require cooperation and good organization, but the shared effort makes it worthwhile.
What Indigenous Cultures Historically Used Snow Wells Before Nordic Communities?
You'll find that Inuit and other Arctic indigenous peoples used snow and ice-based storage methods similar to snow wells, though they primarily relied on ice cellars dug into permafrost rather than packed snow structures.
How Do Snow Wells Affect the Taste of Different Preserved Foods?
You'll find that snow wells preserve food's natural flavors exceptionally well. They'll keep your meats tasting fresh, maintain your fruits' sweetness, and guarantee your vegetables stay crisp without adding unwanted tastes.
Are There Any Traditional Ceremonies Associated With Building Snow Wells?
You'll find few formal ceremonies for snow well building, though some communities would toast to Njörðr for winter's bounty while constructing them. They'd often incorporate this task into broader winter solstice celebrations.
In Summary
Building a snow well connects you to centuries of Nordic food preservation wisdom. You'll find that with proper construction and maintenance, your snow well can keep food fresh through warmer months while using zero electricity. Remember to monitor temperatures regularly, adjust ventilation as needed, and maintain the structure seasonally. When done right, you've got a sustainable, cost-effective storage solution that'll serve you for years to come.


Leave a Reply