To deep clean your salt box, start by completely emptying it and removing loose debris with a soft brush. Mix warm water with mild soap and gently clean both the interior and exterior, paying special attention to corners and crevices. For stubborn salt buildup, create a paste using baking soda and water, then scrub carefully. Rinse thoroughly and dry immediately with a soft cloth, ensuring no moisture remains. Let it air dry completely before refilling to prevent clumping. For wooden salt boxes, apply food-safe mineral oil after cleaning. The type of material your salt box is made from will determine specific care requirements and maintenance steps.
Understanding Your Salt Box Material

A salt box's material plays an essential role in its maintenance and longevity. Each material has unique characteristics that affect how you'll need to clean and maintain it.
If you've got a glass salt box, you'll appreciate its transparency and easy cleaning, but you'll need to handle it with care to prevent breakage.
Metal and stainless steel options offer exceptional durability and are perfect if you're looking for something that can withstand regular use, though they may react with certain salts. For industrial applications, heavy-duty models are available with enhanced durability features.
Ceramic and clay salt boxes excel at preserving salt freshness and won't react with your seasonings. While they're beautiful and functional, you'll need to clean them gently to avoid chipping.
They're ideal for home kitchens but require thorough drying after cleaning.
Wooden salt boxes, typically made from acacia or bamboo, provide an eco-friendly option that allows salt to breathe naturally.
You'll need to maintain these boxes with occasional sealing to prevent warping and guarantee longevity.
While they add a natural touch to your kitchen, they require consistent care to protect against moisture damage and maintain their appearance.
Preparation Before Deep Cleaning
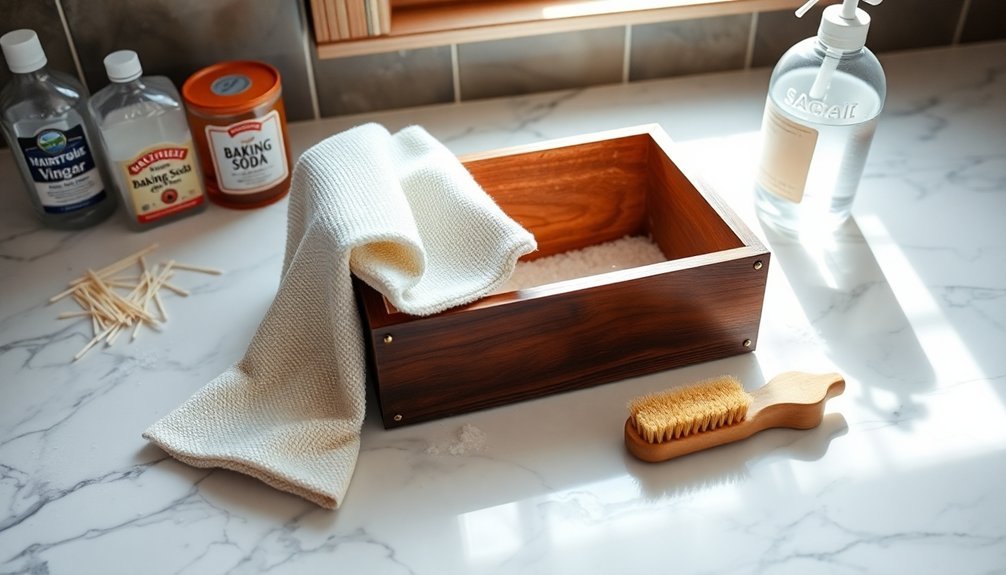
Every successful deep cleaning starts with proper preparation. Before you begin cleaning your salt box, gather all necessary supplies and set up your workspace in a well-ventilated area. You'll need all-purpose cleaners or mild soap, warm water, and a soft cloth or sponge. Consider having white vinegar and baking soda on hand for tough cleaning jobs. Just as with litter boxes, you should avoid using harsh cleaning products that could leave harmful residues.
Protect yourself by wearing gloves and eye protection if needed, especially when dealing with salt residue. Confirm you're working in a space with good lighting to spot any debris or stains effectively.
| Task | What You Need |
|---|---|
| Surface Protection | Towel or protective mat |
| Cleaning Solutions | Soap/cleaner and warm water |
| Personal Safety | Gloves and eye protection |
| Optional Supplies | Vinegar and baking soda |
| Drying Materials | Clean, soft cloths |
Clear the surrounding area to prevent contamination and lay down a protective surface. Remove any nearby items that might interfere with the cleaning process. If you're working in a kitchen, confirm all food items are sealed and stored away. Keep your cleaning supplies organized and within reach to make the process more efficient and thorough.
Removing Salt and Debris
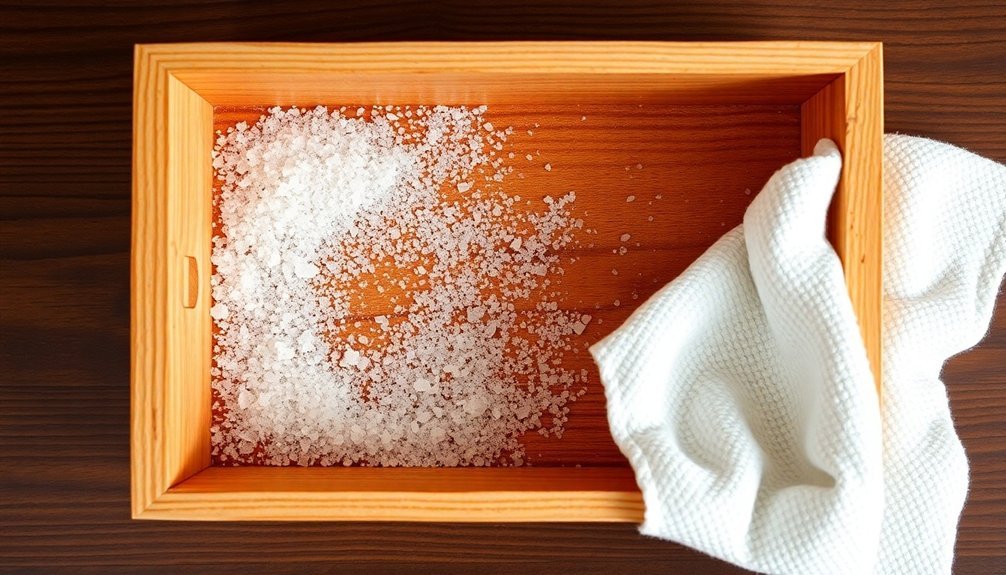
Start by emptying your salt box entirely, making sure to scoop out as much loose salt and debris as possible into a clean container.
You'll need to tackle any stubborn salt buildup using a screwdriver for hard-to-remove residue, paying special attention to corners and crevices where salt tends to accumulate. Similar to cleaning cast iron, use paper towels to wipe away any remaining salt residue.
Using a dry scrub brush, sweep away any remaining loose particles from all interior surfaces before moving on to the next cleaning step.
Empty Container Completely
Properly emptying your salt box marks the crucial first step in deep cleaning. You'll need to verify every grain of salt is removed before proceeding with the washing process. Start by using a spoon or small scoop to remove the bulk of the salt, being methodical to reach all corners of the container.
| Action | Implementation |
|---|---|
| Initial Removal | Use spoon or scoop to remove bulk salt |
| Detail Work | Apply soft brush or cloth for remaining particles |
| Dislodging | Gently tap container to loosen stuck salt |
| Final Check | Wipe with dry paper towel for residual dust |
After removing the main salt content, use a soft brush or small cloth to sweep away any remaining particles. Don't forget to tap the container gently against your palm or a clean surface to dislodge any stubborn salt grains that might be stuck in corners or crevices. Finally, take a dry paper towel and thoroughly wipe the interior to remove any remaining salt dust. Before moving on to the cleaning phase, inspect the container carefully to verify you haven't missed any areas, particularly in the corners and along any seams or joints.
Remove Stubborn Salt Buildup
With the salt box now empty, dealing with stubborn salt buildup requires a strategic approach. Start by using a long-handled tool, such as a broom handle or mop handle, to break up the hardened salt crust.
Insert the tool and carefully chip away at the buildup, switching to a heavier or sharper tool if needed. As you break up the chunks, scoop them out with a plastic container, being careful not to damage the salt box's interior.
For particularly resistant buildup, you'll need to use hot tap water. Pour it directly over the remaining salt mass to help dissolve it. If your salt box has a brine well, add about a quart of hot water to it.
Let the mixture sit for approximately 4 hours to allow complete dissolution. You may need to repeat this process if some buildup remains after the first treatment. Confirm you've turned off the water softener during this cleaning process.
Use a wet/dry shop vac to remove any remaining water from the container's bottom. Confirm you've removed all debris and salt chunks before proceeding with the next cleaning step, paying special attention to any platforms or structures inside the container.
Brush Away Loose Particles
Every loose particle of salt must be thoroughly removed before deep cleaning can begin. Start by emptying your salt box completely, using a scoop or spoon to transfer the salt to another container. Make sure you've removed all visible salt grains and dust from the box's interior.
Next, take a can of compressed air and hold it upright over a sink or cleanable surface. Direct the nozzle into the corners and crevices of your salt box, blowing out any stubborn particles that might be hiding. Continue this process until you don't see any more salt or debris coming loose.
For thorough removal of remaining particles, use a thin bottle brush or soft-bristled brush to clean the inside surfaces. Pay close attention to the corners and areas where salt tends to build up. You'll want to repeat this step if you notice any particles still clinging to the surface.
Finally, wipe down the exterior of your salt box using a mildly abrasive pad or soft cloth. If you're working with a wooden salt box, avoid excess moisture. For other materials, you can use a slightly damp cloth, but be sure to dry the surface thoroughly afterward.
Proper Cleaning Techniques
Start your salt box cleaning by using warm water and mild soap, being careful not to soak the container as this can damage the material.
You'll need to gently wash both the interior and exterior surfaces, paying special attention to any corners or crevices where salt residue might accumulate.
Once you've completed the initial cleaning, thoroughly dry the salt box with a soft cloth, making sure no moisture remains before refilling it with fresh salt.
Initial Cleaning Steps
Proper cleaning of your salt box begins with three essential steps: complete emptying, thorough removal of residual salt, and preparation of cleaning supplies.
Start by emptying all salt from the container, making sure no granules remain, as leftover salt can interfere with the cleaning process and create unwanted clumps when exposed to moisture.
Once you've emptied the box, use a soft-bristled brush or small vacuum to remove any stubborn salt particles from corners and crevices. This step is vital for achieving a thorough clean.
Next, prepare your cleaning materials: you'll need a cloth, warm water, and optionally, white distilled vinegar for tackling tough stains or odors.
Before proceeding with the actual cleaning, dampen your cloth with warm water, being careful not to make it too wet.
If you're dealing with persistent stains or odors, mix a small amount of white distilled vinegar with the warm water. This solution is effective for cleaning while being gentle enough for most salt box materials, whether they're made of wood, ceramic, or bamboo.
Safe Drying Methods
Drying your salt box thoroughly is crucial to prevent moisture-related issues and maintain its long-term durability. After washing, immediately use a soft, clean cloth to wipe down every surface, paying special attention to corners and crevices where moisture can hide.
If you've got a wooden salt box, be extra diligent as wood can retain moisture and warp if not dried properly.
Place your clean salt box in a well-ventilated area away from direct heat sources to air dry completely. You'll want to position it upside down first to guarantee water doesn't pool in the bottom.
Once you're confident it's completely dry, flip it right side up and let it sit for another hour before adding fresh salt.
For extra protection against moisture, you can place a small silica gel packet at the bottom of your salt box before refilling it with salt.
Don't forget to check that the lid or closure mechanism is completely dry as well. If you're using a container with a Gamma Seal or screw top, make sure to dry the threads thoroughly to prevent any rust or corrosion that could compromise the seal.
Drying Methods and Storage

Once your salt box has been thoroughly cleaned, the drying and storage process requires careful attention to maintain salt's quality and prevent moisture-related issues.
You'll need to guarantee the box is completely dry before adding new salt, as any residual moisture can cause clumping and degradation.
Choose a controlled drying environment away from kitchen activity and humidity. You can use forced air or a clean, dry cloth to remove any remaining moisture.
If you're using a wooden salt box, allow it to air dry thoroughly in a cool, dark location to prevent warping or damage.
For storage, select an airtight container that's non-metallic to prevent corrosion. Glass jars or food-grade plastic containers work well.
Place your salt box in a cool, dark area away from strong odors and heat sources. If you live in a humid climate, consider adding a few grains of uncooked rice to absorb excess moisture.
Regular maintenance of your storage conditions is essential. Check periodically for signs of moisture or contamination, and keep the storage area's temperature consistent.
Don't place your salt box near the stove or areas where steam and cooking vapors are present.
Maintaining Wood Salt Boxes
Wooden salt boxes require specific care to maintain their durability and functionality. Regular maintenance includes gentle cleaning with warm water and mild dish soap, avoiding harsh scrubbers that can damage the surface.
Don't use your dishwasher or soak the box in water, as this can cause significant damage to the wood.
To protect your salt box, you'll need to apply food-safe mineral oil or beeswax periodically. Make sure the box is completely clean and dry before applying the finish with a cloth or brush. Let it absorb fully, then wipe away any excess. This treatment helps prevent dryness and maintains the wood's integrity.
Watch out for salt's corrosive nature, especially with exotic woods like Brazilian walnut. You might want to contemplate lining your box with neutral wood like maple to prevent flavor transfer.
If you notice stains or damage, you can carefully sand the affected area, but remember this is permanent and requires re-oiling afterward. For deep cleaning, use a vinegar-water solution or hydrogen peroxide, limiting exposure to 20 minutes.
Regular inspection and maintenance will help your salt box last longer and perform better.
Natural Cleaning Solutions

Natural cleaning solutions provide an effective and environmentally friendly approach to deep cleaning your salt box. Using common household ingredients, you'll create cleaning mixtures that are both safe and powerful for your salt container.
Start by mixing equal parts baking soda and salt with a small amount of water to form a gentle scrubbing paste. This combination effectively removes built-up residue without scratching the surface of your salt box.
If you're dealing with stubborn stains, add a few drops of lemon juice to the mixture for extra cleaning power and natural deodorizing properties.
For wooden salt boxes, create a mixture of salt and vegetable oil to clean and condition the wood simultaneously. Apply this paste sparingly with a soft cloth, working in the direction of the wood grain. You'll not only clean the surface but also help protect it from moisture damage.
Don't forget to deodorize your salt box after cleaning. Mix a solution of salt and vinegar, apply it with a clean cloth, and let it sit for five minutes before wiping clean. This combination eliminates any lingering odors and sanitizes the container naturally.
Preventive Care and Protection
Through proper preventive care, you'll extend the life of your salt box and maintain its functionality. After each use, make sure to dry the hopper completely and remove any salt residue using water and a pressure washer.
Store your salt box in a dry, protected area to prevent unnecessary exposure to moisture and weather elements.
Regular lubrication is essential for peak performance. You'll need to grease the bearings on the idler, spinner, and drive shafts every 10 hours of operation, while the input shaft bearings require lubrication every 50 hours.
Don't forget to apply dielectric grease to electrical connections for protection against moisture.
Check your electrical components weekly for damage or wear. If you notice any error codes on the control board or damaged wires, address these issues immediately.
Keep electrical parts away from excessive water exposure during cleaning.
Maintain a regular inspection schedule and document all maintenance activities in a log. You'll want to look for scale buildup and early signs of corrosion.
When you spot potential problems, don't delay in addressing them – prompt attention to maintenance issues will prevent costly repairs later.
Frequently Asked Questions
Can I Use Vinegar to Clean My Salt Box?
Yes, you can use vinegar to clean your salt box. It's an effective, safe solution that dissolves mineral buildup. Simply soak the box in distilled white vinegar for 2-24 hours, then rinse thoroughly.
How Often Should I Replace My Wooden Salt Box?
You'll need to replace your wooden salt box every 2-3 years with regular use, but it can last longer if you maintain it properly. Watch for signs of warping, cracking, or excessive wear and tear.
Will Microwaving My Salt Box Help Eliminate Moisture?
No, don't microwave your wooden salt box. It could damage or warp the wood. Instead, empty the salt, dry the box thoroughly with a clean cloth, and let it air dry completely.
Does Keeping Rice in My Salt Box Prevent Clumping?
Yes, you'll find rice effective at preventing salt clumping because it's hygroscopic, meaning it absorbs moisture faster than salt does. Place a few grains of long-grain rice in your salt container for best results.
Can I Use Mineral Oil to Treat My Salt Box?
Yes, you can safely use mineral oil on your salt box. It'll protect the wood from moisture, prevent cracking, and won't go rancid like cooking oils. Just apply a light coat periodically.
In Summary
Your salt box will serve you well for years when you maintain it properly through regular cleaning and care. Remember to deep clean every few months, always dry thoroughly, and store in a moisture-free area. For wooden boxes, keep up with mineral oil treatments to prevent absorption. By following these cleaning steps and maintenance tips, you'll preserve your salt box's functionality and appearance.


Leave a Reply