
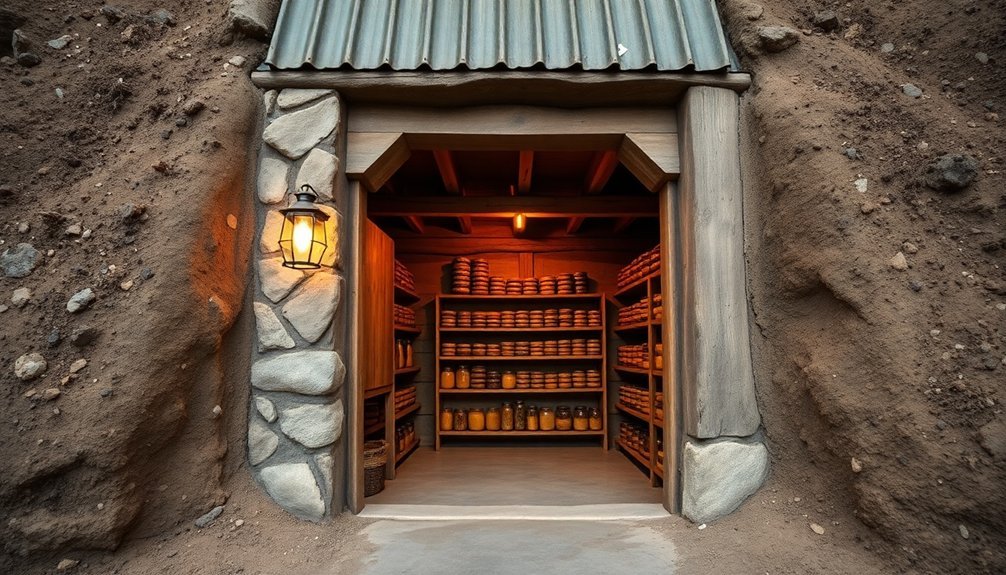
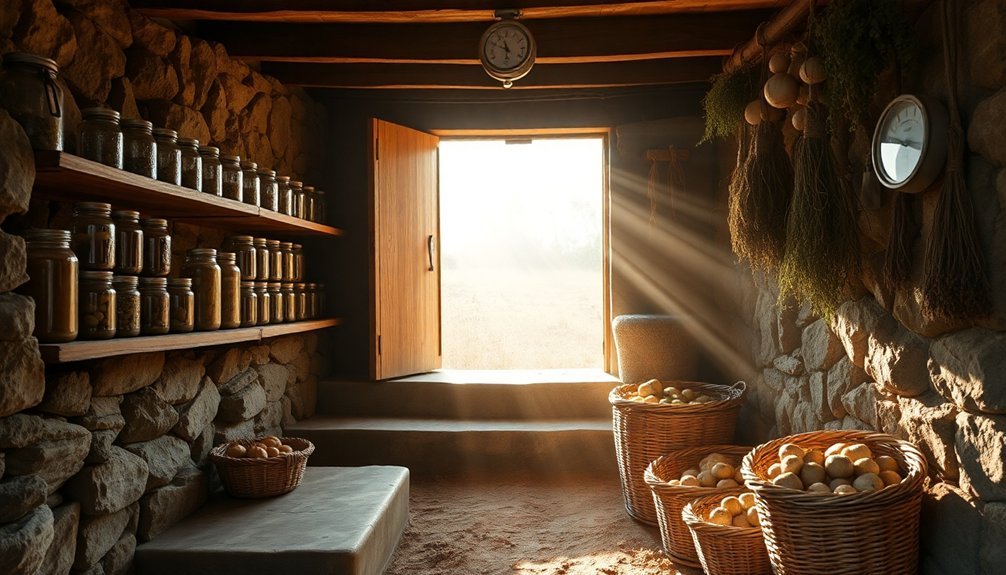
An underground root cellar is your homestead's most valuable food storage solution. You'll preserve fresh produce for months without electricity while maintaining ideal humidity levels of 85-95% and temperatures between 32-40°F. A standard 5×8 ft cellar stores up to 30 bushels of food, letting you take advantage of bulk purchases and abundant harvests. You don't need refrigeration or canning – traditional root storage actually enhances flavor intensity and reduces nutrient loss. Plus, your cellar doubles as an emergency shelter during severe weather events. The path to true food independence starts beneath the surface.
Essential Benefits of Root Storage
Root cellars stand as time-tested powerhouses for sustainable food storage, offering homesteaders significant advantages over modern preservation methods. When you invest in a root cellar, you'll immediately notice substantial reductions in your energy consumption and utility bills, as these underground storage spaces don't require electricity to maintain ideal temperatures. A properly constructed cellar maintains humidity levels of 85-95%, creating optimal conditions for long-term storage.
Your produce will stay fresh for months longer than conventional storage methods, maintaining its natural flavor and texture without the need for freezing or canning. Root vegetables, winter squash, and potatoes thrive particularly well in this environment, reducing food waste and saving you money throughout the year.
You'll appreciate the expanded storage capacity that allows you to take advantage of bulk purchases from farmers' markets and store your abundant harvest. The spacious design accommodates not only fresh produce but also provides room for canning supplies, seeds, and other homesteading essentials.
This increased storage capability enhances your food security and self-sufficiency, ensuring you'll have access to fresh, nutritious produce regardless of the season. By choosing a root cellar, you're embracing a sustainable, cost-effective solution that aligns perfectly with homesteading principles.
Natural Temperature and Humidity Control
Two fundamental factors determine your root cellar's success: temperature and humidity control. You'll want to maintain temperatures between 32°F and 40°F for ideal storage, while keeping humidity levels at 85-95%. Earth's natural properties make this possible without mechanical systems. Regular monitoring with hygrometers helps ensure optimal storage conditions.
Your underground cellar benefits from soil's poor heat conductivity, providing consistent temperatures at 4-6 feet depth. Choose a north-facing hill or shaded area to minimize sun exposure, and guarantee proper drainage to prevent water damage.
| Factor | Natural Control Methods |
|---|---|
| Temperature | Earth insulation at 4-6 feet depth |
| Airflow | Intake/outlet vents for circulation |
| Humidity | Dirt/gravel floors for natural moisture |
| Seasonal Changes | Double doors/anteroom for climate buffer |
| Site Location | North-facing slope with good drainage |
You can fine-tune your cellar's environment by using closable exhaust pipes to borrow cold night air, and maintain humidity through damp sand or water trays. Remember that temperature varies with height – store cold-sensitive items higher up where it's slightly warmer. If you're in an area with extreme winters, consider adding an anteroom to create an airlock system that helps regulate temperature fluctuations.
Building Your Underground Food Vault
You'll start your root cellar project by selecting high ground with natural drainage and mapping out the excavation area to match your storage needs.
Your construction plan should include durable materials like concrete or cinder blocks for the walls, plus essential structural supports and a properly pitched roof to handle the weight of soil coverage. Maintaining a humidity of 85-95% is crucial for optimal food preservation.
Don't forget to incorporate a two-way ventilation system with screened pipes that allow fresh air to enter while stale air exits, ensuring your food stays fresh in the controlled environment.
Location and Site Planning
Picking the right spot for your underground root cellar can make or break its success. You'll want to focus on locations that naturally maintain cool temperatures and proper humidity levels while staying clear of potential water issues.
Start by identifying elevated ground that's not prone to flooding, and keep away from septic systems and high water tables. A hillside location is ideal, as it provides natural temperature regulation and simplified drainage.
If you're dealing with rocky terrain, consider building an above-ground cellar with earth berms instead of fighting the landscape. Position your cellar where it's easily accessible year-round, especially during winter months.
If possible, utilize your home's existing foundation wall as one side of the cellar – this saves on materials and provides structural support. Make sure you're choosing a spot that allows for proper ventilation to prevent ethylene gas buildup from stored produce.
Before breaking ground, check that your chosen location has enough space for an adequate storage area (typically 8×8 feet) and verify that the ground is level enough for a stable foundation.
Essential Building Materials
With your location selected, gathering the right building materials will set the foundation for a lasting root cellar. Your walls can be built using traditional materials like bricks or cinder blocks, which offer durability at a reasonable cost. For an 8×8 foot cellar, you'll need about 350 cinder blocks. Concrete reinforced with rebar provides exceptional strength, particularly in humid conditions.
Your roof requires careful consideration to prevent moisture issues. Start with urethane or Styrofoam sheets for insulation, covered by 6-mil polyethylene sheeting. You'll need enough earth to cover the structure with 2-4 feet of soil, topped with grass to prevent erosion.
Don't forget to apply waterproof coating like DryLok to seal out moisture.
For flooring, you've got options. While dirt floors maintain higher humidity levels, they require proper footers to prevent cave-ins. A better choice is laying gravel topped with plastic sheeting for improved drainage.
Install perforated pipes around the exterior to direct water away from your cellar. Complete your build with proper ventilation using fans to control moisture and maintain air circulation, and add rain gutters above ground to keep water away from your walls.
Ventilation System Design
A well-designed ventilation system forms the backbone of any successful root cellar, controlling both temperature and humidity levels throughout the year.
You'll need to install two essential components: intake vents near the floor and exhaust vents close to the ceiling, positioned on opposite sides of your cellar for ideal airflow.
Your ventilation setup should include 4-inch diameter ductwork connected to an external wall, preferably on the northern side of your building.
Don't forget to cover all vents with wire screens to keep pests out, and seal any gaps between the ducts and walls with silicone caulk.
The system works through natural convection – cold air flows inward and downward through the lower vent, pushing warmer air out through the top vent.
You can enhance this process by installing a fan, but only run it when outside temperatures are cooler than inside.
Monitor your cellar's temperature with a thermometer, aiming to maintain 40-50 degrees.
Regular maintenance is vital.
Check your vents periodically for blockages, verify screens remain intact, and confirm that the system effectively removes ethylene gas, which can speed up produce spoilage.
Optimal Location and Site Selection
Selecting the ideal location for your root cellar requires careful thought of multiple environmental factors.
You'll want to choose a spot that's easily accessible from your home while maintaining the perfect environment for food preservation. A north or northeast-facing hill or mound often provides the ideal natural insulation and temperature control you need.
When choosing your root cellar's location, verify it meets these critical requirements:
- Position the cellar above the water table but below the frost line, avoiding areas prone to flooding or near septic systems.
- Select a site with a natural slope for proper drainage, ideally incorporating a house foundation wall for structural support.
- Build on soil that's easy to excavate, steering clear of rocky terrain that'll make construction difficult.
- Confirm the location allows for proper ventilation setup with room for exhaust pipes or windows.
Remember to keep the cellar's floor higher than the surrounding soil level for effective drainage.
If you're in an extremely cold climate, you might need to take into account a south-facing location to prevent freezing, though this is less common.
A well-chosen location will greatly impact your root cellar's effectiveness in preserving food.
Construction Materials and Methods
When planning your root cellar's construction, you'll need to decide between traditional materials like concrete and bricks or alternative options such as earthbags and recycled materials.
Your choice of building components should prioritize moisture resistance and structural integrity, with proper waterproofing measures like plastic sheeting and DryLok coating being essential.
Earth-sheltered design principles require strong foundational support through concrete footers and adequate reinforcement using rebar, ensuring your root cellar remains stable for years to come.
Essential Building Components
The construction of a reliable root cellar depends on several essential building components that work together to create a stable underground storage environment.
You'll need to carefully select and combine these elements to guarantee your cellar maintains proper temperature, humidity, and structural integrity throughout the seasons.
The core building components you'll incorporate into your root cellar must work as a unified system.
Start with a solid footer foundation of reinforced concrete to prevent shifting and settling.
Then, build your walls using either cinder blocks or earthbag construction, making sure to add proper reinforcement with rebar and bond beams.
- Your roof system must include multiple layers, combining concrete, rebar, and waterproof materials to prevent moisture penetration and guarantee structural strength.
- Install proper ventilation with both intake and exhaust vents to maintain airflow and control humidity.
- Create an insulated entrance with sturdy stairs and a well-sealed door to maintain temperature stability.
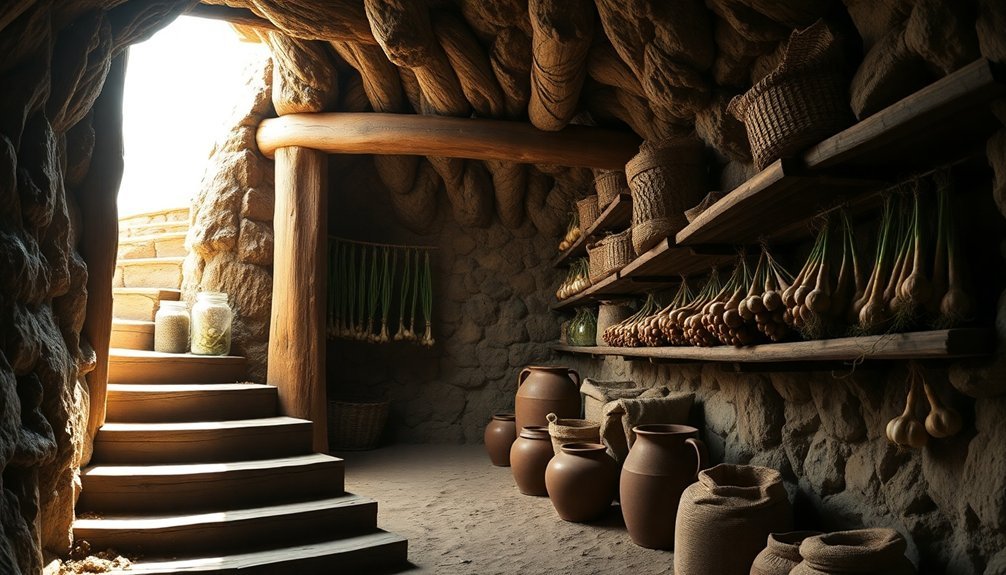
- Use natural dirt floors and guarantee proper drainage around the structure to manage moisture levels.
Earth-Sheltered Design Basics
Building an earth-sheltered root cellar starts with understanding both traditional and modern construction approaches. You'll find that concrete is the most reliable foundation material, offering superior strength and moisture resistance.
For the walls, you can choose between concrete masonry units or rammed earth – both provide excellent thermal mass and durability. If you're budget-conscious, consider incorporating recycled materials like used bricks or repurposed timber for non-structural elements.
Your construction method will largely depend on your site's typography. If you've got a hillside, in-hill construction is your best option, allowing you to dig into the slope while maintaining easy access.
For flat terrain, you'll want to use the berming technique, where you'll build the structure at ground level and then bank earth against the walls. Either way, you'll need to face the entrance toward the south in cold climates to capture natural warmth when needed.
Remember that proper moisture management is essential. You'll need to incorporate waterproofing materials and adequate drainage systems to prevent water infiltration.
This includes installing vapor barriers and ensuring proper soil compaction around the structure to direct water away from the walls.
Ventilation and Air Flow Systems
Inside every successful root cellar lies a well-designed ventilation system that's essential for preserving your stored produce. You'll need both intake and exhaust pipes positioned in opposite corners of your cellar, with the intake pipe near the floor to draw in cool air and the exhaust pipe near the ceiling to release warm air through natural convection.
Your ventilation system must accomplish these critical functions:
- Remove excess heat and carbon dioxide from stored foods while allowing vegetable odors to escape
- Control humidity levels to prevent mold growth and maintain ideal storage conditions
- Eliminate ethylene gas that can cause premature sprouting and affect produce flavor
- Regulate temperature through adjustable airflow during seasonal changes
To build an effective system, use 4-inch diameter PVC or ductwork for your pipes, and don't forget to cover intakes with screens to keep pests out. Seal all connections with silicone caulk for an airtight fit.
You'll need to maintain your system by checking for blockages and cleaning screens regularly. Remember to open your vents at night to let in cool air and monitor humidity levels to adjust airflow accordingly.
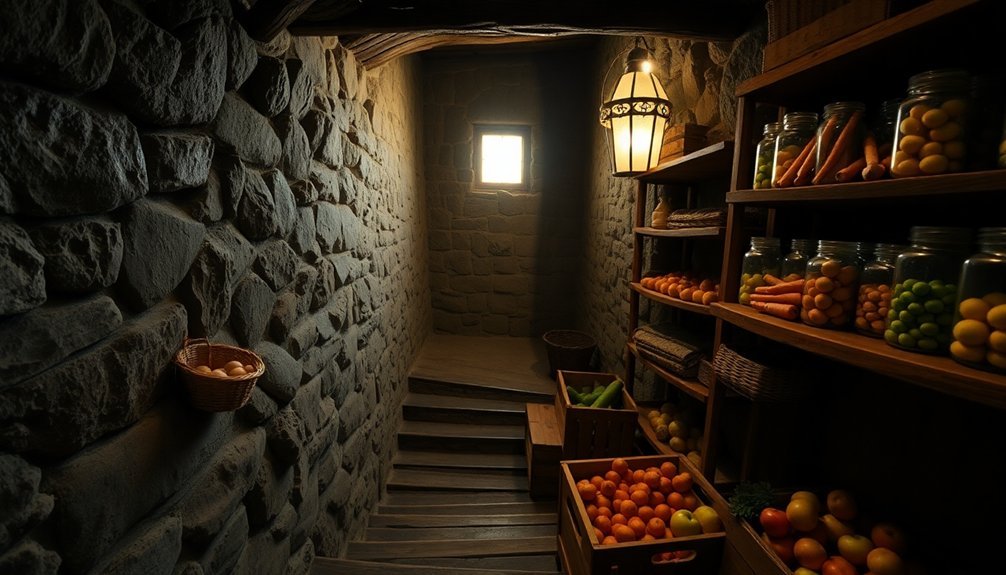
Shelving and Storage Organization
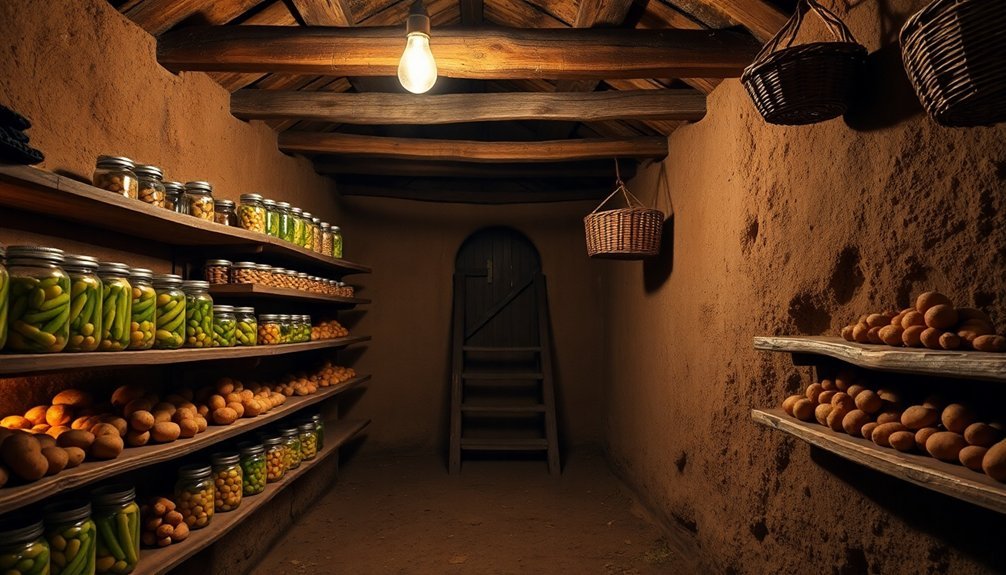
Successfully organizing your root cellar's storage space requires careful planning and the right combination of shelving materials. Start by choosing durable materials like cedar wood for your shelving, as it naturally resists insects and mold.
You'll want to incorporate recycled materials where possible, such as repurposed tires or automobile parts, to keep costs down while maintaining effectiveness.
Organize your storage space by categorizing similar items together. Keep fruits separate from vegetables, particularly apples and root crops, as they can affect each other's storage life. Use bins filled with sand or damp sawdust for root vegetables, and create dedicated areas for meat storage and condiments.
Don't forget to label everything clearly, including storage dates and expected shelf life.
Maintain your storage system by conducting regular inventories and removing any spoiled items immediately. You'll need to rotate stock frequently, making certain older items get used first.
Keep clean, organized sections throughout winter by monitoring conditions regularly and protecting against pests. Consider using straw bales or foam board for additional insulation where needed, and verify your shelving arrangement doesn't interfere with proper ventilation.
Year-Round Food Preservation Techniques
Four essential preservation techniques guarantee your homestead's food stays fresh throughout the year: canning, freezing, dehydrating, and root cellar storage.
Each method serves a unique purpose in your food preservation strategy, allowing you to maintain a diverse and nutritious food supply regardless of the season.
You'll want to master these preservation priorities to maximize your harvest:
- Start with canning for your fruits, vegetables, and homemade sauces. You'll need clean jars, proper sealing techniques, and careful attention to processing times to verify safe preservation.
- Utilize freezing for most of your vegetables and fruits. Remember to blanch vegetables first, then store them in airtight containers with minimal air exposure.
- Set up a dehydrator for creating healthy snacks and preserving herbs. This method removes moisture while maintaining nutritional value and intensifying flavors.
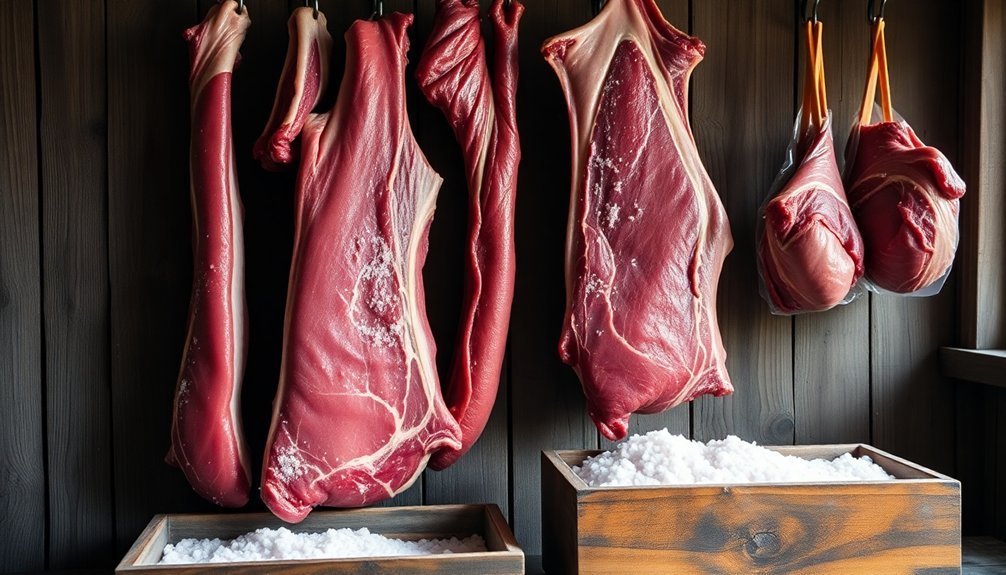
- Rely on your root cellar for storing root vegetables at 32-40°F with 85-95% humidity. This traditional method excels at preserving carrots, beets, parsnips, and potatoes for months.
Emergency Preparedness and Beyond
Beyond traditional food preservation methods, a root cellar serves as a cornerstone of emergency preparedness for any homestead. You'll find that during power outages or natural disasters, your underground storage space becomes an invaluable resource, keeping your food supply secure and accessible without relying on electricity.
Your root cellar can double as a storm shelter, offering protection during severe weather events. Its reinforced structure, whether built with cinder blocks or earthbags, stands strong against earthquakes, tornadoes, and flooding. The underground location naturally shields you from surface-level hazards while maintaining stable temperatures.
You'll appreciate the economic benefits during emergencies, as you won't need electricity for food preservation. By storing bulk purchases from farmers' markets or your garden harvest, you're reducing both food costs and waste. A standard 5 x 8 ft cellar can hold 30 bushels of food, ensuring your family's security during challenging times.
For added protection, you can camouflage your root cellar to blend with the surroundings. Install a sturdy door and proper fencing to prevent unauthorized access and animal intrusion, keeping your food supply confidential and secure during emergencies.
Frequently Asked Questions
How Do You Keep Mice and Other Pests Out of Root Cellars?
You'll need to seal all entry points with caulk and steel wool, maintain a clean space, use natural repellents like peppermint oil, and store food in airtight containers or sand to prevent pest access.
Can Root Cellars Be Used to Age Cheese and Wine?
Yes, you can age both cheese and wine in your root cellar! The consistent cool temperatures (50-55°F) and controllable humidity levels provide ideal conditions. You'll need proper storage containers and monitoring to guarantee successful aging.
What Happens to a Root Cellar During Flooding or Heavy Rains?
During heavy rains, you'll face water seepage through your root cellar's walls and potential flooding. You'll need working sump pumps, proper drainage systems, and waterproof coatings to protect your stored items from water damage.
Do Root Cellars Affect Home Insurance Rates or Property Values?
Yes, your root cellar can increase insurance rates due to flooding risks and liability concerns. However, it'll often boost property value by adding a unique amenity that appeals to buyers interested in sustainability.
How Long Does It Take for Newly Built Root Cellars to Stabilize?
You'll need to wait several weeks to a few months for your new root cellar to stabilize. The time varies based on depth, insulation quality, ventilation, and local conditions, so monitor temperature and humidity regularly.
In Summary
You'll find an underground root cellar transforms your homestead into a self-sufficient haven. By constructing this time-tested storage solution, you're ensuring your harvest lasts longer while saving money on electricity. Your family gains food security through natural preservation methods, and you're prepared for emergencies. Whether storing vegetables, canned goods, or wine, your root cellar becomes an invaluable part of sustainable living.

Leave a Reply