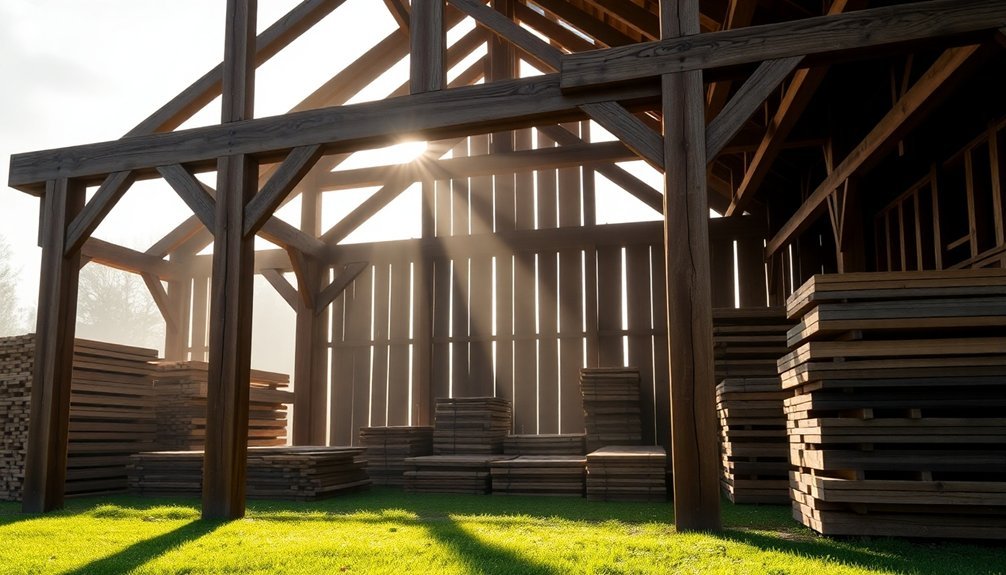
A timber drying frame is essential for any homesteader who wants to process their own lumber efficiently and sustainably. You'll save significant money by drying your own wood instead of buying kiln-dried lumber, and you'll have complete control over the final moisture content. With a basic 15ft x 5ft frame, you can dry approximately 800 board feet of hardwood lumber at once, ensuring a steady supply for your building projects. Proper air circulation and moisture management through your drying frame will prevent warping, cracking, and fungal growth that can ruin valuable timber. The key to success lies in understanding the fundamental principles of frame construction and wood selection.
Building Your First Drying Frame
A well-built drying frame serves as the foundation for properly seasoned timber. When building your first frame, you'll need to focus on five key elements: sturdy structure, proper elevation, protective covering, adequate ventilation, and easy access.
Start by creating a barn-like structure that's strong enough to support your timber load. Consider using kiln-dried Douglas fir for the frame construction since it's significantly lighter than green oak. You'll want to elevate your timbers at least 16-18 inches off the ground using railroad ties or clean boards as a base. This elevation is vital for preventing moisture absorption and promoting air circulation underneath your stack.
For the covering, avoid metal roofing if you're drying oak, as it can cause staining. Instead, opt for asphalt shingles or a well-maintained wooden roof that won't drip onto your timber.
Install fans and vents throughout the structure to maintain consistent air circulation year-round.
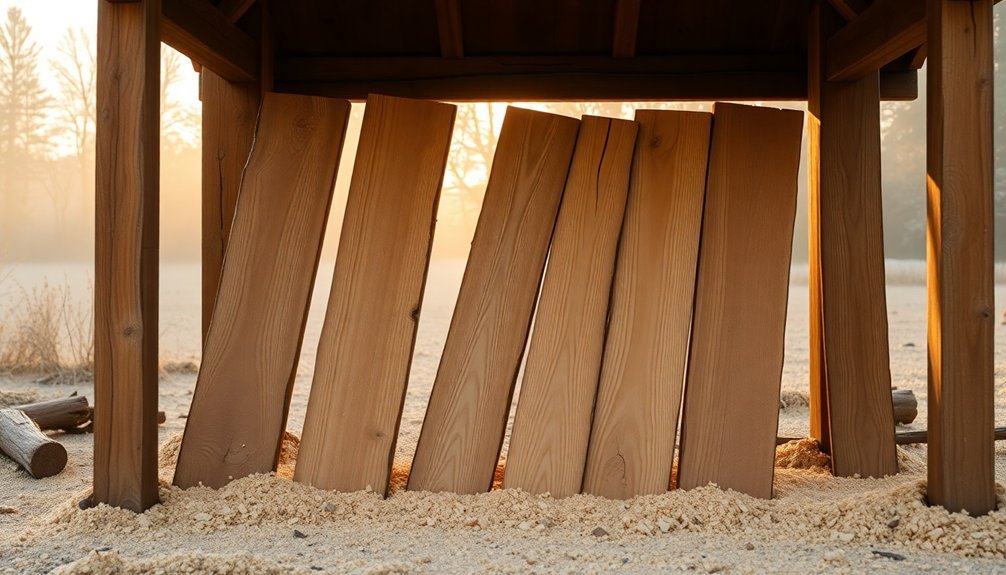
Don't forget to incorporate 2-inch lumber stickers between timber layers to guarantee even drying and prevent warping.
Design your frame with enough space to move around easily when stacking and unstacking timbers. Remember, you'll be accessing this structure regularly to monitor moisture content and adjust ventilation as needed.
Selecting the Right Wood Species
When you're planning a homestead timber-drying operation, you'll want to focus on native species that grow locally, as they're naturally adapted to your climate and typically more cost-effective than exotic woods.
Your local hardwoods will show significant variations in density, which directly impacts their drying times and behavior in your drying frame. Hardwoods like oak require careful attention as they can only safely lose 1% to 2% moisture per day.
While exotic species might offer unique characteristics, they often require specialized drying techniques and can be challenging to source consistently for a small-scale operation.
Native vs. Exotic Species
Selecting wood species for your timber drying frame requires careful consideration of both native and exotic options.
You'll find that native woods like oak, maple, and cherry offer significant advantages for your homestead. They're readily available, support local ecosystems, and typically come with lower transportation costs, reducing your carbon footprint. Color variations in oak, ranging from light greyish to darker honey tones, provide excellent aesthetic flexibility for your project.
While exotic woods like teak and mahogany boast impressive durability and unique aesthetics, they'll cost you more and often come with sustainability concerns. The transportation of exotic species accounts for roughly 34% of CO2 emissions in the timber industry, and some species face threats from overharvesting.
For your timber drying frame, you'll want to prioritize native hardwoods that are FSC or SFI certified. They're not only more sustainable but also provide excellent practical benefits.
Oak and maple offer strength and versatility, while black locust delivers outstanding rot resistance. You'll also find that native species are easier to source and replace when needed.
If you're looking to maintain a sustainable homestead, native woods align perfectly with self-sufficiency principles while supporting your local forest ecosystem.
Hardwood Density Variations
Beyond choosing between native and exotic species, understanding hardwood density plays a major role in building an effective timber drying frame. You'll find that hardwoods typically range from 0.3 to 0.9 grams per cubic centimeter, with species like maple and walnut averaging around 43 pounds per cubic foot, while mahogany can vary between 31-53 pounds per cubic foot.
When you're selecting woods for your drying frame, remember that density directly affects both durability and workability. While denser woods provide better strength and resistance to decay, they're more challenging to work with and require specialized tools. You'll need to pre-drill holes for screws and use heavy-duty fasteners for high-density species.
The density also impacts your drying process considerably. You'll need to adjust your drying parameters carefully – denser woods require lower temperatures and higher humidity levels to prevent cracking and warping.
For example, if you're working with cherry (43-56 lb/ft³), you'll need to maintain precise temperature and humidity controls throughout the drying cycle. Consider incorporating stress-relief conditioning periods into your drying schedule to guarantee the wood stabilizes properly.
Essential Tools and Materials

You'll need basic framing tools like a framing square, tape measure, and carpenter's pencil to guarantee accurate layout of your drying frame's components.
A sturdy hand saw or circular saw, along with a drill and auger bits, will help you cut and join the timber pieces efficiently.
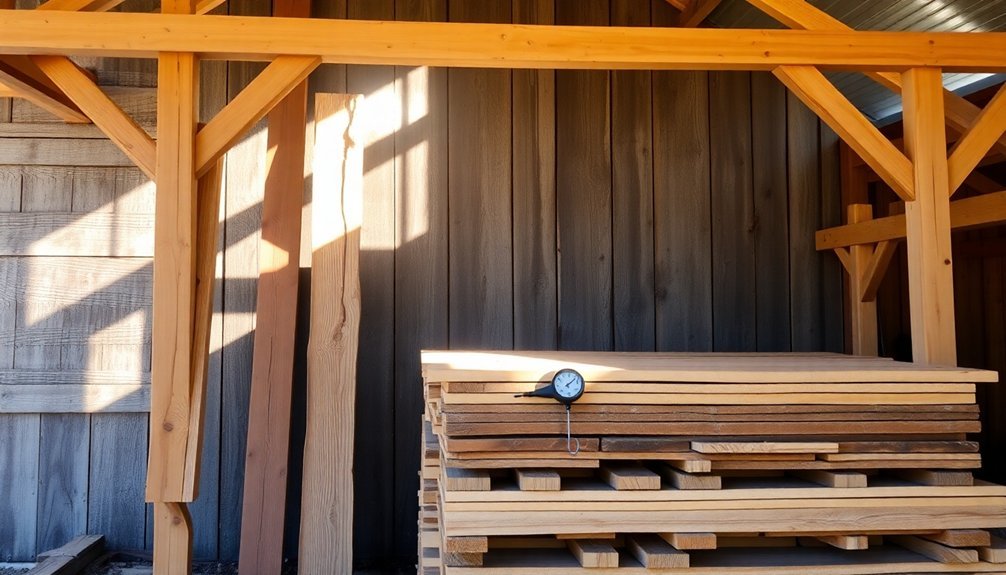
For proper moisture monitoring, you'll want to invest in a reliable moisture meter to test your wood throughout the drying process.
Building the Basic Frame
Building a successful timber drying frame starts with gathering the right tools and materials. You'll need a 24-inch framing square, a reliable carpenter's pencil or marking knife, a hammer, chisel, and hand saw or beam planer. Don't forget the stainless steel pegs for temporary assembly adjustments during construction.
For your frame's structure, you'll want to select appropriate timbers based on whether you're working with hardwood or softwood. Remember that oak timbers dry at ½ inch per year, while pine and fir dry at 1 inch per year.
You'll also need 2x4s or 6×6 timbers for the frame's foundation, along with insulation materials like plastic film or plywood.
Start by elevating your frame off the ground to prevent moisture seepage. You'll want to seal all seams and nails with construction caulk to maintain moisture-proof conditions.
If you're building a kiln-style frame, install multispeed metal window fans for proper air circulation. Position the studs at angles on the sides and back to optimize airflow, and use translucent roofing materials to complete the structure.
Don't forget to account for future shrinkage and potential checks in the wood during construction.
Essential Moisture Testing Equipment
Once your drying frame is constructed, proper moisture monitoring becomes the next critical step. You'll need a reliable moisture meter to guarantee your timber reaches the correct moisture content before use.
For homesteaders, a pin-type meter offers the best balance of accuracy and affordability, providing precise measurements in specific wood types with its electrode system. Your meter should have a measuring range of 6-60% for wood applications, with a resolution of 0.1% for accurate readings.
While pinless meters won't damage your wood's surface, they're typically more expensive and may not offer the same precision for your homestead needs. Look for a meter with adjustment tables for different wood species, as readings can vary considerably based on wood density.
Consider investing in a multi-function meter that also measures ambient temperature and relative humidity. This feature helps you understand how environmental conditions affect your drying timber.
For long-term monitoring, add a basic data logger to track moisture content changes over time. Remember, proper moisture testing isn't just about avoiding warped wood – it's about protecting your investment and guaranteeing your timber projects last for years.
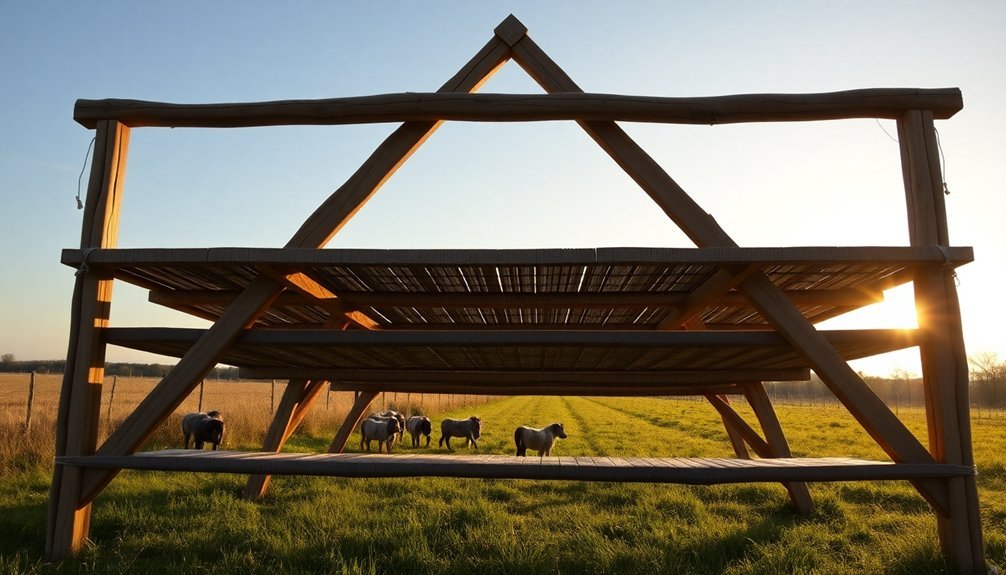
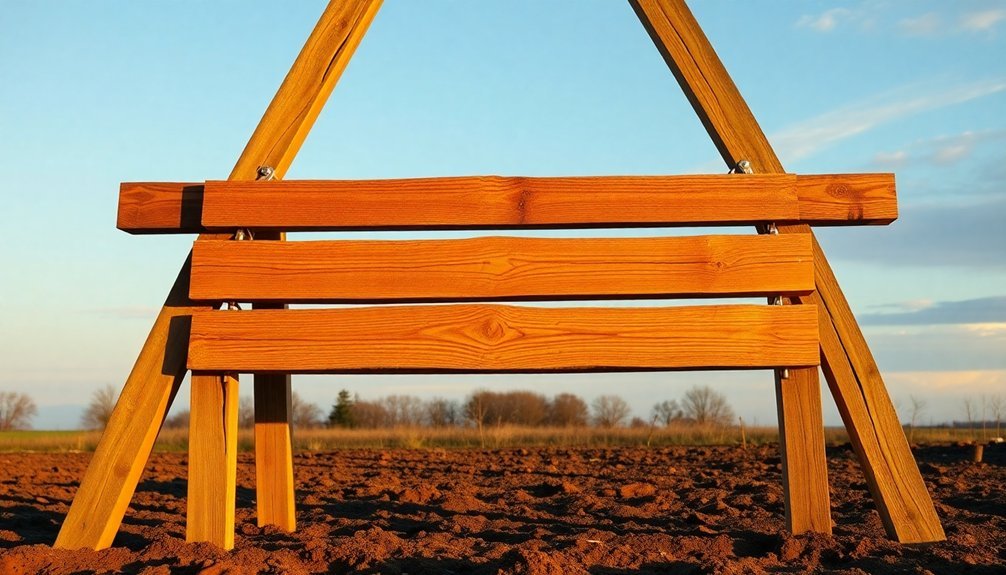
Frame Design and Dimensions
Constructing a timber drying frame starts with precise dimensional planning to secure ideal drying capacity. You'll need to work with exterior dimensions of 15 feet in length and 5 feet, 5 inches in width, with a height of 5 feet to properly accommodate your lumber stacks. This design allows you to dry approximately 800 board feet of hardwood lumber, perfect for most homesteading projects.
For the frame's construction, you'll use 2x4s for wall framing on 16-inch centers, while 6×6 timbers serve as corner posts and beams. The floor frame combines 2x4s topped with ½-inch plywood, creating a stable foundation that's reinforced with 6×6 timbers underneath for forklift access.
Here are three critical design elements you can't overlook:
- Install R-13 fiberglass insulation with the vapor barrier facing downward, covered by 6-mm plastic and ½-inch plywood.
- Frame your walls with proper spacing to secure adequate ventilation and drying.
- Use mortise hinges and barrel latches for doors that allow easy access to check drying samples.
Remember to include proper weather-stripping and caulk between the top and walls to maintain energy efficiency.
Proper Support and Stability
Proper support and stability depend on four key moisture management practices during the drying process. You'll need to make sure your timber maintains a moisture content between 15-19%, use proper spacing for air circulation, protect the wood from direct weather exposure, and allow for uniform drying conditions.
Your drying frame must provide adequate ventilation while keeping the timber covered. Space your PSE timber pieces 10-15mm apart to prevent moisture accumulation, and position them so air can freely circulate around each piece.
You'll want to monitor the moisture content regularly with a moisture meter, as most significant shrinkage occurs between 28% and 16% moisture content.
To maximize stability, pay attention to grain orientation when stacking your timber. Quarter-sawn boards offer better dimensional stability than flat-sawn ones, so arrange them accordingly in your frame.
If you're working with newly cut timber, remember that harvesting in fall and cutting joints in winter can improve stability during the drying process.
Don't forget to protect exposed end grains with wax-based sealers and use corrosion-resistant supports that won't damage your timber during the drying period.
Air Flow Optimization
Your drying frame's cross-stack ventilation needs precise alignment between lumber rows to let air move freely through the entire stack.
You'll want to position your stickers in straight vertical lines to create consistent air channels, maintaining at least 12 inches of clearance beneath the stack for natural draft movement.
Cross-Stack Ventilation Patterns
Throughout the drying process, effective cross-stack ventilation determines how quickly and uniformly your timber will dry. You'll want to position your stacks strategically to take full advantage of prevailing winds while maintaining ideal air velocities – up to 2 m/s for hardwoods and 3-6 m/s for softwoods.
Keep your stacks shorter and narrower, and make sure they're placed away from buildings, trees, or other obstacles that could block airflow.
For consistent drying across your entire stack, you'll need to focus on these essential ventilation patterns:
- Orient your lumber rows parallel to prevailing winds, allowing air to flow directly under the foundations.
- Space your stacks adequately apart to prevent airflow obstruction between them.
- Raise your foundation height to create more space underneath, promoting better air circulation throughout the stack.
As your timber dries, you can adjust your ventilation approach. You'll need less air velocity once you're only dealing with bound water removal.
Remember that uniform airflow distribution through the stack openings is vital for achieving even moisture content, so regularly check for any blockages or inconsistencies in your ventilation patterns.
Natural Draft Maximization
Maximizing natural draft in your timber drying setup requires careful attention to air movement principles and stack configuration. You'll want to position your stacks away from buildings and trees to capture natural wind flow, while keeping them protected from direct rain. The height and width of your stacks directly impact airflow – shorter, narrower configurations promote better air circulation.
| Factor | Target Range | Key Benefit |
|---|---|---|
| Stack Height | 4-6 feet | Ideal convection flow |
| Air Velocity (Hardwood) | Up to 2 m/s | Even moisture removal |
| Air Velocity (Softwood) | 3-6 m/s | Faster drying time |
| Stack Spacing | 12-18 inches | Cross ventilation |
| Draft Direction | Bottom to top | Natural convection |
To maximize natural convection, place your heavier timbers on top of the stack. This creates consistent pressure while allowing warm air to rise naturally through the stack. Cool, moist air will settle at the bottom, so you'll want to verify there's enough ground clearance for this air to escape. Remember to use "H" stickers between layers to maintain consistent airflow channels throughout your stack.
Weather Protection Strategies

Protecting a timber drying frame from weather damage calls for a multi-layered approach that combines structural design with proper maintenance. Your frame needs substantial roof overhangs to shield the wood from rain and UV exposure, while proper elevation keeps timber away from ground moisture.
You'll want to incorporate stainless steel or aluminum plates between timber posts and concrete floors to prevent moisture-related cracking.
For ideal protection of your drying frame, implement these critical measures:
- Install roof gutters to manage water runoff and prevent back splash, making sure they're regularly cleaned to maintain effectiveness.
- Apply high-performance outdoor stain within two months of construction, with reapplication every 2-3 years for exposed areas.
- Maintain good air circulation by avoiding tarps and using commercial screening or shade cloth that allows airflow while deflecting harsh weather.
Remember to take into account your local climate's equilibrium moisture content when planning your frame's protection strategy.
You'll need to adjust your approach based on seasonal changes, as wood naturally shrinks and swells with varying moisture levels.
Use water-repellent finishes that allow the wood to breathe, and verify proper moisture content before applying any protective coatings to prevent blistering or peeling.
Maintenance and Long Term Care
To guarantee your timber drying frame serves you well for decades, proper maintenance and long-term care must focus on consistent moisture management and timely protective treatments.
You'll need to regularly monitor moisture content, ensuring it stays below 18% to prevent decay and resist borer attacks. Pay special attention to areas that are damp and shady, as these spots can foster unwanted moisture buildup.
When it comes to protecting your timber, you'll want to apply appropriate stains and finishes that allow the wood to breathe naturally. Skip lacquers and urethanes, opting instead for transparent oils when needed.
Remember that kiln-dried timber accepts stains better, which means you won't need to re-stain as frequently.
Keep an eye on structural stability by checking for any signs of shrinkage or movement in the joints. If you've used kiln-dried timber, you'll face minimal settling issues since most shrinkage occurs between 28% and 16% moisture content.
Don't forget that maintaining a dry environment is vital for preventing pest problems and decay. Your kiln-dried timber's natural resistance to borers and bugs will continue as long as you keep moisture levels in check.
Common Construction Mistakes
A successful timber drying frame begins with avoiding common construction pitfalls that can compromise your entire project. When building your frame, you'll need to pay close attention to proper sheathing installation and structural support.
Don't rush to complete your frame without ensuring the wood has reached its equilibrium moisture content (EMC), as premature construction can lead to warping, shrinkage, and structural failures.
Your frame's integrity depends on proper material handling and construction techniques. Make sure you're installing panels with their strength axis running perpendicular to supports, and never rip sheathing less than 24 inches without providing adequate backing.
Watch for these vital elements:
- Install sheathing over multiple spans whenever possible to distribute load evenly
- Maintain consistent spacing and alignment in your framing components
- Allow proper airflow between stacked timber pieces to prevent uneven drying
If you're working with kiln-dried lumber, inspect for common defects like casehardening, honeycombing, or checking before use.
These issues can seriously impact your frame's stability and effectiveness. Remember that moisture control isn't just about initial drying – it's an ongoing process that requires proper housewrap and vapor barrier installation.
Seasonal Adjustments for Performance
The performance of your timber drying frame will shift dramatically with the seasons, requiring specific adjustments to maintain ideal drying conditions.
In summer, you'll need to combat high temperatures and humidity by increasing ventilation and monitoring moisture levels closely to prevent cracking. Set up additional vents and maintain steady airflow to distribute heat evenly throughout your frame.
Winter brings its own challenges, demanding careful attention to heat retention. You'll want to check your frame's insulation and consider preconditioning your timber before placement. If you're dealing with particularly cold temperatures, you might need to supplement with additional heating to maintain efficient drying rates.
Spring and autumn require flexible management strategies. During autumn, slightly increase your temperature settings to offset cooler conditions. In spring, you'll face unpredictable weather patterns, so be ready to adjust your setup accordingly.
Take advantage of natural ventilation on dry, windy days, but keep dehumidifiers handy for wet periods.
Throughout the year, monitor moisture movement carefully and adjust your drying schedule based on current conditions. Use automatic controls when possible to maintain ideal temperature and humidity levels, preventing both over-drying and under-drying of your timber.
Traditional Frame Construction Methods
Building your timber frame starts with proper material selection and preparation, which directly impacts its drying performance. You'll want to begin by sawing your largest timbers first, guaranteeing they're box hearted to minimize warping and checking during the drying process.
When stacking your timbers, use 2-inch stickers between layers and keep them elevated off the ground to promote proper air circulation.
Traditional frame construction relies heavily on precise joinery and careful assembly planning. You'll need to account for wood shrinkage in your joint designs to maintain tight connections as your timber dries.
If you're working with green wood, you can build your frame and let it dry while standing, but you'll need to plan for movement in the structure.
Here are three vital steps for traditional frame assembly:
- Pre-assemble your frame sections (bents) using hardwood pegs
- Test fit all components before final installation to guarantee proper alignment
- Raise each bent systematically with a crane, connecting them with horizontal timbers
Remember that proper joint planning is essential – your connections must accommodate wood movement while maintaining structural integrity throughout the drying process.
Storage and Transportation Tips
Properly storing your timber components guarantees successful drying and prevents costly material damage. You'll need to keep your drying frame and timber pieces in a covered area, away from direct sunlight and rain.
If you don't have indoor storage space, raise your materials off the ground using concrete blocks and cover them with waterproof sheeting, leaving room for air circulation.
When handling your timber components, inspect them immediately for moisture content and defects. Don't leave pieces bundled together for extended periods, as this can lead to moisture-related issues.
Instead, sort your timber by length and type, then arrange it properly on your drying frame using stickers for adequate ventilation.
For efficient organization, consider installing cantilever or A-frame racking systems near your drying frame. These systems help protect your stock and make it easier to access different pieces as needed.
Label your racks clearly to track your inventory and drying progress. Remember that hardwoods typically resist moisture better than softwoods, so you'll need to adjust your storage approach accordingly.
After rain, check under any protective covers and remove them temporarily if you find trapped moisture.
Frequently Asked Questions
Does Wood Type Affect Drying Time in Different Climate Zones?
Yes, your wood's drying time varies by climate zone. You'll find that softwoods like pine dry faster in warm, dry regions, while dense hardwoods like oak need longer, especially in humid areas.
Can Timber Frames Be Used to Dry Other Materials Besides Wood?
You shouldn't use timber frames to dry other materials. They're specifically designed for wood's unique drying needs. Different materials require their own specialized drying methods, as timber frames won't provide the right conditions.
How Does Frame Orientation Impact Drying Speed During Different Seasons?
You'll get faster drying with a north-south orientation in summer, as it maximizes airflow. During winter, an east-west frame shields wood from harsh winds while still allowing ventilation through seasonal temperature changes.
What Are the Signs That Wood Is Over-Dried in a Drying Frame?
You'll notice cracks and splits forming in your wood, and it'll feel unusually brittle. Check for warping, excessive shrinkage, and use a moisture meter – readings below 6% indicate over-drying in most species.
Do Natural Wood Preservatives Affect the Drying Process and Timeframe?
Yes, natural preservatives like oils and resins can slow your wood's drying time as they create moisture barriers. You'll need to extend drying periods and guarantee proper ventilation when using these treatments.
In Summary
You'll find that a timber drying frame quickly becomes an essential part of your homesteading toolkit. Once you've mastered proper construction and seasonal adjustments, you can rely on this simple structure to consistently dry your lumber for years to come. Remember to maintain your frame's stability, choose appropriate wood species, and follow traditional methods – you'll be rewarded with quality dried timber for all your homestead projects.


Leave a Reply