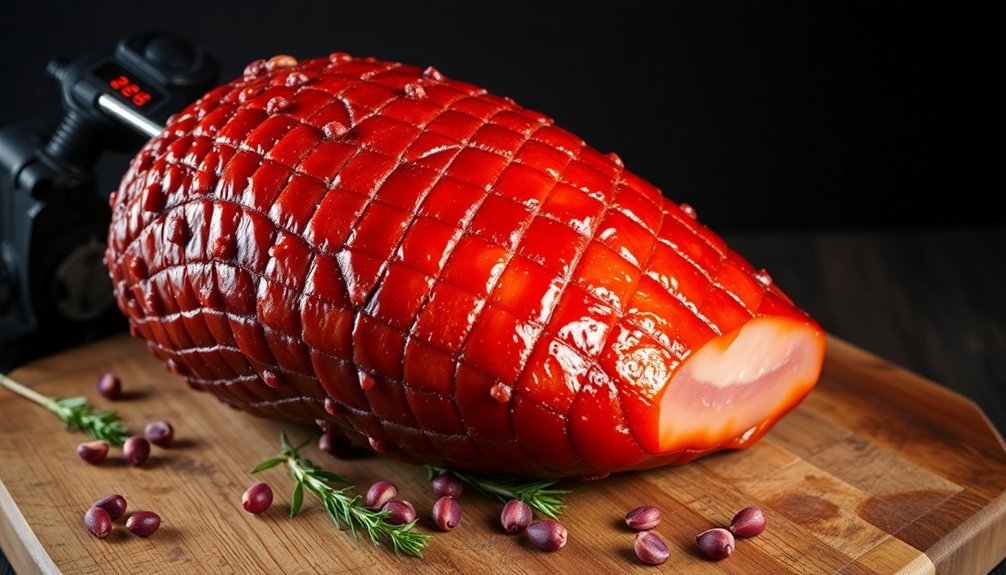
To smoke the perfect ham, you'll need to start with a high-quality, bone-in, uncured cut and plan for 1 pound per person. Score the surface in a crosshatch pattern, apply a mustard binder, and add your favorite BBQ rub. Maintain your smoker between 225°F and 250°F, using classic wood combinations like oak with apple or hickory with cherry for ideal flavor. Smoke for about 20 minutes per pound for bone-in hams, applying a sweet glaze when the internal temperature reaches 115-120°F. Let it rest for 25-30 minutes before carving. The journey to becoming a ham-smoking expert has many more savory secrets to discover.
Selecting Your Perfect Ham

Setting out to smoke the perfect ham starts with selecting the right cut of meat. You'll want to choose a high-quality, bone-in ham that's uncured to achieve the best results. The bone adds substantial flavor and improves the overall texture, while an uncured ham will better absorb the smoky flavors during cooking.
When choosing between cuts, you'll find whole hams include both the butt and shank portions. The butt, coming from the upper shoulder, offers excellent marbling and flavor, while the shank provides a rich, meaty taste. Plan for 1 pound per person when determining how much ham to purchase. Avoid pre-sliced options, as they won't cook evenly in your smoker.
Consider your smoker's capacity when selecting the size of your ham. You'll need to calculate smoking time based on weight, typically allowing 10-15 minutes per pound. Make sure there's adequate space in your smoker for proper heat circulation.
Before smoking, you'll need to prepare your ham by removing packaging and string, rinsing it thoroughly, and patting it dry. Leave a thin layer of fat but score it in a diamond pattern, and remove any remaining skin to enhance smoke absorption.
Equipment and Tools Needed
Getting set up with the right equipment makes all the difference when smoking ham. You'll need a reliable smoker for indirect cooking, though a pellet grill or standard grill with a chimney starter can work too. Essential temperature tools include a digital meat thermometer and heat-proof gloves to safely handle your ham during the smoking process. A high-quality chimney starter will help you achieve and maintain the ideal 325°F temperature throughout cooking.
| Category | Essential Items | Optional Items |
|---|---|---|
| Cooking | Smoker, Wire Rack, Sheet Pan | Pellet Grill, Chimney Starter |
| Temperature | Digital Thermometer, Heat Gloves | Extra Probe, Instant Read |
| Preparation | Sharp Knife, Tongs, Brush | Paper Towels, Aluminum Pan |
| Ingredients | Olive Oil, Seasonings, Glaze | Apple Juice, Chicken Stock |
For proper preparation, you'll want a sharp knife for scoring, tongs for handling, and a basting brush for applying glazes. Don't forget your saucepan for preparing glazes and aluminum foil for wrapping. Keep basic ingredients like olive oil, seasonings, and glaze components handy. You'll also need moisture-adding liquids like apple juice or chicken stock to maintain the ham's juiciness throughout the smoking process.
Essential Wood Smoke Combinations
Creating the perfect smoke flavor for your ham starts with understanding classic wood combinations, such as oak with apple for a balanced sweetness or hickory with cherry for a bold yet fruity profile.
You'll find that seasonal blends can enhance your smoking experience, like using maple and pecan in fall or cherry and apple in spring. Keeping your wood chips dry and unsoaked will deliver more intense smoky notes to your ham.
For the best results, pair stronger woods like hickory or mesquite with milder options like apple or cherry to achieve a well-rounded smoke profile that won't overpower your ham.
Classic Wood Pairings Guide
When selecting wood for smoking ham, the right combination can transform an ordinary cut into a masterpiece of flavor.
Oak serves as a versatile foundation, offering strong smokiness without overpowering your meat, while hickory delivers a bold, hearty profile that's perfect for creating that classic smoked ham taste.
For a more nuanced approach, you'll find apple and cherry woods provide delicate, fruity notes that complement ham's natural sweetness. You can blend these milder woods with stronger varieties to achieve perfect balance.
Cherry pairs exceptionally well with hickory, while apple works beautifully with mesquite for an enhanced depth of flavor.
Here are four proven wood combinations for smoking ham:
- Oak + Cherry: Creates a balanced profile with medium smokiness and subtle fruit undertones
- Hickory + Apple: Delivers classic robust flavor tempered by gentle sweetness
- Cherry + Hickory: Offers rich complexity with a perfect sweet-to-smoke ratio
- Apple + Oak: Provides mild fruitiness backed by consistent smoke depth
Remember to use stronger woods like hickory sparingly, as they can quickly overpower your ham.
When double-smoking, stick to milder woods to avoid overwhelming the existing smoke flavor.
Seasonal Smoke Wood Blends
The art of seasonal wood blending elevates your smoked ham throughout the year, with each season calling for distinct combinations that complement the weather and occasion. You'll discover that mixing different woods creates unique flavor profiles that enhance your ham smoking experience.
For ideal results, consider mixing woods that balance each other's intensity levels. When combining hickory with milder woods, use a 30/70 ratio to prevent overwhelming the meat's natural flavors. You can adjust these ratios based on your preference and the size of your ham.
| Season | Wood Blend Combination |
|---|---|
| Spring | Apple + Cherry (light, sweet profile) |
| Summer | Oak + Apple (balanced, mild smoke) |
| Fall | Hickory + Cherry (rich, complex flavor) |
| Winter | Hickory + Oak (bold, hearty smoke) |
During warmer months, you'll want to stick with lighter combinations like apple and cherry wood for a subtle, sweet profile. When temperatures drop, shift to stronger blends using hickory as your base. Red oak can substitute for hickory if you're seeking a slightly milder winter smoke. Remember that you can always adjust the ratio of woods to fine-tune the intensity of your smoke flavor.
Preparing The Ham Surface
You'll want to start by scoring the ham's surface in a precise crosshatch pattern with 1/2-inch deep cuts spaced 2 inches apart at 45-degree angles.
To develop the essential pellicle, let your ham air-dry in a cool space until the surface becomes slightly sticky, which creates the perfect foundation for smoke adherence.
Before applying any rubs or seasonings, make sure you've properly cleaned and trimmed the ham, leaving a 1/4 to 1/2-inch fat cap for ideal smoke penetration and moisture retention.
Surface Scoring Best Practices
Properly scoring your ham's surface creates pathways for smoke penetration and helps glazes adhere better during the smoking process. Before you begin scoring, verify your ham is completely thawed and stable on your cutting board. You'll need a sharp knife to make precise, clean cuts about ¼ to ⅓-inch deep across the surface.
Create a diamond pattern by making diagonal cuts approximately 1 inch apart, then rotating the ham and making intersecting cuts in the opposite direction. Keep your cutting depth consistent throughout the process for even cooking and ideal flavor absorption.
- Score the entire surface of the ham, including sides, making sure to maintain even spacing between cuts
- Press whole cloves into the intersections of your diamond pattern for enhanced flavor and visual appeal
- Apply a thin layer of Dijon mustard as a binder before adding your favorite BBQ rub
- Verify all cuts are clean and uniform to promote even glazing and caramelization
For best results, score your ham just before placing it in the smoker, and keep a water pan filled to maintain proper moisture levels throughout the smoking process.
Forming The Essential Pellicle
Once your ham is scored, developing a proper pellicle becomes your next focus. This tacky, protein-rich surface layer is essential for smoke adhesion and moisture retention during the smoking process.
You'll want to place your ham on a rack, ensuring air can circulate around all sides of the meat. Start by letting your cured ham rest uncovered in the refrigerator for 24-36 hours. Keep the temperature below 65°F and maintain good airflow around the meat.
If you're working in a dedicated curing space rather than a refrigerator, you'll need to protect the ham with muslin to keep contaminants away. Watch for the surface to develop a slightly sticky feel – this indicates proper pellicle formation.
Don't rush this process, as a well-formed pellicle will greatly enhance your final results. The surface should feel tacky but not leathery. Since ham is a larger cut of pork, you'll want to allow at least 4 hours, though overnight is ideal.
This patience will pay off, as the pellicle will help your ham retain moisture while smoking and create that beautiful mahogany color you're aiming for.
Drying For Better Smoke
The success of smoked ham begins with proper surface preparation. You'll need to focus on creating the ideal surface conditions to guarantee maximum smoke absorption and flavor development.
Start by thoroughly cleaning your ham under cool running water, removing any bone dust, dried bits, or unwanted debris. After cleaning, pat the surface completely dry using paper towels.
For the best smoking results, you'll want to:
- Place your cleaned ham in the refrigerator uncovered for several hours or overnight to develop a tacky exterior
- Remove any packaging materials and pat the surface dry again before proceeding
- Apply your chosen binder (yellow or Dijon mustard) evenly across all surfaces
- Score the fat cap in a crosshatch pattern if it hasn't been spiral cut
Your ham's surface preparation isn't complete until you've trimmed the fat cap to an even 1/4 to 1/2 inch thickness using a sharp boning knife.
This precise fat layer will protect the meat while allowing proper smoke penetration. Remember to wear a Kevlar mesh cut glove for safety during trimming.
The drier, properly prepared surface will help your rub adhere better and create the ideal foundation for smoking.
The Art of Pellicle Formation
Smoking's secret weapon lies in the formation of a pellicle – that tacky, protein-rich surface layer that develops when meat is properly air-dried. This vital layer enhances your ham's smoky flavor, protects against contaminants, and helps retain moisture while preventing unwanted soot from sticking to the meat.
To develop the perfect pellicle on your ham, you'll need to air-dry it uncovered in the refrigerator or a cool room below 65°F. Don't place the meat directly on a flat surface; instead, use racks or hooks to guarantee airflow around all sides.
If you're drying in an open area, cover the ham with muslin to keep insects away.
You can accelerate pellicle formation by applying a dry or wet brine beforehand or using a salt and sugar-based rub to draw moisture to the surface. A fan blowing across the meat will also speed up the process.
For ham, you'll want to allow 2-4 hours minimum, though overnight drying yields ideal results. Watch the meat carefully during this process – you're aiming for a tacky surface, not a leathery one.
Temperature Control Fundamentals
Managing your smoker's heat zones is essential for achieving the perfect smoked ham, with the ideal temperature falling between 225°F and 250°F.
You'll want to establish distinct hot and cool zones by arranging your heat source to one side, allowing for better temperature control and the flexibility to adjust the ham's position if needed.
Keep your smoker's temperature steady by monitoring both the chamber and meat temperatures with reliable thermometers, making small adjustments to the vents as needed to maintain your target range.
Smoker Heat Zone Management
Successful smoking relies on precise temperature control, which starts with understanding your smoker's heat zones.
You'll need to master your smoker's vent system, as the intake and exhaust vents work together to regulate oxygen flow and temperature. Opening the bottom vent increases airflow and heat, while the top vent controls the draft pulling air through the smoker.
A water pan serves as your temperature stabilizer, creating a humid environment that helps prevent temperature spikes. Place it next to your fuel source to maximize its effectiveness.
When managing fuel, remember that hardwoods and charcoal affect temperature differently – charcoal burns hotter, while hardwoods provide steady, consistent heat.
Key elements for maintaining stable heat zones:
- Keep both vents partially open for ideal airflow, avoiding completely closed positions that can smother or starve the fire
- Minimize lid openings to prevent heat loss – remember, "if you're lookin', you ain't cookin'"
- Use high-quality hardwoods like oak or hickory, avoiding softwoods that produce bitter smoke
- Position your water pan strategically to create an effective heat sink and maintain consistent temperatures
Proper heat zone management guarantees your ham develops that perfect smoky flavor while maintaining suitable cooking conditions throughout the process.
Maintaining Stable Target Range
Temperature control mastery stands as the cornerstone of smoking the perfect ham. You'll need to maintain your smoker's temperature between 225°F and 250°F (107°C to 121°C) to achieve ideal results. This vital range guarantees your ham cooks low and slow, allowing smoke to penetrate the meat while keeping it tender and flavorful.
To maintain stability, you'll want to preheat your electric smoker before adding the ham. Fill the water pan to create the necessary moisture environment, and add your chosen wood chips – hickory, apple, or cherry work well.
Monitor your smoker's temperature consistently using a reliable meat thermometer, making adjustments as needed to stay within the target range. Keep track of your ham's internal temperature, aiming for 140°F to 145°F (60°C to 63°C).
Add fresh wood chips every 30-40 minutes to maintain steady smoke production. If you notice the top browning too quickly, cover it with aluminum foil.
Smoke Management Techniques

Throughout the smoking process, proper smoke management stands as the cornerstone of creating a delicious ham with the perfect balance of flavors.
You'll want to aim for that coveted thin blue smoke, which provides ideal flavor without the bitter taste that can come from thick white smoke. To achieve this, make sure your wood smolders rather than burns by carefully managing heat and oxygen levels.
Your smoke quality directly impacts your ham's final taste, so consider these essential management techniques:
- Monitor smoke density constantly – if you see thick white billows, adjust your airflow and heat immediately to return to the desired thin blue smoke
- Start with a small amount of wood and gradually add more as needed, allowing you to control the intensity of smoke flavor
- Use different wood types strategically, as each variety imparts unique flavors to your ham
- Keep your smoker's temperature steady between 225-250°F to maintain consistent smoke production
If you're having trouble maintaining proper smoke, consider using auxiliary smoke generators like an AMNPS or Smoke Daddy.
These tools can help provide steady, clean smoke throughout the cooking process. Remember to keep notes on your smoke management techniques to refine your process for future smokes.
Crafting The Perfect Glaze
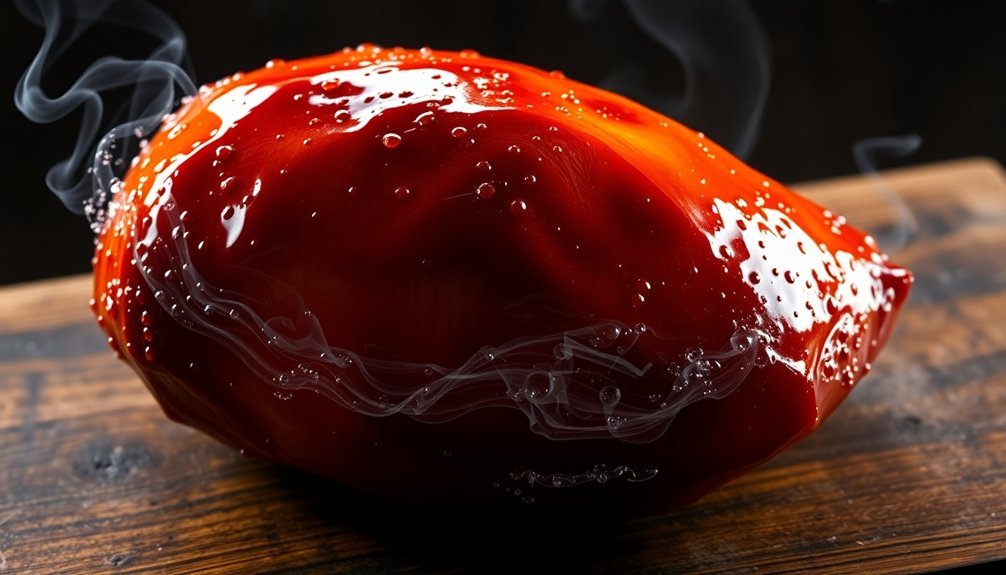
While managing your smoke creates the foundation of flavor, a perfectly crafted glaze adds the finishing touch that transforms an ordinary smoked ham into a show-stopping centerpiece.
Start with light brown sugar as your base, or opt for alternatives like honey, maple syrup, or melted fruit jams. Add depth by incorporating Dijon mustard and your choice of fruit juice – orange, pineapple, or apple work beautifully.
To prepare your glaze, whisk the ingredients in a saucepan over medium heat until the sugar dissolves and the mixture simmers for one minute. Let it cool slightly before applying.
You'll want to wait until your ham reaches an internal temperature of 115-120°F before glazing, which typically occurs during the last 20-30 minutes of smoking.
Apply the glaze generously and evenly across the entire ham. For that picture-perfect finish, you can briefly broil the ham to achieve a glossy, caramelized exterior.
Don't forget to let your masterpiece rest for 15-30 minutes before serving – this allows the glaze to set properly and guarantees the ham retains its moisture.
Timing Your Smoking Process

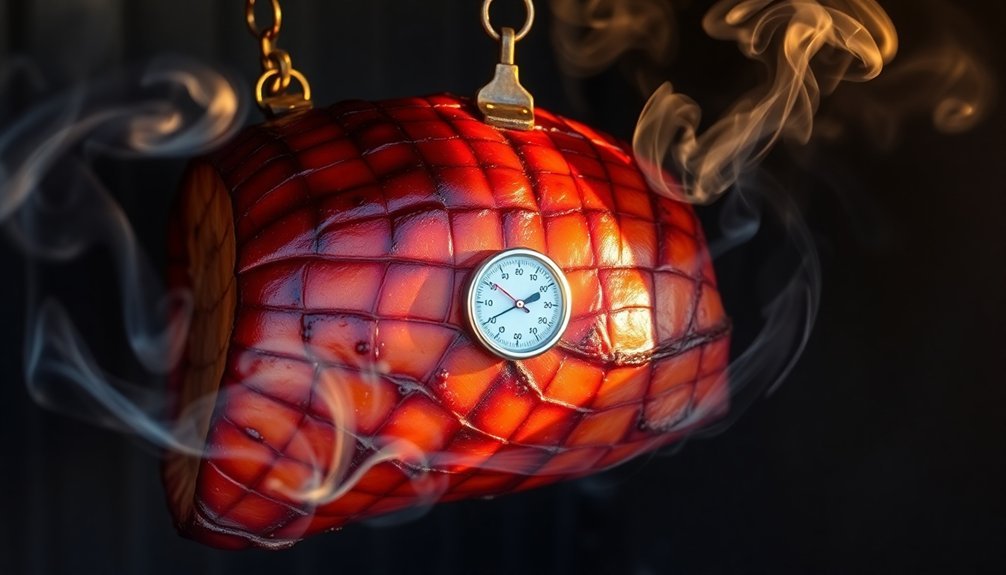
Successfully smoking a ham requires precise timing based on its weight and type. For bone-in hams, you'll need about 20 minutes per pound, while city hams require 10-15 minutes per pound. Your total smoking time could range from 4-10 hours, depending on the size and smoker temperature.
Don't rely solely on time calculations – internal temperature is your most reliable indicator. You'll want to smoke until the ham reaches 140°F internally, using a meat thermometer for accurate readings throughout the process. Maintain a consistent smoker temperature between 225-250°F for ideal results.
Keep in mind these essential timing factors:
- Environmental conditions like wind and humidity can affect your smoking duration
- Different ham types (bone-in vs. city) require distinct cooking times
- Smoker temperature fluctuations will impact your overall timing
- Resting time of 25-30 minutes is vital for juice reabsorption
Once you've reached the target temperature, let your ham rest before slicing. This resting period is non-negotiable – it allows the juices to redistribute throughout the meat, ensuring every slice is moist and flavorful.
You can rest the ham for up to two hours at room temperature without compromising quality.
Mastering Heat Zones
Creating distinct heat zones forms the foundation of perfect ham smoking. You'll need to set up your grill with a clear separation between hot and cool areas, whether you're using charcoal, gas, or a kamado-style cooker.
For charcoal grills, arrange your lit coals on one side, leaving the other side empty for indirect cooking. If you're using a gas grill, turn off one set of burners to achieve the same effect.
Position your drip pan in the cool zone, filling it with water, juice, or beer to maintain moisture and temperature stability. Place your ham fat-side up on the middle grate section, ensuring it's centered and away from direct heat.
You'll want to maintain temperatures between 225-250°F for smoking, or 275-300°F when reheating pre-cooked hams.
Monitor your heat zones using both a lid thermometer and probe thermometer to track ambient and internal temperatures simultaneously.
Fine-tune your heat zones by adjusting the grill's vents – closing them to reduce heat and opening them to increase it. If you notice temperature fluctuations, add fresh charcoal or adjust your gas settings accordingly.
Resting and Carving Methods

After your ham reaches the perfect internal temperature, proper resting and carving techniques become essential for the best results.
Let your ham rest for 20-30 minutes under a loose foil tent, allowing the juices to redistribute throughout the meat. While some sources suggest resting isn't necessary for fully cooked hams, it's still recommended for ideal flavor and texture.
When you're ready to carve, grab a sharp meat carving knife or electric filet knife. You'll want to slice in the direction of the muscle fibers to maintain tenderness and achieve clean, even cuts. Plan for about 3/4 to 1 pound per person when portioning your ham.
For the best carving results, follow these critical steps:
- Confirm your knife is sharp and appropriate for meat carving
- Make uniform, steady cuts for consistent slice thickness
- Carve only what you plan to serve immediately
- Store remaining portions properly for later use
If you're planning to reheat leftover slices, you can use the oven or grill them briefly for a crispy exterior.
Remember that carved ham can stay at room temperature for up to two hours before serving, but refrigerate any leftovers promptly.
Storing Smoked Ham Properly
Once you've carved and served your smoked ham, proper storage becomes the next key focus to preserve its rich flavor and prevent spoilage.
For refrigerator storage, you'll want to wrap your leftover ham tightly in plastic wrap or aluminum foil, or place it in an airtight container. Keep it in the coldest part of your fridge, where it'll last 5-7 days once opened.
If you're planning for longer storage, freezing is your best option. You'll get up to 3 months of quality preservation by double-wrapping your ham in plastic wrap or foil. Don't forget to label the package with the date, and verify your freezer maintains 0°F (-18°C) or lower.
When you're ready to use your frozen ham, thaw it in the refrigerator for 24-48 hours. You can also use the cold water method, changing the water every 30 minutes.
Once thawed, use the ham within 3-5 days. If you're approaching that deadline, consider using the ham in soups or casseroles to mask any slight texture changes.
For maximum longevity, consider using a vacuum sealer, especially if you're storing pre-cooked portions.
Frequently Asked Questions
Can I Smoke a Frozen Ham Directly From the Freezer?
You shouldn't smoke a frozen ham directly from the freezer. It's best to defrost it in your refrigerator first to guarantee even cooking, food safety, and ideal flavor absorption during the smoking process.
What Should I Do if My Smoker Runs Out of Fuel Mid-Smoke?
If your smoker runs out of fuel, quickly add pre-lit charcoal or wood chunks to maintain temperature. Don't use cold fuel, as it'll create bad smoke. Keep spare fuel nearby to minimize interruption time.
Is It Safe to Reuse Leftover Glaze From Smoking?
You shouldn't reuse glaze that's touched raw or cooked ham, as it can harbor harmful bacteria. If you've stored unused glaze properly in the fridge, you can reheat it to 165°F within 1-2 days.
How Can I Prevent My Ham From Drying Out During Smoking?
You'll prevent drying by adding liquid to the pan, maintaining 225-250°F temperature, wrapping the pan in foil, spritzing with apple cider vinegar, and letting the ham rest after smoking. Brining beforehand also helps.
Can I Use Aluminum Pans Instead of Placing Directly on Grates?
Yes, you can use aluminum pans instead of grates. However, you'll want to use a raised rack inside the pan to guarantee proper smoke circulation. This'll contain drippings while still allowing even smoking.
In Summary
You've now mastered the essential techniques for smoking the perfect ham. By following these time-tested methods, from selecting quality meat to proper storage, you'll create consistently delicious results. Remember, patience is key during the smoking process, and don't skip the pellicle formation. With practice, you'll develop an instinct for heat control and smoke management that'll make you the go-to pit master among friends and family.


Leave a Reply