The perfect homemade corned beef cure combines precise measurements and quality ingredients for ideal results. You'll need a mix of kosher salt (1 cup per gallon of water), pink curing salt (2-3 teaspoons per gallon), and brown sugar, along with traditional pickling spices like peppercorns, mustard seeds, and coriander. Keep your brisket submerged in the brine at a consistent temperature below 40°F for 5-7 days, flipping it daily to guarantee even curing. For a natural approach, you can substitute pink salt with celery juice and beetroot powder. Whether you're a traditionalist or prefer natural alternatives, mastering these fundamentals will transform your corned beef game.
The History Behind Corned Beef
Salt preservation, a time-tested method of keeping meat fresh, gave birth to corned beef in 17th century Europe, particularly in Ireland and England. Lower salt taxes in Ireland made the production of salted beef highly cost-effective for export.
When Britain banned the import of live Irish cattle, Ireland began producing salted beef as an export product. You might be surprised to learn that beef wasn't actually a staple in the Irish diet – pork was the more common and affordable choice for local consumption.
The term "corned beef" comes from the large salt crystals, called "corns," used in the preservation process. While there's no actual corn in the recipe, the name has stuck throughout history, reflecting the preservation method rather than the ingredients.
When Irish immigrants arrived in America during the 19th century, they discovered that beef was more affordable here than in their homeland.
This accessibility, combined with influence from Jewish immigrants who were establishing delicatessens, helped transform corned beef into a beloved staple of Irish-American cuisine.
Today, you'll find corned beef as the centerpiece of St. Patrick's Day celebrations across America, though ironically, it's more representative of Irish-American culture than traditional Irish fare.
Essential Ingredients For Curing Success
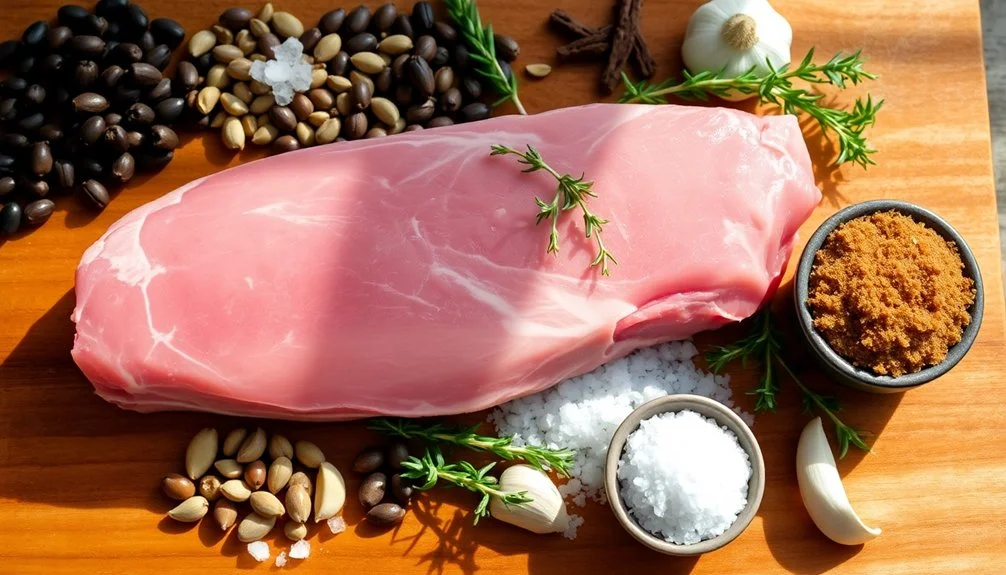
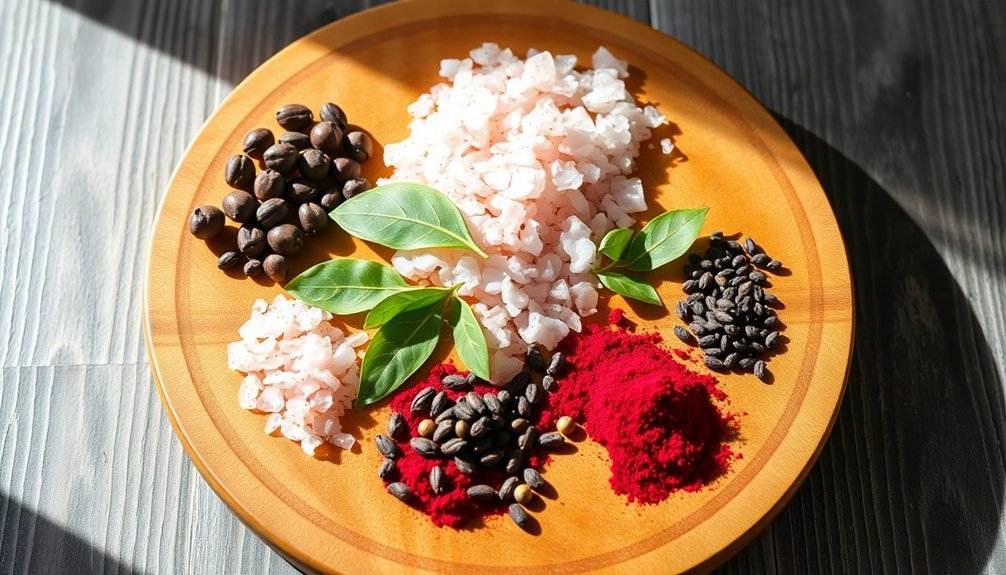
Creating successful corned beef starts with assembling the right mix of curing ingredients. You'll need a foundation of kosher salt, which tenderizes the meat and helps retain moisture.
Pink curing salt (sodium nitrite) is essential for preservation, preventing bacterial growth, and maintaining that signature pink color you're looking for in corned beef. Store curing ingredients in tightly sealed containers to maintain freshness and potency.
The flavor profile comes from a carefully selected blend of spices and aromatics. You'll want to include pickling spice, which combines black peppercorns, mustard seeds, coriander seeds, and allspice berries.
Don't forget to add garlic, bay leaves, and cinnamon sticks for depth of flavor. Ground mace, whole cloves, and ground ginger round out the traditional spice blend.
If you're seeking natural alternatives, you can replace pink curing salt with celery juice, which contains natural nitrates.
Beetroot powder or juice will help achieve that appealing color, while sauerkraut brine adds natural preservatives.
You'll need to keep your brisket fully submerged during curing, so prepare weights or plates to hold it down.
Remember to combine ice and water to cool your brine to room temperature before using.
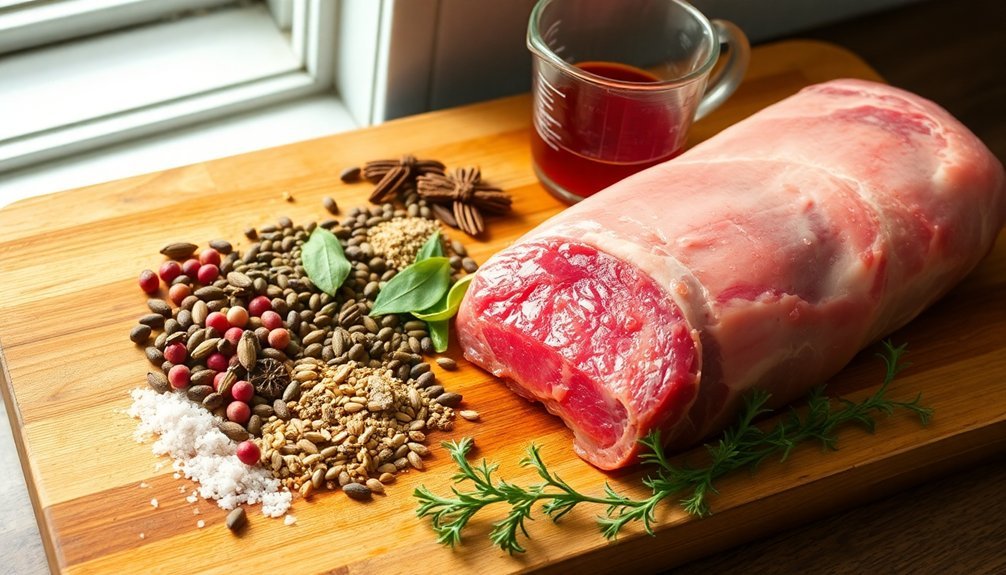
Selecting Your Beef Brisket
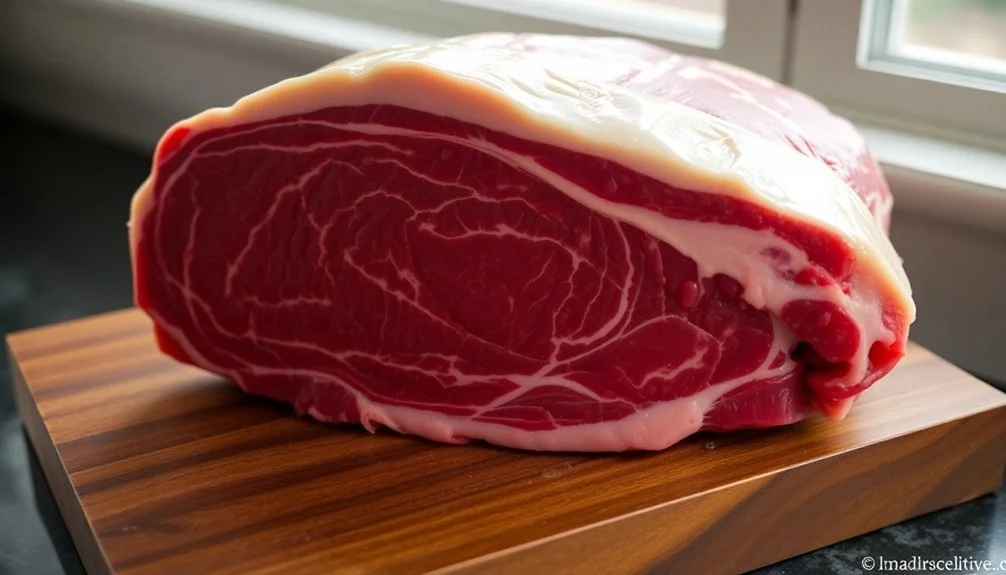
When it comes to making perfect corned beef, choosing the right cut of brisket is essential to your success.
You'll want to select a flat cut brisket, which offers even thickness and less shrinkage compared to the point cut. While both cuts can work, the flat cut's consistent shape and 5-6 pound typical weight make it ideal for uniform curing and cooking results. The curing process will take approximately 10 days to complete properly.
For the best outcome, you'll need to pay attention to the fat content and trimming. Keep the fat cap at about 1/4 inch thickness – this provides enough protection to keep your meat moist during cooking without preventing proper bark formation.
Remove any brown spots and silverskin for better presentation and flavor absorption.
Three key steps when purchasing your brisket:
- Source from a reliable butcher shop or quality retailer like Costco
- Tell your butcher you're making corned beef so they can provide proper trimming
- Check for freshness and choose a piece with uniform thickness throughout
Remember that the quality of your starting meat directly impacts your final product, so don't hesitate to be selective when choosing your brisket.
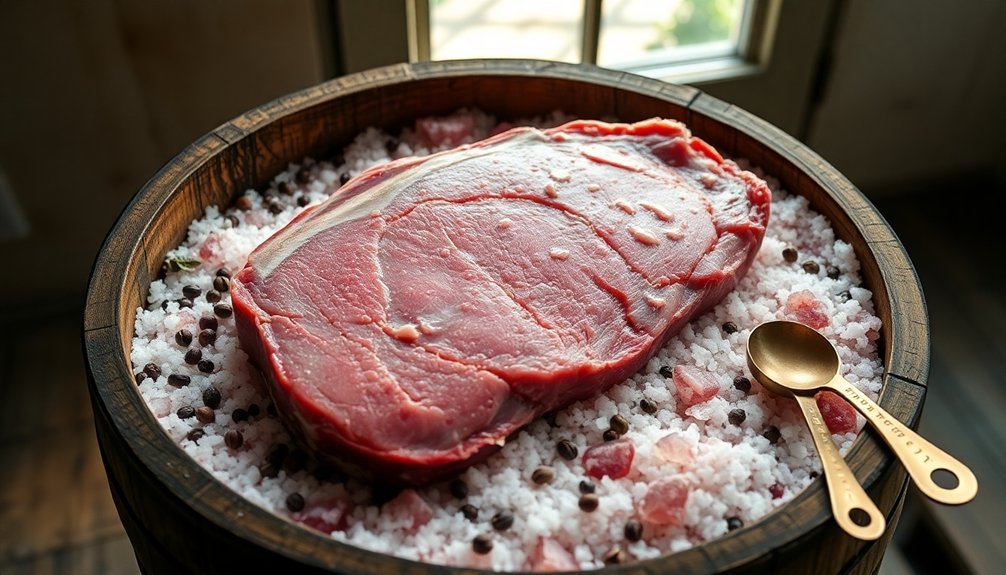
Understanding Salt Ratios
Making perfectly cured corned beef requires precise salt measurements and ratios to guarantee both safety and flavor.
You'll need to calculate your pink curing salt #1 at 0.25% of your total meat and water weight, which typically means 2-3 teaspoons per gallon of water for 5-7 pounds of meat. For accuracy, convert these measurements to grams using a digital scale.
You'll also need to balance your curing salt with regular kosher or pickling salt. Add 1 cup of kosher salt per gallon of water, aiming for a total salt ratio of about 1.75% of your combined meat and water weight.
Make sure you've fully dissolved all salts in your brine before adding the meat. Your water volume should be sufficient to completely submerge your brisket. For every 5-7 pounds of meat, you'll need approximately one gallon of water.
Don't forget to include brown sugar (1/2 cup per gallon) and pickling spices (1/3 to 1/4 cup per gallon) in your brine. If you're looking for a nitrate-free option, you can substitute the pink curing salt with natural alternatives like celery juice or sauerkraut brine.
The Role of Pink Salt
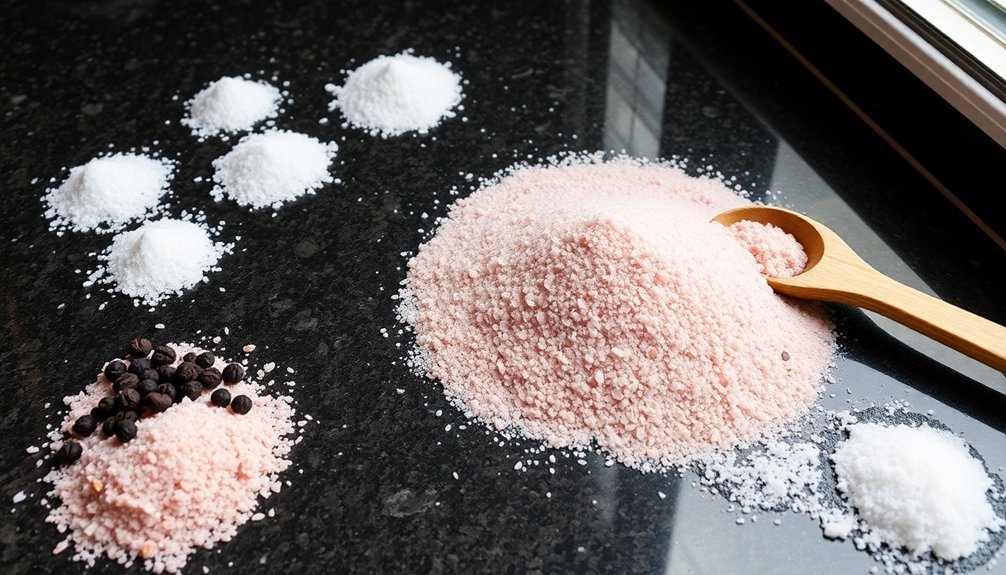
Pink curing salt serves as the cornerstone of traditional corned beef preparation, distinctly different from Himalayan pink salt you might find at the grocery store. This specialized mixture of table salt and sodium nitrite is intentionally dyed pink to prevent confusion with regular salt, and it's vital for achieving that signature corned beef flavor and color you're after.
When you're working with pink curing salt, proper measurement is essential for both safety and success. You'll need:
- 1 teaspoon per 5 pounds of meat for dry brining
- 2-3 teaspoons per gallon of water for wet brining
- Precise measuring tools to guarantee accurate amounts
While you can technically make corned beef without pink salt, you'll miss out on the characteristic deep pink color and extended preservation benefits.
If you're concerned about nitrites, you might consider using beetroot powder as an alternative colorant, though it won't provide the same preservative properties.
Remember that pink curing salt is highly concentrated and potentially toxic if misused, so always follow recipe measurements precisely and store it safely away from regular salt to prevent accidents.
Crafting Your Spice Blend
Now that you've got your pink salt measurements sorted, let's focus on the aromatic spice blend that gives corned beef its distinctive character.
You'll need to start with key spices: mustard seeds (yellow, brown, or both), black peppercorns, coriander seeds, allspice berries, and cardamom. These form the foundation of your blend's complex flavor profile.
To enhance the depth, you'll want to incorporate celery seeds, whole cloves, red pepper flakes, ground ginger, and bay leaves. Remember to use cloves sparingly as they can quickly overpower other flavors.
The secret to maximizing flavor lies in the toasting process – heat your whole spices in a dry pan until they become fragrant, which releases their essential oils.
After toasting, grind your spices to your preferred consistency using a food processor or spice grinder. You can make the blend coarse or fine, depending on your preference.
Store your finished blend in an airtight container, where it'll keep its potency longer than pre-packaged alternatives.
You'll find this homemade blend offers more intense, fresher flavors than store-bought options, and you can adjust the ratios to suit your taste.
Preparing The Perfect Brine
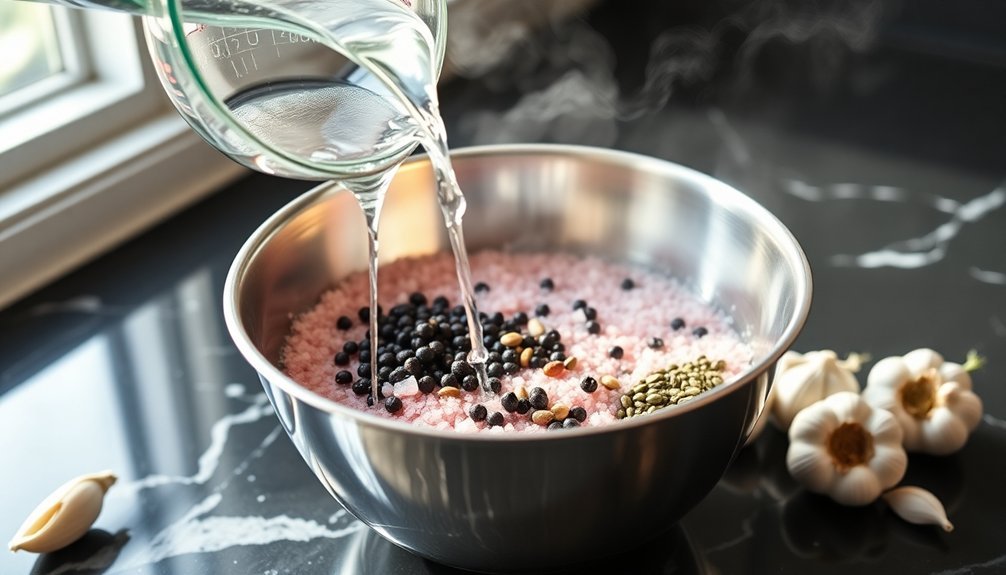
The foundation of exceptional corned beef lies in creating a properly balanced brine solution.
You'll need one gallon of water as your base, combined with a cup of kosher salt, half cup of brown sugar, and 2-4 teaspoons of pink curing salt. These proportions guarantee proper curing while maintaining the perfect balance of flavors.
Start by heating your water in a large pot over medium-high heat, adding your salts and sugar. Bring the mixture to a boil, stirring until everything's completely dissolved.
Once boiled, you'll need to cool the brine to approximately 45°F before using it. You can speed up this process by adding ice cubes.
Here are three critical steps for proper brine application:
- Transfer your cooled brine to a container or 2-gallon sealable bag large enough for your brisket.
- Submerge your brisket completely, using a weight if it floats.
- Store in the refrigerator and flip daily for even curing.
Remember to guarantee your brisket stays fully submerged throughout the curing process – this is essential for achieving consistent results in your final corned beef.
Proper Curing Techniques
Successful meat curing requires careful attention to timing and temperature control throughout the entire process. You'll need to maintain a consistent temperature below 40°F (4°C) and keep your meat submerged in the brine for 5-7 days. If you're aiming for ideal flavor and texture, let it cure for the full 7 days, but don't exceed 5 days if you've omitted pink salt.
Your brine mixture should include kosher salt and pink curing salt as vital ingredients, while brown sugar and pickling spices can enhance the flavor profile. You'll want to use a nonreactive container made of stainless steel or glass to prevent any unwanted chemical reactions with the brine.
Once the curing period ends, you'll notice your meat has become denser with a characteristic pink color. Rinse it thoroughly under cool water to remove excess salt.
You can then cook it using various methods like boiling, slow cooking, or roasting. If you're not planning to cook it immediately, store it in the refrigerator for several days or freeze it for longer storage.
Natural Curing Alternatives
You'll find celery juice to be a potent natural alternative to traditional curing salt, as it contains natural nitrates that effectively preserve meat while offering a healthier option.
When using celery juice as your primary curing agent, you'll need about one ounce per pound of meat, and you can enhance its effectiveness by combining it with sauerkraut brine or beet juice.
If you're looking to move away from synthetic nitrates entirely, you can create an all-encompassing natural cure by mixing sea salt with celery juice, though you'll need to increase the overall salt content to guarantee proper preservation.
Celery Juice For Curing
Natural curing methods have gained popularity among home cooks seeking healthier alternatives to traditional curing salts, with celery juice emerging as a leading option.
You'll find that celery juice contains naturally occurring nitrites that effectively cure meat while avoiding artificial additives. The process is straightforward: process fresh celery stalks in a food processor or juicer, strain the pulp, and combine the juice with your brine mixture.
For the best results when using celery juice in your corned beef cure, follow these key steps:
- Use one large bunch of celery to yield approximately 1 cup of juice, which you'll combine with water, salt, sugar, and pickling spices.
- Store your meat in the celery juice brine for 4-8 days in a non-reactive container, turning periodically for even curing.
- Boil the finished brisket for 10 minutes before braising to guarantee food safety and reduce botulism risk.
You'll need to keep the meat refrigerated throughout the curing process.
The celery juice not only preserves the meat but also helps maintain its characteristic red color while adding a unique flavor profile to your corned beef.
Alternative Salt Brining Methods
Versatility in salt brining methods gives home cooks several options beyond traditional curing salts.
You'll find that sea salt, while less potent than curing salt, offers a natural alternative when used in larger quantities. Though it won't provide the same vibrant color or intense preservation, it's a viable option if you're looking to avoid synthetic nitrates.
Pink salt serves as the closest substitute to traditional curing salt, maintaining the characteristic color and flavor you'd expect in corned beef. You can use it in the same proportions as curing salt, making it a straightforward replacement that doesn't require recipe adjustments.
If you're interested in a more aromatic approach, you can create herb-based brining mixtures using sea salt combined with thyme, rosemary, and sage.
While these blends enhance flavor, you'll need to be mindful that they don't preserve as effectively as conventional curing methods.
For a probiotic-rich alternative, you might consider using sauerkraut brine or whey.
These natural preservatives not only help cure the meat but also contribute to its tenderness and flavor. You can enhance their effectiveness by adding garlic and complementary spices.
Common Curing Mistakes
Making corned beef at home requires careful attention to avoid common pitfalls that can compromise the final product. The curing process is particularly sensitive, and many home cooks make mistakes with timing and salt ratios. You'll need to allow 5-7 days for proper curing, and it's essential to use the correct amount of pink curing salt to guarantee both safety and that signature pink color.
During preparation and cooking, you'll want to watch out for these vital errors:
- Not removing excess salt or properly rinsing the meat before cooking, which can result in an overly salty final product.
- Using too lean of a cut or cooking at high temperatures, leading to tough, chewy meat.
- Failing to maintain adequate cooking liquid or not allowing the meat to rest before slicing.
Remember to keep your meat fully submerged during cooking and slice against the grain for best tenderness.
If you're not using pink salt, you'll need alternative coloring methods like beetroot powder. Always verify your cooking liquid is properly seasoned, but be careful not to over-salt, as this can intensify the already-cured meat's saltiness.
Traditional Cooking Methods
You'll need to choose between stovetop and oven braising when preparing your corned beef, as both methods can yield excellent results through low and slow cooking.
Whether you opt for stovetop simmering in a Dutch oven or traditional oven braising at 325°F, the key is maintaining a consistent temperature and keeping the meat submerged in liquid throughout the cooking process.
Both techniques require several hours of cooking time, but you can't rush the process if you want to achieve that signature fork-tender texture.
Stovetop Vs Oven Braising
Traditional corned beef preparation offers two excellent braising methods: stovetop and oven cooking.
When using the stovetop method, you'll cook your corned beef in a Dutch oven or roasting pan for about 2 hours, simmering it in broth or water with pickling spices until it reaches 190-205°F. You can add vegetables near the end of cooking to guarantee they don't become mushy.
The oven method requires a lower temperature of 275-300°F and longer cooking time of 5-6 hours, but it's more hands-off. You'll need an oven-safe vessel with a tight-fitting lid, and the slower cooking process often results in more tender meat.
Both methods share these essential elements for success:
- Don't add extra salt – your corned beef is already well-seasoned from the curing process
- Always slice against the grain after letting the meat rest for ideal texture
- Use enough braising liquid to keep the meat partially submerged throughout cooking
The main difference lies in timing and attention needed: stovetop requires more monitoring but cooks faster, while oven braising takes longer but needs less supervision.
Either method will give you delicious results when executed properly.
Low and Slow Methods
Low and slow methods present three reliable approaches to cooking corned beef: slow cooker, Instant Pot, and traditional simmering. Each method requires a 5-pound brisket and follows similar principles while varying in cooking times and techniques.
For slow cooker preparation, you'll cook the brisket on low for 8-10 hours or high for 4-5 hours, submerged in 4 cups of liquid with pickling spices.
Add your vegetables strategically: carrots and potatoes at the halfway point, and cabbage in the final two hours.
The Instant Pot method speeds things up considerably, requiring 90 minutes on high pressure with natural release.
You'll add vegetables after the meat's done, cooking them separately for just 3 minutes under pressure.
Traditional simmering takes 3-4 hours on the stovetop, with the brisket covered in water and seasonings.
Add vegetables near the end of cooking to prevent them from becoming mushy.
Regardless of your chosen method, always let the brisket rest for 15-20 minutes before slicing against the grain in 1/8 to 1/4" pieces.
Each technique produces tender, flavorful results when you maintain consistent temperatures and proper timing.
Storing Your Corned Beef
Proper storage techniques guarantee your homemade corned beef stays fresh and maintains its quality for as long as possible.
Whether you're storing it cooked or uncooked, you'll need to wrap it tightly in plastic wrap or aluminum foil to prevent air exposure, then place it in an airtight container.
For uncooked corned beef in its original pouch with pickling juices, you can keep it refrigerated for 5-7 days, but always check the "use-by" date.
Once you've cooked your corned beef, refrigerate it within 2 hours and use it within 3-4 days. If you're freezing it, you can extend its life up to 6 months, though it's best used within 2-3 months for ideal flavor and texture.
Here's what to remember when storing your corned beef:
- Cool cooked corned beef quickly by storing it in small, shallow containers
- Label frozen packages with the date to track storage time
- Always check for signs of spoilage before using stored corned beef
For maximum safety, verify your refrigerator maintains a consistent cool temperature and that your corned beef reaches an internal temperature of 160°F before storing.
Frequently Asked Questions
Can I Use the Leftover Brine for a Second Batch of Corned Beef?
You shouldn't reuse leftover corned beef brine. It's unsafe due to bacterial contamination, has reduced salt concentration, and won't deliver proper flavor. Always make fresh brine to guarantee food safety and quality results.
Why Does My Corned Beef Sometimes Develop a Grayish-Green Surface Color?
Your corned beef's grayish-green color is likely due to insufficient sodium nitrite or improper curing time. You'll need to guarantee you're using the right amount of sodium nitrite and curing for at least 5-7 days.
Is It Possible to Freeze the Brisket While It's Still Curing?
You shouldn't freeze your brisket during the curing process. It'll interrupt the essential chemical reactions and prevent proper curing from taking place. Instead, wait until you've completely cured and cooked the meat before freezing.
Can I Cure Other Cuts of Meat Using the Same Corned Beef Process?
Yes, you can cure other tough cuts like shanks, rounds, and shoulder cuts using the same process. You'll need to adjust cure times based on thickness, but avoid lean cuts as they lack the necessary connective tissue.
What Happens if I Accidentally Over-Cure My Brisket Beyond Ten Days?
If you've left your brisket curing beyond ten days, don't panic. While it won't cure further, it might be saltier than desired. You can soak it in fresh water to reduce saltiness before cooking.
In Summary
You're now equipped to create perfect homemade corned beef by understanding the right salt ratios, choosing quality brisket, and mastering traditional curing methods. Whether you're using pink salt or opting for natural alternatives, you'll get consistent results by avoiding common mistakes and following proper storage techniques. With this knowledge, you'll transform simple brisket into flavorful, tender corned beef that rivals any deli's offering.


Leave a Reply