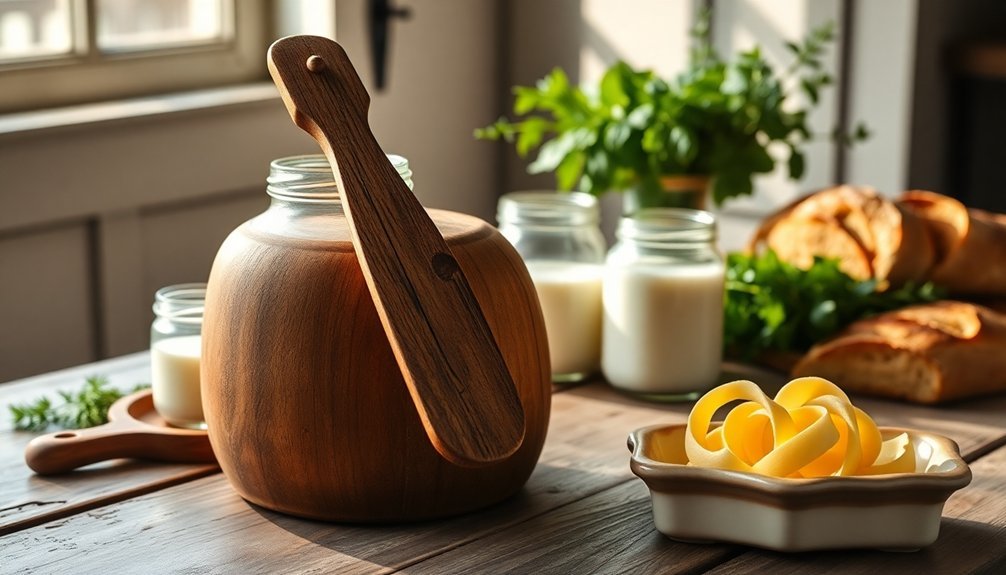
Hand-churned butter tools let you create fresh, flavorful butter that's superior to store-bought options. You'll have complete control over ingredients and additives while producing customizable textures and consistencies that match your preferences. These traditional tools, from wooden churns to paddle designs, connect you to an 8,000-year-old culinary heritage while proving surprisingly cost-effective for regular butter users. You can achieve ideal churning temperatures and perfect your technique using time-tested equipment that supports local dairy farms. The rich history and practical benefits of hand-churned butter tools offer an engaging world of culinary possibilities to explore.
Traditional Dairy Equipment Essentials
Setting up a traditional dairy operation starts with essential milking equipment that guarantees both efficiency and animal welfare.
You'll need high-quality milk liners that connect your teat cups to the collection system, mimicking a calf's natural sucking motion for gentle milking. Your vacuum pumps must maintain consistent pressure levels to guarantee proper attachment and functioning of the teat cups. Many dairy farms also use stainless steel containers to ensure maximum hygiene during the milking process.
When choosing teat cups, you'll want to focus on proper fit and material selection, inspecting them regularly for signs of wear.
Don't forget to stock up on nitrile or latex gloves, changing them frequently to maintain strict hygiene standards. For milk handling, you'll require sturdy milk containers and buckets as part of your basic equipment setup.
If you're operating on a smaller scale, bucket milkers are your best choice, as they're perfect for handling 1-2 cows at a time.
These units include essential components like a bucket, lid, claw, pulsator, and vacuum pump. For cooling and storage, you'll need milk chiller tanks to maintain freshness immediately after milking.
Remember to invest in proper cleaning equipment to maintain sanitary conditions throughout your operation.
Hand-Churning Tools Through History
You'll discover that the earliest butter-churning tools appeared over 8,000 years ago in ancient Israel, where people used simple vessels to transform milk into butter.
Through centuries of innovation, these tools evolved from basic skin bags used by nomads to more sophisticated devices like dash churns, paddle churns, and barrel churns that made butter production more efficient. Today, even simple wooden butter churners remain the only specialized tool needed for making homemade butter.
Ancient Butter Making Devices
The journey of butter-making tools begins with a fascinating discovery around 2000 BC, as evidenced by ancient limestone tablets depicting the earliest known butter-making process.
You'll find that nomadic cultures were the pioneers of butter making, discovering it accidentally when milk stored in animal skin bags attached to pack animals turned into butter during travel.
What's particularly interesting is how these early butter makers used simple yet effective methods. The plunge churning method became widely adopted across Europe by the 6th century AD.
You'd have seen them using animal skin sacks filled with milk, either shaking them manually or letting their pack animals do the work during migration. They'd also employ a wooden tripod setup with ropes to rock the skin sacks back and forth, creating a consistent churning motion.
The earliest butter wasn't just from cow's milk – it came from goats, sheep, and yaks, as these were the first domesticated dairy animals.
You can still see evidence of these ancient practices in archaeological findings, like the preserved butter discovered in wooden buckets in Irish bogs dating back to 400 BC, showing how these early methods were effective enough to produce butter that could be stored for extended periods.
Evolution of Churning Methods
As we move into the 19th century, hand-churning tools underwent considerable transformations from simple rocker churns to more sophisticated mechanical devices.
You'll find that early churns, like the dash and wooden barrel types, required substantial physical effort but laid the groundwork for future innovations.
By the late 1800s, you'd see remarkable progress in churning technology with the introduction of:
- Tin churns with two-handled crank operations, making the process more manageable
- Decorative stoneware churns that combined functionality with aesthetic appeal
- Glass churns that would later incorporate electric motors for enhanced efficiency
You'll notice that paddle churns revolutionized the process by using a crank handle to operate rotating paddles, considerably reducing the labor involved.
The development of continuous churning methods in Europe during the 1930s transformed butter-making from a small-scale operation to industrial production.
Today, you can choose from various modern adaptations, including mason jar churns and stand mixer attachments, which make the process considerably easier while maintaining the traditional principles of butter-making.
These tools allow you to create customized butter with your choice of herbs and seasonings.
Basic Manual Churning Equipment
When you're getting started with butter churning, you'll need essential tools like a hand-crank churn, paddles, and a draining outlet for separating buttermilk.
Your choice between traditional wooden churns and modern stainless steel or glass designs will impact both the churning experience and maintenance requirements, with wooden models requiring more careful cleaning to prevent bacterial growth.
To maintain your churning equipment properly, you'll need to disassemble the parts after each use, wash them thoroughly with hot water, sanitize wooden components with food-grade sanitizer, and guarantee complete drying before storage.
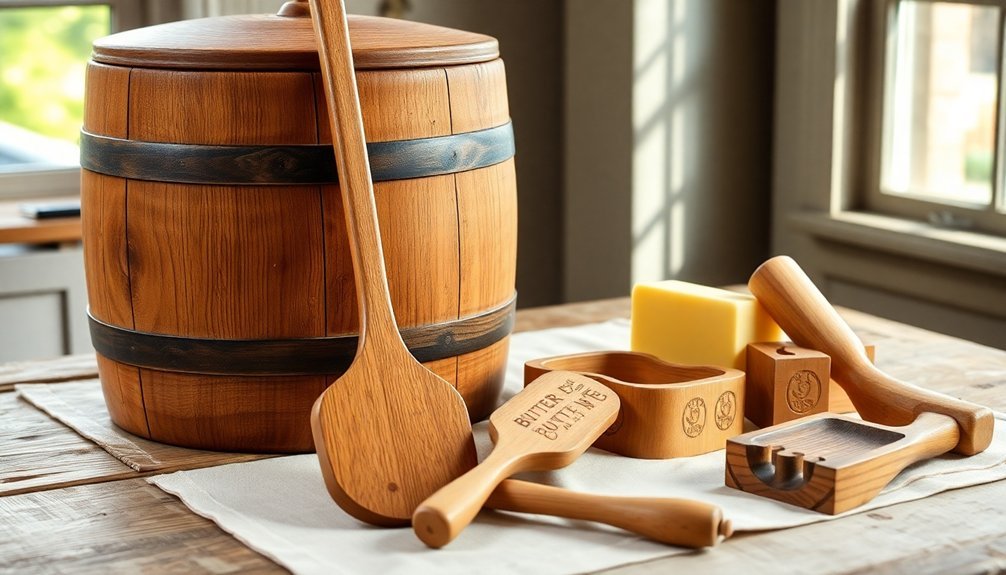
Essential Butter Churning Tools
Making delicious homemade butter starts with having the right tools at your disposal. You'll need a reliable butter churner, which includes a hand-crank mechanism and a container designed to hold your cream while you work. The churning process typically takes between 10 to 30 minutes, during which you'll transform cream into butter and separate out the buttermilk.
Butter paddles are equally essential for your butter-making journey. These specialized tools feature grooved surfaces that help you knead, press, and shape your butter while removing excess buttermilk. You'll want to handwash these paddles to maintain their quality and guarantee they continue serving you well.
Here are the key components you'll need for successful butter churning:
- A glass or stainless steel jar with a transparent lid for monitoring the churning process
- A hand-cranked churning mechanism that's properly sized for your jar
- Well-maintained butter paddles for working and shaping the final product
Remember to keep your cream at room temperature before churning and only fill your container to ¾ capacity. This allows proper movement of the cream during the churning process, guaranteeing the best possible results.
Wooden Vs Metal Designs
Between wooden and metal butter churns, each design offers distinct advantages for the home butter maker. With wooden churns, you'll get a traditional, rustic appearance that develops a beautiful patina over time. These classic designs, featuring tall narrow slant-sided or barrel shapes, provide an authentic butter-making experience complete with soothing, horse-trotting-like sounds during churning.
Metal churns, however, offer practical benefits you won't find with wood. They're typically easier to clean, more resistant to damage, and won't shrink or attract pests like their wooden counterparts. You'll find that metal designs, especially those with paddles, can churn butter more quickly by effectively incorporating air into the cream. Many metal churns also feature secure clamping lids and galvanized surfaces for durability.
If you're choosing between the two, consider your priorities. Wooden churns require more maintenance, including periodic soaking and hoop re-riveting, but they offer historical charm dating back to medieval times.
Metal churns, while more modern, provide efficiency and easier upkeep. You can even adapt metal components into homemade setups, such as attaching a metal paddle to a drill for improved churning speed.
Proper Equipment Maintenance Steps
For successful butter churning, proper maintenance of your equipment is essential to both safety and quality. You'll need to clean your churn thoroughly after each use with soap and hot water, making sure to pay special attention to all removable parts.
While the glass jar and paddle can go in the dishwasher, you'll want to hand-wash the transparent dome and mechanical top to protect their integrity.
Regular inspection and proper storage are vital for maintaining your churning equipment. Here's what you need to focus on:
- Inspect the churn before and after use for loose parts, chips, or foreign objects that could compromise your butter's quality.
- Lubricate the gear mechanism with food-grade oils like coconut or olive oil to keep it running smoothly.
- Store your churn in a clean, dry place with the lid removed for proper ventilation.
When handling your churn, always support the glass jar from the bottom and never carry it by the arc handle alone.
For longer-term maintenance, you'll want to sanitize periodically with a vinegar solution, especially if you notice any lingering odors. Remember to tighten screws regularly and replace worn parts as needed.
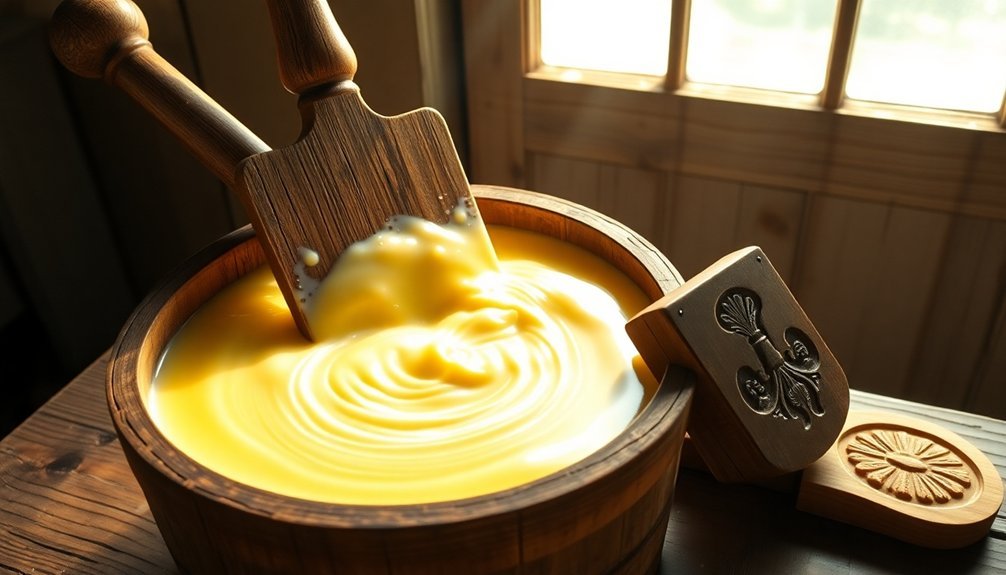
Wooden Butter Making Tools
Traditional wooden butter-making tools represent a time-honored approach to transforming cream into butter. While they'll require more manual effort and time compared to modern alternatives, these tools offer you a genuine connection to historical dairy-making practices. You'll find classic implements like plunger churns and barrel churns that can produce butter in 60 to 90 minutes of dedicated churning.
When you're working with wooden butter-making tools, you'll need to pay special attention to maintenance. These implements require thorough cleaning after each use and can be sensitive to environmental factors like humidity and temperature.
While they're durable when properly cared for, you'll need to invest time in their upkeep to prevent wear and guarantee food safety.
To maximize your butter-making efficiency, you might want to contemplate combining traditional tools with modern equipment. You can integrate wooden tools into a hybrid approach that preserves traditional techniques while improving productivity.
Though you won't achieve the same consistency as electrical churns, wooden tools can still produce quality butter while providing educational value and maintaining a connection to traditional dairy-making methods.
Temperature Control Instruments
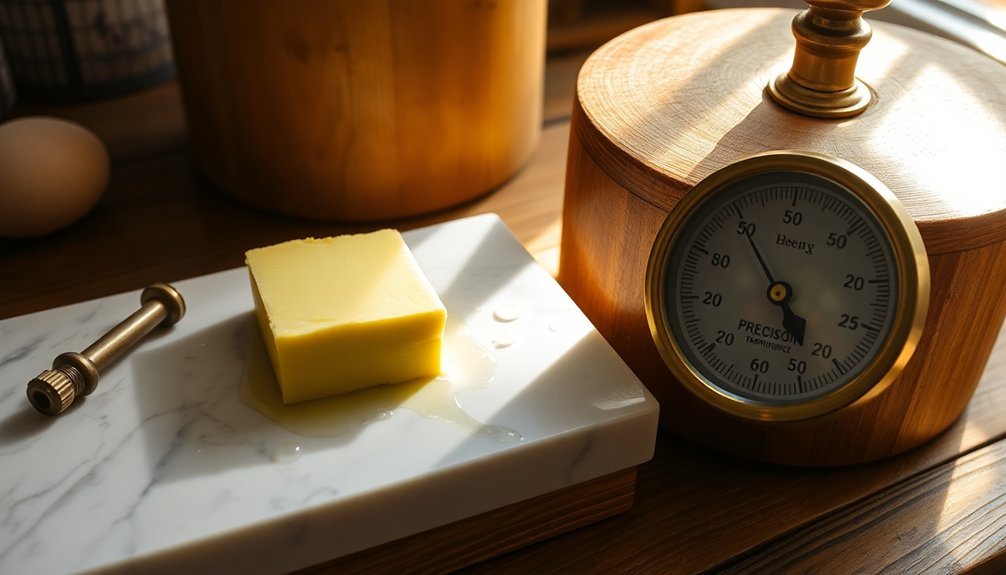
While wooden butter-making tools offer a historical connection, modern temperature control instruments provide the precision needed for consistent, high-quality butter production.
Even in hand-churning, you'll need to maintain specific temperatures to achieve the perfect butter texture. If your cream's too warm, you'll end up with greasy butter; if it's too cold, it'll become brittle and sticky.
For ideal results, you'll want to incorporate these essential temperature control instruments:
- A high-precision thermometer that can measure within 0.02 K accuracy – this helps you maintain the ideal churning temperature of 7-10°C in summer and 10-13°C in winter.
- A double-insulated churning container that helps maintain consistent temperature throughout the cream ripening process.
- A moisture measuring device to monitor water content in your final product, ensuring you achieve the right consistency.
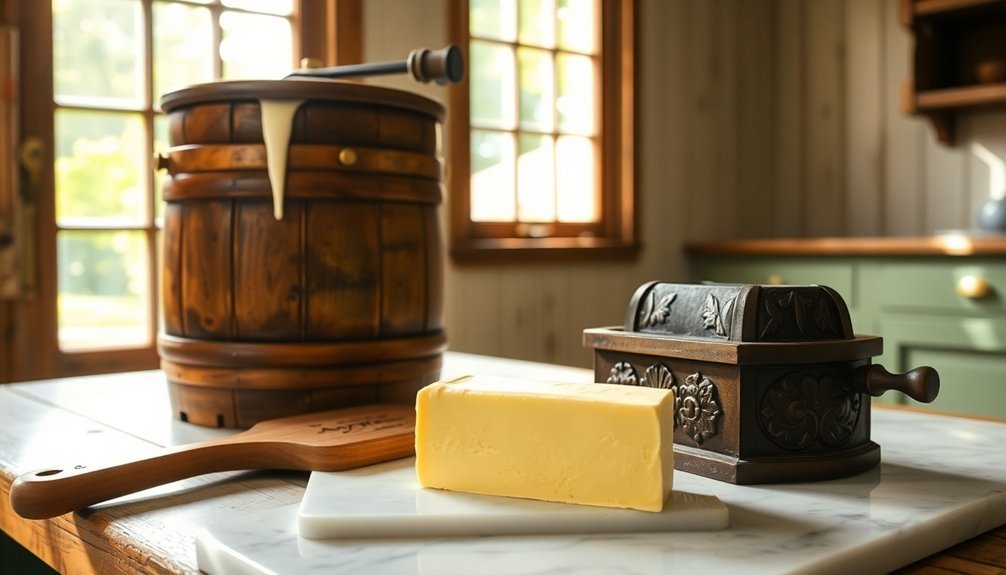
Butter Molds and Stamps
Anyone seeking to elevate their butter-making experience should consider investing in butter molds and stamps. These traditional tools, typically crafted from wood, allow you to transform your freshly churned butter into decorative shapes while ensuring consistent portions for storage or presentation.
You'll find various types to choose from, including simple box-type molds, hinged designs with screws for easy removal, and even specialized Scandinavian house-shaped versions. If you're interested in antique pieces, you can source them from thrift shops or online marketplaces, though they'll need proper sanitizing before use.
To use your mold effectively, you'll need to wet it with cold water first, which creates a barrier for easy butter release. Press your softened butter into the chilled mold, then refrigerate it until firm. Once it's set, you can remove the butter and wrap it in plastic wrap or parchment paper for storage.
Beyond their practical benefits, butter molds offer sustainable advantages by reducing single-use packaging needs. They're also excellent for creating impressive table presentations, combining traditional craftsmanship with modern convenience while preserving the artisanal aspects of home butter-making.
Cream Preparation Tools
Modern cream preparation tools offer various methods to transform heavy cream into homemade butter. You'll find that stand mixers and hand mixers are among the most efficient options, requiring heavy cream with at least 36% fat content and a bowl filled no more than ¾ full for ideal results.
For a different approach, you can use blenders or food processors, which create a softer, creamier butter due to retained buttermilk. While blenders need about 6 minutes of processing time, food processors can complete the task in roughly 4 minutes using the metal blade attachment.
If you're interested in a more traditional method, manual churning tools like Mason jars or handheld butter churners provide both a workout and a satisfying butter-making experience, though they'll require 10-20 minutes of effort.
- Processing Times:
- Stand/Hand Mixers: 5-7 minutes
- Blenders: 6 minutes
- Food Processors: 4 minutes
Each tool requires specific techniques: mixers need speed adjustment as cream thickens, blenders need frequent scraping of sides, and processors require monitoring until liquid splatters indicate separation.
Choose your method based on your preferred texture and time investment.
Cleaning and Maintenance Supplies
Proper maintenance supplies are essential for keeping your butter-churning equipment in top condition. You'll need several key items to maintain your churn effectively: dish soap, scrub brushes, clean towels, vinegar, and food-grade lime solution for wooden churns.
You should also keep a set of basic tools handy for periodic maintenance, including a screwdriver for tightening loose parts.
For daily cleaning, you'll require lukewarm and hot water sources, along with gentle dish soap that won't leave residues. If you're dealing with persistent sour smells, keep white vinegar on hand as a natural sanitizer.
For wooden churns specifically, you'll need food-grade lime solution to maintain proper sanitization without damaging the wood.
Don't forget to stock up on cleaning brushes of various sizes to reach all parts of your churn, especially the paddles and mechanical components.
You'll also want lint-free towels for thorough drying, as moisture can lead to bacterial growth. If you're using a mechanical churn, you'll need appropriate lubricants as specified by your manufacturer to keep the moving parts working smoothly.
Storage and Preservation Equipment
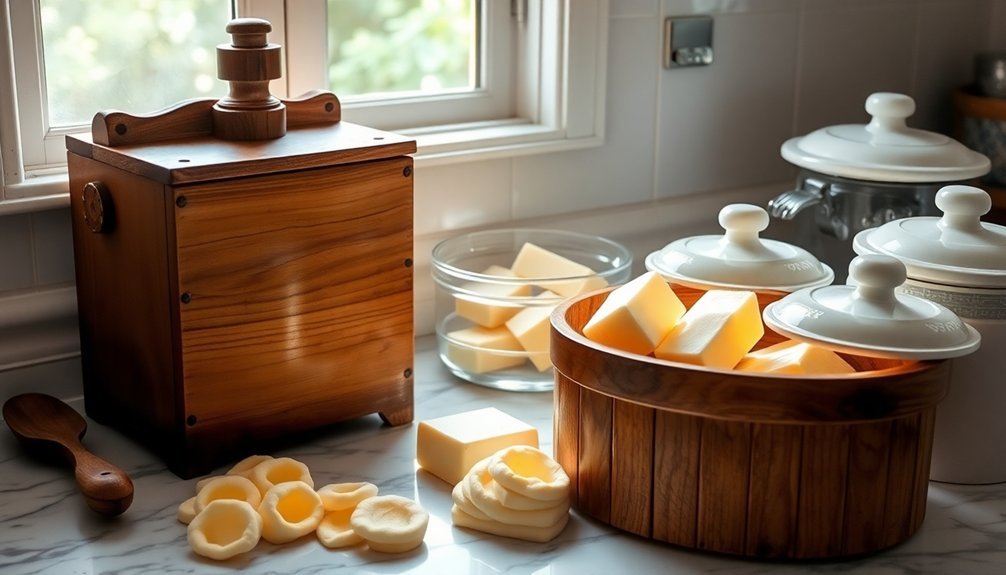
Essential storage and preservation equipment falls into three main categories: butter keeper crocks, canning supplies, and butter paddles. When you're investing in hand-churned butter tools, proper storage equipment guarantees your efforts don't go to waste.
A butter keeper crock lets you maintain spreadable butter for up to 30 days without refrigeration, using a water seal to keep air out.
For long-term preservation, you'll need proper canning equipment and supplies. Whether you choose water bath or pressure canning methods, high-quality butter can be preserved indefinitely when stored in a cool, dry location. Remember to shake the jars during cooling to prevent separation.
- Butter Keeper Essentials:
- Stoneware or marble crock with ½ cup capacity
- Hand-wash only construction
- Attractive tabletop design
- Canning Equipment:
- Pressure canner or water bath canner
- Mason jars with proper seals
- Salt for preservation
- Maintenance Tools:
- Beechwood butter paddles for shaping
- Vacuum sealer for additional storage options
- Cool, dry storage space for preserved butter
Frequently Asked Questions
How Long Does It Typically Take to Churn Butter by Hand?
You'll spend between 20 to 60 minutes churning butter by hand, depending on your cream's temperature and churning technique. The process starts with whipping cream until fat globules separate from buttermilk.
Can I Use Any Type of Cream for Hand-Churning Butter?
You'll need heavy cream or whipping cream with at least 36% fat content for best results. While you can use cream with 25% fat or higher, it'll produce less butter and take longer to churn.
What's the Ideal Room Temperature for Hand-Churning Butter?
You'll want to churn butter at a room temperature between 50°F and 70°F, with 60-65°F being ideal. If your cream's too cold, let it sit out until it reaches this temperature range first.
How Many Pounds of Butter Can One Churning Session Produce?
You'll typically get about one pound of butter from a quart of cream in a single churning session. If you're using a larger churn, you can produce up to 8-9 pounds from 100 liters of milk.
Does Hand-Churned Butter Have a Longer Shelf Life Than Store-Bought Butter?
No, your hand-churned butter won't last as long as store-bought butter. It has higher moisture content and fewer preservatives, making it more susceptible to spoilage. You'll need to use it more quickly or freeze it.
In Summary
You'll find that using hand-churned butter tools connects you to centuries of traditional dairy-making while giving you complete control over your butter's texture and taste. Whether you're using wooden churns, paddles, or molds, these tools help you create a superior product with better flavor than mass-produced alternatives. Plus, you're preserving an important culinary craft that's both rewarding and sustainable for future generations.

Leave a Reply