Sun-drying fresh produce is a cost-free, natural preservation method that's been used for centuries. You'll need ripe, unblemished fruits or vegetables, drying racks, and protective covers like cheesecloth. First, wash your produce thoroughly and cut it into uniform pieces (1/4 to 1/2 inch thick). Arrange the pieces in a single layer on elevated racks, then place them in direct sunlight where temperatures exceed 85°F with low humidity. Most fruits take 2-4 days to dry, while vegetables need 3-5 days. Once dried, store your produce in airtight containers. There's much more to discover about this ancient preservation technique.
Why Choose Sun Drying
Through the ages, sun drying has remained one of the most reliable and sustainable methods of food preservation. Dating back to ancient civilizations worldwide, this natural process has stood the test of time. You'll find that this natural process not only preserves food but actually enhances its nutritional value. Sun-dried fruits contain three and a half times more fiber than fresh ones, while maintaining high levels of vitamins A and C. If you're looking to boost your vitamin D intake, sun-dried mushrooms are an excellent choice.
When you choose sun drying, you're selecting a method that offers impressive long-term storage capabilities. Your dried fruits can last up to five years, while vegetables can stay good for an incredible decade when stored properly. You won't need to worry about food waste, and you'll have access to your favorite seasonal produce year-round.
You'll save money and help the environment since sun drying uses free solar energy and requires minimal equipment. There's no electricity needed, which means zero greenhouse gas emissions.
The process is remarkably safe, too – the natural low pH and reduced moisture content protect against foodborne illnesses, while proper setup keeps insects and animals away from your produce.
Selecting The Best Produce
Now that you understand the benefits of sun drying, selecting the right produce will determine your success. Look for fruits that are fully ripe but not overripe, firm, and heavy for their size. Your produce shouldn't have any blemishes, wormholes, or bruises, as these imperfections will only worsen during the drying process.
Fruits with high sugar and acid content work best for sun drying. You'll want to focus on popular options like apricots, grapes, dates, and hot peppers. While most vegetables aren't suitable for sun drying due to their low sugar and acid content, you can dry some varieties like vine-dried beans indoors. Since sun drying is a cost-effective alternative to buying produce out of season, it's worth mastering the technique with these recommended items.
| Produce Type | Best Choices | Key Indicators |
|---|---|---|
| Fruits | Apricots, Grapes, Dates | Firm, Heavy, No Blemishes |
| Tomatoes | Roma, Cherry, Plum | Bright Color, Ripe but Firm |
| Peppers | Hot Peppers, Bell Peppers | Crisp, Vibrant, No Soft Spots |
Before drying, wash your produce thoroughly and cut it into uniform pieces. You can prevent browning by soaking fruits in lemon juice or red wine vinegar. Remember, proper preparation greatly impacts your final product's quality.
Essential Tools And Equipment
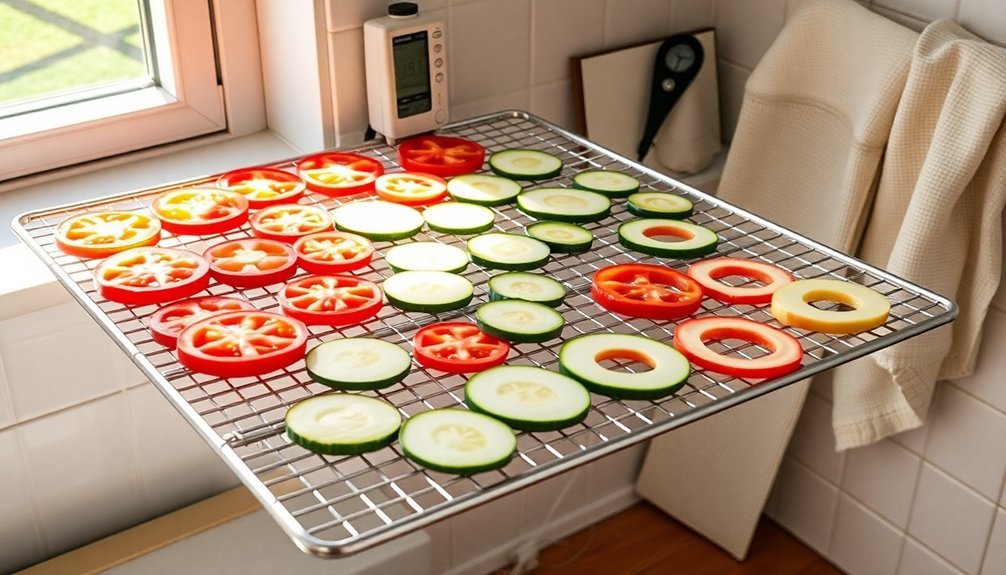
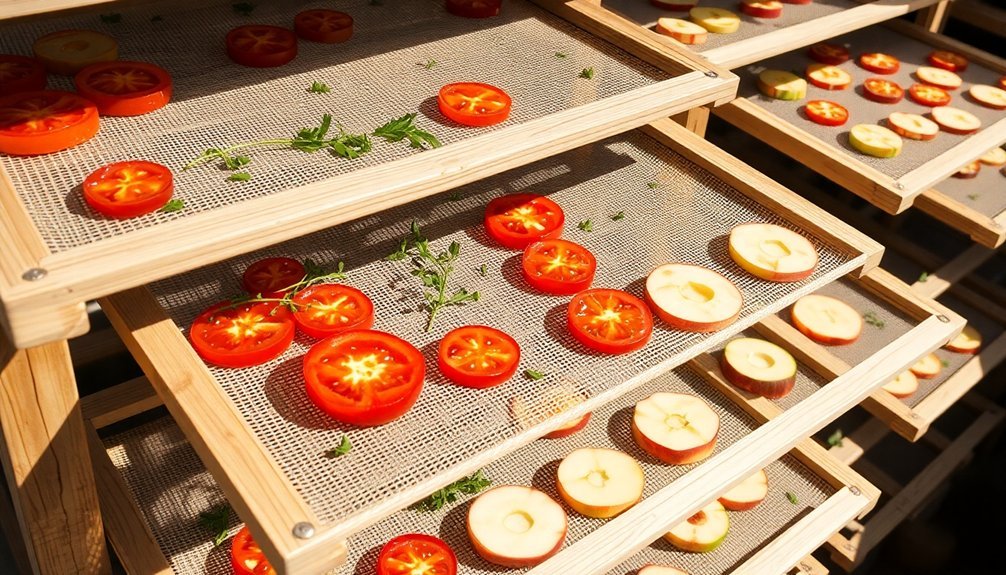
Proper tools and equipment form the foundation of successful sun-drying. You'll need drying racks that allow air to circulate around your produce – cooling racks on cookie sheets work well, or you can use plastic racks from dehydrators.
For protection, cover your produce with cheesecloth or suspended screens to keep insects away while allowing airflow. Fresh ripe fruit works best for optimal drying results.
Your pretreatment supplies should include lemon juice for preventing browning (mix 1 cup with 4 cups water), and sea salt for seasoning, particularly when drying tomatoes.
Don't forget to set up your drying station in a warm, dry area with temperatures above 85°F and humidity below 60%.
Four essential setup components you'll need:
- Drying racks with adequate spacing between layers
- Protective coverings like cheesecloth or mesh screens
- Foil liners to catch any drips
- A sheltered space that protects from rain and night moisture
Consider building or purchasing a solar dryer with a collector box for more consistent results.
This setup provides indirect drying and better protection from the elements while maintaining ideal temperature and airflow conditions.
Preparing Your Workspace
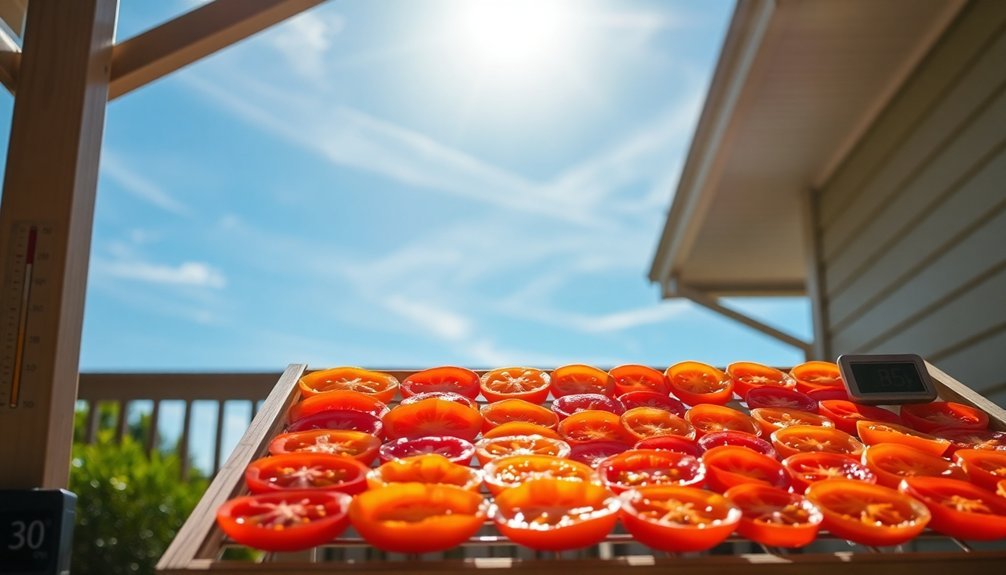
Setting up your workspace intelligently makes the difference between success and failure in sun-drying. Choose a south-facing location that receives direct sunlight throughout the day, away from shadows and areas where debris could accumulate.
You'll want to position your drying area on a concrete driveway or similar moisture-resistant surface, taking advantage of natural breezes for better air circulation.
Monitor your environmental conditions closely. You're looking for temperatures above 85°F (29°C) and humidity levels between 30-60%. Use hygrometers and thermometers to track these conditions, and make certain you've elevated your drying racks to promote airflow on all sides.
For best results, maintain air speeds of 1-2 mph through your drying area.
Protect your produce from pests and contamination using food-safe screens made from stainless steel, Teflon-coated fiberglass, or plastic. Don't use galvanized metal cloth, copper, or aluminum screens.
Cover your food with cheesecloth or double screening to keep birds and insects away. Boost heat collection by incorporating reflective surfaces like aluminum foil or mirrors, and if you're in a humid area, consider using a solar dehydrator with built-in fans.
Cleaning And Cutting Methods
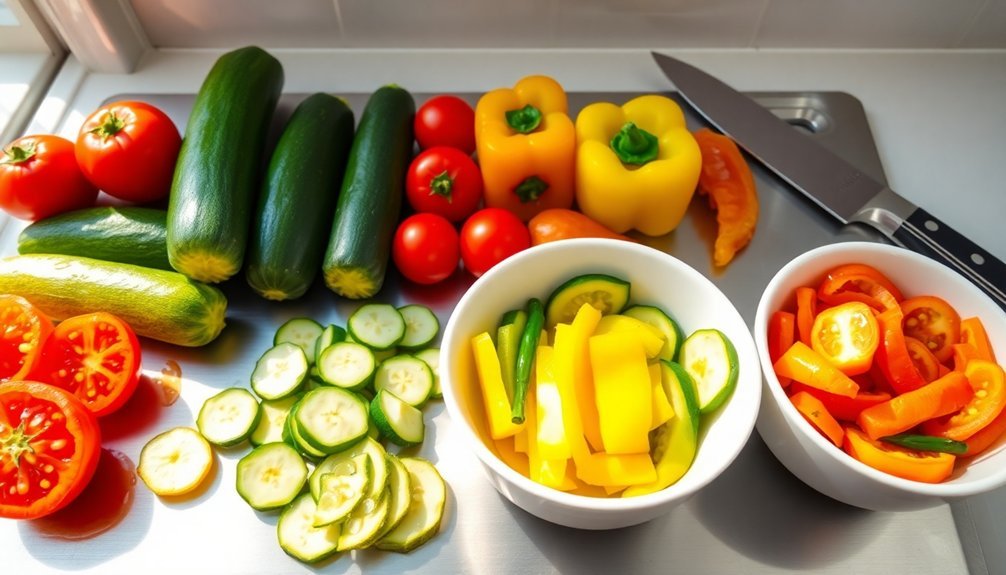
Food-prep cleanliness stands as your critical first step in sun-drying produce. Always wash your fruits and vegetables under running water, using a clean bowl instead of the sink to avoid contamination from drain bacteria. For items with hard rinds, you'll need to scrub with a vegetable brush.
Remember to keep your rinse water within 10 degrees of the produce's temperature to prevent unwanted microbial growth.
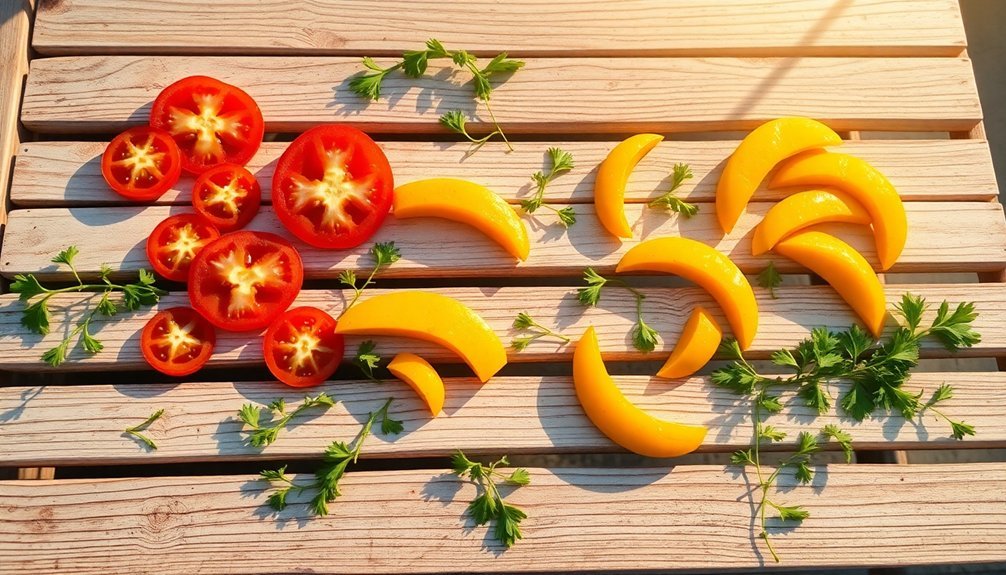
When you're ready to cut, focus on achieving uniform pieces for even drying. You'll want to slice most produce into 1/4 to 1/2 inch thick pieces, removing any damaged areas, cores, or woody portions.
Here's how to handle specific items:
- For fruits like apples and pears: Remove cores and slice into rings or wedges, keeping thickness consistent.
- For vegetables like potatoes and squash: Cut into 1/4-inch strips or slices, maintaining uniform size.
- For leafy items like herbs: Separate into smaller clusters and remove tough stems.
- For round produce like onions: Remove outer layers and slice 1/8 to 1/4 inch thick.
Use a food processor or slicer when possible to maintain consistency in your cuts, which will help guarantee even drying times.
Pre-Treatment Techniques
Before you begin drying your produce, applying the right pre-treatment techniques will greatly extend shelf life and preserve quality. You'll need to prevent enzymatic browning and maintain nutrients through specific methods tailored to different fruits and vegetables.
For most fruits, you can use ascorbic acid solutions or lemon juice mixtures to prevent darkening. Dip your apples, pears, apricots, and peaches in these solutions for 3-4 minutes. Honey dips work well too, helping preserve both flavor and nutrients. For bananas, a quick lemon juice dip is optional but effective.
Blanching is essential for many vegetables and some fruits. Submerge your produce in boiling water briefly – tomatoes need just 30 seconds – then immediately transfer to cold water. If you're at high elevation, add one minute to blanching time for every 2000 feet above 4000 feet.
For grapes and blueberries, you'll need to pierce their skins or briefly dip them in boiling water.
While melons don't require pre-treatment, make sure you thoroughly wash them and remove seeds. Remember that sulfuring or sodium bisulfite dips can also effectively prevent browning and reduce vitamin C loss.
Setting Up Drying Racks
When you're building your drying racks, start with untreated wooden slats or stainless steel mesh that allows proper air circulation around your produce.
You'll want to create a sturdy frame that can support the weight of your fruits and vegetables while maintaining enough space between the slats or mesh openings for ideal airflow.
Cover your completed rack with cheesecloth or nylon netting, making sure to prop up the covering material so it doesn't touch the food while still protecting it from insects and debris.
Rack Construction Basics
Building a sturdy drying rack requires careful material selection and precise construction techniques. You'll need 1 1/2 inch thick wood for a lightweight yet durable frame, along with timber blocks for reinforcement. Pre-drill holes in the wood to prevent splitting when you insert 3-inch screws to hold the boards together.
For proper assembly, cut your base and side timber pieces according to your desired dimensions. Make certain to position the base side strips parallel to each other for maximum stability. You'll want to incorporate backstops to keep your produce from sliding off, and use timber blocks at the corners for added strength.
Here are the essential steps for constructing multiple drying rack layers:
- Install spacers or ribs underneath each rack level to guarantee proper airflow.
- Position racks at even intervals, checking they're perfectly level.
- Secure each rack firmly to the base frame using standard timber screws.
- Add silicone sealant along the edges to prevent any material from falling through.
Consider adding heavy-duty casters if you need mobility, and use corrugated metal for the base to help absorb heat during the drying process.
Optimal Airflow Design
Getting the airflow right can make or break your produce-drying success. To achieve superior results, you'll need to guarantee your drying rack allows air to circulate freely around your produce. Position your rack off the ground using footings or stands, which lets air move underneath the food while preventing moisture accumulation.
Use mesh screens or perforated surfaces for your drying racks – they're essential for maximizing airflow while keeping dust and allergens away from your produce. Place your rack in an open area where gentle breezes can reach it, but make sure you can protect it from strong winds that might introduce debris or disrupt the drying process.
Keep the area around your drying rack clear of obstacles, and don't place it near doors or windows that could block air circulation. For enclosed systems, incorporate ventilation holes and consider using dual circulation mechanisms.
You'll want to monitor humidity levels with a hygrometer to guarantee your produce is drying effectively. During the process, remember to position your rack in direct sunlight, but provide shade during peak hours to prevent overheating. This balanced approach will help you achieve consistently well-dried produce.
The Drying Process
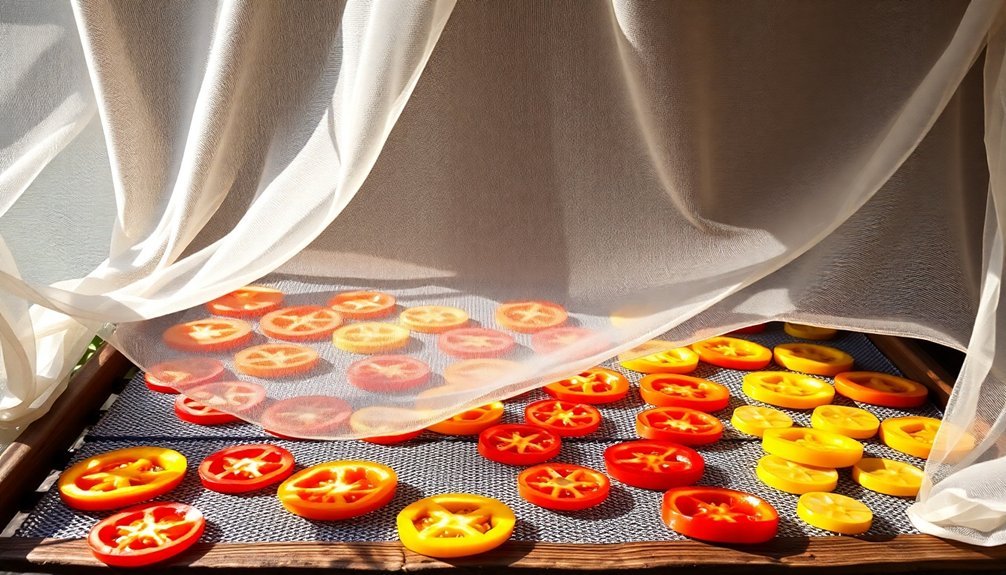
Place your prepared produce in a single layer on the drying racks during peak sunlight hours, ensuring they receive maximum sun exposure while being protected by cheesecloth or netting.
You'll need to turn the produce once daily and watch for signs of proper drying, such as vegetables becoming brittle or crisp.
Don't forget to bring your drying racks indoors each night to prevent moisture from rehydrating your partially dried produce.
Daily Sun Exposure Steps
Three essential steps make up the daily sun-drying routine for your produce. First, arrange your prepared fruits or vegetables in a single layer on drying racks, guaranteeing there's enough space between pieces for proper air circulation.
Next, cover the produce with cheesecloth or screens to protect it from insects while maintaining adequate airflow.
Finally, position your racks in a sunny, well-ventilated area where temperatures will reach above 98°F.
To guarantee successful drying, you'll need to monitor and adjust your produce throughout the day:
- Rotate your drying racks 180 degrees each morning to confirm uniform sun exposure.
- Turn individual pieces daily with a spatula to prevent rotting and guarantee even drying.
- Keep vegetables in direct sunlight for only 1-2 days to avoid scorching.
- Monitor air temperatures to maintain them between 120-185°F.
If your produce isn't completely dry after direct sun exposure, move the racks to a shaded area with good ventilation to continue the process.
Remember to check your produce frequently throughout the day, and if you have access to a solar dryer, you can use it to reduce drying times considerably.
Nighttime Storage Practices
Proper nighttime storage proves essential for successful sun-drying of produce. You'll need to protect your food from moisture, insects, and animals while maintaining proper air circulation throughout the night. Cover your drying trays with cheesecloth or netting, or bring them indoors to prevent nighttime condensation from rehydrating your produce.
If you're keeping your trays outside, elevate them off the ground using blocks or place them on a concrete driveway to improve airflow. You can also place table legs in cans of water to prevent insects from climbing up. For additional protection, suspend screens above your food and keep the trays away from areas with high animal traffic or vehicle exhaust.
Monitor weather conditions regularly and adjust your storage location if you notice excess humidity. If indoor space is limited, you can use a shed or garage, but make sure the area is clean, pest-free, and well-ventilated.
Consider using a fan to enhance air circulation around your drying trays. Check your produce regularly for signs of spoilage or rehydration, and maintain a clean, organized storage space to prevent contamination.
Weather And Timing Considerations
Successful sun-drying depends heavily on the right weather conditions and timing. You'll need temperatures above 85°F (29°C) and humidity levels between 30-60% for ideal results. Breezy days are your friend, as wind helps remove moisture and improves drying efficiency. To maximize your success, always check weather forecasts before starting your drying project.
Different produce types require varying drying times, and you'll need to monitor their progress carefully:
- Fruits typically need 2-4 days to dry completely, depending on their thickness and water content.
- Vegetables take longer, usually 3-5 days, with limited direct sun exposure in the first 1-2 days.
- High humidity will extend drying times and increase the risk of mold growth.
- Cloudy or cool days will greatly slow down the process.
You'll want to position your drying racks to catch prevailing breezes and guarantee good air circulation. Use a hygrometer to track humidity levels and a thermometer to monitor temperature.
If you're in a particularly humid area, consider using a solar dehydrator with built-in fans for better control over the drying environment.
Testing For Doneness
Knowing when your sun-dried produce is ready for storage requires multiple testing methods. You'll need to test fruits and vegetables differently, as each has unique indicators of doneness. Fruits should feel leathery but not hard, while vegetables must become brittle or tough.
| Test Method | For Fruits | For Vegetables |
|---|---|---|
| Touch Test | Leathery, slightly sticky for high-sugar fruits | Brittle, tough, no flexibility |
| Break Test | Falls apart when squeezed | Snaps cleanly when bent |
| Moisture Test | No moisture when cut and pressed | Completely dry, no moisture inside |
To calculate precise dryness, weigh your produce before and after drying. For fruits, aim for 80% solids, and for vegetables, target 90% solids. You can verify doneness using the oven method by heating sealed jars at 325°F for 15 minutes – if the lid seals properly after cooling, your produce is ready. When using a dehydrator, dry at 140℉ for 20-24 hours, rotating trays and checking regularly. Remember, it's better to over-dry than under-dry, as moisture can lead to spoilage.
Storage And Preservation Methods

Once you've finished drying your produce, you'll need proper storage containers that seal tightly to keep moisture and air out, with glass jars and vacuum-sealed bags being your best options.
You'll want to store your containers in a cool, dark place between 60-70°F, or opt for freezer storage at 0°F if you live in a humid climate.
Make sure you're checking your stored produce regularly for moisture buildup, and if you spot any condensation inside the containers, return the produce to the dehydrator before repackaging.
Airtight Container Best Practices
To extend the life of your sun-dried produce, proper storage in airtight containers is crucial. When you're selecting containers, opt for vacuum-sealed options that can remove nearly all air, extending freshness up to five times longer than conventional storage methods.
You'll want to choose either BPA-free plastic or borosilicate glass containers, as they're both safe for long-term food storage and won't react with your dried goods.
- Before storing, verify your sun-dried produce is completely cooled and dry to prevent moisture accumulation.
- Use oxygen absorbers in your airtight containers to further extend shelf life of dried goods.
- Store containers in a cool, dark place to maintain peak freshness and nutritional value.
- Label each container with contents and drying date to track freshness.
Remember to keep ethylene-producing dried fruits separate from other dried produce to prevent unwanted ripening.
If you're storing herbs, include a damp paper towel in the container to maintain proper moisture levels.
For maximum organization and space efficiency, choose stackable containers that'll help you make the most of your storage area while keeping your dried goods easily accessible.
Moisture Control During Storage
Effective moisture control stands as the cornerstone of successful long-term storage for sun-dried produce.
You'll need to let your dried items cool completely before storage to prevent unwanted condensation. Once cooled, place them in large plastic or glass containers, filling them only two-thirds full to allow proper air circulation.
To guarantee even moisture distribution, you'll want to shake or stir your containers daily for 4-10 days. If you notice any moisture beads forming inside, return the produce to your dehydrator immediately.
Keep humidity levels below 60% by storing your containers in well-ventilated areas, and use a hygrometer to monitor conditions regularly.
For longer storage periods, consider using your freezer. Store items in airtight freezer bags or vacuum-sealed containers, removing as much air as possible.
Maintain a freezer temperature of 0°F (-18°C) or lower, and minimize how often you open the freezer door to prevent moisture from getting in. Don't forget to label each package with contents and date.
Remember to regularly inspect your stored items for any signs of moisture reabsorption or mold, taking corrective action if needed.
Temperature and Environment Management
Maintaining the right temperature and environment for your dried produce complements proper moisture control during storage. You'll want to store your sun-dried foods in a cool, dark place where temperatures remain stable.
While the drying process requires temperatures between 85°F and 100°F, storage conditions should be much cooler to extend shelf life and prevent quality deterioration.
For ideal storage results, follow these essential guidelines:
- Store dried foods in airtight containers, making sure they've cooled completely before sealing to prevent condensation.
- Place paper layers between dried fruits to prevent them from sticking together and forming clumps.
- Choose storage locations away from direct sunlight and heat sources to maintain quality for up to one year.
- Monitor your storage area's humidity levels, aiming to keep them between 30-60%.
Remember that proper ventilation during the drying process directly affects storage success.
When sun-drying, position your racks to catch natural breezes and maintain air circulation of 1-2 mph. Use screens or netting to protect your produce while allowing adequate airflow, and always elevate drying racks for ideal air movement around your foods.
Frequently Asked Questions
How Long Can Sun-Dried Produce Last When Stored Properly?
You'll find your properly stored sun-dried produce can last 6-12 months in the pantry, up to 2 years in the fridge, and indefinitely in the freezer, though specific times vary by food type.
Can I Sun-Dry Frozen Fruits and Vegetables?
You shouldn't sun-dry frozen produce as it's not recommended. The high moisture content after thawing and increased risk of spoilage make it unsafe. Instead, use a food dehydrator or oven for better results.
What Signs Indicate That Sun-Dried Produce Has Gone Bad?
Check your sun-dried produce for mold, unusual discoloration, slimy texture, or foul odors. If you notice any of these signs, or if it's mushy, crumbly, or has a fermented smell, don't eat it.
Is Sun-Dried Produce More Nutritious Than Fresh Produce?
While you'll get more concentrated nutrients and antioxidants per weight in sun-dried produce, you'll lose some water-soluble vitamins. Fresh produce offers better vitamin C and B content, but both forms have unique benefits.
Can I Sun-Dry Produce on My Apartment Balcony?
Yes, you can sun-dry produce on your balcony if it gets good sunlight exposure. Just guarantee proper air circulation, use elevated trays with protective covering, and monitor the drying process throughout the day.
In Summary
Sun-drying your own produce isn't just economical – it's a rewarding way to preserve nature's bounty. You'll find that with the right preparation, tools, and timing, you can successfully dry almost any fruit or vegetable. Remember to store your dried goods in airtight containers away from light and moisture, and you'll enjoy your homemade preserves for months to come. Start small, learn from experience, and you'll master this ancient preservation method.


Leave a Reply