
To create sugar-preserved fruit, you'll need fresh, firm produce and the right tools – a nonreactive pot, reliable thermometer, and sterile jars. Start by layering cleaned fruit with sugar and letting it macerate overnight in the refrigerator. Cook your sugar syrup to 230°F, then add the macerated fruit and cook until the mixture reaches 220°F at sea level. Test for doneness by checking the consistency – look for thick syrup and reduced boiling action. Process in a water bath for 10 minutes and store in a cool, dark place for up to a year. Master these basics, and you'll reveal the secrets to perfectly preserved seasonal fruits.
Understanding Sugar Preservation Science
When you preserve fruit with sugar, you're employing a time-tested scientific process that harnesses sugar's unique molecular properties. The science behind this preservation method relies on sugar's ability to reduce water activity (AW) in foods, creating an environment where harmful microorganisms can't survive or multiply.
Sugar's hygroscopic nature means it attracts and binds with water molecules, making that water unavailable for bacterial, yeast, and mold growth. You'll need to maintain a sugar concentration between 60-65% in your preserves to guarantee proper preservation. This concentration not only prevents spoilage but also helps maintain the fruit's natural texture and appearance by inhibiting enzymatic browning. A proper gel texture requires pectin content between 0.5-1% by weight.
When you're working with sugar preservation, you're also enhancing the sensory experience of your preserved fruits. The sugar molecules interact with the fruit's natural compounds to maintain vibrant colors, preserve desirable textures, and enhance flavors.
Understanding these molecular interactions helps you create preserves that aren't only safe to eat but also maintain their quality over time. Whether you're making jams, jellies, or whole preserved fruits, this scientific process guarantees your creations remain stable and delicious.
Essential Equipment and Tools
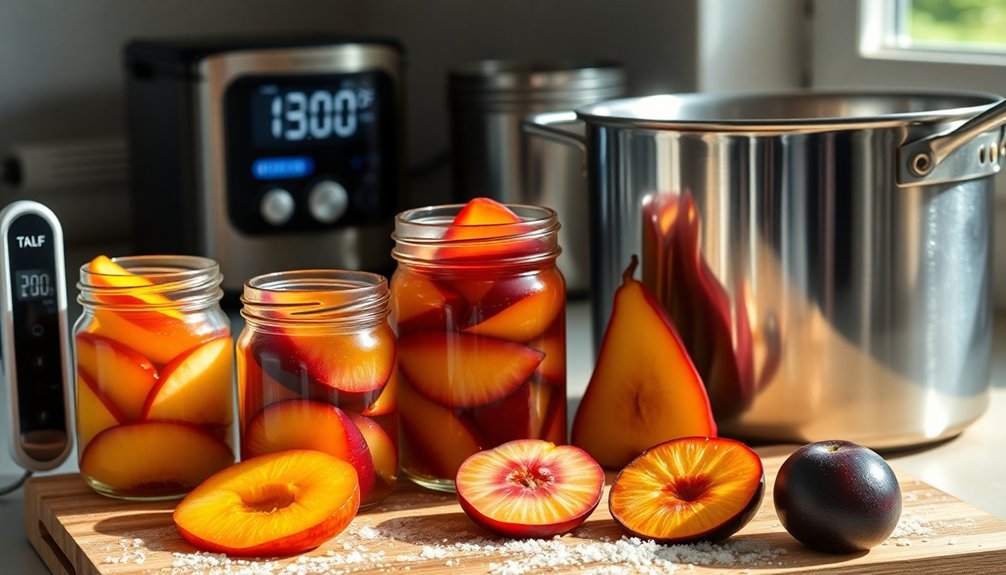
To put the science of sugar preservation into practice, you'll need the right tools and equipment in your kitchen. The foundation of your preserving setup starts with a nonreactive canning kettle and a heavy pot for cooking both the sugar syrup and fruit mixture.
You'll also need a large bowl or casserole dish for macerating your fruit with sugar. Precise measurements are vital for successful preservation, so equip yourself with a reliable scale and thermometers. A slotted spoon is essential for skimming foam during the cooking process to achieve clear, visually appealing preserves.
You'll need both a candy thermometer to monitor sugar syrup temperature and a jelly thermometer to determine the jellying point. A refractometer will help you test sugar concentration in your fruit juice.
For the packaging process, gather clean jars with lids and a wide-neck funnel to prevent spills. You'll need a deep pot for water-bath processing to guarantee proper sterilization.
Keep essential tools like a knife, slicer, and ladle handy for fruit preparation and jar filling. Don't forget strainers and wooden spoons for removing foam and particles from your preserves.
A set of clean tea towels will help you maintain hygiene throughout the process.
Selecting the Perfect Fruit

Success in fruit preservation begins with selecting high-quality fruit at its peak ripeness. You'll want to choose fruits that are firm and fresh, avoiding any that show signs of damage or spoilage. While perfectly ripe fruit offers ideal flavor, a mix of ripe and slightly underripe pieces can provide better texture and pectin content, especially for jam-making. It's crucial to process fruits immediately after harvest for optimal preservation results.
Different fruits require different approaches to preservation. Berries and stone fruits excel in sugar preservation, while tart fruits might need extra sugar to balance their acidity. Hard fruits like small plums generally need less sugar due to their natural pectin content, while softer fruits like figs and cherries work best in sugar syrup.
Key indicators of suitable fruit for preservation:
- Fruit should be firm to the touch with vibrant, natural color
- No visible bruising, mold, or soft spots
- Fruit should have a fresh, clean aroma
- Stems and leaves should look fresh, not withered
- For berries, look for plump fruit that isn't water-logged or mushy
Remember to evaluate each fruit's natural pectin levels when planning your preservation method, as this will affect how much sugar you'll need to achieve the desired results.
Fruit Preparation Methods
Proper fruit preparation forms the backbone of successful sugar preservation.
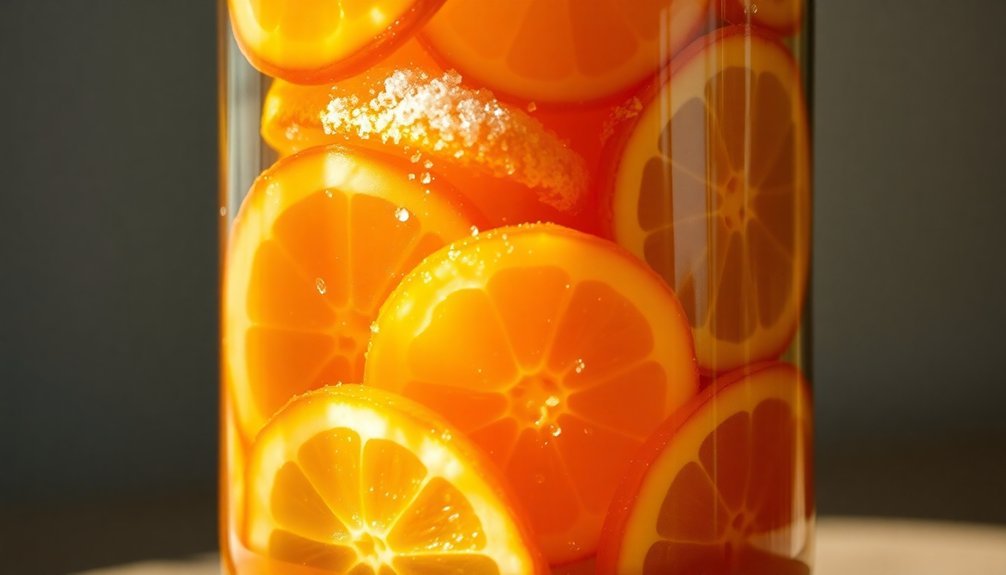
Begin by arranging your cleaned fruit and sugar in alternating layers, starting with fruit and ending with sugar. You'll want to use a scale for accurate measurements since cup volumes can vary considerably depending on the fruit.
Let the layered mixture macerate in your refrigerator overnight, though you can extend this up to three days. During this time, the sugar will naturally draw out the fruit's juices, creating a rich syrup and reducing your eventual cooking time.
Before cooking, make sure you scrape any undissolved sugar into the developing syrup.
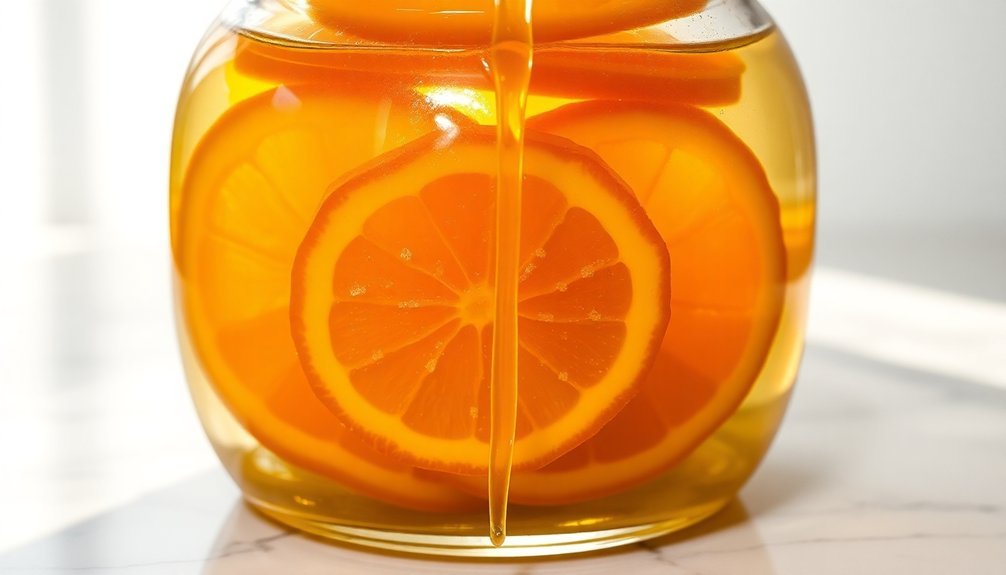
When you're ready to cook, start by boiling the sugar syrup separately until it reaches 230°F, carefully skimming off any foam that forms.
Then add your macerated fruit and reduce the heat to medium. You'll need to cook until the fruit becomes translucent and your syrup thickens to about 221°F.
Test the consistency by placing a spoonful on a cold plate in the freezer. The preserves should set but remain slightly runny for the perfect texture.
Sugar Syrup Basics
When you're making sugar syrup for preserving fruit, you'll need to understand the basic ratios of sugar to liquid, which typically range from equal parts for lighter fruits to as much as 50% sugar concentration for heavier preserves.
Your syrup's success depends on achieving the right temperature, with 230˚F (110˚C) being the ideal point for most fruit preserves.
You can guarantee perfect results by dissolving sugar completely in lukewarm water until clear, then heating the mixture over medium heat while skimming off any foam that forms on the surface.
Sugar-Water Ratios Explained
Understanding sugar-water ratios forms the foundation of successful fruit preservation. You'll need to choose from several syrup concentrations, ranging from very light (10% sugar) to heavy (40% sugar), depending on your fruit's natural sweetness and your desired outcome.
When preparing your syrup, simply combine sugar and water according to your chosen ratio, heat until the sugar dissolves completely, and bring to a boil before using.
For a 9-pint load, you can follow these essential syrup ratios:
- Very Light Syrup: Mix 6.5 cups water with 0.75 cups sugar for naturally sweet fruits
- Light Syrup: Combine 5.75 cups water with 1.5 cups sugar for sweet berries and cherries
- Medium Syrup: Use 5.25 cups water with 2.25 cups sugar for grapes and sweet apples
- Heavy Syrup: Blend 5 cups water with 3 cups sugar for tart fruits
- Extra Heavy Option: Mix 1 quart water with 4-5 cups sugar for very tart fruits
You can customize these ratios to suit your taste preferences, and you're free to substitute up to half the sugar with light corn syrup or mild honey.
Perfect Syrup Temperature Points
The success of your sugar-preserved fruits depends heavily on reaching precise temperature points throughout the cooking process. You'll need to master four vital stages to achieve the perfect preservation.
Start by watching for the thread stage (102-113°C), where your syrup forms delicate threads when dropped from a spoon. This stage is ideal for creating fruit liqueurs and basic preserving syrups.
As you continue heating to the soft ball stage (113-118°C), you'll notice the syrup becomes thicker and forms a soft, malleable ball when dropped in ice water.
For firmer preserves, aim for the firm ball stage (118-121°C), where the syrup creates thick, ropy threads and forms a ball that holds its shape but remains squeezable.
If you're making candied fruits, you'll want to reach the hard ball stage (121-132°C), which produces a rigid ball in ice water that maintains its form.
Don't exceed the soft crack stage (132-149°C) for fruit preservation, as higher temperatures will result in hard candy textures.
Use a reliable candy thermometer and always test your syrup in ice water to confirm you've reached the right consistency for your specific preservation needs.
The Art of Layering
Successfully layering fruit and sugar creates the foundation for perfectly preserved treats.
You'll want to establish a precise ratio of 60% fruit to 40% sugar by weight to achieve ideal preservation and flavor development. Start by placing a layer of prepared fruit at the bottom of your container, followed by a generous sprinkle of sugar. Continue alternating these layers, always beginning and ending with fruit.
During the maceration period, which can last from overnight to three days in the refrigerator, you'll notice the sugar drawing moisture from the fruit. This process is essential for developing the right texture and guaranteeing proper preservation.
- Mix the fruit and sugar thoroughly to guarantee even distribution
- Keep all layers well-covered during the maceration phase
- Strain and collect the resulting syrup for later cooking
- Start with room-temperature fruit for best results
- Check regularly to guarantee the fruit remains submerged
The success of your preserved fruit depends largely on how well you execute this layering process.
Once complete, you'll be ready to strain the fruit and collect the syrup for the next preservation steps, where you'll cook it to the proper concentration.
Temperature and Time Control
Once your layered fruit and sugar have properly macerated, precise temperature control becomes the next key factor in creating perfectly preserved fruit. You'll need to monitor temperatures carefully to achieve the ideal 65% sugar concentration that prevents spoilage and guarantees proper preservation.
| Altitude Level | Boiling Point | Target Temperature |
|---|---|---|
| Sea Level | 212°F (100°C) | 217-222°F (103-106°C) |
| 3,000 ft | 206°F (97°C) | 211-216°F (99-102°C) |
| 6,000 ft | 200°F (93°C) | 205-210°F (96-99°C) |
When cooking at higher altitudes, you'll need to adjust your target temperature downward. For every 1,000 feet above sea level, subtract 2°F from your target temperature. Use a wide pan to speed up water evaporation and reduce cooking time. As you bring the mixture to a gentle boil, avoid vigorous stirring that might crush the fruit. You'll know you've reached the right consistency when your instant-read digital thermometer shows the adjusted target temperature for your altitude. Remember that sugar concentration increases more quickly at high altitudes, so monitor the process closely to achieve the ideal 60-65% sugar content or approximately 75 degrees brix.
Testing for Doneness
Determining when your sugar-preserved fruit has reached its ideal consistency requires multiple testing methods for accuracy.
You'll need to combine temperature readings, visual cues, and consistency tests to guarantee perfect results every time.
For temperature testing, use a candy thermometer to reach 220°F at sea level, adjusting for altitude changes. When making marmalades, aim for 104-105.5°C (219.2-221.9°F).
The sheet test offers another reliable method: lift a metal spoon and watch how the mixture flows – it's ready when two drops merge and sheet off the spoon's edge.
For a foolproof approach, try the refrigerator test by placing a small sample on a cold plate in your freezer. You'll know it's done when the cooled mixture gels properly.
Watch for these visual and auditory signs during cooking:
- Large bubbles forming on the surface
- Less vigorous boiling action
- Change in the sound of the boil
- Thicker consistency when stirred
- Clear tracks remaining when you draw a spoon through the mixture
Always remember that your preserves will continue to thicken as they cool, so don't overcook them.
Proper Storage Techniques

Proper storage serves as the foundation for maintaining the quality and shelf life of your sugar-preserved fruits. To guarantee long-term preservation, you'll need to process your preserves in a water bath for 10 minutes before storing them in sterilized containers.
Once processed, you've got two main storage options. You can refrigerate your preserves for immediate use, or store them in a cool, dark place where they'll keep for at least a year. Choose a storage environment that's away from moisture, extreme temperatures, and chemical sources.
Don't place your preserves near coolers or vents, as temperature fluctuations can affect their quality.
When selecting containers, opt for clean, sterilized jars with tight-fitting lids. The sugar in your preserves creates an osmotic effect that inhibits microbial growth, but proper containment is essential for maintaining this preservation.
You'll want to regularly check your stored preserves for any signs of spoilage or degradation.
Remember to label your containers with the preparation date and contents. If you're storing multiple batches, organize them so you can use the oldest preserves first, maintaining a practical rotation system.
Common Preservation Mistakes
Making successful sugar-preserved fruits requires attention to detail and avoiding common pitfalls that can ruin your preserves. When you're making preserves, you'll need to carefully balance sugar content, as too little won't set properly while too much leads to crystallization. Proper pectin levels and fruit ripeness are essential for achieving the right consistency.
Watch out for these critical preservation mistakes:
- Using contaminated equipment or failing to sterilize properly, which can lead to fermentation and spoilage
- Cooking your preserves too long or too short, resulting in either a rubbery texture or failure to set
- Not dissolving sugar completely before boiling, causing unwanted crystallization in your final product
- Failing to achieve an airtight seal, which leads to contamination and cloudy appearance
- Ignoring proper acidity levels, resulting in bland flavor and potential preservation issues
You'll need to pay attention to the cooking process to prevent burning, which can ruin your preserve's flavor.
If you notice moving bubbles in your finished product, don't consume it – this indicates spoilage.
Keep your preserved fruits at a consistent temperature to prevent weeping and maintain quality.
Frequently Asked Questions
Can I Use Artificial Sweeteners Instead of Sugar for Preserving Fruit?
You can use artificial sweeteners, but they won't preserve fruit's texture and color like sugar does. For best results, use special "no-sugar-needed" pectin and add sweeteners after cooking to avoid bitter flavors.
How Long Does the Preserved Fruit Remain Safe to Eat Once Opened?
Once you've opened your preserved fruit, it'll stay safe for up to 12 months if it's traditionally preserved with sugar. You'll want to keep it refrigerated and check regularly for any signs of spoilage.
Why Do Some Preserved Fruits Float to the Top of Jars?
You'll notice fruits float because they contain trapped air in their cells and are less dense than the syrup. Hot packing can help prevent this by releasing air, while using lighter syrups reduces density differences.
Can I Reprocess Jars if the Seal Fails After a Few Days?
Yes, you can reprocess jars with failed seals within 24 hours. Check the jar rim, use a new lid, reheat contents, and reprocess using the original method. For safety, consider refrigerating instead.
Are Vacuum-Sealed Bags an Acceptable Alternative to Traditional Glass Jars?
While you can use vacuum-sealed bags for storing fruit, they're not a direct substitute for properly canned jars. They'll extend shelf life but don't provide the same preservation benefits and require refrigeration or freezing.
In Summary
You've now mastered the art of sugar preservation! Remember to keep your preserved fruit in a cool, dark place and always use sterilized jars. Don't forget to check periodically for any signs of fermentation or mold. With proper technique and attention to detail, you'll enjoy your homemade candied fruits for months to come. Share your creations with friends and family – they'll be amazed at your new skill!


Leave a Reply