To sterilize Mason jars safely, wash them first in hot, soapy water and rinse thoroughly. You'll need to choose between three reliable methods: boiling water bath (most recommended), oven sterilization, or dishwasher sanitizing cycle. For the boiling method, submerge clean jars in water and maintain a rolling boil for 10 minutes, adding extra time for high altitudes. Don't forget to sterilize lids and bands separately. Always handle hot jars with proper tools like jar lifters, and guarantee your workspace stays clean throughout the process. Mastering these essential steps will open your path to successful home canning.
Why Sterilization Matters
Three vital aspects make sterilization essential in canning: food safety, jar integrity, and contamination prevention.
When you sterilize your jars, you're eliminating harmful bacteria and microorganisms that could compromise your preserved foods. If you skip this vital step, you risk contamination that can lead to spoilage, foodborne illnesses, and wasted effort. You'll notice signs of improper sterilization through cloudy contents, bulging lids, or unusual smells.
Processing time directly affects your sterilization needs. If your recipe requires less than 10 minutes of processing, you must sterilize your jars beforehand. For recipes with longer processing times, the extended heat exposure will handle sterilization. Remember to adjust your timing for altitude – add one minute for every 1,000 feet elevation. Using hot, soapy water to wash jars before sterilization ensures the best results.
Your jars' integrity depends on proper sterilization. The process helps you spot any cracks or chips that could cause seal failures, and it removes dust, debris, and glass particles that might interfere with creating tight seals.
When you sterilize correctly, you'll eliminate residues and films that could disrupt preservation, ensuring your jars remain safe for long-term storage and future reuse.
Choosing Your Sterilization Method
When it comes to sterilizing your canning jars, you'll need to choose between several proven methods, each with its own advantages and requirements. The boiling water method remains the most reliable and FDA-approved approach, requiring just a large pot, rack, and jar lifter. You'll need to boil your jars for 10 minutes at lower altitudes, adding an extra minute for each 1,000 feet of elevation.
While alternative methods exist, they're not all equally effective. Consider these key factors when selecting your sterilization method:
- Boiling water method offers the most reliable sterilization and is FDA-approved
- Oven sterilization at 275°F works but isn't officially endorsed for safety
- Dishwasher sterilization requires a sanitize cycle that reaches at least 150°F
- Microwave sterilization isn't recommended due to uneven heating risks
- High-altitude locations require longer processing times regardless of method
If you're new to canning, stick with the boiling water method. It's foolproof when done correctly and doesn't require special equipment beyond basic canning tools. John Landis Mason's invention in 1858 revolutionized food preservation with its innovative airtight seal design.
While the dishwasher method might seem convenient, it's only reliable with a proper sanitize cycle, and oven sterilization requires extra caution to prevent thermal shock.
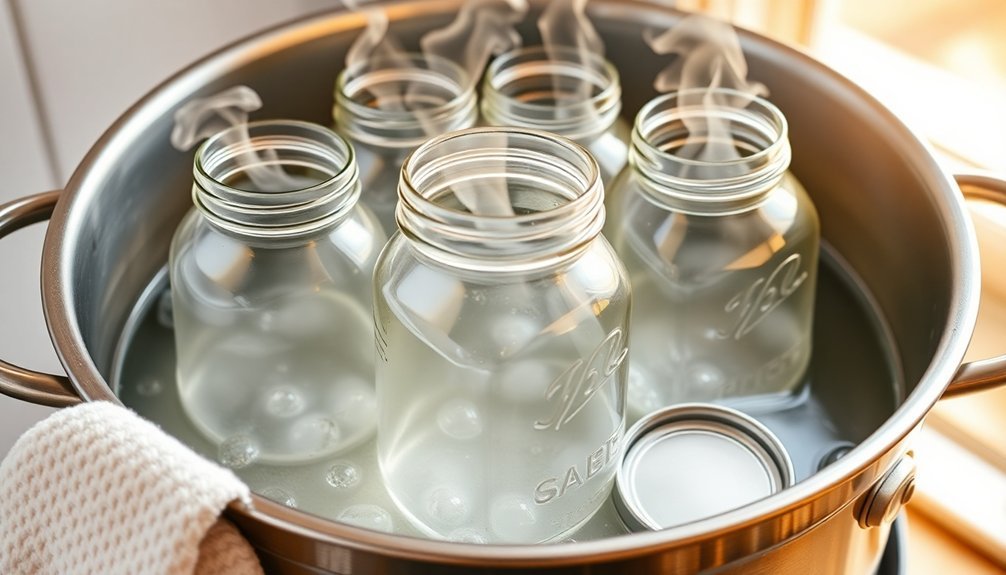
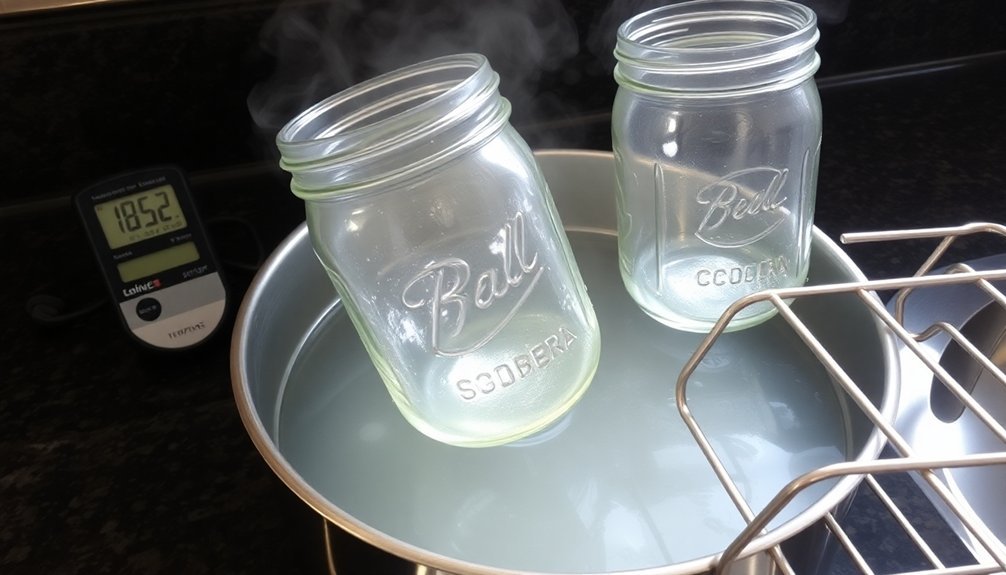
Boiling Water Sterilization Steps
Start by washing your jars, lids, and bands thoroughly in hot, soapy water.
Place the clean jars right-side-up on your rack and fill them with hot (not boiling) water. Add water to the canner until it reaches about an inch above the jar tops. Check that your water bath canner has a functional lid and rack before beginning the process.
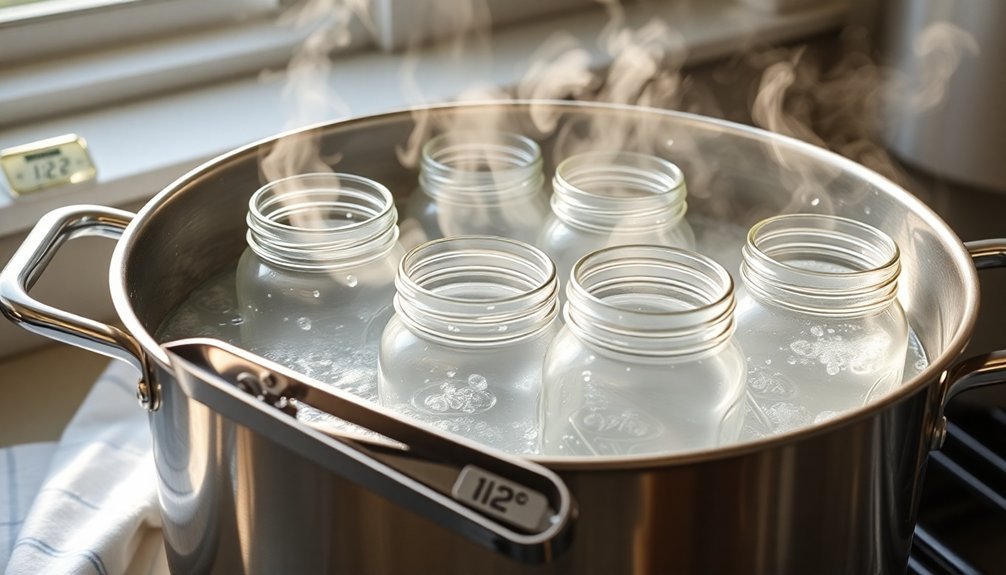
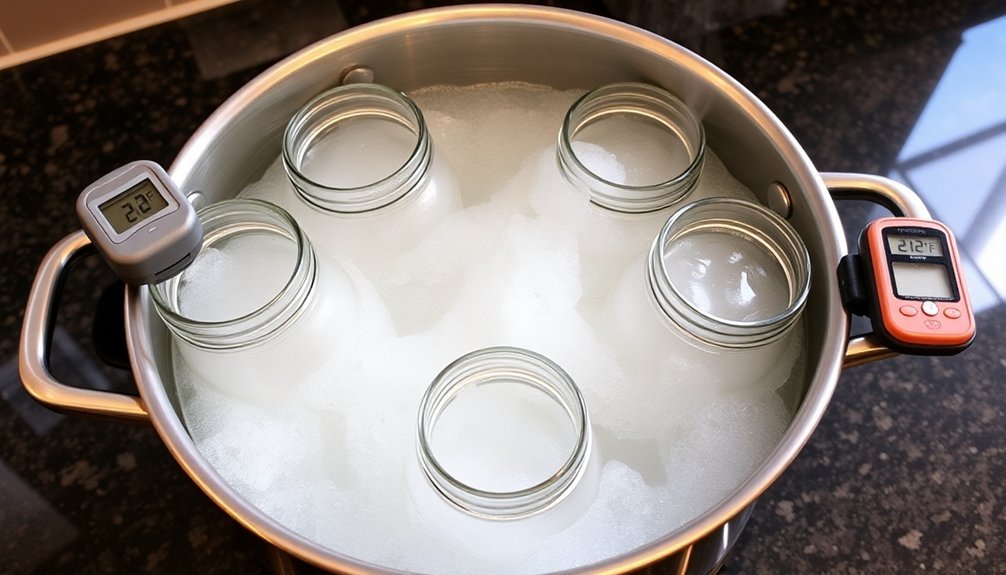
Next, bring the water to a rolling boil over high heat. You'll need to maintain this boil for at least 10 minutes if you're below 1,000 feet elevation, adding an extra minute for each additional 1,000 feet.
Always use jar lifters or tongs to handle the hot jars safely.
If you're not ready to can immediately, let the jars sit in the hot water for up to an hour.
When removing them, drain well and place on a clean surface. You'll want to begin canning right away to maintain sterility.
Oven Method Guidelines
When you're using the oven method for jar sterilization, you'll need to maintain a precise temperature between 250°F and 275°F (121-135°C) for exactly 10 minutes.
You must place your wet, clean jars on a baking sheet to guarantee even heating throughout the sterilization process.
To prevent accidents and guarantee safety, you'll want to handle the hot jars with protective equipment and keep them warm until you're ready to fill them with your preserves.
Temperature and Timing Control
Before beginning the oven sterilization process, you'll need to maintain precise temperature control between 225-275°F (107-135°C). For best results, set your oven to 250°F (121°C) to prevent thermal shock and jar breakage. If you're using 275°F (135°C), you'll achieve faster sterilization, while lower temperatures around 225°F (107°C) require extended processing times.
Your sterilization timing must be precise, with a minimum of 10 minutes at the selected temperature. When canning at higher altitudes, you'll need to adjust accordingly:
- Add 5-10 minutes to sterilization time if you're above 1,000 feet
- Space jars evenly on the middle rack for consistent heat distribution
- Place wet jars upside down to guarantee proper air circulation
- Monitor temperature constantly to maintain steady heat levels
- Keep jars warm until you're ready to fill them
Remember to handle timing and temperature as critical factors in successful sterilization.
While the complete process takes about 30 minutes, don't rush it. You'll want to preheat your oven fully before inserting the jars, and maintain the selected temperature throughout the entire sterilization period.
Safety Precautions While Heating
Remember to position your jars upside down on the tray to guarantee even heating and prevent water spots.
If you're using lower-quality glass jars, be especially cautious as they're more susceptible to damage from dry heat.
Dishwasher Sterilization Technique
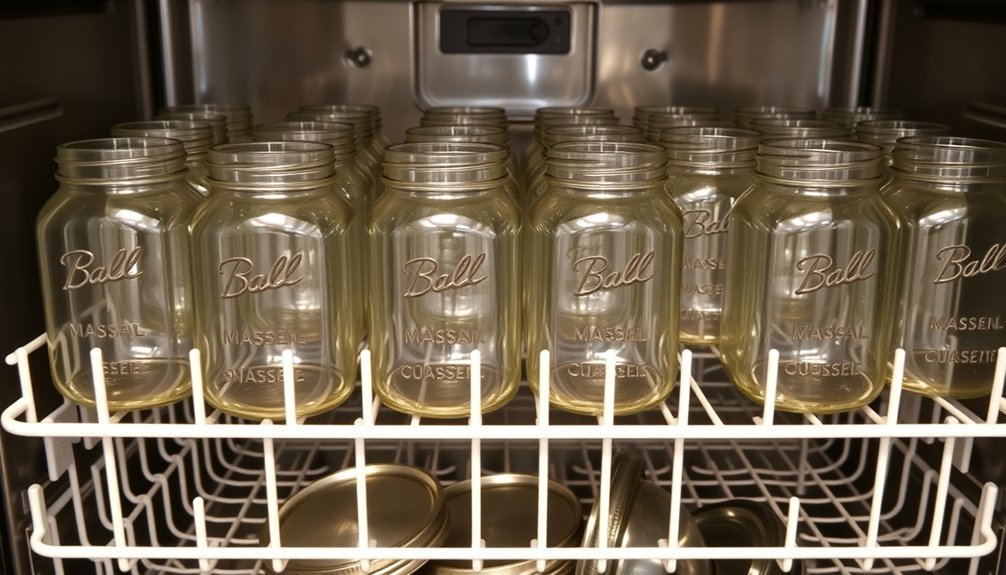
Modern dishwashers equipped with a sanitize cycle offer a convenient and reliable method for sterilizing your canning jars. To use this method effectively, you'll need a dishwasher that can maintain temperatures of at least 160°F (71°C) and includes a sanitize setting. Before starting, wash your jars, rings, and lids in hot soapy water.
Key steps for successful dishwasher sterilization:
- Load jars, rings, and lids on the top rack only
- Remove all other items from the dishwasher to prevent contamination
- Select the hottest cycle with steam dry option
- Time the cycle to finish just before you'll fill the jars
- Keep the dishwasher door closed until you're ready to use the jars
The process typically takes about two hours to complete.
Once the cycle ends, you'll need to work quickly while the jars are still hot. Don't dry the sterilized jars; instead, fill them while they're hot to prevent thermal shock. Remember to use new lids each time for proper sealing.
If you can't use the jars immediately after sterilization, you'll need to run another sanitize cycle before using them.
Preparing Equipment and Workspace
Before you start canning, thoroughly clean and sanitize your working surfaces, removing any food debris or dust that could contaminate your preserves.
Set out all your essential tools including jars, lids, rings, jar lifter, funnel, and headspace measuring tool in a clean, designated area.
Don't forget your safety equipment like heat-resistant gloves and an apron to protect yourself during the hot water processing.
Clean Working Surfaces First
Starting your canning project with clean working surfaces is essential for safe food preservation. You'll need to remove all clutter and thoroughly sanitize every surface that will come in contact with your canning equipment and food. Use a mild detergent or sanitizing solution to wipe down countertops, tables, and cutting boards, ensuring you've eliminated any potential sources of contamination.
Before you begin the actual canning process, create an organized workspace that allows for efficient movement and easy access to all your supplies. Keep your sanitized equipment within reach and establish a designated cooling area for your processed jars.
Here are the key steps to prepare your workspace:
- Clear away all debris and remove items that could introduce contaminants
- Wipe down all surfaces with sanitizing solution, including your canning pot
- Clean and sanitize all tools, including jar lifters, tongs, and bubble removers
- Set up a specific area for cooling jars on clean kitchen towels or wire racks
- Keep the workspace well-ventilated and free from pets and children
Remember to maintain clean, dry hands throughout the process, and don't towel dry your sterilized jars – fill them immediately after sterilization to prevent contamination.
Essential Tools Checklist
Having a clean workspace sets the stage for successful canning, but you'll need the right tools to complete your project safely and effectively. Start with a boiling water canner or large stainless steel pot that's at least two inches taller than your jars. You'll need a rack at the bottom to prevent jar breakage and a lid to maintain proper temperature.
For handling hot jars safely, gather your jar lifter, lid wand, and wide-mouth funnel. Don't forget long-handled spoons for filling jars without making a mess. Keep dish detergent, sponges, and clean dishcloths ready for washing jars and equipment throughout the process.
Your essential equipment list should include glass Mason jars with two-piece lids, ensuring they're free from chips or cracks. You'll also need a colander for draining, potholders for handling hot items, and clean towels for drying and workspace maintenance.
For precise results, include measuring cups and a kitchen scale to follow recipes accurately. Remember to have a timer handy – proper processing times are vital for safe food preservation. Keep all these tools within easy reach before you begin the sterilization process.
Safety Equipment Ready
Safety demands careful preparation of your canning equipment and workspace. Before you begin, set up a dedicated area in your kitchen where you'll have enough room to work efficiently.
You'll need a boiling-water canner or large pot equipped with a jar rack or folded towel at the bottom to prevent breakage. Keep your sterilized jars hot and ready by maintaining water at least one inch above their tops.
Essential safety equipment you'll need at your workspace:
- Jar lifter or sturdy tongs to safely handle hot jars
- Clean, soapy water and dish rag for immediate spill cleanup
- Extra counter space or portable tables for organizing supplies
- Comfortable, non-slip standing mat
- First aid kit nearby for any minor burns or cuts
Remember to adjust your sterilization time based on your altitude – start with 10 minutes at sea level and add an extra minute for each 1,000 feet elevation.
Don't take shortcuts with sterilization; follow the National Center for Home Food Preservation guidelines strictly. When washing jars, inspect each one carefully for damage, and avoid drying them with towels to prevent contamination.
Once sterilized, fill your jars immediately to maintain their sterility.
Common Sterilization Mistakes
Successful canning depends heavily on proper sterilization, yet many home canners make critical mistakes during this essential step. You'll want to avoid common errors that can compromise your food's safety and shelf life.
Don't rely on unproven sterilization methods like using your oven or microwave, as these aren't FDA-approved. Instead, guarantee you're fully submerging your jars in boiling water for 10-15 minutes, using a rack to prevent breakage.
When it comes to lids, never boil them – this can damage the sealing compound. You should only simmer them gently to soften the seal.
Even new jars require proper preparation. You'll need to wash them with hot, soapy water and inspect for any defects before sterilizing. Don't make the mistake of using commercial product jars, as they're not designed for home canning.
Remember to adjust your sterilization times based on your altitude, and always maintain proper headspace in your jars.
Watch out for handling errors too. Keep your hands clean when touching sterilized lids, and make sure your jars are completely dry after washing to prevent water spots or residue that could affect the seal.
Safety Tips and Precautions
Your safety while canning depends on three essential elements: using protective gear like oven mitts and jar lifters to prevent burns, checking your equipment for damage before each use, and maintaining proper temperature control throughout the process.
You'll need to keep hot foods hot and cold foods cold to avoid thermal shock that can lead to jar breakage and potential injuries. When moving between temperature zones, always use proper tools and heat-resistant surfaces to protect both yourself and your canning materials.
Burn Prevention Basics
Burn prevention forms the cornerstone of safe home canning practices. When handling hot jars and equipment, you'll need specialized tools to protect yourself from steam and scalding temperatures.
Always use jar lifters to remove containers from boiling water, and keep your face and body away from steam vents and pressure release valves.
Your workspace setup plays an essential role in preventing burns. Place hot jars on a heat-resistant surface with a towel or cooling rack underneath. Don't forget to maintain proper ventilation and keep the area clear of clutter, children, and pets.
Important burn prevention measures include:
- Using jar lifters or tongs to handle hot containers
- Opening canner lids away from your face and body
- Wearing protective gloves when managing hot equipment
- Placing jars on stable, heat-resistant surfaces
- Maintaining adequate distance from steam vents
If you don't have proper canning tools, use oven mitts or clean, dry towels as alternatives. Remember to store cooling jars in a safe location where they won't be disturbed, and always keep flammable materials away from your canning station.
Good lighting in your work area will help you spot potential hazards before they cause accidents.
Equipment Safety Protocols
Before starting any canning project, proper equipment safety protocols form the foundation of a safe canning operation. You'll need to thoroughly inspect each jar for cracks, chips, or damage, discarding any compromised vessels. Remove all labels and adhesive residue using warm, soapy water and verify jars are completely clean before sterilization.
When using an autoclave, don't overload it, as steam needs to circulate freely. Add a small amount of distilled water to bottles for dry sterilization. If you're using an oven method, preheat to 275 degrees and place jars on a baking tray for 10 minutes. For boiling water sterilization, place a rack in the pot's bottom and confirm jars are covered by 1-2 inches of water.
Always use proper tools when handling hot equipment. A jar lifter is your safest option, though tongs can work as an alternative. Don't use oven mitts, which can become waterlogged and cause burns.
Keep your face and body away from steam when opening the autoclave, and let materials cool to room temperature before moving them. If you're using a dishwasher, select the sanitize setting and skip additional rinse aids to prevent residue buildup.
Temperature Control Guidelines
Following proper equipment protocols leads naturally to mastering temperature control – the cornerstone of safe canning practices.
You'll need to carefully monitor temperatures whether you're using the oven or boiling water method. For oven sterilization, preheat to 225°F (107°C), placing jars on the middle rack for even heat distribution.
When using the boiling water method, make certain the water maintains a rolling boil and completely covers your jars by at least one inch.
Remember to adjust sterilization times based on your altitude. If you're above 1,000 feet, add 5-10 minutes; above 2,000 feet, increase by 10-15 minutes to make sure proper sterilization.
Key temperature control tips to remember:
- Keep oven temperature between 225-250°F (107-121°C) for best sterilization
- Maintain water at a rolling boil for at least 10 minutes when using the water bath method
- Simmer lids separately for 5-10 minutes to properly soften the sealing compound
- Use a canning rack to make sure proper heat circulation around jars
- Let jars cool naturally to prevent cracking, especially when filling with hot contents
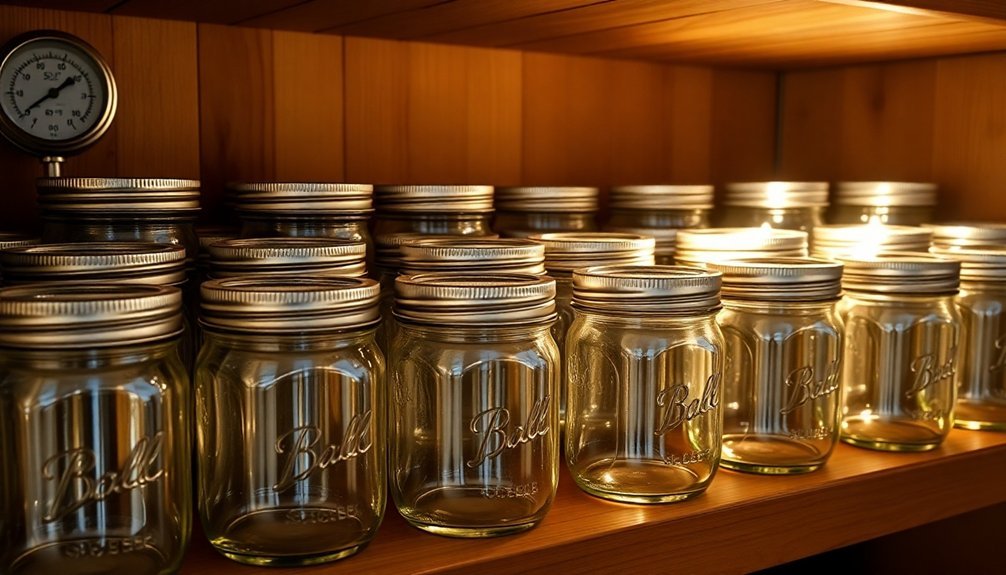
Proper Jar Storage
Proper jar storage begins with complete dryness inside and out. Before storing your jars, verify they're thoroughly dried on a clean towel or cooling rack.
Don't place hot jars directly on cold surfaces, as they might crack or shatter. Allow them to air dry in an upright position to prevent moisture buildup.
Store your sanitized jars in an inverted position on an absorbent towel or rack to protect them from dust and contaminants. You'll want to cover them to maintain sterility for up to 24 hours, though properly sterilized jars can remain safe for several months if stored correctly.
Keep your storage area clean, dry, and free from humidity. Organize your jars so they don't touch each other, and store lids and rings separately in a sterile environment.
It's helpful to label and date your stored jars for easy identification. You'll need to check them regularly for signs of contamination, such as cloudy contents or unusual smells.
If you've stored them properly, your jars should remain visibly clean and free of debris. Maintain easy access to your jars by keeping them in a convenient, clean location that allows quick visibility when needed.
Testing Jar Seal Success
After your jars have been stored, verifying successful seals becomes your next priority.
You'll need to wait 12-24 hours for the jars to cool completely before testing, and don't tighten the screw bands during this time.
Once cooled, remove the bands and try these reliable testing methods to confirm your seals.
The press method involves pushing down on the center of the lid – if it doesn't spring back, you've got a good seal.
For the spoon tap test, use a metal spoon to tap the lid; a high-pitched ring indicates success, while a dull thud suggests a failed seal.
You can also visually check for a slight downward curve in the center of the lid, which verifies a proper seal.
- Test seals only after jars have completely cooled (12-24 hours minimum)
- Remove screw bands before testing to guarantee accurate results
- Press the lid's center – no spring-back means it's sealed
- Listen for a high-pitched ring when tapping with a metal spoon
- Look for a concave lid shape as visual confirmation
If you discover any failed seals, you'll need to either reprocess those jars or refrigerate the contents immediately.
Frequently Asked Questions
Can I Reuse Jar Lids From Previous Canning Sessions?
You shouldn't reuse canning lids as they're designed for single use only. The sealing compound can become compromised after the first use, increasing your risk of food spoilage and potential health hazards.
How Long Do Properly Sterilized and Sealed Jars Last on the Shelf?
Your properly sealed home-canned foods will stay safe indefinitely, but you'll get the best quality within the first year. After that, they're still safe to eat but may lose some flavor and texture.
What Happens if Water Gets Inside the Jars During Sterilization?
Don't worry if water gets inside your jars during sterilization – it won't affect the process. You'll just need to empty and dry them before filling. The sterilization still works perfectly with water present.
Can I Sterilize Different-Sized Jars Together in the Same Batch?
Yes, you can sterilize different-sized jars together. Just make sure they're all completely submerged in water, standing upright, and not touching each other. Arrange taller jars in the center for better stability.
Should I Sterilize More Jars Than Needed for My Recipe?
Yes, you'll want to sterilize a few extra jars. It saves time if you need more and prevents delays when your recipe yields more than expected. Plus, you'll have backups if any jars break.
In Summary
You'll find that proper jar sterilization isn't just a suggestion – it's essential for safe food preservation. By following these methods and avoiding common mistakes, you're protecting your family from harmful bacteria while ensuring your preserves last longer. Remember to test your seals and store your sterilized jars correctly. When you take the time to sterilize properly, you're setting yourself up for successful canning every time.


Leave a Reply