To set up your stainless drying rack, start by inspecting all package contents for damage and completeness. Set up the base structure on a flat surface, guaranteeing proper alignment with your sink. Connect the support brackets, making sure they're level and securely fastened in position. Install the upper drying platform following the manual's specifications, then attach all drainage components to guarantee proper water flow. Mount storage accessories like utensil holders and cup racks in their designated spots. Finally, test the rack's stability by gently loading it with dishes. Following these key steps will help you access your rack's full organizational potential.
Inspect Your Package Contents

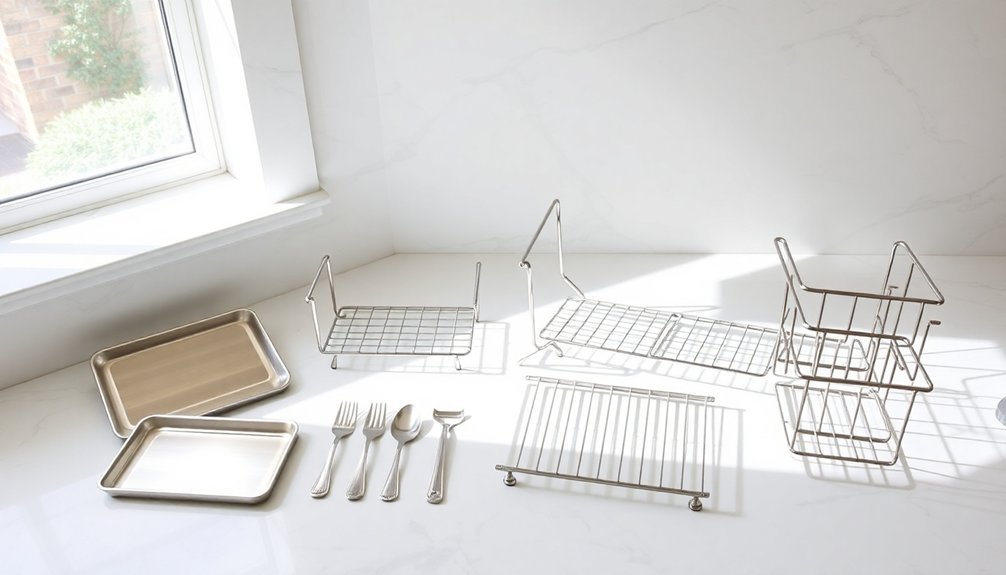
A thorough inspection of your package contents is the first essential step in setting up your stainless drying rack. Start by identifying the main components: the dish rack frame, accessory kit, instruction manual, utensil holder, and cup holder with its removable drip tray.
Next, you'll need to verify the presence of additional components such as the utensil caddy, knife/tool holder, cutting board holder, dish soap basket, and organizational hooks. The rack's stainless steel construction ensures durability and resistance to rust over time. If any items are missing, contact the manufacturer immediately before proceeding with assembly.
Carefully examine all parts for damage. Check the stainless steel components for scratches or dents, and ascertain all plastic parts, including the drainboard, are free from cracks or defects. Confirm that you've received all necessary hardware and screws for assembly.
Finally, verify the package dimensions and weight match the product specifications. Your drying rack should measure approximately 12.5"D x 22.5"W x 9.7"H and weigh around 4 lb (1.8 kg).
Remove all packaging materials and set them aside for recycling. Once you've confirmed everything is present and in good condition, you're ready to move forward with the setup process.
Set Up The Base Structure
Setting up your rack's base structure requires careful attention to guarantee stability and proper functionality.
Begin by placing the bottom rack on a completely flat surface, making sure you've got enough space to work comfortably. You'll need to precisely align the bottom rack with the base structure, following the manufacturer's instructions for your specific model. The rack comes in a padded box for protection during shipping.
As you assemble the upper section, you'll attach it to the base rack's brackets using the designated hooks. Make sure you're applying gentle pressure when securing the upper rack – it should click into place smoothly.
Check that it's perfectly level and adjust if needed.
Next, you'll install the drainboard by flipping it over and attaching the rod. Slide this assembly into the designated slot on your base rack, positioning it for ideal drainage. The drainboard's angle should allow water to flow efficiently.
Finally, locate the spots where your utensil holder, cup holder, and cutting board rack will attach. These components should fit snugly into their designated areas.
Once everything's in place, give each part a final check to confirm it's properly secured and won't shift during use.
Connect Support Brackets

You'll need to carefully align both folding brackets on a flat surface, ensuring the black tabs are properly oriented in opposite directions.
Make sure the brackets are level and parallel to each other before proceeding with the rod connections. No tools are needed for this simple assembly process.
Double-check that both brackets are securely locked in their extended positions, as this will provide the stable foundation needed for the rest of the assembly process.
Align Brackets Securely First
Proper bracket alignment forms the foundation for a stable drying rack installation.
You'll need to measure the width of both your sink and drying rack carefully, marking precise positions where you'll attach the brackets. Use a level to confirm your marks are perfectly straight and verify they're compatible with your specific sink type.
Before attaching anything, you'll want to prepare the mounting surface thoroughly. Clean the area where you're placing the brackets, removing all debris, grease, and moisture. Make sure it's completely dry and apply any recommended adhesive or silicone coating to enhance stability.
Next, you'll secure the brackets at your marked positions. If you're installing a dish drainer plate rack, you may need to drill holes first. Use the provided screws or clips to mount the brackets firmly, but don't overtighten them. Check if they need additional support for stability.
Finally, place your drying rack onto the brackets, confirming it's centered and balanced. Secure it using the included fastening mechanisms, then test its stability by applying moderate weight. Make any necessary adjustments to prevent wobbling or tilting during use.
Check Bracket Level Position
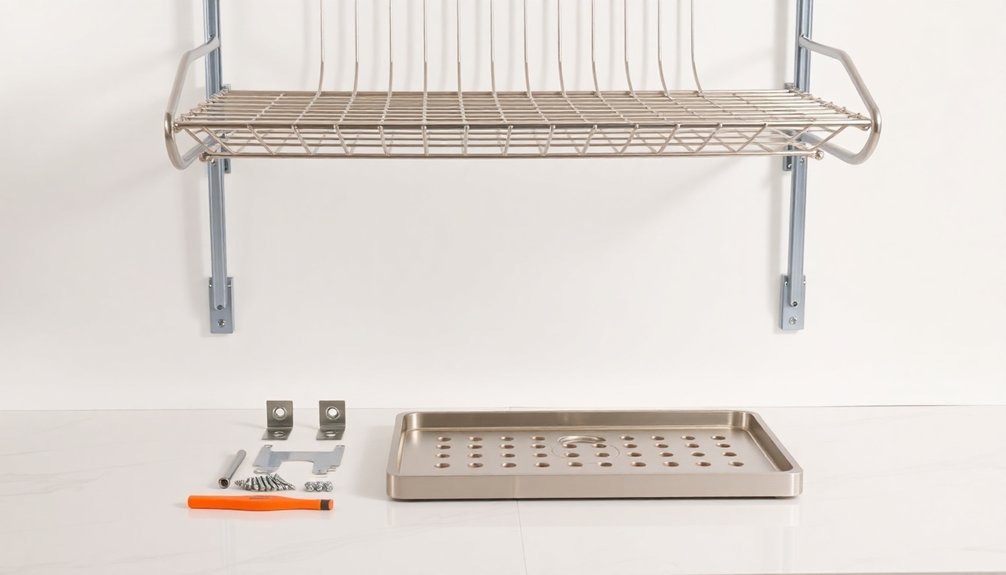
Before proceeding with wall mounting, you'll want to mark and drill the holes for your mounting hardware at your chosen location.
Once you've drilled the holes, mount the support brackets to the wall, then position your rack shelf onto them by aligning the studs. Secure everything using the provided acorn nuts.
You'll need to tighten all bolts firmly once the shelf is positioned correctly.
Apply NSF-approved silicone sealant to the button head bolts, guaranteeing they're completely sealed. Test the shelf's stability and verify it's perfectly level.
Don't forget to check that your shelf can support its intended load without any bending.
Make any necessary adjustments to guarantee proper drainage and accessibility.
Double-check all components are tightly secured and there aren't any gaps or misalignments that could compromise safety.
Install Upper Drying Platform
Successfully installing the upper drying platform begins with identifying the perfect mounting location in your kitchen.
You'll need to verify you've chosen a flat, stable surface that's free from any obstacles and perfectly matches the rack's dimensions. Before proceeding, gather all the necessary tools and hardware that came with your drying rack, and carefully review the installation manual for specific guidance.
- Mark your installation points precisely according to the manual's specifications, double-checking measurements to verify proper alignment with studs or secure mounting points.
- Drill mounting holes using the correct bit size, and insert plastic anchors if you're not mounting directly into studs.
- Position the upper platform carefully, aligning it with your pre-drilled holes, and secure it firmly using the provided screws.
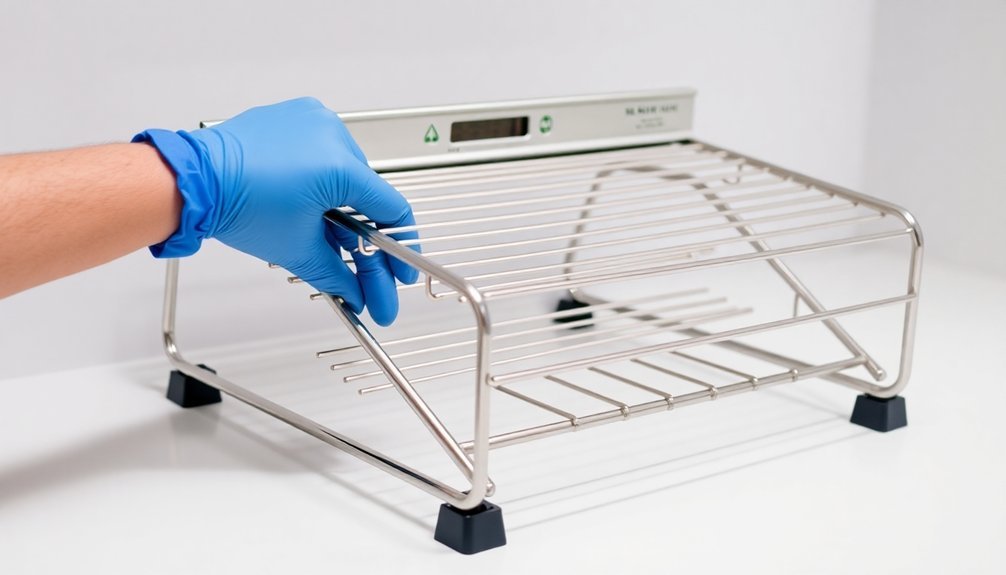
- Test the platform's stability by gently applying pressure, and make any necessary adjustments to the tensioners or support brackets.
Once you've secured the platform, verify that it's level and stable.
Check that all components, including utensil holders and side hooks, are properly attached. Verify the platform doesn't interfere with your kitchen workflow and that water will drain properly into the sink.
Attach Drainage Components
With your upper drying platform securely in place, attaching the drainage components requires careful attention to alignment and stability.
You'll need to position the drainage component so it aligns perfectly with your sink's edge, guaranteeing the long edge of the drain board extends over the sink for proper water flow.
Start by flattening the drainage channel and connecting it firmly to the water tray.
You'll want to verify it's free from any blockages and test the water flow to confirm it drains directly into the sink without pooling.
Don't forget to secure the channel to prevent any potential leaks.
Next, you'll need to apply non-slip silicone bumpers to the base of your drainage component.
These protect your sink and countertop while providing stability.
Make sure they're positioned correctly without blocking the drainage pathway.
Finally, integrate the component with your existing sink setup.
Check that it's compatible with your sink material and design features, such as workstation ledges or raised lips.
Ascertain the drainage component doesn't interfere with your faucet's operation and fits seamlessly into your overall sink layout.
Mount Storage Accessories
Mounting storage accessories requires a systematic approach to maximize your drying rack's functionality. You'll need to carefully consider the placement of hooks, utensil holders, and other components to guarantee efficient use of space while maintaining easy access to all items.
- Start by installing the side hooks for your stemware and kitchen towels. Make sure they're firmly attached to support the weight of wet glassware and heavy dish rags. You can drill holes in utensil handles if you'd like to hang them from the hooks.
- Attach the removable utensil holder in a position that's convenient for accessing your cooking tools. This versatile component can serve as both a kitchen caddy and silverware organizer.
- If you're working with a customizable rack, adjust the shelf positions using the available holes (typically 20 per vertical tube) to accommodate items of different heights.
- For PVC pipe racks, use transparent cement for assembly and bend pipes to create custom hooks as needed. Remember to let bent hooks cool completely before trimming their ends to guarantee even lengths and proper support for your items.
Test Overall Stability
Testing your drying rack's stability is an essential final step before regular use. Load your rack with various items to verify it can handle the intended weight capacity and maintain balance. Check that the non-slip features effectively grip the surface and prevent unwanted movement. If you've got an over-the-sink model, make sure it fits securely without wobbling.
Test your rack's structural integrity by gently bumping it while loaded to confirm it remains stable. Pay attention to how the drainage system works when dishes are in place, and verify that water flows properly without pooling.
| Test Area | What to Check |
|---|---|
| Weight Distribution | Even spread of items, no tipping |
| Surface Grip | Non-slip feet effectiveness |
| Frame Stability | No wobbling when loaded |
| Drainage Flow | Water runs off properly |
| Utensil Storage | Holder doesn't affect balance |
Don't forget to verify that large cookware items sit securely without compromising the rack's stability. Square bars typically provide better support than round ones, so make sure your dishes rest flat on the surface. Regular cleaning will help maintain the rack's stability over time by preventing corrosion and buildup.
Frequently Asked Questions
How Much Weight Can the Drying Rack Safely Hold?
You'll find most standard drying racks can hold between 40-75 pounds safely, but heavy-duty models support up to 100 pounds. It's essential you check your specific model's weight limit to prevent damage.
Can I Use Bleach-Based Cleaners to Sanitize the Stainless Rack?
Don't use bleach on your stainless steel rack as it'll damage the protective chromium oxide layer and cause corrosion. Instead, use 70% isopropyl alcohol or mild detergent for safe, effective sanitization.
Will the Rack Rust if Left Outdoors on a Covered Patio?
While your stainless steel rack is rust-resistant, it can still corrode if left outdoors constantly. You'll minimize rust risk by keeping it under cover, drying it thoroughly after use, and performing regular maintenance.
How Often Should I Tighten the Brackets for Optimal Performance?
You don't need to regularly tighten brackets on stainless steel drying racks as they're typically bracket-free. Just check the rack's stability after cleaning and make adjustments if you notice any movement.
Can I Customize the Height if My Cabinets Are Lower?
You'll find most dish racks aren't height-adjustable, but you can try DIY cabinet modifications or custom steel pull-out drawers. Consider installing a mesh-door cabinet drainer that fits your specific lower cabinet dimensions.
In Summary
You've now successfully assembled your stainless drying rack by following these seven essential steps. Don't forget to periodically check all connections and tighten any loose parts to maintain stability. Your new rack will save valuable counter space while providing efficient drying and storage solutions. Make the most of your rack by organizing items strategically and keeping the drainage area clear.
Leave a Reply