Building your own spring house starts with selecting the perfect location near a natural spring with good drainage and accessibility. You'll need to design a rectangular layout that incorporates proper water circulation and multi-tiered storage systems. Next, pour a solid concrete foundation with reinforced walls, ensuring proper structural integrity and stability. The roof construction requires careful attention to waterproofing and ventilation details. Finally, set up the interior with effective drainage systems and organized storage spaces. Follow these essential steps, and you'll create a functional spring house that keeps your perishables naturally cool year-round. Let's explore each step in detail.
Find Your Perfect Location

Every successful spring house project begins with selecting the perfect location, as this decision impacts both your daily life and long-term investment. Start by evaluating neighborhood characteristics, focusing on areas with well-maintained homes, quality landscaping, and active community engagement. Low crime rates create safer, more vibrant neighborhoods where families can thrive.
You'll want to guarantee easy access to major transit routes and essential amenities like grocery stores, schools, and healthcare facilities.
When examining specific lots, consider both desirable and undesirable features. Avoid properties near busy roadways, commercial areas, or industrial zones that could create noise pollution.
Instead, look for lots with natural features, good sun orientation, and adequate drainage. Corner lots or properties in cul-de-sacs often offer better privacy and reduced traffic.
Don't forget to factor in your lifestyle needs. Calculate your daily commute time, check proximity to schools if you have children, and verify access to activities that matter to you.
Research the area's development plans and zoning regulations to understand future changes that might affect your property's value.
Design Your Layout
Now that you've secured your ideal location, it's time to map out your spring house design with purpose and precision. Your layout needs to prioritize functionality while maximizing the cooling effects of your water source.
Start by sketching a simple rectangular floor plan that's no larger than a small room, ensuring your walls will be 1-2 feet thick for proper insulation. Just like modern energy-efficient designs, this approach helps maintain consistent temperatures.
Plan for a small water channel that'll run along the interior walls, allowing the spring water to circulate effectively. You'll want to position your shelving units and hanging storage spaces strategically above this channel.
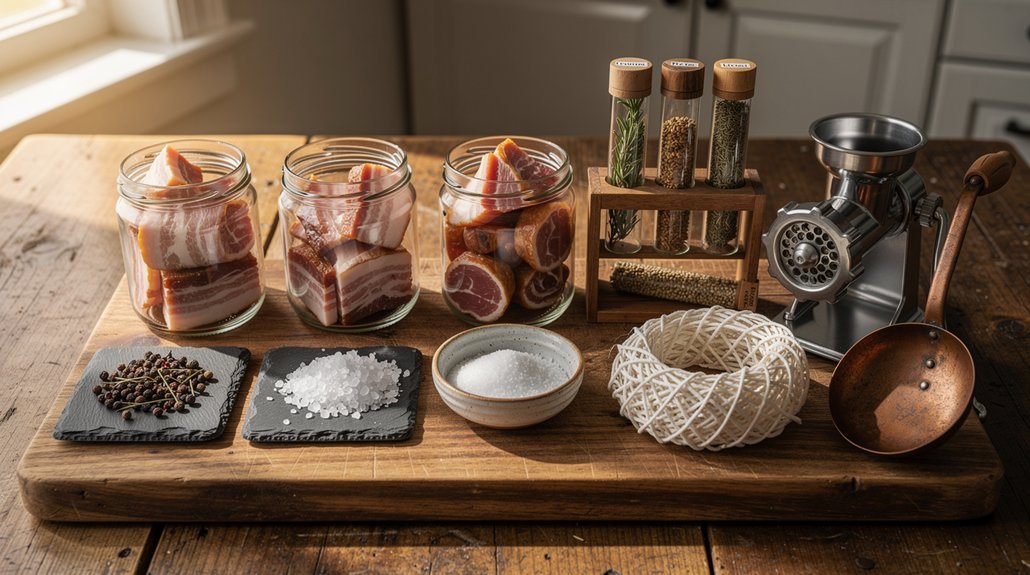
Design your storage system with multiple tiers: lower shelves for crocks and stoneware, middle shelves for daily-access items, and upper rafters for hanging meats and suspended storage.
Include a single, well-sealed door positioned away from direct sunlight, and consider adding small ventilation windows near the roof line.
Your interior layout should maintain clear pathways for easy access to all stored items. Remember to incorporate sufficient workspace for handling dairy products and organizing perishables, keeping everything within arm's reach but safely above the water flow.
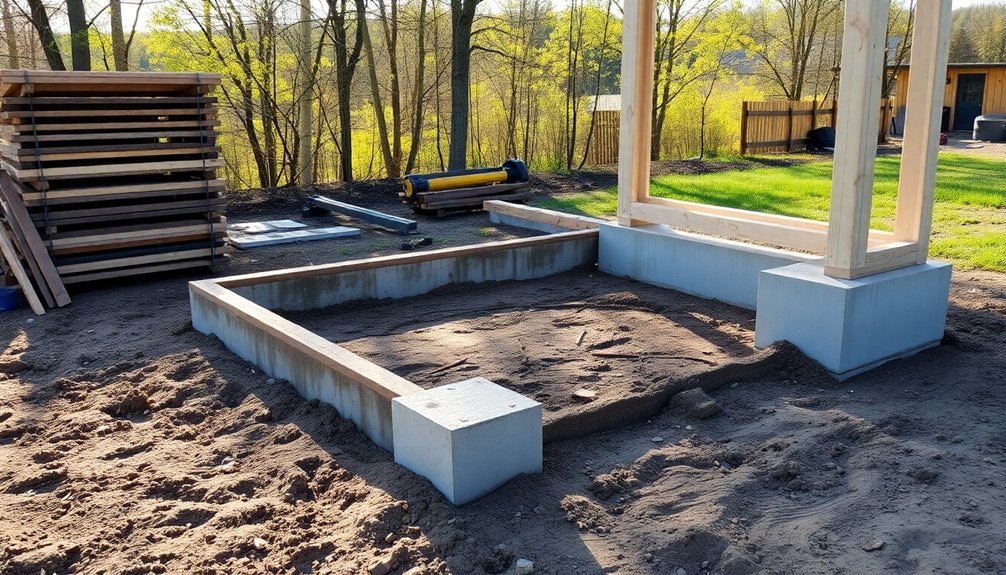
Pour Foundation and Walls

Before pouring the concrete, you'll need to thoroughly prepare your site by clearing vegetation, leveling the ground, and removing any obstacles.
Make sure to conduct any necessary envelope surveys and lot cuts based on your specific terrain requirements. Soil testing should be performed to verify the ground can properly support your foundation.
Next, dig the foundation according to your local building codes, ensuring proper depth and dimensions.
Install the footings first, making them wider than your foundation walls for maximum stability. You'll need to insert steel rebar into the footings before pouring the concrete and leveling it carefully.
Set up your formwork using plastic, metal, or wood to create the shape of your foundation walls.
Check that all forms are level and properly positioned. Insert steel reinforcement throughout the formwork to enhance structural integrity, and don't forget to install headers for areas like porches.
When you're ready to pour, mix your concrete using the right proportions of cement, sand, aggregate, and water.
Pour in layers to prevent air bubbles from forming. Keep the concrete moist during the curing process and protect it from extreme temperature changes.
Once cured, remove the forms and tighten any post-tension cables if you've included them in your design.
Build Your Roof
Building a solid roof starts with proper preparation of the decking structure. You'll need to inspect the decking for any damage or rot, replacing compromised sections before proceeding.
Install drip edges around the perimeter and apply a protective underlayment that extends past the edges at the eaves.
When installing the underlayment, start by unrolling the self-adhesive ice-and-water barrier. Peel off the top backing first, nail the edge, then remove the bottom backing to secure it firmly to the roof. Remember to overlap sections by 6 inches horizontally and 2 inches vertically for proper coverage.
For the shingles, begin with a starter course using trimmed three-tab shingles along the eave, positioning the self-sealing strip facing up. Work from the midpoint, laying subsequent rows left and right while maintaining proper overlap.
- Watch your footing – one misstep could send you tumbling
- Feel the satisfaction of each perfectly aligned row
- Take pride in creating a shield that'll protect for decades
- Experience the peace of mind knowing you've done it right
Install step flashing around all roof penetrations, securing it to walls and ensuring proper coverage of previous nails.
Interior Setup and Drainage
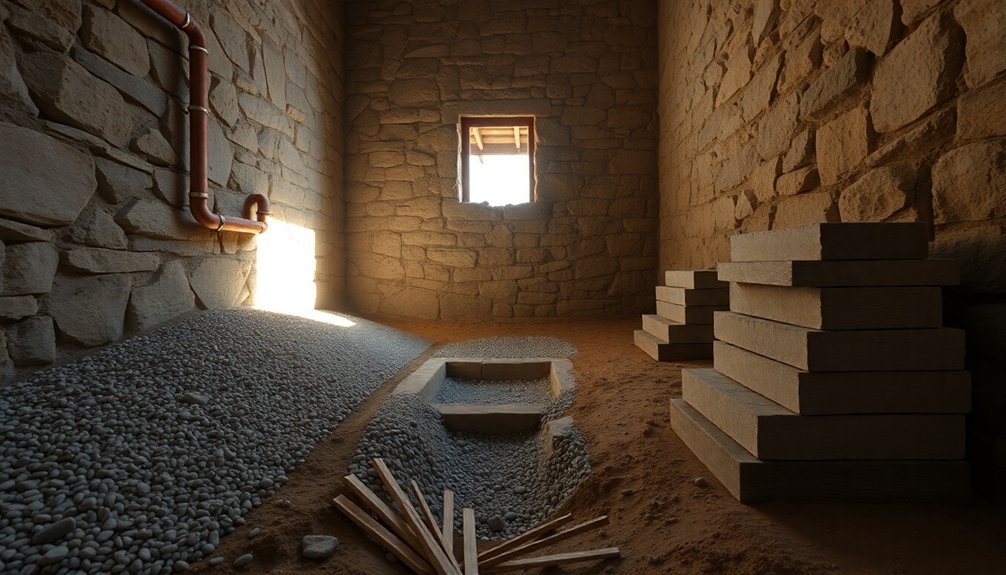
With your roof providing reliable shelter, the interior setup and drainage system will determine your spring house's functionality and charm.
Start by decluttering the space and removing any winter-related items. You'll want to create a fresh canvas before incorporating garden-inspired decor elements like rustic pots, lanterns, and seasonal greenery.
For the drainage system, you'll need to assess and correct the grading first. Check your yard's slope to guarantee water flows away from the structure, not toward it.
Install a drainage field system using schedule 40 PVC pipe, making sure there's proper fall in the excavated trench. Cover it with landscape fabric and stone for support, and connect to existing systems using flexible coupling connectors.
Add functional elements to your interior like a foyer table for seasonal displays and comfortable seating.
Don't forget to maintain your gutters and downspouts regularly, keeping them clear of debris and properly directed away from the foundation.
Once you've installed the drainage system, test it thoroughly to confirm water flows smoothly through the new pipe and stream without pooling or causing erosion.
Frequently Asked Questions
How Long Does It Typically Take to Complete a Spring House Project?
You'll typically need 6-10 months to complete your house project, though timing varies by region and style. Your custom home could take up to 18 months, while production homes finish faster at 6-7 months.
What Permits Are Required Before Starting Spring House Construction?
You'll need a building permit, plumbing permit, and zoning permit before construction. If you're adding electrical systems, get an electrical permit too. Make sure to submit all required documentation and construction drawings.
What Is the Average Cost to Build a Spring House?
You'll typically spend between $15,000 to $40,000 to build a spring house. Your final cost depends on materials chosen, size, location, labor rates, and required permits in your area.
Can Spring Houses Be Used During Winter Months Without Freezing?
Yes, you'll find spring houses work well in winter. They won't freeze because the constant flow of spring water maintains temperatures around 50°F, while the thick stone walls and hillside construction provide natural insulation.
How Often Should Water Quality Testing Be Performed in Spring Houses?
You'll need to test your spring house water at least once a year, twice if it's shallow. Always test after repairs, floods, or nearby land disturbances, and whenever you notice changes in taste or color.
In Summary
Now that you've completed your spring house, you'll enjoy a reliable source of clean, cool water year-round. Regular maintenance will keep your structure functioning properly for decades to come. Remember to check the drainage system monthly, clear any debris around the foundation, and test your water quality seasonally. With proper care, your spring house will serve as both a practical water source and a charming addition to your property.


Leave a Reply