To make authentic Korean kimchi, you'll need 5-6 pounds of Napa cabbage, Korean coarse sea salt, and plenty of water for brining. Start by cutting your cabbage lengthwise and soaking it in a salt brine for about 6 hours, flipping twice. You'll combine this with a spicy seasoning paste made from gochugaru (Korean red pepper flakes), sweet rice porridge, fish sauce, garlic, and ginger, plus vegetables like radish and green onions. Proper fermentation at 60-70°F creates that signature tangy flavor, while the right equipment and temperature control guarantee your kimchi develops its traditional taste and texture. The art of perfecting this ancient dish goes far deeper than these basics.
Essential Kimchi Equipment Needed
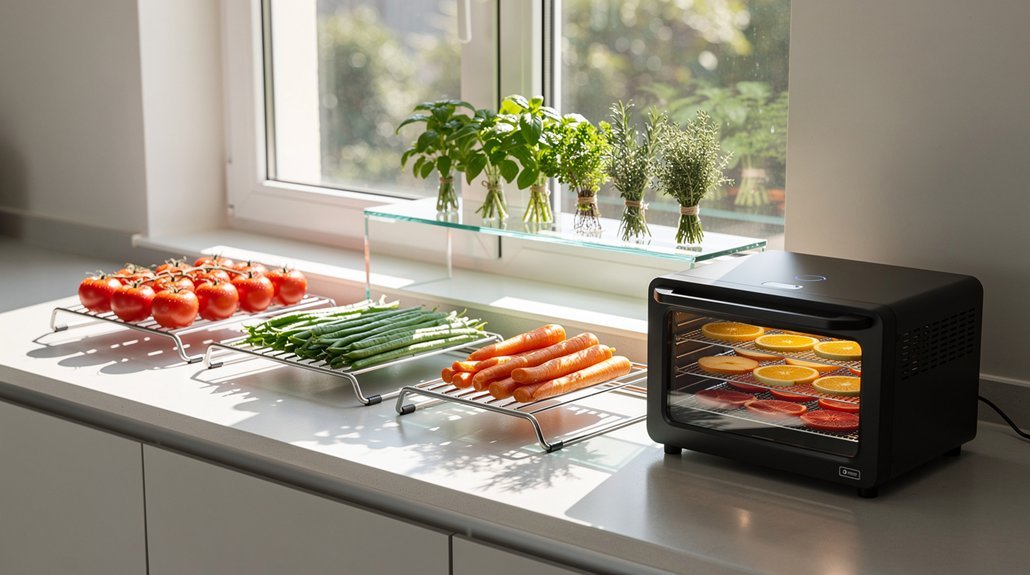
Three main categories of equipment are essential for making authentic kimchi: cutting tools, mixing containers, and fermentation vessels.
For cutting and preparing vegetables, you'll need a large, sharp knife and a sturdy chopping board to guarantee safe, precise cuts. A colander is vital for draining the brined cabbage, while graters and peelers help prepare other vegetables. Traditional Korean cooks often use clay earthenware pots for both mixing and fermentation due to their excellent breathability. You might also want a fermentation tamper to compress the mixture effectively.
Your mixing equipment should include a large bowl for combining ingredients, rubber gloves to protect your hands from the red pepper powder, and precise measuring cups and spoons. Don't forget wooden spoons for thorough mixing and a small paring knife for any additional cutting needs.
For fermentation, you'll need food-safe containers with tight-fitting lids – either glass jars or plastic containers work well. Mason jars or Le Parfait-style vessels are ideal, and you'll want fermentation weights to keep the vegetables submerged. Include funnels for easy transfer and a canning funnel specifically for filling jars.
A 1-quart saucepan is necessary if you're making sweet rice paste, and a food processor can be helpful for grinding spices.
Selecting Your Napa Cabbage
When shopping, look for firm, compact heads of Napa cabbage weighing between 2-3 pounds with crisp, tightly closed leaves. You'll want to avoid any cabbage showing signs of wilting or bruising, as these won't ferment properly.
Napa cabbage is essential for authentic kimchi because of its tender texture, which sets it apart from other varieties. While you can substitute green cabbage or bok choy, understand that it'll change your kimchi's traditional texture and flavor profile. Using Korean brining salt will ensure proper salting during preparation.
If you can't find large heads, medium-sized ones will work fine – just adjust your recipe quantities accordingly.
Once you've selected your cabbage, you'll need to prepare it properly. Start by removing any damaged outer leaves and thoroughly washing the head.
Cut the cabbage lengthwise into halves or quarters, depending on your preference. This preparation makes it easier to salt and fill the cabbage later.
Remember to cut away the core at the base, as it's typically too tough to eat. Your cabbage should now be ready for the brining process.
Salt Brining Process
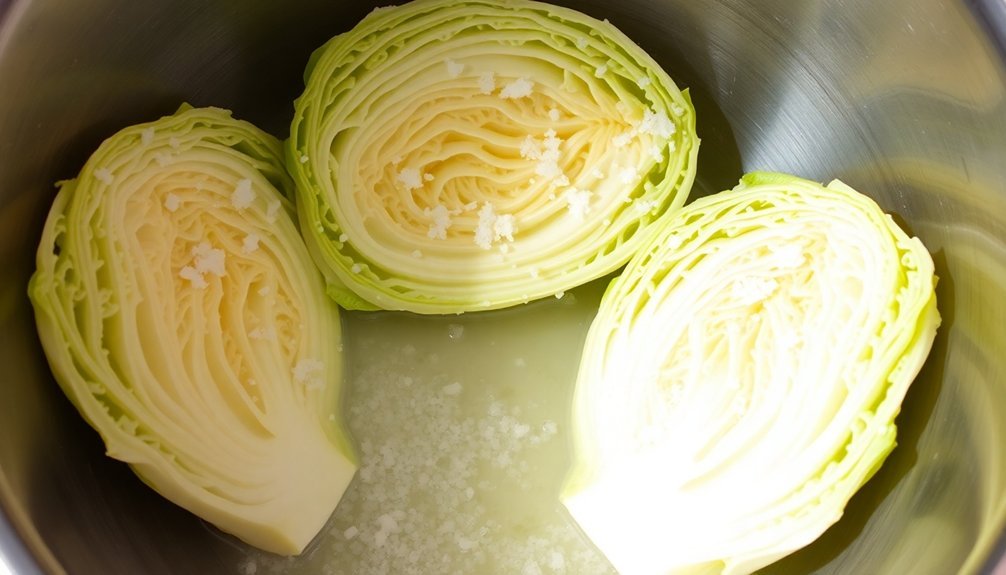
Along with proper cabbage selection, the salt brining process stands as one of the most essential steps in making authentic kimchi. You'll need to create a brine solution using Korean coarse sea salt (cheonilyeom) and water, following a ratio of 2 cups of salt per 2 gallons of water. Traditional Korean napa cabbage remains the most common variety used in kimchi making.
| Step | Duration | Key Action |
|---|---|---|
| Initial Prep | 10 minutes | Quarter cabbage, remove blemished leaves |
| Brining | 6 hours | Submerge in saltwater, flip twice |
| Draining | 1 hour | Rinse thoroughly, drain excess water |
Start by preparing your cabbage quarters, keeping the stems intact to hold the leaves together. Submerge them in your brine solution, making sure to sprinkle additional salt between the leaves, especially on the thick white parts. During the 6-hour brining process, you'll need to flip the cabbage twice to guarantee even salt distribution.
Don't exceed the recommended brining time, as over-salting is irreversible. After brining, rinse your cabbage thoroughly under cold water and let it drain for at least an hour. You can reserve some brine for later use in the seasoning process. Once properly drained, your cabbage is ready for the next step: mixing with kimchi seasonings.
Making Sweet Rice Porridge
Sweet rice porridge serves as a crucial binding agent in traditional kimchi, creating the perfect consistency for the seasoning paste.
To prepare it, you'll need short grain rice and water in a 1:8 ratio, typically starting with 1 cup of rice.
Begin by washing your rice thoroughly and soaking it for 30 minutes. Low in sodium content makes this porridge an ideal base for kimchi seasonings.
After soaking, blend the rice with water until it's broken down into smaller particles.
Transfer this mixture to a pot and bring it to a boil, then reduce the heat and simmer.
You'll need to stir frequently to prevent the rice from sticking to the bottom, cooking for about 5-7 minutes until it reaches your desired consistency.
You can enhance the porridge's flavor by using dashima broth instead of water, though this isn't essential for kimchi-making purposes.
Add a small pinch of salt for seasoning.
Once cooked, let the porridge cool completely before incorporating it into your kimchi paste.
If you're making the porridge ahead of time, you can store it in an airtight container in the refrigerator, though using it fresh will give you the best results.
Preparing Spice Paste
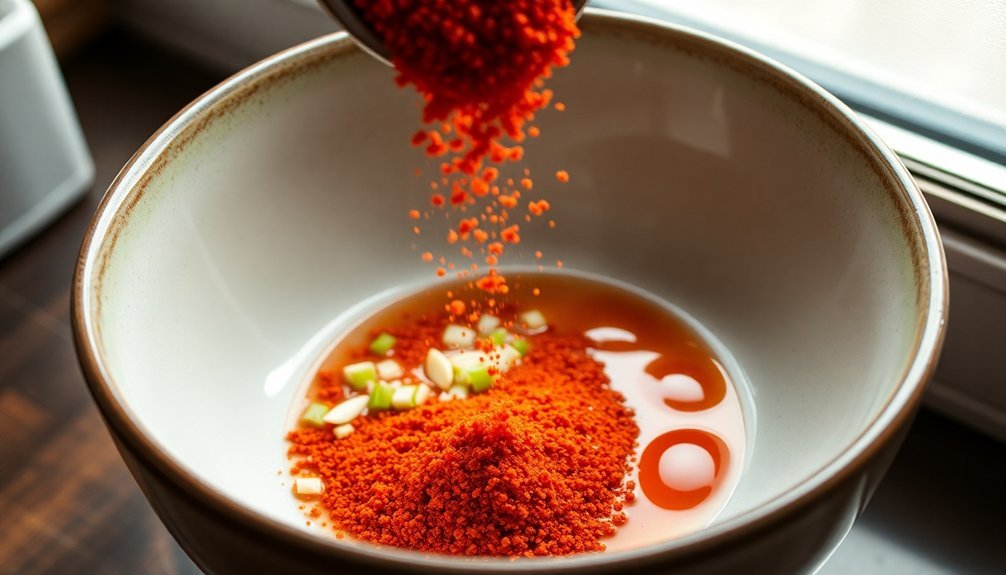
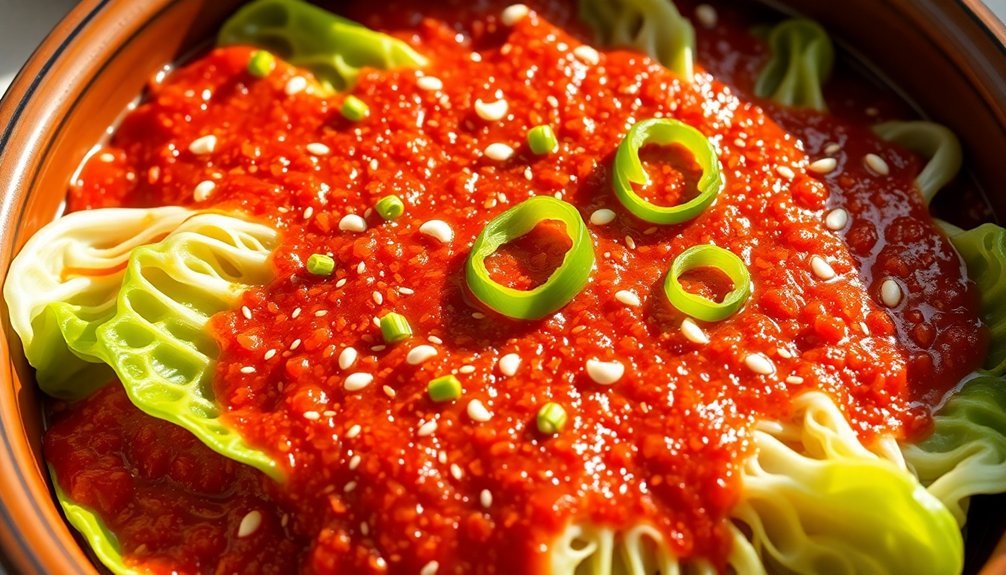
With your sweet rice porridge ready, the next step focuses on creating the vibrant red spice paste that gives kimchi its signature color and heat.
Gochugaru, Korean red pepper flakes made from sun-dried chili peppers, forms the foundation of this essential mixture, delivering a complex blend of smoky, sweet, and earthy flavors with moderate heat. You'll need to combine the gochugaru with glutinous rice paste that has completely cooled.
You'll combine your cooled rice porridge with gochugaru, fish sauce, minced garlic, and grated ginger. For best results, divide your seasonings into portions before mixing to guarantee even distribution throughout your kimchi.
If you're seeking a milder flavor, you can adjust the amount of gochugaru, as its heat levels can range from 1,000 to 8,000 Scoville units.
Consider adding optional ingredients like sesame oil or seeds to enhance the paste's depth. If you're vegetarian, you'll need to substitute the fish sauce – we'll cover alternatives in later steps.
Once mixed, store your paste in an airtight container in a cool, dry place. While dried gochugaru can last up to two years, you'll want to use the mixed paste relatively soon to maintain ideal freshness and flavor in your kimchi.
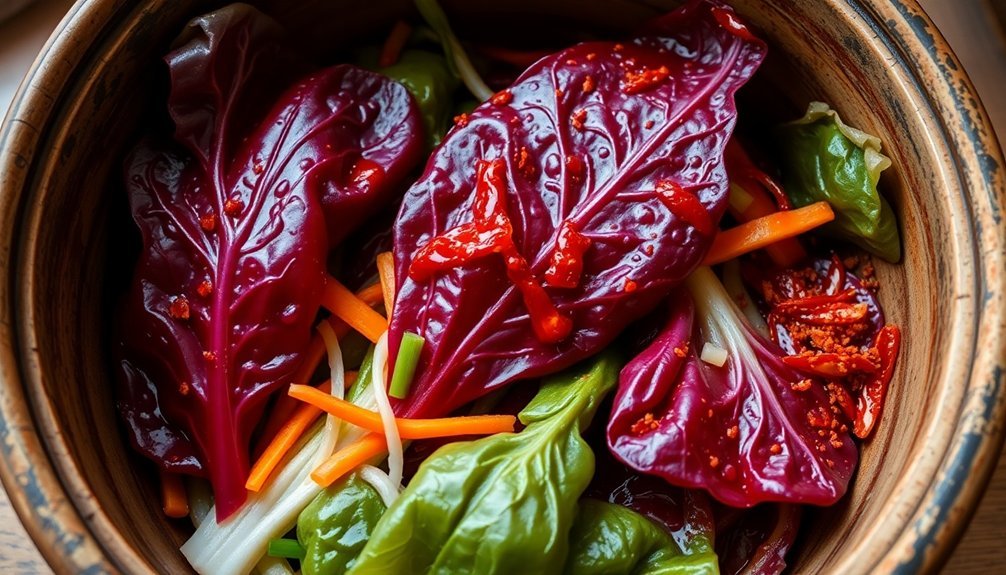
Fresh Vegetable Additions
Add daikon radish and Korean radish for a satisfying crunch that'll complement your kimchi's texture.
You'll want to include freshly chopped green onions and Korean chives, which bring a mild, aromatic quality to the mix.
For the best results, choose vegetables based on the season – use thin-leaved napa cabbage in summer, young radish leaves for yeolmu kimchi, or regular cabbage as a year-round alternative. No fancy stuffing is needed when preparing these fresh vegetable additions, allowing their natural flavors to shine through.
Root Vegetables For Crunch
Fresh root vegetables bring essential crunch and texture to authentic Korean kimchi. You'll need about 3 pounds of mixed root vegetables, including kohlrabi, turnips, radishes, daikon, rutabaga, and parsnip. While you'll need to peel kohlrabi, you can leave the skin on radishes and turnips. Cut all vegetables into uniform ½-inch cubes to guarantee consistent fermentation. The root vegetables should be blended with shiitake mushroom powder for an umami-rich flavor.
| Vegetable | Preparation | Special Notes |
|---|---|---|
| Kohlrabi | Peel & cube | Firm texture holds up well |
| Turnips | Cube only | Adds peppery bite |
| Daikon | Cube only | Traditional Korean choice |
Begin the brining process by tossing your cubed vegetables with 2 tablespoons of coarse sea salt. Let them sit for 30 minutes to an hour, depending on room temperature – warmer conditions require less time. This critical step prepares the vegetables for fermentation and guarantees proper texture development. For additional depth of flavor, consider adding Asian pear and red bell pepper to your mix. These complementary ingredients enhance the final taste while maintaining the signature crunch that makes kimchi so satisfying.
Green Onion and Chives
The subtle bite of green onions and chives plays a crucial role in authentic kimchi. You'll need about 3 pounds of green onions (approximately 60 pieces or 6 bunches) for a traditional batch.
Trim the roots and cut each green onion into 3 to 4 bite-sized pieces, using both the white and green parts for uniform flavor distribution. This creates a spicy and crispy texture that Pa-kimchi is famous for.
Add 1 cup of chopped Korean chives (buchu) to complement the green onions. If you can't find Korean chives, you can substitute with additional green onions without compromising the recipe's authenticity.
When you're mixing the kimchi paste, incorporate these fresh vegetables along with your radish and carrots, ensuring even coating.
Layer your ingredients carefully: place the sauce on the white parts of the scallions first, then add the green portions, mixing gently.
These fresh additions will ferment alongside your cabbage for 1 to 3 days at room temperature, depending on environmental conditions.
You'll know fermentation is progressing when bubbles form beneath the surface and a pleasant sour aroma develops.
Once fermented, store your kimchi in a BPA-free plastic or glass container in the refrigerator.
Seasonal Vegetable Options
Seasonal vegetables bring vibrant variety to traditional kimchi recipes throughout the year. You'll find that while napa cabbage, radish, and cucumbers form the foundation of many traditional recipes, you can adapt your kimchi based on what's fresh and available in each season.
In spring, you can combine napa cabbage with fresh spring greens and daikon radish for a crisp texture. Add carrots for natural sweetness and spring onions for a mild, aromatic flavor.
You'll also discover that wild greens like miner's lettuce and chickweed can create unique spring variations.
Summer offers invigorating options with cucumbers taking center stage in lighter, vegan-friendly versions. You can incorporate pickling cucumbers for extra crunch and baby radishes for a delicate flavor.
Adding Asian pear brings a subtle sweetness to your summer kimchi.
During autumn and winter, you'll want to use heartier vegetables. Korean radish and napa cabbage become the stars of winter kimchi, offering durability and rich flavor.
Consider using chonggak radish for traditional varieties, and don't forget to increase your spices and garlic content for warming winter kimchi that packs more heat.
Seasoning and Sauce Components
Creating authentic kimchi relies heavily on a precise blend of seasonings and sauces that form its signature taste profile.
You'll need to combine Korean chili flakes (gochugaru) with minced garlic and ginger as your base seasonings. Sugar and fine sea salt work together to achieve the perfect balance of sweet and salty notes, while sulfites may be present in some commercial blends to maintain color.
For the sauce components, you'll start by creating a thickening agent using glutinous rice flour boiled with water, which must cool before mixing.
Korean fish sauce and salted fermented shrimp provide the essential umami depth that's characteristic of traditional kimchi. Raw sugar helps counterbalance the spicy and salty elements in your mixture.
You can enhance your seasoning blend further by incorporating miso powder or cabbage extract powder, though these are more commonly found in commercial products. If you're following a traditional recipe, you might consider adding fermented squid for an extra layer of complexity.
Remember to blend your onions finely or grate them before adding to your paste, as this guarantees even distribution of flavor throughout your kimchi.
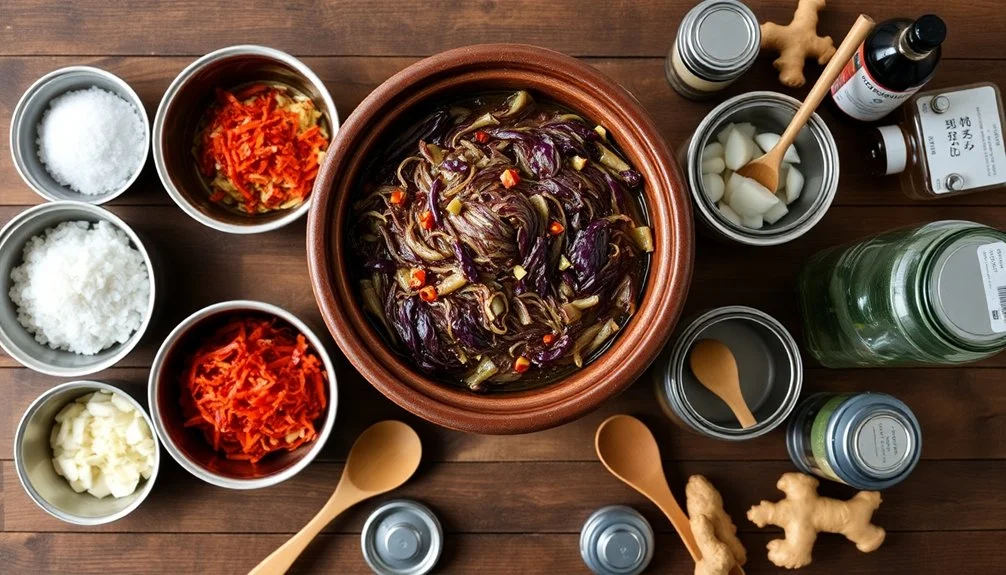
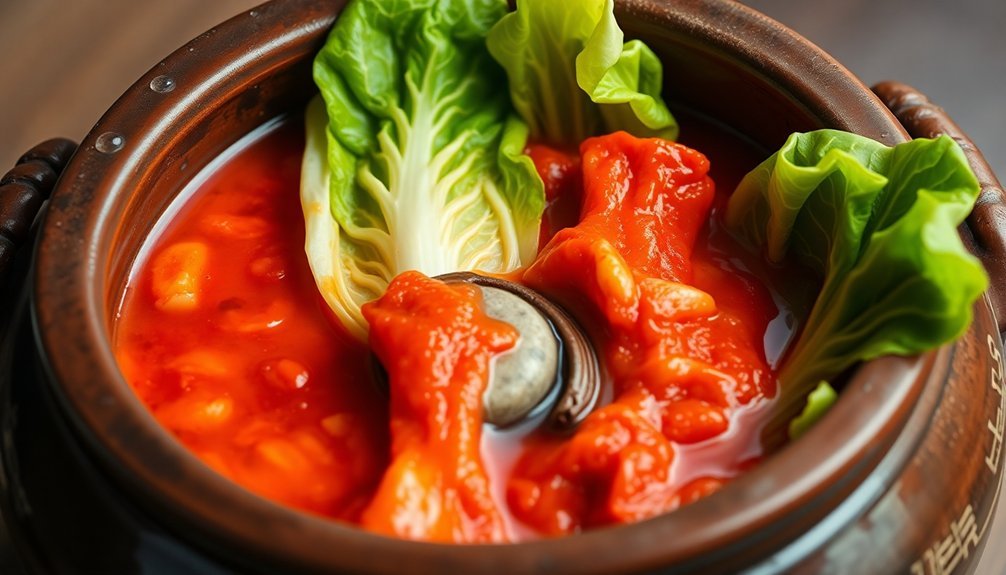
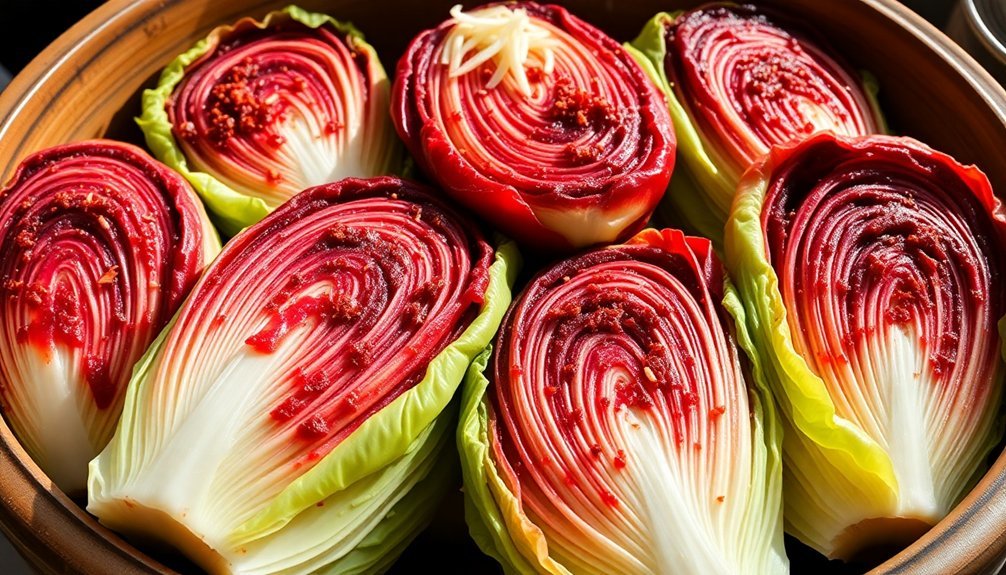
Assembling Your Kimchi
After preparing your seasoning paste, assembling kimchi requires careful attention to both ingredient preparation and layering techniques.
Start by cutting your napa cabbage into uniform 1-inch cubes or quarters, and save the outer leaves for later use.
You'll need to brine the cabbage by soaking it in salted water for 6-8 hours, stirring occasionally to guarantee even distribution.
Similarly, prepare your daikon radish by cutting it into matchsticks and brining for 45 minutes.
Once your vegetables are brined, rinse them thoroughly and press out excess liquid.
Now you're ready to combine everything. Put on food-safe gloves and mix your vegetables with the prepared kimchi paste, massaging thoroughly to guarantee each piece is well-coated.
Don't forget to add your trimmed scallions to the mixture.
Pack your kimchi mixture into clean jars, filling them about ¾ full to allow space for fermentation.
Press down firmly to remove air pockets, and cover the surface with your reserved outer cabbage leaves.
Let your kimchi begin its fermentation journey at room temperature for 1-2 days before transferring it to the refrigerator.
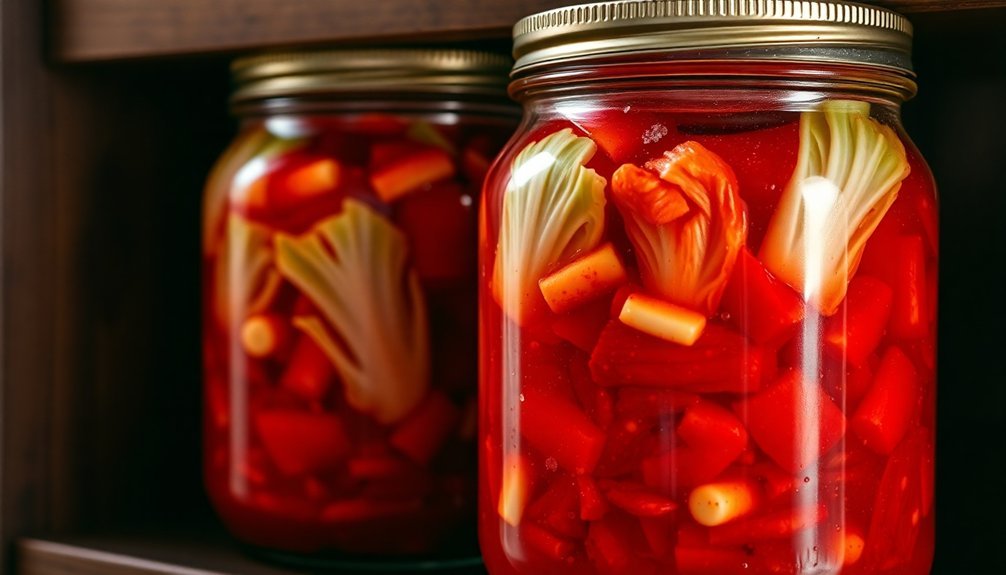
Proper Container Selection
The selection of proper containers stands at the heart of successful kimchi fermentation. Today's modern containers combine traditional wisdom with innovative technology, offering you the perfect environment for your homemade kimchi.
Look for containers made from BPA-free polypropylene mixed with Korean red clay, which mimics the breathability of traditional onggi while being much easier to maintain.
Choose containers with double-lid technology – an inner vacuum lid with a silicone gasket and an outer lid with handles. This design creates the ideal anaerobic environment your kimchi needs while preventing unwanted mold growth.
The adjustable inner lid keeps vegetables submerged and away from air contact, ensuring ideal fermentation conditions.
For batch sizing, consider that an 8.5L container can handle a full kimchi batch, while smaller sizes from 1.7L to 7.6L work well for varying needs. Fill your chosen container to 80-90% capacity for the best results.
You'll appreciate features like leak-proof seals, transparent lids for easy monitoring, and breathing valves that release fermentation gases while keeping air out. These modern containers eliminate the need for traditional burial methods while maintaining authentic fermentation conditions.
Fermentation Time and Temperature
You'll want to begin your kimchi's fermentation journey by leaving it at room temperature for 24 hours to kickstart the process.
For ideal results, continue fermenting at 65°F for 3-5 days, checking daily for bubbles and pushing the cabbage below the brine as needed.
Once you've achieved your desired level of tanginess, transfer your kimchi to the refrigerator at around 40°F, where the cold temperature will substantially slow down fermentation while maintaining the flavor profile you've developed.
Room Temperature Fermentation Process
Proper fermentation at room temperature serves as the foundation for creating authentic kimchi with balanced flavors and the perfect level of tanginess. You'll want to maintain a temperature between 60-70°F, with 65°F being the sweet spot for ideal bacterial growth and flavor development.
| Fermentation Stage | Temperature | Time Frame |
|---|---|---|
| Initial Start | 65°F (ideal) | First 24 hours |
| Active Period | 60-70°F | 1-2 days |
| Final Stage | Below 40°F | Ongoing in fridge |
Place your kimchi in a well-ventilated, cool, and dark location, such as a lower kitchen cabinet or pantry. You'll need to pack the vegetables tightly to encourage proper brine formation and minimize air exposure. Don't seal the container too tightly – allow some air to escape while preventing contamination. Check your kimchi daily to monitor the fermentation progress and prevent over-fermentation.
Once you've achieved your desired level of tanginess, transfer the kimchi to the refrigerator. This slows down the fermentation process and helps maintain the ideal flavor profile. Remember that warmer temperatures will speed up fermentation, while cooler temperatures will slow it down, so adjust your timing accordingly based on your environment.
Advanced Cold Storage Methods
Mastering cold storage techniques guarantees your kimchi retains the best flavor and prevents over-fermentation during long-term storage.
Store your kimchi in the refrigerator at 0°C-4°C, which markedly slows down the fermentation process while maintaining the beneficial probiotics.
Store your kimchi in sterile, airtight containers, ensuring the vegetables remain fully submerged in their brine to prevent mold growth. Don't forget to release built-up gases every few days by opening the container briefly.
Your kimchi can last 3-6 months when properly stored, though it's best consumed within 3 months for peak flavor and texture.
Use clean utensils whenever you're handling the kimchi to prevent contamination. If you notice your kimchi becoming too sour, you can incorporate it into cooked dishes to mellow out the flavor.
Watch for signs of spoilage such as visible mold or unusual odors – these are clear indicators it's time to discard the batch. Remember that while your kimchi will continue to ferment slowly in the refrigerator, becoming softer and more sour over time, it's still safe to eat as long as there are no signs of spoilage.
Storage and Shelf Life
Success in storing kimchi lies in maintaining the right temperature and using appropriate containers. You'll need to store your kimchi in sterile, airtight jars at temperatures below 4°C to slow down fermentation and preserve its quality.
Before refrigeration, let your kimchi ferment at room temperature for 1-2 days to initiate the process.
When properly stored in the refrigerator, your kimchi can last 3-6 months, though you'll get the best quality within the first three months.
If you're using canned kimchi, it'll stay good for up to two years unopened, but once you break the seal, plan to consume it within three months.
To maintain freshness, always use clean utensils when handling your kimchi and verify all ingredients remain submerged in the brine. Don't freeze your kimchi, as this will kill the beneficial probiotics and damage its texture.
Pack your kimchi tightly in containers to minimize air exposure, and regularly check for signs of spoilage such as mold, unusual odors, or texture changes.
If you notice any bulging containers, that's a warning sign of potential spoilage, and you should discard the kimchi immediately.
Common Troubleshooting Tips
Every batch of kimchi presents its own challenges, but most common issues have simple solutions.
If you notice your kimchi's top layer turning brown or gray, check if the liquid is stuck and use a spatula to create a path for it to flow upward. Remember to keep your kimchi fully submerged to prevent air exposure and potential spoilage.
When dealing with fermentation concerns, watch out for these common problems:
- Quick fermentation: Verify you're using storage mode rather than fermentation mode, and check your salt concentration.
- Mold or slime: If your kimchi develops a vinegary odor or becomes soft and slimy, it's likely over-fermented and should be discarded.
- Saltiness issues: Let overly salty kimchi ferment longer, or add radishes to help absorb excess salt.
If you're experiencing preparation-related problems, focus on proper brining techniques. Insufficient brining leads to soft, moldy kimchi, while over-brining results in excessive saltiness.
For ideal results, maintain correct temperature settings during storage and regularly check for signs of spoilage.
Remember that black spots resembling pepper are normal and safe to consume.
Regional Recipe Variations
You'll notice stark differences between northern and southern Korean kimchi styles, with northern regions typically featuring less red pepper and more preserved seafood.
In the south, particularly in street food hubs, you'll find bolder, spicier variations that often incorporate more garlic and chili powder.
These regional distinctions have led to creative street food adaptations, where vendors incorporate their local kimchi styles into popular dishes like kimchi pancakes and kimchi fried rice.
Northern Vs Southern Styles
Korean kimchi varies dramatically between the northern and southern regions, primarily due to climate differences and local ingredients.
In the north, where temperatures are cooler, you'll find kimchi that's less salty and spicy since the fermentation process happens more slowly. Northern style often incorporates various fish like cod and pollack, with dong-chi-mi (watery radish kimchi) being a regional favorite.
Southern style kimchi packs more heat and salt content due to warmer climates that speed up fermentation.
You'll notice complex flavors in southern recipes, especially in Jeolla Province, where they use:
- Fermented seafood varieties from coastal areas
- Bitter vegetables and mustard greens for depth
- Anchovy-based fish sauces for bold, rich taste
The contrast between these styles reflects Korea's diverse culinary landscape.
While northern regions like Gangwon Province focus on lighter, fresher flavors using natural ingredients, southern areas like Gyeongsang Province embrace stronger tastes with additional garlic and chili.
These regional differences showcase how climate and local resources have shaped kimchi-making traditions throughout Korea's history.
Street Food Adaptations
These regional kimchi traditions have sparked innovative street food adaptations throughout modern Korea. You'll find kimchi reimagined in creative ways across street vendors and casual eateries, with dishes that blend traditional fermentation methods with contemporary cooking styles.
One of the most beloved street foods is kimchi buchimgae, a savory pancake that combines kimchi with a simple flour batter. You'll often see vendors serving it with a traditional dipping sauce, making it perfect for a quick snack or appetizer.
For a protein-rich option, try dubu kimchi, which pairs fresh tofu with spicy kimchi and is often enhanced with sesame oil and pork.
Modern fusion has brought about creative combinations like kimchi pizza, where the fermented cabbage adds a distinctly Korean twist to Italian-style pies. The addition of gochujang sauce creates a unique flavor profile that's particularly popular among younger diners.
Even the classic Korean street toast has been reimagined with kimchi variations, where the traditional cabbage patty gets an extra kick from fermented kimchi. These adaptations showcase how kimchi's versatility continues to evolve while maintaining its essential Korean character.
Frequently Asked Questions
Can I Make Kimchi Without Fish Sauce for a Vegetarian Version?
Yes, you can make delicious vegetarian kimchi! Simply replace fish sauce with Korean soup soy sauce and vegetable stock for umami flavor. You'll still get that authentic tangy, spicy taste through proper fermentation.
Why Does My Kimchi Sometimes Taste Bitter or Have a Metallic Flavor?
Your kimchi's bitter or metallic taste could be from insufficient fermentation, low-quality pepper flakes, or excess seasonings. You'll want to guarantee proper fermentation time and use fresh, high-quality ingredients to avoid this.
Is It Safe to Eat Kimchi During Pregnancy?
You can eat kimchi during pregnancy, but stick to store-bought, pasteurized versions to avoid bacteria risks. It's packed with nutrients and probiotics, but you'll want to avoid homemade or raw varieties for safety.
Can I Reduce the Spiciness Without Compromising the Authentic Taste?
Yes, you can reduce spiciness while maintaining authenticity by using less gochugaru (Korean red pepper flakes), mixing with white kimchi, or adding sweet ingredients like pear. The fermentation process will still develop authentic flavors.
Why Does My Kimchi Smell Different From Store-Bought Versions?
Your homemade kimchi smells stronger because it's actively fermenting with natural bacteria, while store-bought versions often use controlled fermentation processes and preservatives. They'll also typically include standardized ingredients for consistent smell.
In Summary
You'll find that making authentic Korean kimchi is both an art and a science. With proper preparation and patience, you'll create a complex, flavorful fermented dish that's packed with probiotics and traditional flavors. Whether you're following a centuries-old family recipe or trying it for the first time, remember that temperature control and cleanliness are key to successful fermentation. Trust your senses – when it tastes and smells right, it's ready.
Leave a Reply