You'll find several effective off-grid smoking methods to preserve and flavor your meat without electricity. The traditional tipi smoker offers simplicity with a tripod structure and tarp cover, while brick pit smoking provides durability with heat-retaining fire bricks. A converted barrel smoker gives precise temperature control, and natural draft smokehouses utilize basic physics for consistent results. Other options include cold smoking with hardwoods, rock cairn setups, primitive log cabin smokers, clay ovens, and modified Weber kettles. Whether you're a beginner or experienced smoker, each method has unique advantages to help you master the art of off-grid meat preservation. Let's explore these time-tested techniques in detail.
Traditional Tipi Smoker Method
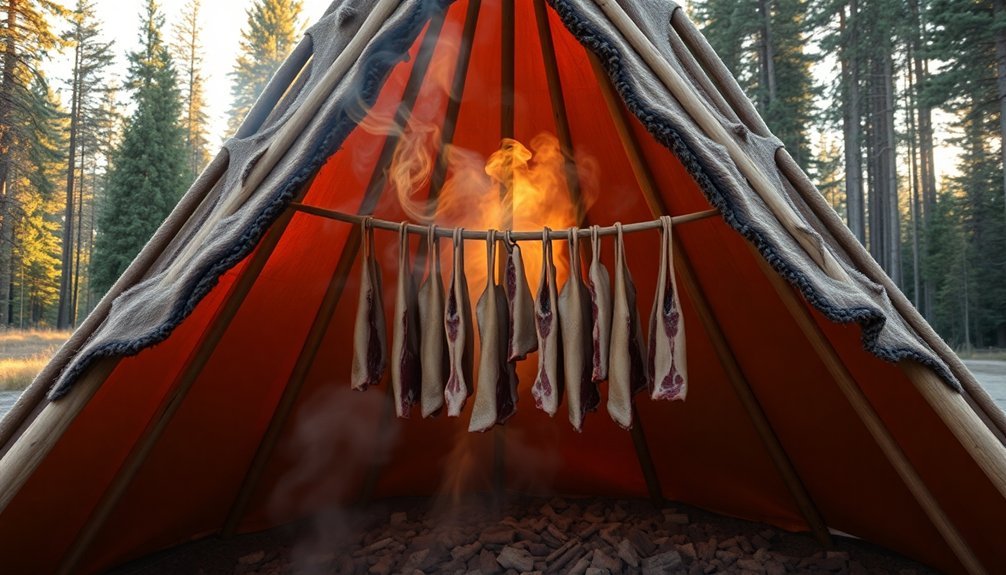
The traditional tipi smoker's simple design belies its effectiveness in preserving meat off-grid. You'll need to start by building a tripod structure using sturdy sticks, then create an internal rack to suspend your meat about two feet above the smoking coals.
Cover the entire setup with a tarp to contain the precious smoke that'll preserve your meat. Secure the tarp with heavy rocks or items to prevent wind disruption.
For the best results, you'll want to use hardwoods like dry maple, avoiding conifers that'll leave an unpleasant resinous taste. Green wood from deciduous trees works well too, especially when you're aiming for heavy smoke production.
You'll need to maintain a small, smoky fire by adding wood pieces every couple of hours.
Before smoking, cut your meat into uniform, thin strips with the grain. If you're working with lean game meat, consider adding fat or marinades to prevent excessive drying.
Once you've hung the strips, maintain a steady smoke for several hours or overnight. One night of heavy smoking preserves meat for about a week, while two nights can extend storage time to 2-4 weeks.
You'll know it's done when the meat looks dark, brittle, and curled.
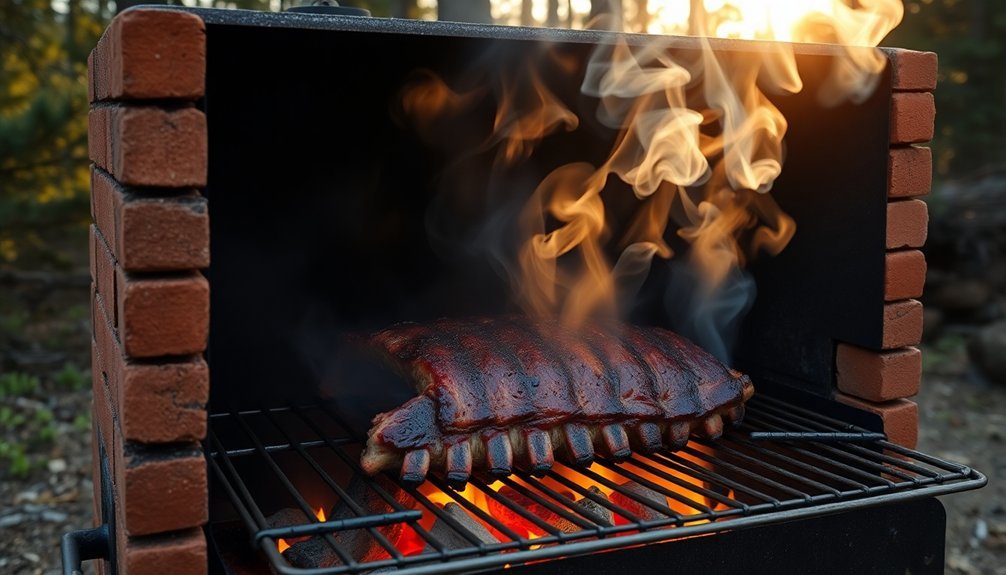
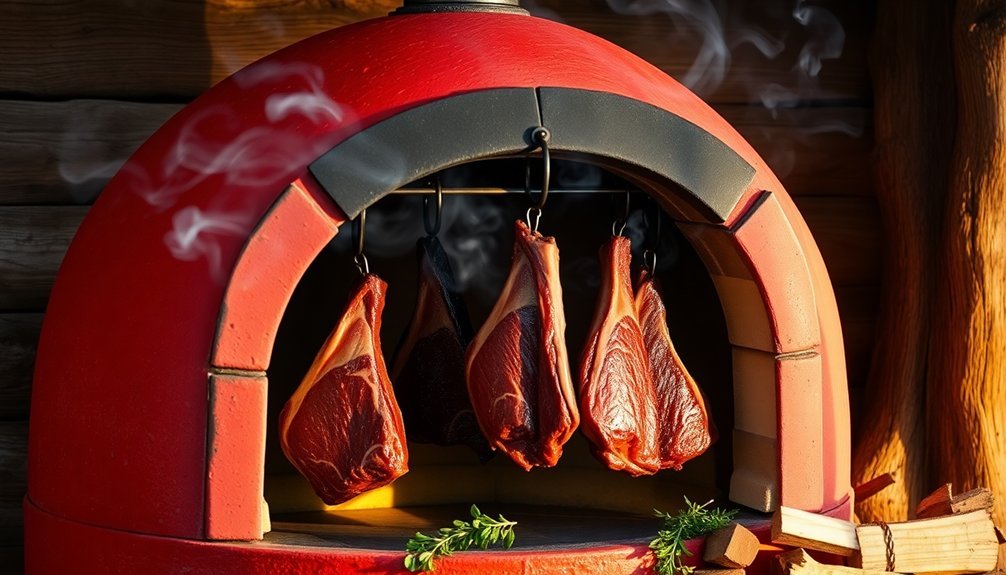
Brick Pit Smoking
Building a brick pit smoker represents one of the most durable and efficient off-grid smoking solutions you'll find.
You'll need to start by carefully planning your smoker's dimensions based on your cooking needs and selecting an ideal location on level ground. The foundation begins with properly laid paving slabs that'll provide stable support for the entire structure.
For construction, you'll want to use fire bricks for maximum heat retention, joining them with heat-resistant mortar. As you build up the walls, make sure each layer remains level and properly aligned. Similar to the water pan setup in the Snake Method, incorporating a water container helps maintain consistent moisture and temperature control.
You'll need to incorporate strategic openings for your cast iron doors and create proper ventilation through well-placed air intakes and a chimney flue.
The final assembly requires careful attention to the functional elements. You'll install a charcoal basket secured with U-bolts and nuts, mount your stainless steel grilling grates, and add temperature gauges for heat monitoring.
Don't forget to create sufficient air circulation holes and make certain your door handle is securely attached. With proper installation of these components, you'll have a reliable smoking station that'll serve you for years to come.
Barrel Smoker Setup
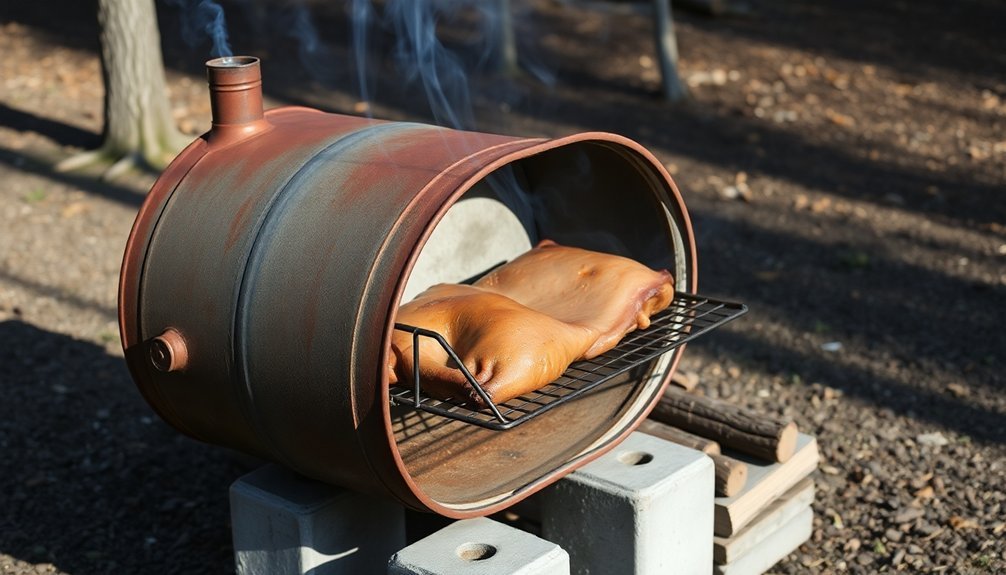
From selecting the right wood barrel to installing essential components, creating a functional barrel smoker requires careful planning and attention to detail.
You'll need to start with a quality wine or whiskey barrel, ensuring it's in good condition and appropriate for your smoking needs. Regular maintenance and re-hydration will keep your barrel in optimal condition year-round. Once you've cleaned and stained the barrel, you'll install the critical components.
Begin by mounting a 22.5" round grill grate for your food and a 12"-24" charcoal grate below it. You'll need to construct a charcoal basket using aluminum mesh or expanded steel, complete with a handle and legs.
Install an ash tray underneath, leaving space for proper air circulation. For temperature control, set up the air intake system using a ball valve, steel pipe elbows, and connectors, sealing everything with silicone caulk.
On top of the barrel, cut a 3" hole and install a galvanized steel elbow as your exhaust pipe. You'll control the temperature by adjusting both the air intake valve and exhaust damper.
This setup allows you to maintain the ideal smoking temperature of 220°F while ensuring proper smoke circulation around your meat.
Cold Smoking With Wood
While barrel smokers excel at hot smoking, mastering cold smoking opens up a world of traditional meat preservation and flavor enhancement. You'll need to carefully select your wood, with hardwoods being your best choice. Hickory delivers full-bodied flavor, while alder provides a more delicate smoke. Fruit woods like apple and pear offer unique taste profiles that you'll appreciate for specialty items.
To achieve successful cold smoking, you'll want to focus on these essential techniques:
- Dry your wood thoroughly to avoid bitter flavors, then soak chips and freeze them for year-round use.
- Use a wire mesh basket to control burn rate and keep temperatures below 100°F (38°C).
- Monitor smoking chamber temperature with a digital thermometer, aiming for below 71°F (21°C).
- Guarantee proper ventilation for even smoke distribution and flavor development.
- Place a water pan with ice to maintain consistently low temperatures.
You can generate smoke using several methods, including the smothered coals technique or a cold smoke generator.
Remember that cold smoking doesn't cook the meat – it only adds flavor and aids preservation, so proper curing beforehand is essential for food safety.
Natural Draft Smoke House
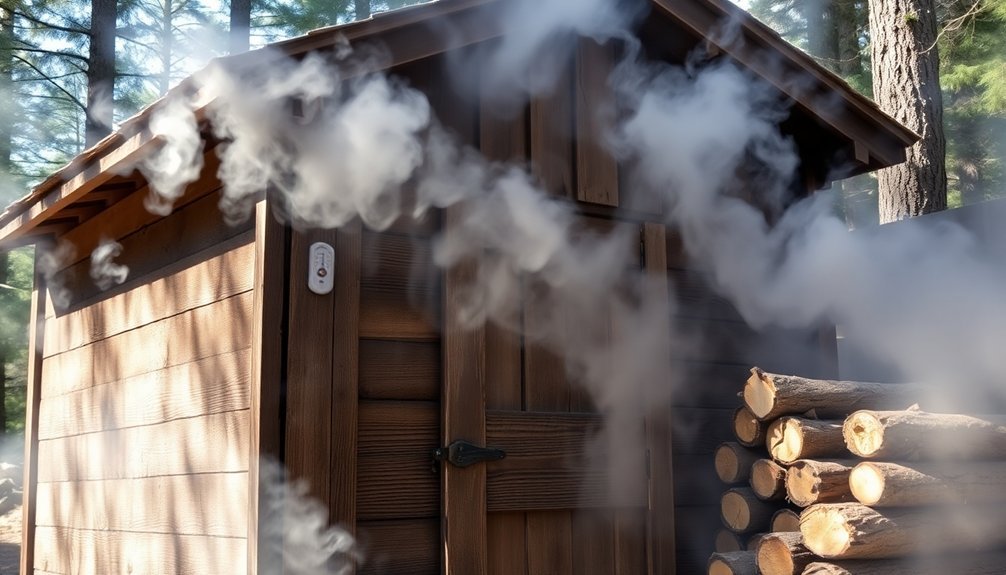
A natural draft smokehouse harnesses basic physics to create the perfect smoking environment without relying on electricity or mechanical fans. The key to its success lies in the height of your structure and the temperature difference between the smoke and outside air – the greater these differences, the stronger your draft will be.
You'll want to position your firebox 10-12 inches below the smokehouse floor and 8-10 feet from the center hole.
Build your structure using concrete blocks, untreated lumber, or wood pallets on a floating slab foundation with reinforcing rebar. Install glass block windows for natural light and cover your peak vents with window screening for draft control.
To maximize draft efficiency, you'll need to manage your smoke path carefully. Use metal piping with a steeper angle rather than a longer, gradual slope.
You can improve draft strength by insulating the smoke chimney and installing adjustable controls like hinged doors and dampers. Keep your smoking temperatures under 160°F, and you'll find the system works best during cooler months when the temperature difference creates stronger natural drafts.
Underground Earth Pit Smoking
You'll start by digging a 5-foot deep pit lined with cinder blocks, ensuring it's large enough for your meat and additional cooking items.
The pit's temperature control comes from a carefully managed bed of hot coals and wood, which you'll lay down before placing your wrapped meat.
Once you've positioned the meat and sealed the pit with a cover, the underground chamber maintains consistent heat through a combination of baking, steaming, and smoking for 8-12 hours.
Building The Earth Pit
Building an earth pit smoker begins with careful site selection and ground preparation. You'll need to choose a spot with good drainage and clear it of any flammable materials or overhanging branches. Before digging, soften hard soil with water and mark your pit's outline using a template like a bicycle rim.
Key steps for constructing your earth pit smoker:
- Dig the pit to accommodate fuel height, cooking surface, and a 1-inch drainage layer
- Shape the bottom into a slight dome to support your brick structure
- Line the walls with bricks, positioning drainage holes toward the inside
- Secure bricks by patting soil into gaps and crevices
- Top the structure with straight bricks for a level surface
Once you've completed the basic structure, you'll need proper fire management for effective smoking. Start with charcoal or logs and let them smolder rather than burn openly.
Add soaked hickory chunks for smoke generation, and maintain temperature control by adjusting airflow with your pit cover. You'll want to keep about six inches between your food and the fuel source for ideal smoking results.
Traditional Smoking Temperature Control
Throughout centuries of traditional smoking, earth pit temperature control has remained one of the most reliable methods for maintaining consistent heat. You'll find that the earth itself acts as a natural insulator, helping you maintain steady temperatures while smoking your meat.
By properly sealing your pit and monitoring for cracks or holes in the earth covering, you'll prevent unwanted air leakage that could disrupt the smoking process.
To achieve ideal temperature control, you'll need to establish proper ventilation through strategically placed vents or buried chimneys. These allow you to regulate both smoke and airflow while maintaining the desired heat levels.
Your pit's design plays a vital role – smaller pits offer better air control and more uniform results, though they'll process less meat at once.
You'll want to watch for the earth covering slowly sinking during the smoking process, requiring periodic adjustments to maintain proper insulation.
Remember to exercise extreme caution, as the pit surface can be dangerous. Mark the area clearly and never walk on the pit surface.
When adding fuel or making adjustments, use the designated vents to maintain safe and consistent temperature control.
Rock Cairn Smoking Technique
You'll want to start your rock cairn smoker by arranging flat, heat-resistant stones in a circular base pattern that allows for proper airflow while containing your heat source.
Stack additional rocks carefully around the perimeter, leaving strategic gaps for smoke ventilation and temperature control by adjusting the spacing between stones.
To achieve the best results, position your meat on a grate above the cairn's center, where smoke and heat will flow evenly around your protein while the stones help maintain consistent cooking temperatures.
Building The Stone Base
The foundation of a rock cairn smoking setup rests on three critical elements: location, rock selection, and proper assembly.
You'll need to start by finding a flat, stable surface away from wildlife paths and areas prone to disturbance. Choose a spot that complies with local regulations and won't impact the surrounding ecosystem.
When selecting rocks for your smoking base, focus on finding flat, clean stones of varying sizes. The foundation requires the largest and most stable pieces, while smaller rocks will help fill gaps and provide stability. You'll want to guarantee all stones are thoroughly dried before assembly.
- Select the largest, flattest rock as your primary base stone
- Test the base rock's stability with a gentle wiggle
- Layer additional large stones to create a solid foundation
- Use smaller rocks to fill gaps and guarantee proper balance
- Stack rocks with staggered edges for enhanced stability
As you build the base, concentrate on creating a sturdy platform that will support your smoking structure.
Each rock should align well with those beneath it, maintaining balance rather than focusing on height. This careful attention to foundation building guarantees your smoking setup remains stable throughout the cooking process.
Heat Control Through Stacking
Once your stone base is secure, mastering heat control becomes the next challenge in rock cairn smoking.
Start by arranging your lump charcoal in a modified minion method, placing unlit coals at the bottom and a few lit ones on top. This setup will give you sustained heat for your extended smoking session.
Stack your hardwood pieces in a three to four log pattern above your coal bed, positioning them near the cairn's entrance for better temperature control.
You'll want to use dense woods like oak or hickory, which burn slowly and provide consistent smoke. Don't forget to maintain proper airflow by leaving small gaps between the logs.
Monitor your temperature carefully, aiming for 225°F (107°C). You can adjust the heat by tightening or loosening the coal bed and managing airflow through strategic log placement.
Add a water pan among the stones to help stabilize temperature and keep your meat moist.
Remember to check smoke thickness regularly – you're looking for thin, blue smoke rather than thick, white billows.
When needed, add more wood chunks directly onto the hot coals to maintain your desired smoke level.
Meat Placement For Success
Proper meat placement within your rock cairn smoker can make or break your smoking session. You'll need to position your meat strategically to guarantee even smoke distribution and ideal preservation.
Start by creating a stable rack system using your tripod structure, making sure it's positioned above the smoke path but not directly over the fire source.
- Score the fat cap of larger cuts like brisket in a crosshatch pattern to enhance smoke penetration.
- Slice thinner meats uniformly and hang them with proper spacing to allow smoke circulation.
- Position thicker cuts toward the bottom of your smoking chamber where heat concentration is higher.
- Arrange similar-sized pieces at the same level to guarantee consistent smoking.
- Leave enough space between meat pieces to prevent them from touching or blocking smoke flow.
Monitor your meat's position throughout the smoking process, as pieces may shift or sag as they cook.
You'll want to maintain proper ventilation by adjusting your covering materials and smoke flow. Remember to check internal temperatures regularly, especially in thicker cuts, to guarantee they reach 160°F for food safety.
If you notice uneven coloring, rotate the pieces to achieve consistent exposure to smoke.
Converted Weber Kettle Method
Converting your Weber Kettle grill into a smoking powerhouse doesn't require complex modifications. You'll need to set up two distinct zones: a hot zone for your fuel and a cool zone for your meat. Place your charcoal baskets on opposite sides, then position a half-size aluminum pan in the cool zone to catch drippings.
| Setup Step | Why It Matters |
|---|---|
| Vent Position | 25% open keeps steady temp |
| Thermometer Placement | Away from direct heat guarantees accuracy |
| Charcoal Method | Snake or basket setup maximizes burn time |
| Wood Chunks | Strategic placement creates perfect smoke |
For longer smoking sessions, you'll want to try the snake method – arrange your unlit briquettes in a ring around the kettle's outer edge. Light just a few briquettes at one end, and they'll gradually ignite the rest, providing 8-12 hours of consistent heat. Position your top vent opposite the lit end to draw smoke across your meat.
Maintain your target temperature of 250°F by adjusting your vents as needed. You'll find adding wood chunks gradually rather than all at once creates better smoke flavor and prevents bitter tastes from developing.
Clay Oven Smoking
Traditional clay ovens excel at smoking meat thanks to their superior heat retention and natural insulation properties. You'll need to start by firing up your clay oven with kiln-dried wood until it reaches ideal temperature, then let it cool to 110-130°C before beginning the smoking process.
- Position your hot embers at the back or side of the oven using a metal peel.
- Place your marinated, room-temperature meat on an elevated wire rack for ideal smoke exposure.
- Add wood chips or chunks to create clean smoke while maintaining temperature with charcoal.
- Keep the oven door slightly ajar to maintain oxygen flow without losing too much heat.
- Monitor temperature consistently, avoiding frequent door openings.
Your clay oven's natural insulation allows for extended smoking sessions without significant temperature fluctuations.
You'll want to make sure your meat sits in the smoke layer by properly elevating the tray. Let the smoking process continue uninterrupted for several hours, maintaining a steady smolder rather than an active flame.
The key to success lies in managing your smoke levels by adjusting wood and charcoal amounts while keeping the temperature within the perfect smoking range.
Primitive Log Cabin Smoker
When you're building a primitive log cabin smoker, start by selecting straight, sturdy logs and stacking them horizontally with notched ends to create a secure, draft-free structure.
You'll need to carefully plan spaces between logs to control airflow, typically leaving small gaps at the bottom for intake and a larger opening at the top for smoke release.
Your success in maintaining ideal smoking temperatures depends on mastering these airflow controls through strategic placement of adjustable vents and dampeners between the firebox and smoking chamber.
Building With Raw Logs
Through careful log selection and precise construction techniques, you can build a primitive log cabin smoker that will serve your off-grid smoking needs. Start by selecting large logs and flattening their bottoms to create a stable foundation. You'll need to cut notches about a foot from each end, guaranteeing the upper notches fit securely over the lower ones.
When constructing your smoker, begin with the largest logs at the front and rear as your base. As you stack additional logs, you'll need to carefully notch each one to interlock with the layers below, building up the walls to their full height before adding the roof.
Key construction points to remember:
- Roll logs carefully into position to maintain structural integrity
- Cut door openings after reaching desired wall height, using cleats for stability
- Install wooden strips along openings to prevent buckling
- Create a watertight roof using overlapping logs in a tile pattern
- Apply clay lining to all logs, including the chimney area
For the finishing touches, cover your roof with bark for extra protection and guarantee your chimney extends well above the gable to maintain proper airflow.
Don't forget to secure door jambs and add a proper lintel and sill to complete the structure.
Airflow Control Methods
Inside every primitive log cabin smoker, mastering airflow control determines your smoking success.
You'll need to manage both intake and outtake vents carefully, treating the intake like a gas pedal and the chimney vent as your brake. Start with your outtake vent fully open, then make small adjustments to the intake to achieve your target temperature.
You'll want to create deliberate gaps between wood splits using the log cabin stacking method, ensuring proper airflow through your firebox.
Watch your smoke color – you're aiming for light blue or clear smoke, which signals ideal combustion. If you see thick, white, or dark smoke, you'll need to adjust your airflow.
Keep your firebox door slightly cracked to enhance smoke flavor, but don't let it leak excessively.
Don't close your chimney vent more than halfway, as this can choke your fire and create harsh smoke. When adding wood, use preheated logs to maintain consistent temperatures.
Make all vent adjustments gradually – small changes can dramatically affect your temperature and smoke quality.
Frequently Asked Questions
How Do You Prevent Meat Spoilage During Extended Power Outages While Smoking?
You'll prevent meat spoilage by maintaining consistent temperatures, using natural preservatives like salt and smoke, monitoring with thermometers, storing in airtight containers, and utilizing dry ice or coolers during power outages.
Can Wild-Harvested Plants Be Used Instead of Traditional Wood for Smoking?
Yes, you can use wild-harvested plants like hickory, cherry, alder, and maple for smoking. You'll need to guarantee they're properly dried, chemical-free, and from non-conifer trees for safe, flavorful results.
What Are Emergency Alternatives to Thermometers for Monitoring Smoking Temperatures?
You can monitor smoke color, check meat firmness, test clear juices, observe fat melting, and use wood chip types as temperature indicators. The "feel test" and visual cues offer reliable thermometer alternatives.
How Do Seasonal Weather Changes Affect Off-Grid Smoking Techniques?
You'll need more fuel and time in cold weather, while summer lets you smoke faster. Adjust your vent positions seasonally, and protect your smoker from wind and rain to maintain consistent temperatures.
Which Indigenous Smoking Methods Work Best for Different Climate Zones?
You'll find temperate zones benefit from hardwood tipi smokers, arid regions excel with mesquite fires, tropical areas need quick-cooling methods, and arctic zones require careful heat management with added fats for best results.
In Summary
You'll find these off-grid smoking methods bring a new dimension to preserving and flavoring your meat without relying on electricity or modern equipment. Whether you're using a traditional tipi smoker or building a primitive log cabin setup, each technique lets you tap into age-old wisdom while creating delicious, well-preserved food. Master these methods, and you'll always have a way to smoke meat, no matter where you are.


Leave a Reply