
You'll need to start with fresh, lean fish like cod or snapper within 2-3 days of refrigeration. Clean and scale your fish thoroughly, removing all internal organs and blood through careful rinsing. Set up your drying space in a well-ventilated, shaded area with temperatures between 70-77°F, using wire racks or bamboo strainers for ideal air circulation. Place fish in single layers, rotate them multiple times daily, and protect them with mosquito netting from pests. The process can take several days, with proper drying indicated by a hard, leathery texture. The journey to perfectly dried fish involves more essential steps and techniques to master.
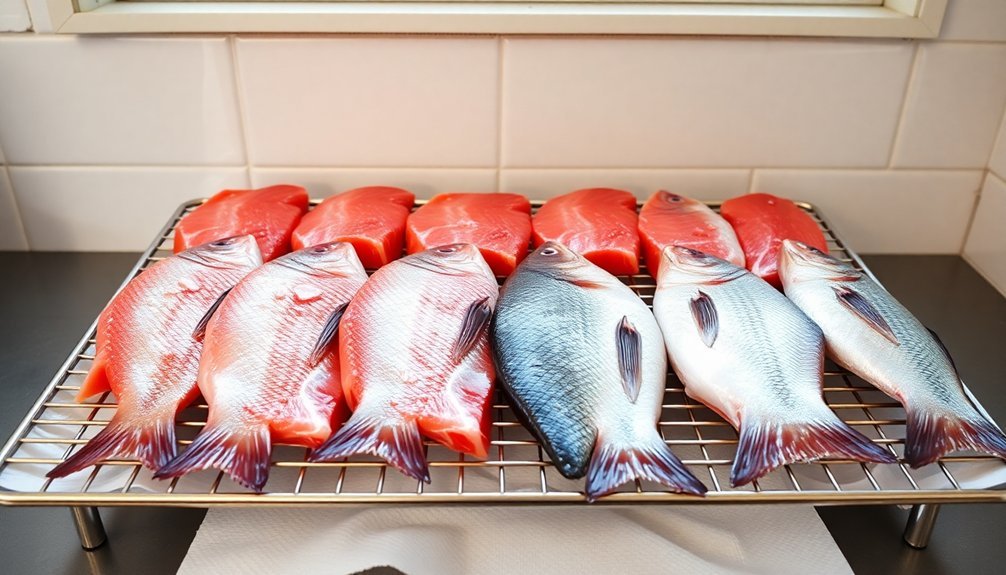
Selecting The Right Fish

Three key factors make selecting the right fish essential for successful air-drying: the fish's oil content, its freshness, and proper preparation.
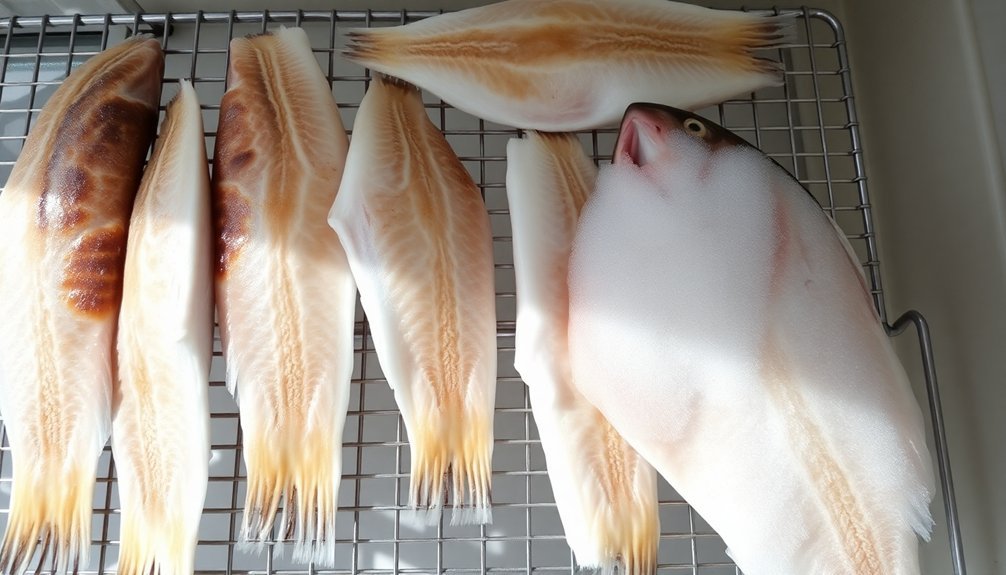
When choosing fish for air-drying, you'll want to focus on lean varieties, as they're perfect for preservation. Look for fish like cod, flounder, haddock, sea bass, or snapper. These types contain less oil, which helps prevent quick spoilage during the drying process. Bold flavors naturally complement the drying process and create delicious results.
Avoid fatty fish, as they'll typically spoil within the first week of drying, even under ideal conditions.
Freshness is crucial – you'll need to use fish within 2-3 days of refrigeration, and it shouldn't show any signs of spoilage. Check for clear eyes, firm flesh, and a fresh ocean smell. If you're using fresh-caught fish, remove the intestines, scales, and gills immediately.
Consider the fish's size when making your selection. You'll butterfly small and medium fish, while larger ones work better as fillets.
Whatever size you choose, you'll need to cut it into uniform strips about ¼ to ⅜-inch thick to guarantee even drying. Remember that some fish varieties offer stronger flavors that hold up well during the drying process.
Essential Tools And Equipment
Whether you're setting up an indoor drying station or outdoor drying area, you'll need essential tools to properly air-dry your fish.
For indoor drying, gather a food dehydrator or oven, bamboo strainers, and wire racks to guarantee proper air circulation and temperature control. A reliable fish scaler tool will ensure proper preparation before the drying process begins.
If you're drying fish outdoors, you'll want a protective drying basket, mesh screens, and elevated racks to keep your fish safe from insects while allowing maximum airflow.
Indoor Drying Setup Equipment
Several essential pieces of equipment are needed to create an effective indoor fish-drying setup at home.
You'll need a well-insulated drying chamber or oven equipped with fans and heat sources. Look for a unit with multiple trays to guarantee proper air circulation and even drying of your fish. This setup helps achieve consistent production quality throughout the drying process.
For temperature control, you'll want a system that maintains consistent heat between 25-50°C. A PLC touch screen control panel will help you monitor and adjust both temperature and humidity levels.
To manage moisture effectively, you'll need a dehumidification system – either a desiant dehumidifier or a condenser system that removes excess moisture from the air.
Don't forget about mobility and accessibility. Choose a unit with supporting wheels or a trolley system for easy movement, and make sure it has an observation window so you can monitor your fish without opening the door.
For energy efficiency, consider a heat pump system that can save up to 70% on energy costs. If you're working with limited space, look for compact models that offer simple installation while still providing all the essential features for successful fish drying.
Outdoor Fish Drying Tools
Getting started with outdoor fish drying calls for specific tools and equipment to guarantee safe, hygienic processing and ideal outcomes. You'll need basic preparation tools, including a sharp fillet knife for precise cuts, a fish scaler to remove scales efficiently, and sturdy kitchen shears for tackling fins and small bones. Don't forget a dedicated cutting board that's easy to sanitize and resistant to scratches.
For the drying setup, you'll need either a lattice system or mesh racks to guarantee proper air circulation. Secure your fish using durable twine or cord that can withstand outdoor conditions. Consider adding a protective cover to shield your drying fish from excessive sun or debris.
| Essential Tool | Primary Function | Key Feature |
|---|---|---|
| Fillet Knife | Precise fish cutting | Regular sharpening required |
| Mesh Racks | Even air circulation | Easy to clean surface |
| Cut-Resistant Gloves | Hand protection | Enhanced grip control |
Monitor environmental conditions carefully – you'll want temperatures below 10°C/50°F, low humidity levels, and consistent airflow for ideal outcomes. Use a psychrometer to track humidity levels and guarantee your fish dries properly without risking spoilage.
Cleaning Your Fresh Catch
Before you start air-drying your fish, you'll need to clean it thoroughly by removing all internal organs through a careful belly cut and cavity cleaning.
Next, you'll want to use a scaling tool or the back of a knife to scrape off all scales from tail to head, ensuring you don't miss spots around the fins and belly area.
Finally, make sure you rinse out any remaining blood from the cavity and along the backbone, as leftover blood can lead to spoilage and off-flavors in your dried fish.
Remove Internal Organs First
Proper internal organ removal stands as the essential first step in preparing fish for air-drying.
You'll need to position your fish on its side on a covered cutting board, then make a precise shallow cut from the anus to the gills, being careful not to puncture the intestines.
Once you've created the opening, spread the cavity and remove all internal organs using your fingers or a spoon. Don't forget to scrape out the kidney near the backbone.
You'll want to dispose of the entrails in a designated container as you work to keep your workspace clean.
Next, cut out the anus in a V-shape and thoroughly rinse the cavity under cold running water.
You'll need to remove all dark tissue lining the cavity, as this can create an unpleasant fishy taste. Continue rinsing until you see only clean, white or pink flesh.
Finally, trim the fins if desired, and decide whether to keep or remove the head based on your drying preferences.
Remove the gills if you haven't already, then give the fish a final rinse.
Pat it dry with paper towels before moving on to the next step in the air-drying process.
Proper Fish Descaling Tips
Thorough descaling guarantees your fish will be clean and ready for the air-drying process. Before you begin, lay out newspaper under your cutting board and rinse the fish under cold water to loosen the scales. Pat it dry with paper towels to prevent slipping during handling.
| Action | Technique |
|---|---|
| Tool Selection | Use fish scaler or butter knife's blunt edge |
| Grip Position | Hold fish firmly by tail |
| Scraping Motion | Work from tail to head in short strokes |
| Pressure Control | Apply moderate force to avoid damaging meat |
| Final Check | Run finger against grain to detect missed spots |
Start scaling by holding your tool at a comfortable angle, then scrape from tail to head using short, controlled motions. Don't press too hard – you want to remove scales without damaging the flesh underneath. Work systematically on both sides of the fish, and rinse frequently to check your progress. Once you think you're done, run your finger against the grain to feel for any remaining scales. Give the fish a final thorough rinse under cold running water to remove any loose scales or debris before proceeding with the next preparation steps.
Blood Removal Techniques
Fresh fish needs immediate bleeding to guarantee the best possible flavor and texture. To start the process, you'll need to cut the throat or gills right after killing the fish.
For fish under 16 inches, use the gill popping method by pulling out the gills to allow blood drainage. With larger fish over 30 pounds, sever multiple gills and use a raw water washdown hose or drag the fish alongside your boat.
You'll want to keep the fish in water during bleeding, as this helps the heart pump out all remaining blood. For medium-sized fish, cut one or two gills on a single side.
Make sure you have a sharp knife, cutting board, and bucket or livewell ready before starting the process.
After bleeding, rinse the fish thoroughly with cold water to remove any blood traces and entrail bits. Don't forget to scrape out the kidney and bloodline along the backbone.
Pat the fish dry with paper towels, and check for any remaining scales or bones. This thorough bleeding process removes lactic acid from stressed fish, greatly improving both flavor and texture of your final product.
Salt Treatment Methods
Salt transforms raw fish into a preserved delicacy through several proven methods, each offering unique advantages for home preservation.
You'll need to choose between dry salting, wet salting, or pickle salting based on your fish type and desired outcome.
For dry salting, gut and clean your fish, then score thick flesh to help salt penetrate. Mix large and small grain food-grade salt, using a ratio between 1:3 and 1:10 (salt to fish). Layer the fish with salt and apply weight, letting it cure for 24-48 hours.
This method works well for non-fatty fish and yields a firm texture with up to three months of shelf life.
Wet salting suits fatty fish like mackerel and sardines. After cleaning, place your fish in a tank where it'll create its own brine. You can add saturated brine if needed.
While this method requires less drying time, it results in a more delicate texture but shorter shelf life.
Pickle salting combines aspects of both methods. Layer your cleaned fish with granular salt and let it form a natural brine.
The salt solution will draw out moisture while preserving the fish, though you'll need to monitor carefully to prevent spoilage.
Setting Up Drying Space
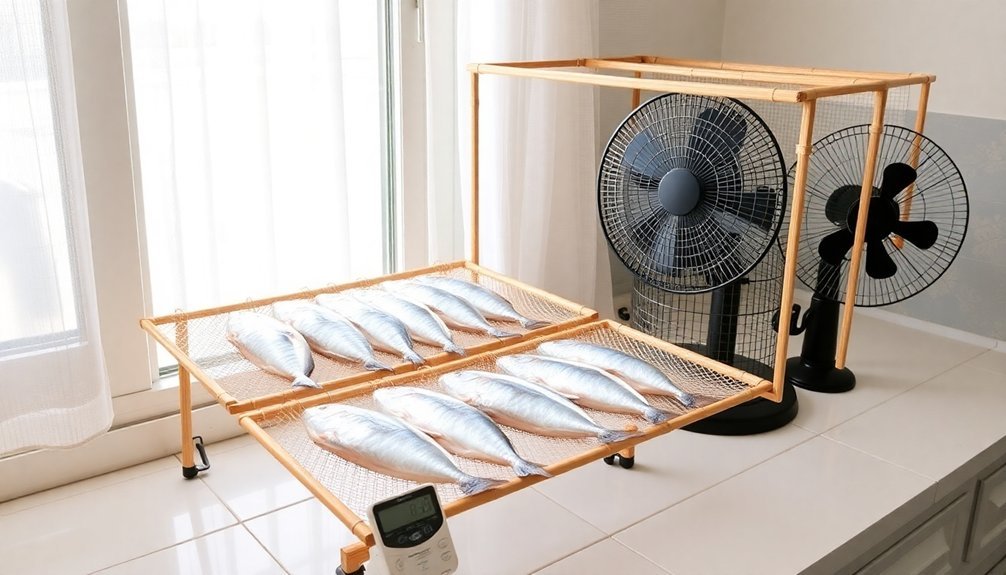
You'll need a well-ventilated, shaded area with steady air flow and temperatures below 10°C/50°F to set up your fish drying space.
Create a drying table using wire screen or thin wooden strips with gaps between them, ensuring the structure allows air to circulate from all sides including underneath.
Position your drying setup under a tree or covered area that shields the fish from direct sunlight while maintaining good cross breezes.
Ideal Location Requirements
Successful fish drying begins with choosing the right location that meets several critical environmental requirements. You'll need a spot with temperatures below 10°C/50°F, low humidity, and consistent air circulation. The area must be clean, protected from pests, and easily accessible for monitoring.
Select a location that's either outdoors with natural wind flow or indoors with controlled ventilation. While outdoor spots offer natural advantages, they'll need protection from extreme weather. Indoor spaces work well when you can control the environment and maintain proper air movement.
| Factor | Outdoor Location | Indoor Location |
|---|---|---|
| Temperature | Natural cooling | Controlled cooling |
| Ventilation | Natural wind flow | Fans or vents |
| Protection | Weather barriers needed | Built-in protection |
| Monitoring | Regular checks required | Easier to monitor |
Your chosen spot should be away from direct sunlight, though partial shade is beneficial. If you're using an indoor space, make certain it's well-ventilated and equipped with proper drying equipment. Remember that higher altitudes may affect drying times, so you'll need to adjust accordingly. Whatever location you choose, it must allow for easy maintenance and regular monitoring of the drying process.
Tools and Support Structure
Having selected an appropriate location, setting up your drying space requires specific tools and support structures for ideal results.
You'll need a setup that promotes proper air circulation while protecting your fish from contaminants and pests. The key is to create a system that allows hot air to flow evenly around each piece of fish, similar to commercial drying chambers but adapted for home use.
Essential tools and structures for your fish drying setup:
- Drying racks or food-grade mesh trays that provide adequate spacing between fish pieces
- Strong support frame or stands to hold your trays at proper heights for air circulation
- Clean, food-safe hooks or hanging systems if you're planning to dry fish vertically
- Thermometer and humidity meter to monitor environmental conditions
- Protective mesh screens or food-grade netting to keep insects away while allowing airflow
When arranging your setup, guarantee there's enough space between fish pieces to prevent them from touching.
Position your trays or racks so they're stable and level, allowing for consistent drying conditions. If you're using multiple levels, maintain sufficient vertical spacing to promote proper air movement between layers.
Air Temperature And Humidity
Proper temperature and humidity control are critical factors in air-drying fish at home. For ideal results, you'll need to maintain consistent temperatures between 70-77°F (21-25°C) when drying fish fillets.
If you're working with small fish or fillets that you plan to hot smoke later, start with low-temperature drying at 95-104°F (35-40°C).
Your drying environment's humidity levels are equally important. Start with 80-100% humidity for initial low-temperature drying, then reduce it below 75% as you progress.
If you're using cold air drying methods, aim for around 30% relative humidity. High humidity can cause serious problems, including head collapse and bacterial growth.
You'll need to create proper air circulation to remove moisture effectively. Position your drying setup in a draughty area or use a fan to maintain constant airflow.
As you increase the temperature to 158°F (70°C), open dampers to create maximum draft. Remember to monitor both temperature and humidity continuously throughout the process.
This vigilance helps prevent bacterial growth and guarantees your fish dries evenly and safely while maintaining its structural integrity.
Fish Positioning And Rotation

Once you've established the right temperature and humidity conditions, the way you position your fish determines the success of the drying process.
Place your fish in a single layer on clean drying racks or mats to maximize air exposure. If you're working with small fish, butterfly them for even drying, while larger fish should be split either ventrally or dorsally.
To guarantee proper drying, you'll need to turn and rotate your fish several times throughout the day. This prevents uneven moisture distribution and bacterial growth. You can use a bamboo strainer or drying basket to protect your fish from pests while maintaining easy access for rotation.
- Position fish to maximize sunlight exposure, but avoid intense direct sun
- Turn fish multiple times daily to guarantee even drying
- Use weights during salting and drying to encourage moisture movement
- Support fish with racks or hangers to maintain shape
- Keep fish in a single layer to prevent uneven drying
If you're drying fish overnight, move them to a covered area to prevent moisture absorption.
For areas with high humidity, consider using solar-powered driers to enhance the drying conditions while maintaining proper ventilation around your fish.
Pest Control During Drying
While drying your fish, you'll need to protect them from various pests that can contaminate or damage the product. Start by using bamboo strainers or drying baskets, which offer natural antibacterial properties while protecting your fish from flies and birds. Cover the fish with mosquito netting or wire screens, ensuring there's enough airflow to prevent spoilage.
Keep your fish elevated on poles or racks to prevent ground-dwelling pests from reaching them. Don't pack the fish too densely, as this can restrict airflow and create conditions that attract pests.
During sunny days, dry your fish in shaded areas to reduce pest activity, and bring them inside at night to protect from nocturnal creatures. Maintain a clean drying area free of debris that might attract unwanted visitors.
If you're dealing with persistent pest problems, consider alternative drying methods like vacuum or heat pump drying. You can also incorporate initial salting or brining before drying to make the fish less attractive to pests.
For additional protection, cover your drying fish with lightweight, breathable materials when they're not in direct sunlight, and avoid drying during periods of high humidity or rain.
Testing For Proper Dryness
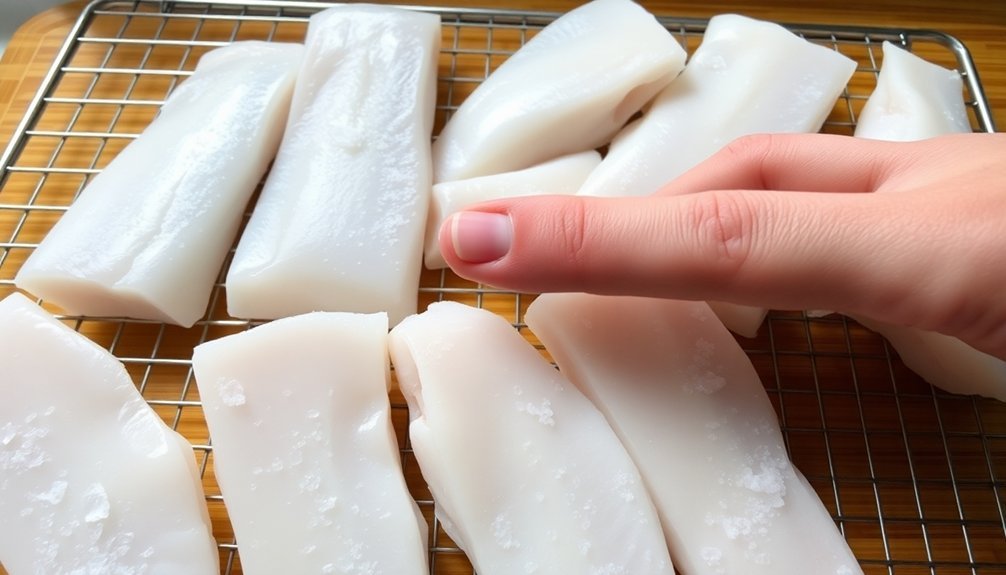
Testing dried fish requires both visual and tactile inspection to verify it's properly preserved.
You'll need to check for a hard, leathery texture and ascertain there's no moisture or soft spots remaining. Break off a piece from the thickest part to confirm it's dry all the way through – it should feel like hard, fishy paper and flake apart easily in your hands.
Key indicators of properly dried fish:
- Uniform color with no signs of moisture or mold
- Doesn't stick to your finger when touched
- Flexible but not soft texture
- Breaks cleanly and flakes easily
- Hard and leathery throughout, even in thick areas
The drying time will vary based on your chosen method and environmental conditions.
If you're air-drying, ensure good ventilation and temperatures below 50°F. For sun drying, maximize direct sunlight exposure. When using a dehydrator, check after 10 hours and adjust as needed. For oven drying, monitor the fish at different temperatures between 50-65°C.
Remember that thicker cuts will need more time, and you'll want to maintain enough flexibility to prevent the fish from becoming too brittle.
Safe Storage Techniques
Proper storage plays a critical role in preserving your dried fish for months to come. You'll need to store your dried fish in a cool, dry place using moisture-proof containers like plastic zipper bags, clean glass jars, or vacuum-sealed bags. When properly stored, your dried fish can last between 6 to 12 months.
For maximum shelf life, keep the fish's water activity at 0.85 or below and regularly check for any signs of spoilage or moisture exposure. If you're planning for long-term storage, consider freezing your dried fish at 0°F (-18°C) or below. When freezing, wrap the fish tightly in moisture-proof bags or use a combination of plastic wrap and aluminum foil.
To prevent cross-contamination, always handle your fish with clean hands and use separate cutting boards for seafood. Don't use wooden boards; instead, opt for plastic, acrylic, or rubber surfaces that are easier to sanitize.
When packaging your dried fish, make sure you're using airtight, vapor-proof materials to prevent rehydration. Remember to mark the freezing date on your packages and store them away from any potential moisture sources to maintain quality.
Common Drying Problems
Even with careful storage practices, you'll likely encounter several challenges when drying fish at home. Understanding these common problems will help you prevent or address them effectively during your fish drying process.
- Mold growth occurs when humidity exceeds 75%, especially at temperatures between 30-35°C.
- Salt burn develops if you're using fine-grain salt, causing rapid surface drying without proper penetration.
- Case hardening happens when fish dries too quickly, creating a dry exterior but leaving the center wet.
- Rancidity affects oil-rich fish like mackerel, causing unpleasant flavors and yellow-to-brown discoloration.
- Insect infestations can occur during initial drying and storage, particularly from blowflies.
You can prevent most of these issues through proper techniques. For mold prevention, dip your fish in a 5% calcium propionate solution mixed with saturated brine for 3-5 minutes.
Use a combination of large and small salt grains for even drying. Control temperature and humidity carefully to avoid case hardening.
For fatty fish, guarantee proper storage conditions and consider using antioxidants. Keep your drying area clean and well-ventilated to minimize insect problems.
Early detection of these issues allows for timely intervention before they become severe.
Frequently Asked Questions
Can I Dry Fish Indoors Using a Fan and Air Conditioning?
Yes, you can dry fish indoors using a fan and AC. You'll need good ventilation, consistent temperature control, and proper spacing on drying racks. Make sure your AC reduces humidity below 75%.
How Long Will Properly Dried Fish Remain Safe to Eat?
You can keep properly dried fish for 6-12 months in cool, dry storage. If you vacuum-seal and freeze it, it'll last up to a year. Once opened, you'll need to eat it within 1-2 weeks.
What Happens if It Rains During the Drying Process?
If it rains during drying, you'll need to quickly move your fish indoors. Rain can spoil your fish, cause unbearable odors, attract worms, and reverse the drying progress. Don't let it get wet!
Can I Air-Dry Frozen Fish After Thawing?
You shouldn't air-dry thawed frozen fish because it's already lost moisture during freezing and thawing. The texture won't be right, and there's a higher risk of bacterial growth. Use fresh fish instead.
Why Does My Dried Fish Sometimes Develop a White Powdery Coating?
Your dried fish's white powdery coating is likely caused by moisture reabsorption, insect infestations, or fungal growth. It can also happen if you've used pesticides or haven't dried the fish completely before storage.
In Summary
You've now mastered the basics of air-drying fish at home. Remember to select fresh fish, maintain proper sanitation, and monitor the drying process closely. Don't rush – successful drying takes patience and attention to detail. With these techniques, you'll be able to preserve your catch safely and enjoy the unique flavor of home-dried fish for months to come. Keep practicing, and you'll perfect your method.


Leave a Reply