
Root cellars offer you a time-tested way to preserve fresh produce year-round without electricity by using the earth's natural cooling properties. You'll need to dig at least 4 feet underground and maintain temperatures between 32-50°F with humidity levels of 85-95%. Choose a well-drained location, build sturdy walls with moisture-resistant materials, and install proper ventilation with intake and outlet vents. You can store various foods including fruits, vegetables, and nuts by organizing them according to temperature needs and using containers with sawdust or peat moss. The success of your underground pantry depends on understanding the essential details of construction, storage, and maintenance.
What Is A Root Cellar
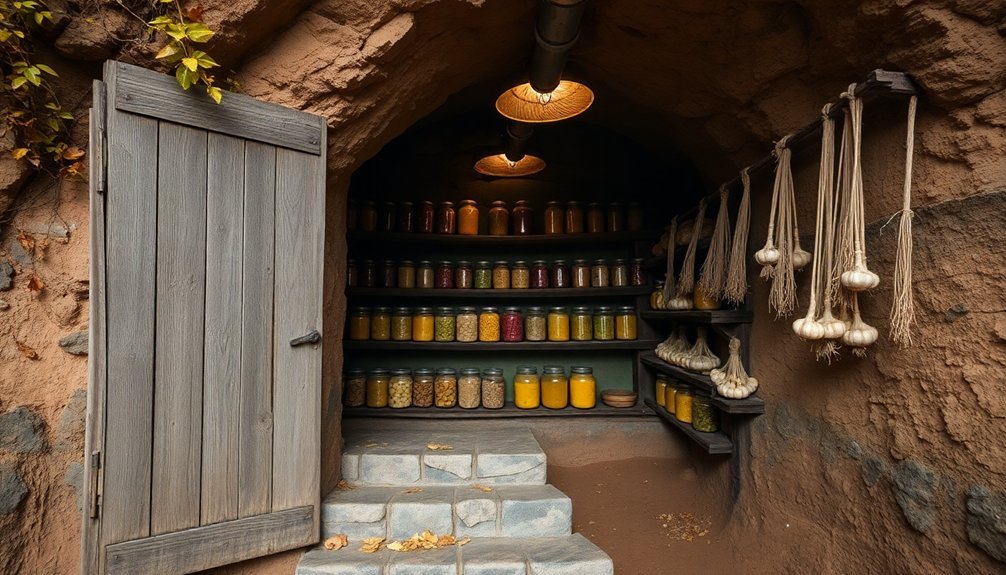
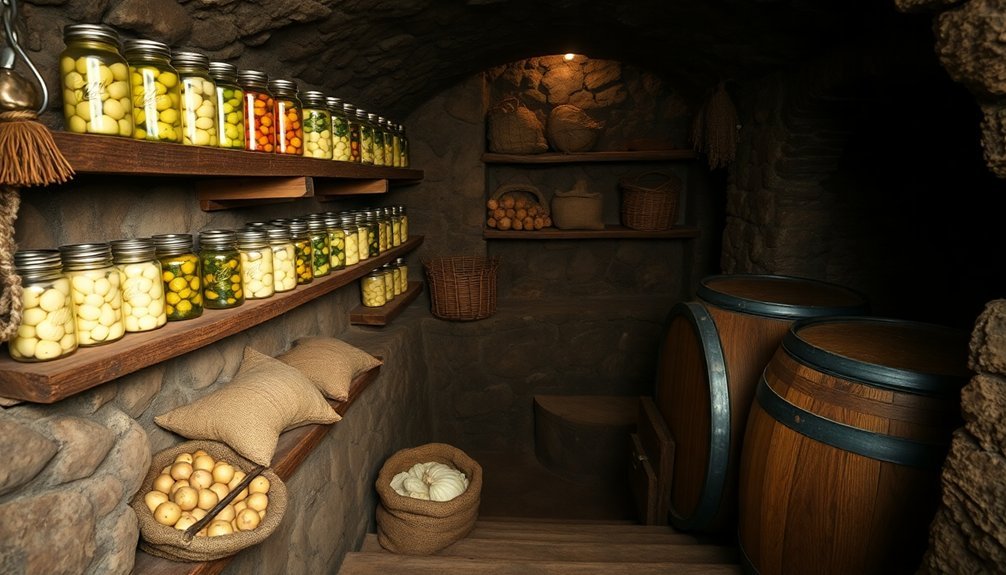
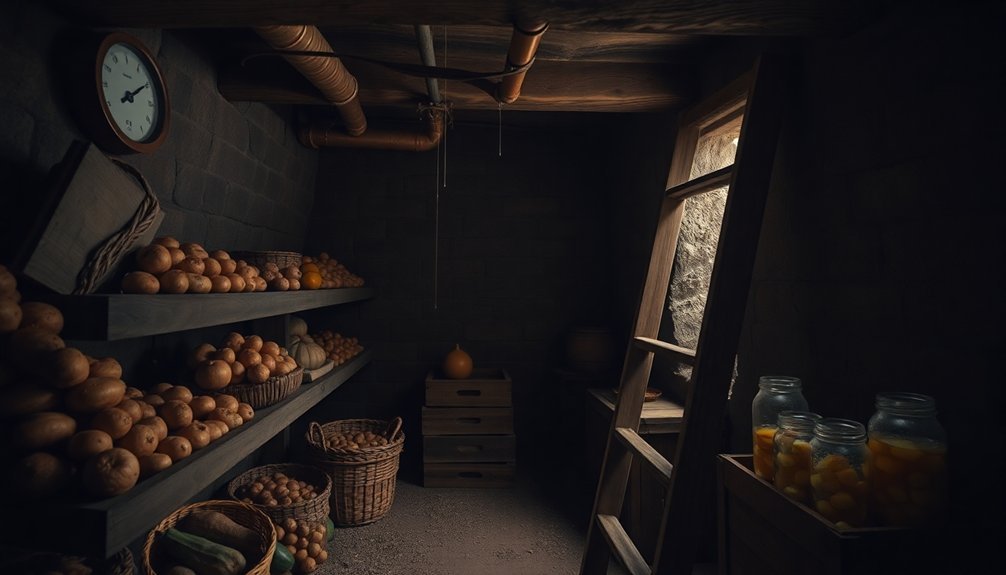
Storing food without electricity might seem like a challenge, but that's exactly what a root cellar does best. A root cellar is an underground or partially underground structure that maintains a natural cooling environment for preserving your food throughout the year.
While its name suggests it's only for root vegetables, you can actually store a wide variety of fruits, vegetables, and nuts in this traditional storage space.
You'll find that a root cellar works by keeping temperatures consistently cool and humidity levels high. These conditions prevent your food from freezing during winter months and stay cool enough in summer to avoid spoilage. The ideal temperature range is between 32-70°F, depending on what you're storing, with humidity levels typically maintained at 90-95%. Historically, these structures were critical for farm survival during long winter months when fresh food was scarce.
You can build a root cellar into the ground, a hillside, or beneath your house using materials like earthbags, cordwood, or metal roofing.
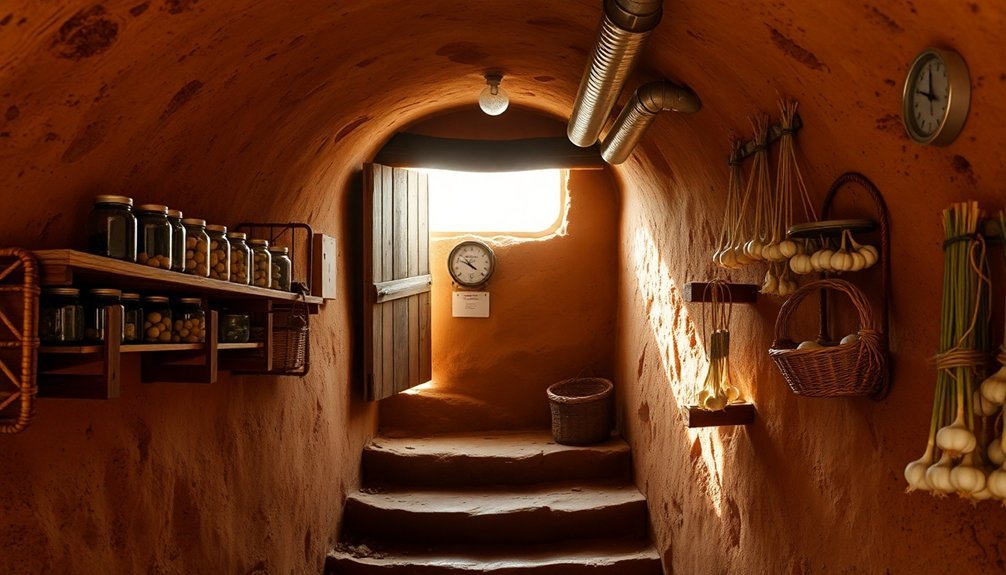
The structure's design often includes insulated roofing and can be accessed through a door, steps, or trap door. To monitor conditions without entering, you'll want to install temperature and humidity gauges.
Planning Your Underground Storage Space
Before breaking ground on your root cellar, you'll need to make several key decisions about its design and location.
Start by determining the size you'll need – a standard 8 x 8 foot space works well for most families and provides enough room for shelving and storage bins. Don't forget to factor in standing room and future expansion needs.
Next, choose the type of root cellar that best suits your property. You can opt for a traditional underground cellar, a hill design, or even utilize the space under an existing structure like a porch. Maintaining optimal humidity levels between 85-95% is crucial for preserving your stored produce.
Consider your terrain, budget, and time constraints when making this decision.
When selecting your location, look for an area with stable soil conditions and minimal rock content. You'll want to avoid spots that receive direct afternoon sunlight if any portion will be above ground.
The location should also allow for proper ventilation – you'll need to install intake vents near the ground and exhaust vents near the ceiling to create essential air circulation.
Finding The Perfect Location
When you're selecting the perfect spot for your root cellar, you'll want to focus on natural drainage patterns to prevent water accumulation and potential flooding issues.
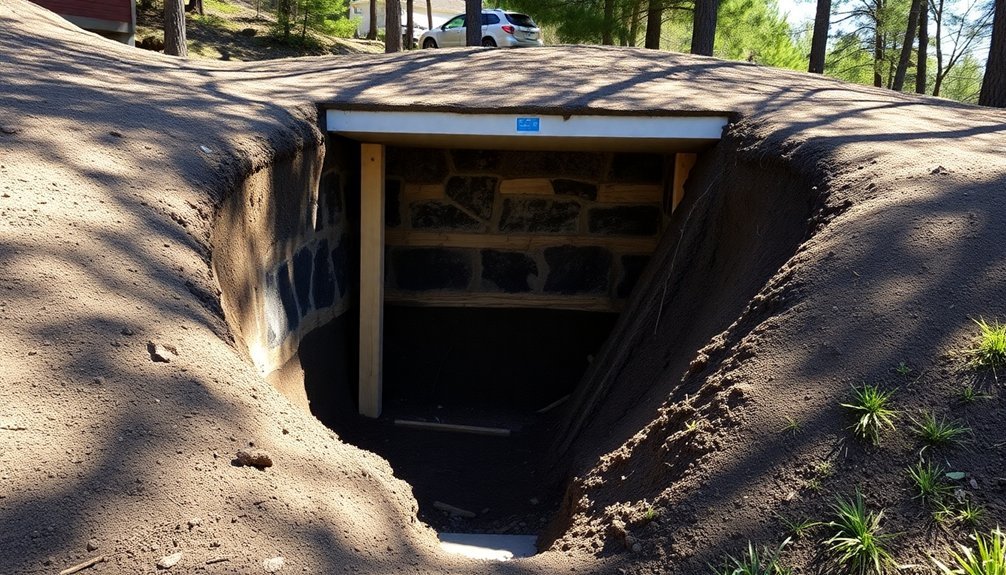
You'll benefit from the earth's natural insulation properties by choosing a location that maintains consistent temperatures, such as a hillside or well-drained slope. The ideal depth should be at least 4 feet underground to maintain stable soil temperatures throughout the year.
Your chosen site should also offer protection from harsh weather conditions while remaining easily accessible during all seasons.
Ideal Drainage Conditions
Throughout the process of building a root cellar, proper drainage stands as one of the most significant factors in finding the perfect location.
You'll want to focus on soil composition first, selecting a site with sandy soil that allows water to seep through naturally. Clay-heavy soils won't provide the drainage your cellar needs and should be avoided.
The site's elevation plays an essential role in preventing water accumulation.
You'll need to position your cellar on an elevated slope where water naturally runs away from the structure. Don't place it in low-lying areas where water tends to collect, as this can lead to flooding and moisture problems.
To guarantee ideal drainage, you'll need to implement specific systems.
Install a French drain around the cellar's exterior base, and layer the floor with gravel or rocks. You can also dig a deeper drainage hole adjacent to the cellar.
Don't forget to add protective measures like water barriers on the exterior walls and waterproof coatings where necessary.
Install rain gutters to direct water away from the cellar's perimeter, and use screens to keep out unwanted pests while maintaining proper airflow.
Natural Temperature Control
The success of your root cellar depends heavily on maintaining consistent, cool temperatures between 32-40°F (0-4°C). Going underground is your best strategy, as the earth's natural insulation provides stable temperatures year-round.
If you're storing vegetables, you'll want to avoid temperatures above 40°F that can trigger sprouting and decay, while keeping them safely above freezing to prevent damage.
Underground locations offer natural advantages you won't find above ground. The earth's consistent temperature shields your stored produce from seasonal extremes, while the ground's moisture helps maintain proper humidity levels.
You'll need proper ventilation to prevent mold and regulate air quality, so install vents at both floor and ceiling levels with protective screens.
- Choose a location with adequate soil depth and low water table to guarantee proper insulation and prevent flooding
- Install separate entrance options (outside door or trap door) to minimize temperature fluctuations when accessing stored items
- Consider your climate carefully – if you're in a warm southern region, you might need alternative preservation methods like canning
Remember that proper air circulation is essential, so design your ventilation system to allow natural airflow while maintaining those vital cool temperatures.
Protected From Elements
Finding the perfect location for your root cellar starts with protecting it from nature's harsh elements. You'll want to select a spot that's naturally shaded and away from direct sunlight, as exposure to sun can dramatically affect temperature stability and accelerate food spoilage. Look for areas under existing structures like porches or decks, or consider utilizing a hillside that offers natural protection.
When choosing your location, verify it's on stable ground that provides good drainage to prevent water accumulation. You don't want your root cellar in an area prone to flooding or excessive moisture, which can lead to mold growth and structural issues.
If you're converting a basement or crawlspace, check that the area is properly insulated and protected from outside weather conditions.
Your root cellar's ventilation system should be sheltered from rain and snow while still allowing proper air circulation. This balance is essential for managing humidity levels and preventing ethylene gas buildup.
Consider installing adjustable vents that you can control based on weather conditions. Remember to position your cellar's entrance away from prevailing winds and verify it's easily accessible for regular maintenance and harvest storage.
Essential Tools And Materials
Building a root cellar requires careful preparation and a specific set of tools and materials before you begin construction.
You'll need basic tools like shovels for excavation, a 4-foot level to guarantee proper alignment, and specialized items such as wire cutters and a rebar cutter for structural work. The construction process demands both heavy-duty materials for stability and protective materials for insulation.
Your material list should prioritize durability and moisture resistance. For the main structure, you'll need sandbags, dirt with clay content, and barbed wire for reinforcement. The insulation and roofing components require specific materials to protect against temperature fluctuations and water damage.
- Structural materials: 6-mm plastic sheeting, 3/8-inch rebar, and cinder blocks create a solid foundation and walls
- Insulation materials: Styrofoam blueboard, foam board, and OSB provide necessary temperature control
- Finishing materials: Concrete powder, lime, and metal roofing guarantee longevity and weather protection
Don't forget to source materials that can withstand underground conditions.
You'll want to combine cement powder with sawdust for proper wall coating, and guarantee your roofing materials can handle soil pressure and moisture exposure.
Digging Your Root Cellar
With your tools and materials ready, it's time to break ground on your root cellar project. Choose a shady, north-facing location with good drainage and natural protection from the elements. You'll want a spot that's easily accessible while staying below the frost line to prevent freezing during winter months.
Before digging, clear all vegetation and debris from your chosen site. Mark the cellar's dimensions on the ground, adding extra space around the perimeter for backfill and construction needs. Level the surface to guarantee proper excavation, removing any rocks or roots that might interfere with your work.
Start digging your hole at least 6 feet deep, maintaining straight, sturdy walls throughout the process. Create a deeper perimeter ditch for your footer, and shape the entrance area to accommodate steps if needed.
You'll want to keep the excavated dirt nearby for later backfilling. If you're building a larger cellar, consider renting heavy equipment to make the job easier.
Level the bottom thoroughly once you've reached your desired depth. Install necessary support structures to prevent cave-ins, and double-check that your excavation provides a stable foundation for your cellar's construction.
Building Strong Foundation Walls
Your root cellar's foundation walls need proper materials and methods, starting with a well-cured concrete footer that's reinforced with rebar and extends below the frost line.
You'll want to build load-bearing walls using either concrete blocks or poured concrete, reinforced with vertical and horizontal rebar placed at regular intervals.
A reliable waterproofing system, including proper drainage and moisture barriers, will protect your cellar's contents from water damage and maintain ideal storage conditions.
Foundation Materials and Methods
Strong foundation walls form the backbone of a successful root cellar, requiring careful selection of materials and proper construction methods.
You'll need to start with proper excavation, digging below the frost line and guaranteeing a level surface. For the foundation itself, you've got several reliable options: bricks offer excellent durability against moisture and cold, while concrete provides superior strength and stability. If you're working with a tighter budget, consider cinder blocks or earthbags.
Before building walls, you'll need to construct proper footers. Pour concrete footers that are 7¼ inches deep and either 16 inches wide for block walls or 8 inches wide for poured concrete walls. Include reinforcing rods for added strength, and allow three to seven days for proper curing.
- Use a backhoe or excavator for larger cellars to save time and guarantee precise digging
- Install perforated drainpipes with proper slope and cover with gravel for effective drainage
- Apply 6-mil plastic sheeting to prevent silt accumulation and protect against moisture
Remember to incorporate proper drainage and insulation systems during construction.
Add gravel bedding beneath the footer, and guarantee all materials are properly sealed and reinforced to prevent shifting or collapse over time.
Load-Bearing Wall Construction
Building load-bearing walls demands careful attention to both structural design and material placement.
You'll want to construct your walls into a hillside whenever possible to maximize natural earth insulation. For peak strength, install horizontal rebar every 12 inches and vertical rebar every 24 inches, using either #4 or #3 rebar depending on your specific load requirements.
When laying bricks or blocks, use a four-to-one ratio of sand to cement in your mortar mix, adding a small amount of lime additive for better workability.
You'll need to verify each layer is level and properly aligned, removing excess mortar as you go. For an 8 x 8 root cellar, plan on using 18 rebars total – nine horizontal and nine vertical.
Don't forget to incorporate proper ventilation into your wall design through strategically placed vent holes.
If you're using structural insulated panels (SIPs), you'll need adequate support while positioning them.
Remember to extend your footings below the frost line and consider adding angled wings or extensions to enhance wall stability.
Your wall structure must be capable of handling both the earth's weight and any additional external pressures.
Waterproofing and Drainage Systems
For effective root cellar construction, proper waterproofing and drainage systems form the critical foundation of your build. You'll need to start with exterior waterproofing by applying sealants or membranes to your foundation walls after excavation.
While this process can be disruptive, it provides long-term protection against water infiltration.
Install a French drain system around your foundation, using perforated pipes covered with gravel. Confirm you maintain a proper slope of 1 inch per 8 feet and protect the pipes with heavy roofing paper or plastic sheeting to prevent clogging.
The drainage system should connect to daylight for effective water flow.
Inside your root cellar, you'll want to implement multiple moisture control measures:
- Install an interior French drain connected to a sump pump system
- Apply DryLok or similar waterproof coating to interior walls
- Place plastic sheeting over gravel floors to prevent rising moisture
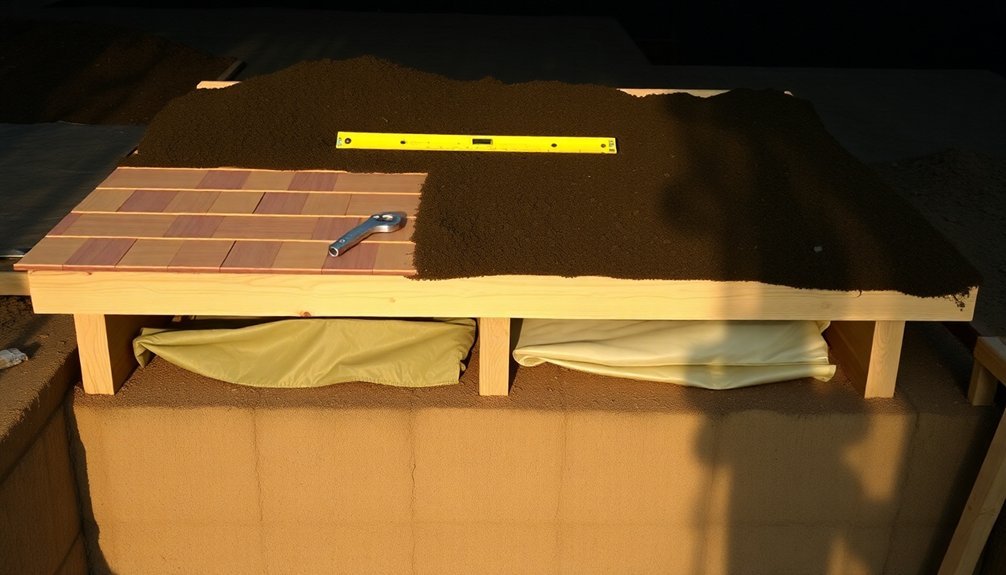
Don't forget to install rain gutters above ground and cover your root cellar with 2-4 feet of earth topped with grass.
Add insulation like urethane or Styrofoam to the roof's exterior surface to regulate temperature and prevent condensation issues.
Constructing A Weatherproof Roof
A weatherproof roof stands as the most critical component of any root cellar, protecting your stored goods from moisture damage and decay.
You'll need to start with a strong foundation using reinforced concrete slabs, supported by temporary bracing with 2x6s and poles during construction. Frame the sides using the top row of blocks before pouring the concrete.
Build your roof with an arch design to allow condensation to run down the sides, preventing mold buildup.
You'll want to install a double-layer waterproofing system: first, apply a standard waterproof layer, then add a root-resistant barrier to protect against any vegetation damage from above. For additional protection, use plywood or OSB for sheathing and structural support.
Don't forget to insulate properly with 4-inch rigid insulation boards on both ceiling and walls.
You'll need to guarantee proper air circulation while maintaining a tight seal. Use spray foam to fill any gaps between materials.
Before finishing, conduct closed water tests to verify your waterproofing's effectiveness.
Install drainage and aeration panels to manage moisture levels and maintain ideal storage conditions in your root cellar.
Ventilation And Temperature Control
Maintaining proper ventilation and temperature control is essential for preserving your stored produce throughout the year.
You'll need at least one intake vent near the ground and one outlet vent close to the ceiling to create natural air circulation. This setup takes advantage of cold air's heavier weight, creating a natural convection that exchanges stale air with fresh air.
To optimize your root cellar's environment, keep the temperature between 40°F and 50°F, and monitor it regularly with thermometers. During warm seasons, open your vents at night to let in cooler air, but seal them tightly during winter using packed cloth or expanding foam to prevent freezing temperatures.
- Install vents on opposite walls when possible, though they can work side-by-side.
- Use fans for active ventilation when outside temperatures are lower than inside.
- Consider automated vent controls that respond to temperature differentials.
Don't forget to manage humidity and ethylene gas. Instead of heat-generating humidifiers, use porous materials with water to add moisture to the air.
Maintain consistent air circulation to prevent ethylene gas buildup, which can speed up produce ripening and rotting. If humidity becomes excessive, use products like Absorpole to reduce moisture levels.
Storage Methods For Different Foods
To maximize your root cellar's efficiency, you'll want to organize your root crops in specific zones based on their temperature needs and storage requirements.
Place hardier vegetables like beets and carrots in the coldest areas (32-40°F), while keeping potatoes in slightly warmer, darker spots to prevent sprouting.
Pack your root vegetables in containers filled with sawdust or peat moss to maintain proper humidity levels, and separate fruits like apples from other produce to prevent their ethylene gas from affecting nearby crops.
Root Crops Storage Layout
Proper root crop storage demands a methodical approach to layout and organization.
You'll need to arrange your root vegetables in a way that maximizes both space and ventilation while maintaining ideal moisture levels. When setting up your storage area, group vegetables with similar requirements together, and keep incompatible items like potatoes and onions separate to prevent premature spoilage.
Start by preparing your containers with adequate ventilation holes and appropriate moisture-retaining materials.
You'll want to layer your storage medium – whether it's damp sand, sawdust, or sphagnum moss – with your vegetables, making sure they don't touch each other or the container walls.
- Place hardier vegetables like potatoes and rutabagas in deeper bins or buckets on lower shelves, using paper bags or wooden crates with proper ventilation.
- Store shorter-term items like radishes in the upper areas, wrapped in damp towels or in perforated plastic bags for easy access.
- Arrange onions in mesh bags or slatted crates in a separate, well-ventilated section after proper curing.
Remember to maintain single layers when using refrigerator storage, and drill additional holes in containers if needed to guarantee proper airflow throughout your root cellar setup.
Temperature Zones For Produce
In a root cellar, different produce items require specific temperature and humidity zones for ideal storage.
You'll need to organize your produce into four main storage zones to maximize shelf life and maintain quality.
The coldest zone should stay between 32-40°F with very high humidity (90-95%) for root vegetables like beets, carrots, parsnips, and celeriac.
This zone's also ideal for leeks, kohlrabi, and Chinese cabbage.
Adjacent to this, create a cold and damp zone (32-40°F, 80-90% humidity) for storing apples, cabbage, potatoes, and citrus fruits.
For produce that needs cool and damp conditions (40-50°F, 85-90% humidity), designate a separate area for short-term storage of items like cucumbers, eggplants, and ripe tomatoes.
You'll also want to establish two dry storage zones: a cool one (35-40°F, 60-70% humidity) for garlic and onions, and a moderately warm one (50-60°F, 60-70% humidity) for winter squash, pumpkins, and sweet potatoes.
Pest Prevention Strategies
Effective pest prevention in your root cellar relies on four key strategies: physical barriers, natural deterrents, environmental controls, and structural maintenance.
Start by installing tight-fitting lids and covering ventilation holes with wire mesh or hardware cloth. Elevate your root cellar's base using bricks or concrete blocks to prevent burrowing rodents, and wrap storage containers with hardware cloth to stop mice from chewing through.
Natural deterrents provide an additional layer of protection. Place peppermint or eucalyptus oil-soaked cotton balls throughout your cellar, and plant pest-repellent herbs like mint and lavender around the perimeter.
You'll also want to maintain a clean environment by removing spoiled produce promptly and keeping the surrounding area free of weeds.
- Install a door sweep or rubber gasket to create an airtight seal
- Create a gravel barrier around the cellar's perimeter
- Sprinkle diatomaceous earth to control insect populations
Regular structural maintenance is vital. Check for gaps or weaknesses in the walls, verify proper ventilation with screened openings, and consider installing perimeter fencing with buried hardware cloth.
Monitor for pest activity using non-toxic traps and address any issues immediately to maintain a pest-free storage environment.
Year-Round Maintenance Tips
Your root cellar's longevity depends on consistent year-round maintenance focused on four critical areas: ventilation, temperature control, humidity management, and regular inspections.
You'll need to check your ventilation system regularly, guaranteeing ceiling vents remain clear for warm air escape and ground-level pipes stay unobstructed for cool air intake.
Monitor airflow patterns seasonally and adjust fans as needed to maintain proper circulation.
Keep your cellar's temperature between 32-40°F (0-4°C) by monitoring insulation effectiveness and making seasonal adjustments.
In summer, you can use stored winter ice to maintain cool temperatures.
Check your temperature gauges from outside to avoid unnecessarily opening the cellar door.
Maintain humidity levels between 85-95% by adjusting ventilation and using natural insulation materials.
You'll want to inspect humidity gauges regularly and guarantee even distribution through proper air circulation.
Conduct thorough inspections for signs of pests, mold, or decay without disrupting the internal environment.
Remove spoiled produce immediately, sanitize storage areas regularly, and rotate your stored items to minimize waste.
Your maintenance routine should adapt to seasonal changes while maintaining consistent monitoring of these critical factors.
Frequently Asked Questions
How Long Does It Take to Build a Root Cellar?
You'll need 3-6 weeks to build a root cellar, depending on your experience, weather conditions, and cellar complexity. The curing time for concrete and settling periods account for most delays in construction.
Can I Build a Root Cellar in Areas With High Water Tables?
Yes, you can build a root cellar in high water table areas, but you'll need to use above-ground or partially-buried designs like earth berms or hillside structures instead of traditional underground cellars.
What's the Average Cost to Build a Basic Root Cellar?
You'll typically spend between $2,600 and $11,500 for a basic root cellar, but you can reduce costs to around $400-$1,000 if you're willing to DIY with simple materials and designs.
Do Root Cellars Attract Snakes or Other Wildlife?
Yes, your root cellar can attract snakes and wildlife, especially if rodents are present. You'll need to seal entry points, use proper vents and screens, and maintain cleanliness to minimize unwanted visitors.
Can Multiple Families Share One Root Cellar Effectively?
Yes, you'll find that multiple families can effectively share a root cellar. It requires good organization, clear communication, and shared responsibilities. The community effort reduces costs and workload while fostering stronger neighborhood bonds.
In Summary
You'll find that a well-built root cellar is worth every bit of effort you've invested. Keep monitoring temperature and humidity levels, rotate your stored foods regularly, and maintain proper ventilation to guarantee your underground storage serves you year after year. Whether you're storing root vegetables, preserves, or canned goods, your root cellar will become an invaluable part of your self-sufficient lifestyle.


Leave a Reply