Start with a fresh Moulard duck breast, scoring the skin in a diamond pattern. You'll need to create a curing environment between 50-60°F with good airflow. Cover the breast completely in kosher or sea salt mixed with your choice of herbs, and let it cure for 24-48 hours in the refrigerator. After rinsing, wrap the breast in cheesecloth and hang it in your curing space for 7-14 days until it loses 30% of its weight. Monitor for acceptable white mold, slice paper-thin against the grain, and store properly. From selecting the perfect cut to achieving that silky texture, there's an art to crafting this charcuterie masterpiece.
Selecting Your Duck Breast
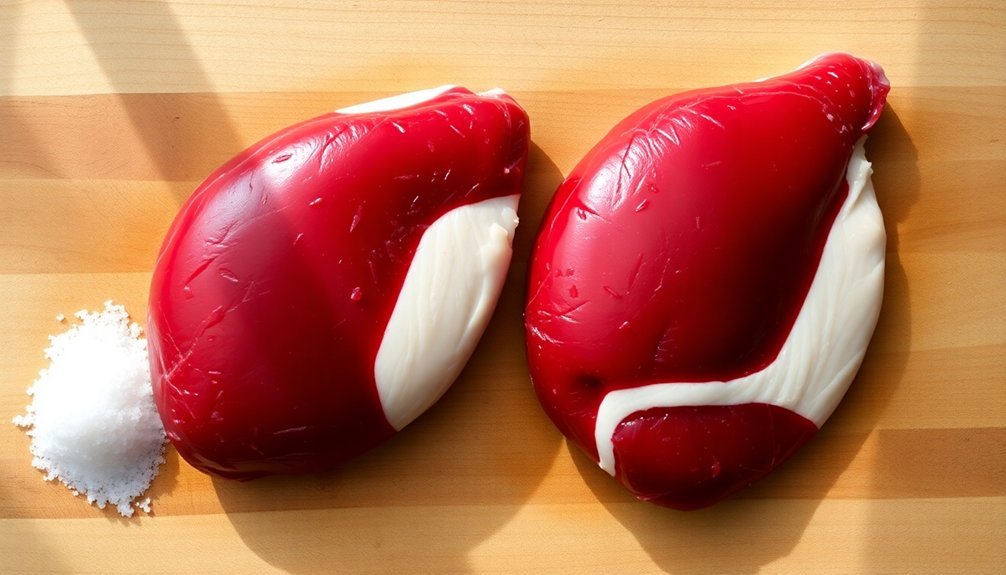
With tender meat and rich marbling, Moulard duck breast stands as the premier choice for making duck prosciutto. While you can use other duck varieties, Moulard's superior fat content and texture make it ideal for the curing process. This gourmet option typically starts at $32.50 for a whole breast.
You'll want to select fresh, boneless breasts with the skin intact, as this guarantees optimal flavor development during curing. Look for duck breasts weighing around 8 ounces each, as this size allows for consistent curing times and even results. If you're working with larger breasts, you'll need to adjust your curing duration accordingly.
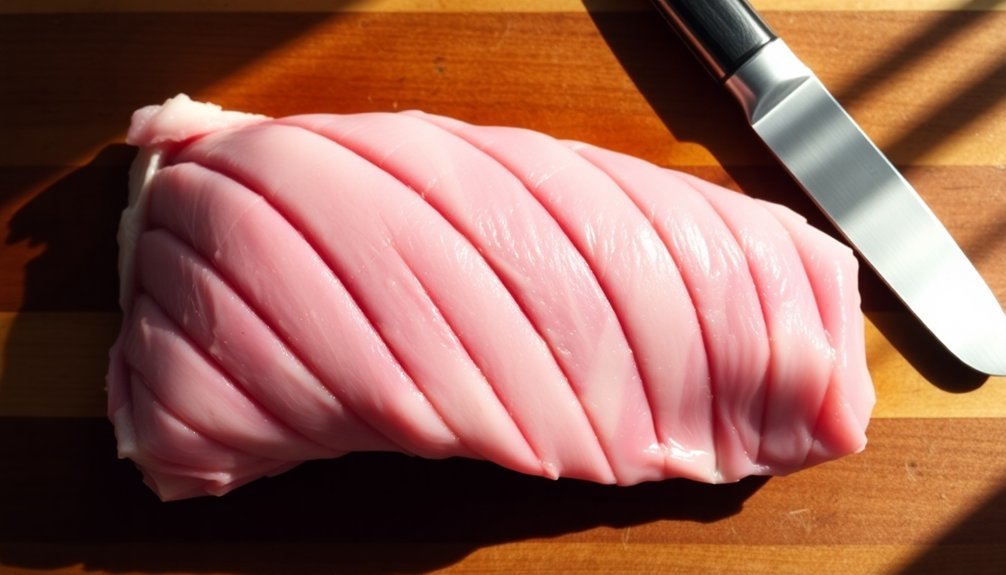
Before beginning the curing process, you'll need to prepare your breasts properly. Start by trimming any excess bits and squaring off the ends to achieve a uniform shape.
Don't remove the fat cap or skin, as they're essential for maintaining moisture and developing flavor throughout the curing process. However, you should score the skin with diagonal cuts to help the cure penetrate evenly.
Remove any silver skin or tender that could interfere with proper curing, and guarantee the skin remains undamaged to prevent spoilage during the process.
Preparing The Curing Space
Now that you've prepared your duck breast, finding the right environment for curing will determine your prosciutto's success.
You'll need a space that maintains temperatures between 50-60°F, with good airflow and high humidity levels. If temperatures rise above 65°F, you can temporarily move your prosciutto to a refrigerator, though it shouldn't stay there long due to poor air circulation. Adding fresh herbs nearby during the hanging process can enhance flavor development.
A basement, unlit fireplace, or well-ventilated garage can serve as ideal curing locations. You'll want to monitor the environment carefully using a thermometer with a humidity gauge to guarantee the best conditions throughout the process.
- Check the temperature daily – if it's too warm, your meat won't cure properly
- Monitor humidity levels – you need a consistently humid environment for proper weight loss
- Maintain good airflow to prevent stale air and potential mold growth
- Track the duck breast's weight – it must lose 30% of its initial weight to be safe
When you've found your space, wrap the duck breast in cheesecloth and secure it with string.
Remember to check regularly for mold – white mold is acceptable, but other colors indicate the curing has failed.
Scoring The Duck Skin
When scoring your duck skin, you'll want to create shallow cuts that penetrate only the fatty layer without reaching the meat beneath.
Create a uniform diamond pattern across the skin's surface by making parallel diagonal cuts in one direction, followed by intersecting diagonal cuts in the opposite direction.
Your cuts should be approximately ¼-inch apart and just deep enough to expose tiny glimpses of the fat layer, ensuring ideal salt penetration while maintaining the skin's integrity. This preparation allows the beneficial lactic acid bacteria to properly develop during the curing process.
Proper Scoring Depth Guide
Properly scoring duck skin marks a critical first step in creating prosciutto, requiring precise depth control and careful technique. You'll want to maintain a depth between 1/8-inch to 1/4-inch, depending on your duck breast's fat cap thickness. This precise depth guarantees proper salt penetration while protecting the meat beneath.
Using a sharp, sanitized knife, create diagonal cuts spaced 1/2-inch to 1-inch apart, then cross them in the opposite direction to form a diamond pattern. You'll know you've achieved the right depth when you've cut through the skin and into the fat without reaching the meat below.
- Score too deeply, and you'll risk uneven curing and premature drying.
- Score too shallowly, and the salt won't penetrate effectively.
- Keep your cuts consistent across the entire surface for uniform curing.
- Avoid tearing the skin by using gentle, controlled movements.
Once you've completed the scoring, you're ready to apply your salt and spice mixture. Confirm the cure thoroughly covers all scored areas before placing the duck breasts in a non-reactive container for the curing process.
Diamond Pattern Technique
Creating an expert diamond pattern starts with selecting the right knife – a sharp boning or utility knife will give you the precision needed for clean cuts.
You'll want to avoid serrated knives, as they can tear the skin unevenly and compromise your final product. Confirm your knife is properly sharpened before beginning, as a dull blade will damage the delicate skin.
To create the diamond pattern, you'll need to score the skin in a cross-hatch fashion across the entire breast surface.
Make your first set of parallel cuts at a 45-degree angle, then create a second set of cuts in the opposite direction to form diamonds. Keep your cuts light and consistent, penetrating only through the skin and fat layer without reaching the meat below.
Space your cuts evenly to guarantee uniform fat rendering during the curing process.
Once you've completed the pattern, inspect your work to verify you haven't scored too deeply anywhere.
Pat the surface dry with a paper towel, and immediately apply your salt cure to prevent the meat from drying out.
If you notice any silver skin, remove it before proceeding with the curing process.
Mixing Your Salt Cure
At the heart of duck prosciutto preparation lies the essential step of mixing your salt cure. You'll want to start with kosher or sea salt as your base, avoiding iodized salt which can impart harsh flavors.
For ideal results, combine your salt with complementary herbs and spices in a medium bowl to create a well-balanced cure mixture.
Here's what you'll need to create your perfect cure:
- 4-6 cups of non-iodized salt for multiple breasts, or 1 cup for a single breast
- Fresh herbs like rosemary, thyme, and sage
- Whole black peppercorns or ground black pepper
- Optional additions like fennel seeds, mace, or brown sugar for complexity
Mix all your ingredients thoroughly in a bowl until they're well combined.
While precise measurements aren't critical, you can use a 1:1 ratio of salt to meat weight as a general guide.
Once you've achieved an even mixture, you're ready to massage it into your duck breast, ensuring complete coverage on all sides.
Initial Salt Application
The essential initial salt application sets the foundation for perfectly cured duck prosciutto.
You'll need to begin by selecting a non-reactive container, such as ceramic or glass, that's just large enough to hold your duck breast. This smart sizing helps you minimize salt usage while guaranteeing proper coverage.
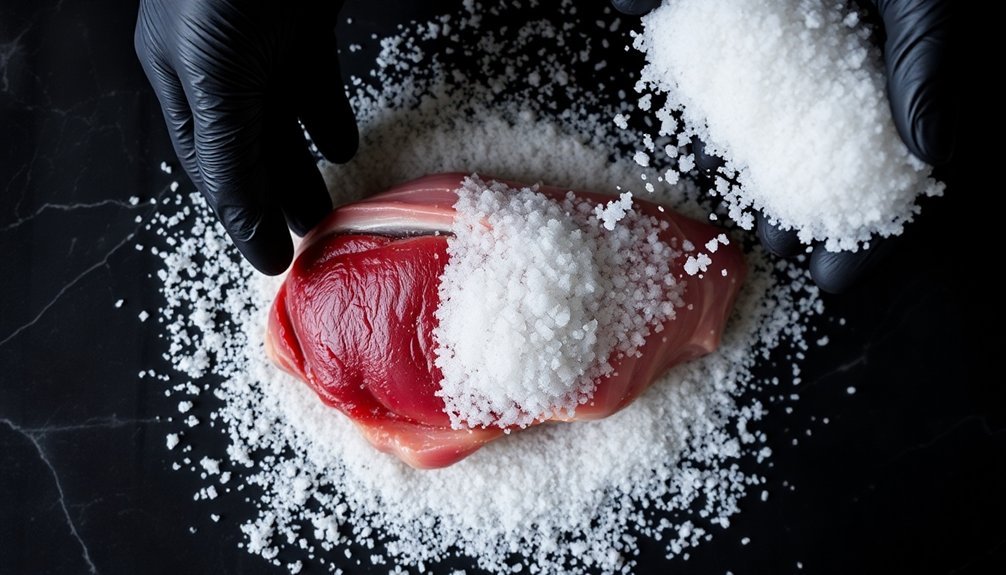
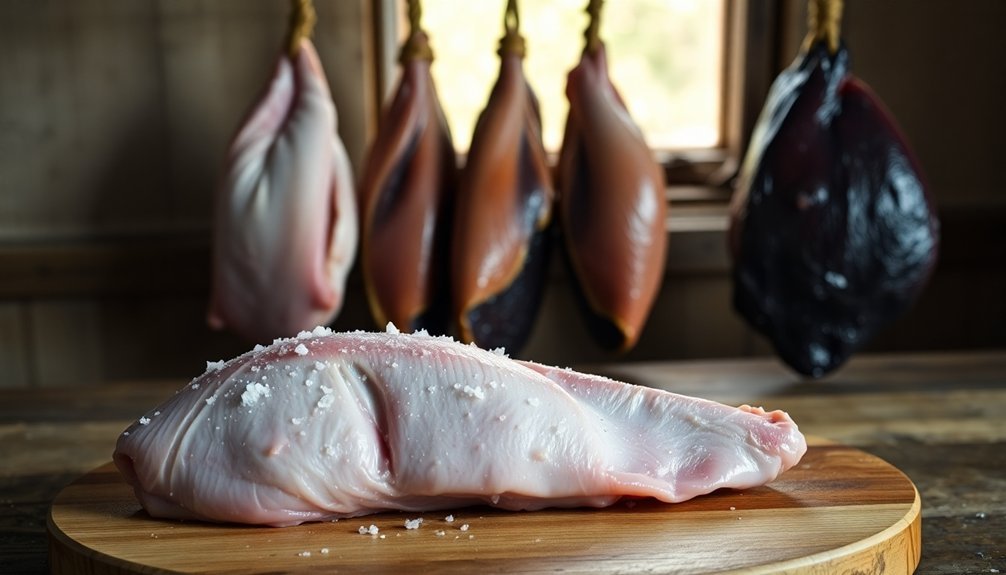
Start by spreading a half-inch layer of kosher, sea, or pickling salt across the bottom of your container.
Don't use iodized salt, as it can impart harsh flavors to your prosciutto. Before placing your duck breast on this salt bed, pat it thoroughly dry with paper towels to enhance the curing process.
Position your duck breast skin side up on the salt layer. If you're curing multiple breasts, make sure they don't touch each other to guarantee even curing.
Now comes the vital step: completely cover the duck breast with additional salt, leaving no surface exposed. This full coverage is essential to prevent spoilage during the curing process.
Finally, seal your container with a lid or plastic wrap to maintain a controlled environment.
Your proper salt application will now begin transforming your duck breast into prosciutto.
The First Week Cure
Once your salt application is complete, you'll begin the first week of curing – a period that demands careful attention to detail. During this vital phase, you'll need to maintain proper refrigeration while the salt draws moisture from the duck breasts.
Keep the meat completely covered in your salt and spice mixture, ensuring even distribution across all surfaces.
Monitor your curing duck breasts closely during the first 24-48 hours, as this is when the most significant moisture extraction occurs. You'll want to check for any pooling liquid and adjust the salt coverage if needed. Remember that leaving the meat in the cure too long can result in an overly salty product.
- Check your duck breasts daily, ensuring they're still fully covered in the cure mixture
- Maintain consistent refrigeration temperature throughout the curing period
- Record weight changes to track moisture loss
- Watch for any unusual odors or discoloration
After 24-48 hours, you'll need to rinse the duck breasts thoroughly and pat them dry with paper towels.
Once cleaned, dust them with black pepper and wrap them securely in cheesecloth, preparing them for the drying phase that follows.
Rinsing and Drying
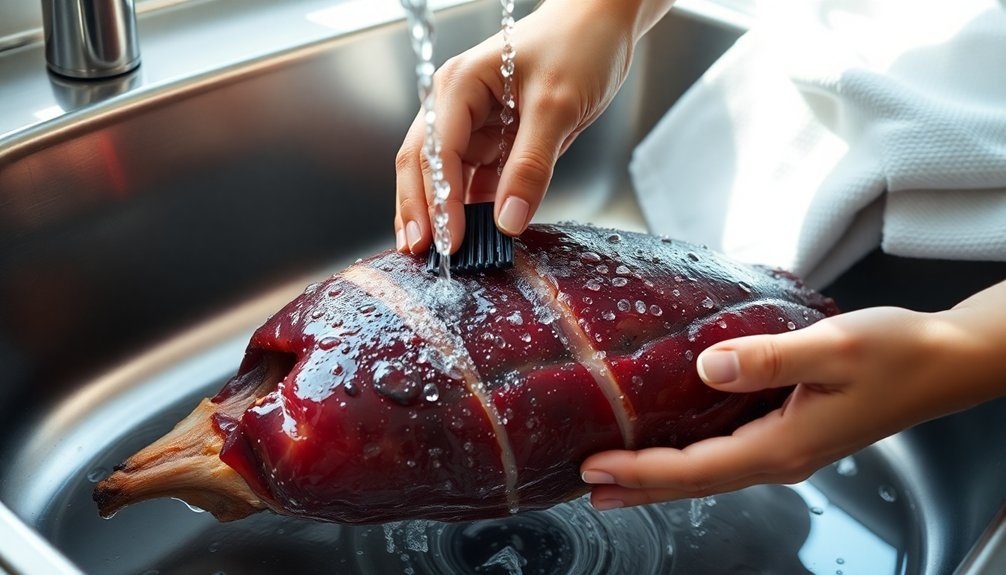
After completing the salt cure, you'll need to thoroughly rinse your duck breast under cold running water, removing all visible traces of salt.
Check that the flesh has become firm and developed a deeper color, then remove any accumulated liquid from the curing process.
Pat the breast dry with paper towels before wrapping it in cheesecloth.
You'll need to hang it in a cool, humid location where the temperature stays between 50-60°F and humidity remains at 70-80% RH.
A basement, garage, or unlit fireplace works well for maintaining these conditions.
If you're using a refrigerator as your curing chamber, place open water containers inside to maintain proper humidity.
Monitor your duck breast over the next 7-14 days as it dries.
You're aiming for approximately 30% weight loss.
During this time, check regularly for mold growth – white or green mold can be wiped away, but black mold means your duck isn't safe to eat.
Once it reaches the desired weight and texture, remove the cheesecloth, wrap the breast tightly in plastic, and store it in your refrigerator.
When properly stored, your duck prosciutto will keep for several weeks.
Wrapping in Cheesecloth
You'll want to wrap your salt-cured duck breast in double-layered cheesecloth to guarantee even drying and better protection throughout the curing process.
When wrapping, place the breast in the center of a generously sized piece of cheesecloth and fold it like a package, making sure there are no gaps or exposed areas.
Secure the wrapped breast tightly with kitchen twine, as proper tension helps maintain even coverage and prevents the meat from slipping out during the extended drying period.
Proper Wrapping Technique
The art of wrapping duck breast in cheesecloth requires careful attention to detail and proper preparation.
You'll need to start by cutting double-thickness cheesecloth pieces large enough to fully envelop your duck breast, guaranteeing they're clean and dry to maintain food safety standards.
Position your duck breast in the center of the prepared cheesecloth, skin side up, making sure it doesn't touch the edges. If you're using herbs or spices, place them directly on the cheesecloth before positioning the meat.
The wrapping process should be methodical and precise.
- Fold the cheesecloth around the duck breast like a package, maintaining even tension throughout.
- Guarantee complete coverage without gaps while allowing sufficient air circulation.
- Secure the wrapping with butcher's twine, leaving enough length for hanging.
- Double-check that the twine isn't too tight to restrict proper air flow.
Once you've wrapped the breast, hang it in a cool, humid environment between 50-60°F.
Your basement or garage might provide ideal conditions for the curing process, which typically takes about seven days or until the meat reaches your desired firmness.
Double-Layer Cloth Benefits
During the curing process, double-layered cheesecloth serves as more than just a simple wrapper for your duck prosciutto. It creates an important microenvironment that actively promotes proper aging while protecting your meat from unwanted elements.
You'll find that the dual layers provide superior moisture management, as the cloth absorbs excess liquid while maintaining ideal humidity levels around the meat. This balance is vital for achieving that 30% weight reduction you're aiming for.
The double layer also guarantees better air circulation, preventing the dreaded case hardening that can occur when the outside dries too quickly.
The two-layer approach doubles down on protection, creating a more effective barrier against dust, insects, and environmental contaminants. You'll notice it provides better structural support for maintaining the duck breast's shape throughout the curing process.
This careful wrapping method helps preserve the meat's natural flavors while allowing them to develop into that sought-after sweet, delicate profile you want in your prosciutto.
While a single layer might suffice, the double layer gives you an extra measure of control over the aging process, resulting in a more consistent final product with optimal texture and flavor development.
Avoiding Common Wrapping Mistakes
Mastering proper cheesecloth wrapping technique can make or break your duck prosciutto's final quality. You'll need to be mindful of several critical factors to guarantee your duck breast dries evenly and develops the perfect texture.
When wrapping, ensure you've cut a piece of cheesecloth large enough to completely envelop the meat while allowing for proper air circulation.
To avoid common wrapping pitfalls, follow these essential steps:
- Don't wrap the cheesecloth too tightly – you need some space for air movement, but not so loose that the wrapping becomes ineffective.
- Check for gaps or openings in your wrapping that could lead to uneven drying or exposed areas.
- Secure all edges properly with butcher's twine, making sure the wrapping won't unravel during the curing process.
- Position any additional herbs evenly around the breast before wrapping to guarantee balanced flavor distribution.
Once you've wrapped the duck breast, hang it in a cool, humid environment between 50-60°F, away from direct sunlight and drafts.
Remember to monitor the drying process regularly and flip the breast daily if it's not hanging. When the curing is complete, wrap it tightly in plastic and refrigerate until serving.
The Two Week Hang
A successful prosciutto's two-week hanging period marks the final and most transformative stage of the curing process. During this time, you'll need to maintain specific environmental conditions to achieve the perfect texture and flavor development.
| Day Check | Action Required |
|---|---|
| Day 1-3 | Monitor humidity levels, guarantee 50-60°F temperature |
| Day 4-7 | Check for any mold growth, maintain air circulation |
| Day 8-10 | Observe color changes, test firmness |
| Day 11-12 | Watch for proper weight loss progression |
| Day 13-14 | Verify 30% weight reduction, assess texture |
You'll want to hang your wrapped duck breast in a space that maintains consistent humidity, such as a basement or unlit fireplace. The ideal temperature range of 50-60°F helps prevent bacterial growth while allowing proper aging. During the two-week period, you should notice your prosciutto gradually becoming firmer and darker in color. Don't rush this process – the full 14 days are essential for developing the complex flavors and achieving the proper texture. If you've weighed your duck breast initially, you can track its progress toward the target 30% weight loss, which indicates it's ready for consumption.
Slicing and Storage
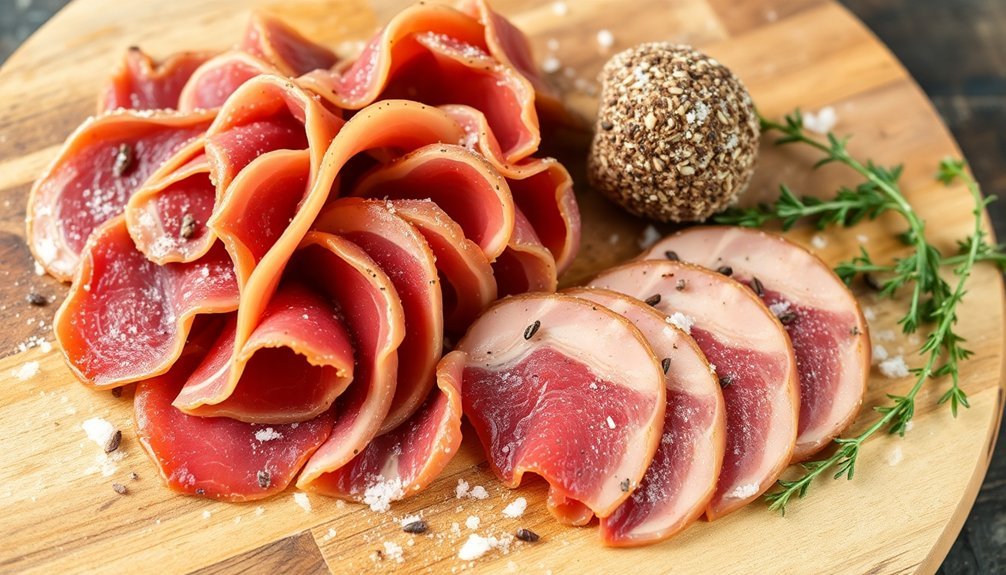
To get the most from your duck prosciutto, you'll need to slice it paper-thin against the grain with a very sharp carving knife just before serving.
When it comes to storage, wrap your cured duck breast tightly in plastic wrap and keep it in the refrigerator, where it can last for several weeks while maintaining its quality.
You can also store your prosciutto in a humid environment like a root cellar or cheese cave to prevent over-drying, but remember to check it periodically and adjust conditions as needed.
Proper Slicing Techniques
Properly slicing duck prosciutto requires specific techniques and tools to achieve the best results. Before you begin, verify your prosciutto has reached room temperature and remove any wrapping or cheesecloth. You'll want to use a sharp slicing or chef's knife to prevent tearing the meat, and pat the surface dry with a paper towel if needed.
For the finest results, follow these essential steps:
- Cut against the grain, making extremely thin slices around 1/16 inch or thinner for ideal texture.
- Maintain consistent direction and pressure while slicing to guarantee uniform thickness.
- Use a meat slicer if available for perfectly even results.
- Slice just before serving to preserve freshness and flavor.
Once you've sliced your prosciutto, you can fold or roll the pieces for an elegant presentation on a charcuterie board.
Store any unused slices in an airtight container in the refrigerator, using wax or parchment paper between layers to prevent sticking. While you can freeze sliced prosciutto, it's best to consume it within several days for peak flavor and texture.
Optimal Storage Conditions
Storing your duck prosciutto correctly will determine its longevity and flavor quality after slicing. For short-term storage, keep your sliced prosciutto in the refrigerator, tightly wrapped to maintain moisture. When properly stored, it'll stay fresh for up to two weeks while preventing bacterial growth.
If you're planning for long-term storage, freezing is your best option. You can extend the shelf life to over a year by vacuum-sealing or wrapping the meat tightly in airtight packaging before freezing. When needed, simply thaw and use without significant quality loss.
For ideal flavor development, consider storing your prosciutto in a humid environment with about 70% relative humidity. Root cellars or cheese caves provide perfect conditions that prevent over-drying while maintaining the meat's suppleness.
During the drying process, hang your prosciutto in a cool space between 50-60°F with good air circulation. You'll want to monitor the weight loss until it reaches approximately 30% of its original weight.
Remember to check regularly for any signs of mold or case hardening, ensuring your prosciutto maintains its quality throughout the storage period.
Serving Temperature Guidelines
When serving duck prosciutto, temperature plays a crucial role in maximizing its delicate flavors and textures. You'll want to serve it at room temperature, allowing the subtle nuances of the meat to fully develop.
Before serving, slice your prosciutto paper-thin using a sharp carving knife or meat slicer, aiming for uniform pieces no thicker than 1/4 inch.
For ideal presentation and taste, follow these essential steps:
- Remove the prosciutto from refrigeration 30 minutes before serving to reach room temperature.
- Slice immediately before serving to maintain freshness and prevent oxidation.
- Arrange thin slices in elegant ribbons on your serving platter.
- Pair with complementary items like fresh figs or melon for contrast.
If you've got leftover slices, wrap them tightly in plastic wrap or aluminum foil and store them in the refrigerator. You'll want to use these within a few days.
For prosciutto that's become overly dried, don't discard it – instead, grate it using a microplane to create an umami-rich topping for soups, salads, or pasta dishes. This alternative preparation method guarantees you'll get the most from your cured duck.
Frequently Asked Questions
Can I Use Frozen Duck Breast for Making Prosciutto?
Yes, you can use frozen duck breast for prosciutto, but you'll need to thaw it completely in the fridge first. While fresh is preferred, frozen will work if you guarantee it's properly defrosted and free from freezer burn.
What Causes Black Mold Spots During the Curing Process?
You'll see black mold spots when there's too much humidity, poor ventilation, or contaminated equipment. If your temperature isn't stable or your cleaning routine isn't thorough, you're creating ideal conditions for harmful mold growth.
Is It Safe to Cure Duck Without Using Pink Curing Salt?
You shouldn't cure duck without pink curing salt as it's unsafe. You'll risk dangerous bacterial growth, especially botulism. While alternatives exist, they don't provide the same safety level for proper meat preservation.
Why Did My Duck Prosciutto Develop a Tough Outer Crust?
Your duck prosciutto's tough crust likely developed due to low humidity levels or high temperatures during curing. You'll need to maintain 70-80% humidity and keep temperatures between 50-60°F for even drying throughout.
Can I Speed up the Curing Process Using a Dehydrator?
You shouldn't use a dehydrator to speed up curing. It'll only dry the meat without proper bacterial fermentation, resulting in tough, flavorless meat. Stick to traditional curing methods for the best results.
In Summary
You've now mastered the art of making duck prosciutto at home. Don't let the two-week process intimidate you – the hands-on time is minimal, and the results are worth the wait. Store your finished prosciutto in the refrigerator, wrapped tightly in butcher paper, and it'll keep for several weeks. Slice it paper-thin when serving, and you'll enjoy a delicacy that rivals any Italian salumi.


Leave a Reply