
You'll need just a few affordable essentials to start fermenting: wide-mouth Mason jars, a digital kitchen scale for measuring salt, and a non-metal weight to keep vegetables submerged (a smaller jar filled with water works perfectly). Add a sharp knife or mandoline for consistent cutting, plus a long-handled spoon for mixing brine. For temperature control, start with a basic stick-on thermometer and a cool, dark spot in your kitchen. Keep everything clean with hot, soapy water and designate these tools specifically for fermentation. There's plenty more to explore as your fermentation journey grows.
Essential Jars and Containers
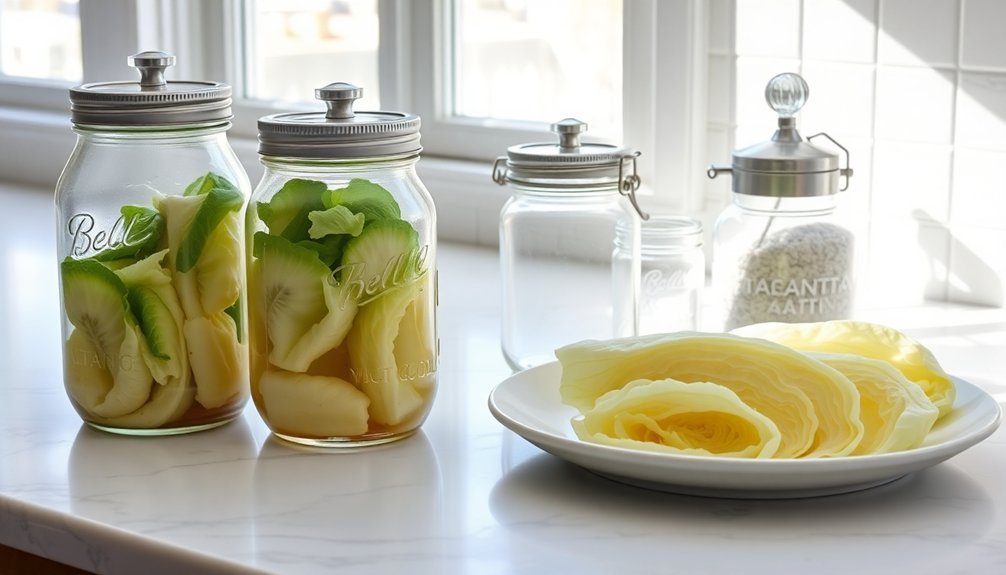
The fermentation container lineup forms the backbone of any successful fermentation project. Your primary choice should be glass jars, particularly Mason jars, which offer affordability and versatility. You'll appreciate their clear walls that let you monitor fermentation progress and spot any potential issues like mold formation. Sous-vide bags can provide a space-saving alternative for those with limited storage.
For enhanced functionality, think about glass jars with specialized lids, such as those featuring lever lid systems. These jars provide excellent sealing capabilities with replaceable rubber gaskets, and some models even offer built-in airlock functionality through water-filled grooves.
If you're planning larger batches, ceramic jars present a traditional option with ample capacity and natural, non-reactive materials.
When selecting your containers, you'll want to evaluate size options carefully. Half-gallon jars work well for smaller batches, while gallon-sized containers or ceramic crocks are ideal for larger quantities. Wide-mouth options make it easier to handle ingredients and clean the containers.
Whatever type you choose, make sure it's food-safe, durable, and simple to maintain. Remember, you can store most ferments directly in their containers in the fridge once fermentation is complete.
Weights to Keep Vegetables Submerged
Keeping fermented vegetables submerged in brine sits at the heart of successful fermentation. You'll want to guarantee your vegetables remain under the liquid to prevent mold growth and maintain an anaerobic environment. Non-porous materials are essential for weights to prevent flavor transfer between batches.
Commercial options like ceramic weights, glass Pickle Pebbles, and ViscoDisc Canning Buddies work perfectly, but you don't need to spend money to get started. Several DIY solutions can be just as effective. You can nestle a smaller jar inside your fermentation vessel or use clean cabbage leaves as a natural barrier.
For larger batches, try placing a clean plate directly on top of the vegetables in a bowl, adding weight if needed.
Your most practical weighting options:
- Use a smaller Mason jar filled with water as a weight inside your fermentation vessel
- Layer large cabbage leaves on top of your vegetables before adding weight
- Try glass Pickle Pebbles or ceramic weights if you're looking for a long-term solution
- Create a tight pack of vegetables themselves, particularly for items like carrot sticks
Remember to avoid metal weights as they'll corrode in the brine, and always guarantee whatever you're using is thoroughly cleaned before use.
Must-Have Kitchen Tools

Setting up your fermentation workspace requires six essential tool categories to guarantee success: vessels, cutting implements, weights, monitoring equipment, storage containers, and cleaning supplies.
Traditional fermentation methods have been used for centuries to preserve fresh foods naturally. Start with a selection of wide-mouth glass jars and ceramic crocks that'll accommodate different batch sizes. You'll need a sharp mandoline for precise vegetable slicing and a sturdy vegetable tamper to pack ingredients firmly.
Don't forget a fine-mesh colander for ingredient preparation and cleaning.
For maintaining proper fermentation conditions, invest in airlocks to release gases while keeping oxygen out. pH test strips and a reliable thermometer are vital for monitoring your ferments' progress.
You'll also want cheesecloth or butter muslin to keep ingredients submerged below the brine.
When it comes to storage and serving, flip-top bottles work well for fermented beverages, while Dutch ovens or cast iron pots are perfect for sourdough baking.
Keep nut milk bags handy for straining finished products. Remember to include practical items like stainless steel or glass funnels to prevent messes during transfers, and maintain several sizes of kraut weights for different vessel openings.
Measuring and Storage Equipment
Accurate measuring and proper storage equipment form the backbone of successful fermentation projects.
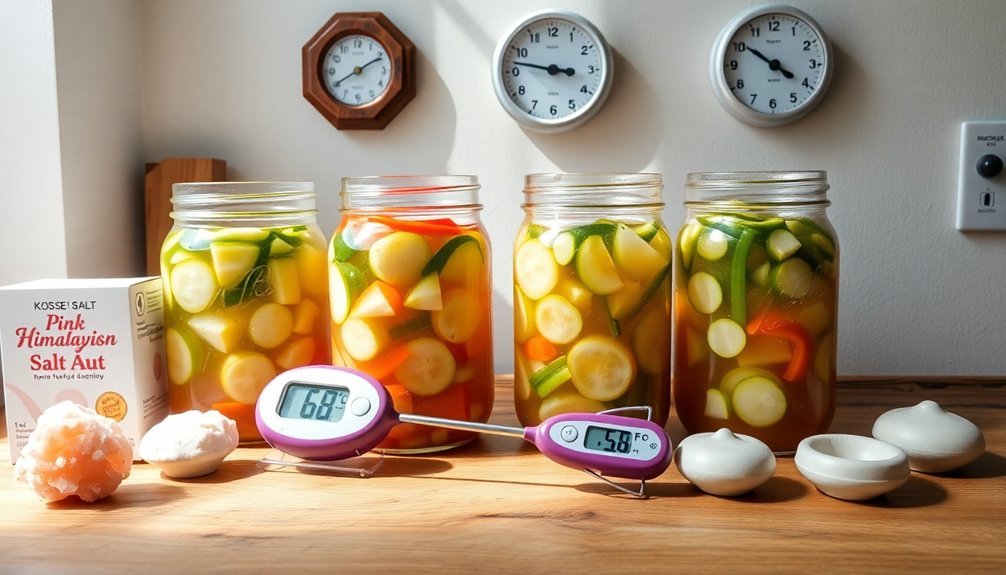
You'll need reliable tools to monitor gravity, pH levels, temperature, and ingredient weights throughout the process. A quality refractometer or hydrometer helps track fermentation progress, while pH strips or meters guarantee ideal acidity levels for your cultures.
Digital thermometers are essential for maintaining perfect temperature ranges, and precise scales help you measure ingredients accurately.
For storage, you'll want vessels that create the ideal environment for your ferments. Whether you're using Mason jars for small batches or larger fermentation crocks, proper air locks and seals are vital for maintaining anaerobic conditions.
Don't forget fermentation weights to keep your produce submerged below the brine level.
- Choose vessels based on your batch size: Mason jars for small projects, carboys for brewing, or crocks for larger ferments
- Invest in quality measuring tools first – they're essential for consistency and success
- Look for airlocks and seals that fit your vessels perfectly to maintain proper fermentation conditions
- Consider dual-purpose equipment when possible to maximize your investment and save space
Temperature Control Methods
The battle for perfect fermentation temperatures requires both heating and cooling strategies to maintain ideal conditions. You'll need to adapt your approach based on your environment and the specific fermentation requirements of your project.
For heating, you can use simple solutions like wrapping your fermenter in a sleeping bag or using heating pads. When cooling is necessary, try the wet towel method or create an ice bath setup. Here's a comparison of basic temperature control methods and their effectiveness:
| Method | Cost-Effective | Temperature Control |
|---|---|---|
| Sleeping Bag | Yes | Moderate |
| Heating Pad | Yes | Good |
| Wet Towel | Yes | Limited |
| Ice Bath | Yes | Very Good |
| Digital Controller | No | Excellent |
For precise control, you'll want to invest in a digital temperature controller like the Inkbird ITC-308. It'll help you maintain exact temperatures by managing both heating and cooling devices. Monitor your fermentation using self-adhesive thermometer strips and adjust as needed. If you're working with limited resources, create a DIY solution using an insulated chamber with basic temperature control devices. Remember to check temperatures regularly and make gradual adjustments rather than sudden changes.
Starter Brine Making Tools
Now that you've got your temperature control sorted out, making starter brine requires a specific set of tools to guarantee consistent results. A reliable kitchen scale is your most essential tool, as precise salt-to-water ratios are critical for successful fermentation.
You'll need measuring cups to maintain accuracy, especially when working with smaller batches where a 2-tablespoon-per-quart ratio is standard. For mixing your brine, you'll want dedicated containers that are large enough to accommodate your water volume while allowing room for thorough stirring.
Clean spoons and spatulas are important for making sure salt dissolves completely, preventing any undissolved crystals from settling at the bottom.
Here are the must-have tools for consistent brine preparation:
- A digital kitchen scale that measures in both grams and ounces for precise salt measurements
- Glass or ceramic mixing containers to prevent any unwanted chemical reactions
- Long-handled spoons or spatulas for thorough mixing without splashing
- Multiple measuring cups and spoons for handling different quantities
Remember to keep these tools clean and dedicated to fermentation to avoid cross-contamination and make sure your starter brine's success every time.
Frequently Asked Questions
How Long Do Fermentation Tools Typically Last Before Needing Replacement?
Your fermentation tools' lifespan varies: stainless steel vessels last 15-20 years, while plastic options like HDPE and PET last several years. With proper maintenance and cleaning, you'll extend their usable life considerably.
Can Plastic Containers Be Used Instead of Glass for Fermentation?
Yes, you can use plastic containers for fermentation, but they're better for short-term projects. While they're cheaper and lighter than glass, they're more prone to scratches and oxygen permeability, affecting your fermentation quality.
What Cleaning Products Are Safe to Use on Fermentation Equipment?
You'll want to use PBW cleaner for deep cleaning and Star San sanitizer for disinfecting your fermentation equipment. They're both safe and effective, while avoiding bleach and dish soap is recommended.
Are Expensive Fermentation Tools Worth the Investment for Beginners?
You don't need expensive tools to start fermenting. Basic Mason jars and DIY weights work great for beginners. Invest in pricier equipment like crocks and specialized airlocks only after you're sure you'll continue fermenting.
How Do You Sterilize Fermentation Equipment Without Special Cleaning Products?
You can effectively sterilize fermentation equipment by washing with hot, soapy water, then either boiling for 15 minutes or soaking in diluted bleach solution (1 tbsp per 10L water) for 5 minutes.
In Summary
You'll find that fermentation doesn't require fancy equipment to get started. With basic jars, weights, kitchen tools, measuring equipment, temperature control, and brine-making supplies, you're ready to begin your fermentation journey. As you gain confidence, you can slowly expand your toolkit. Focus on mastering the fundamentals with these essential tools, and you'll be creating delicious ferments in no time.
Leave a Reply