Traditional salt box curing methods transform your raw meat into delectable, shelf-stable charcuterie using time-tested techniques that date back thousands of years. You'll find success with the dry salt box method, which uses pure salt for basic preservation, or the salt and spice blend approach for more complex flavors. Two-stage progressive curing offers precise control, while layered salt preservation guarantees even distribution. You can also explore salt box aging chambers, heritage cold smoking, and mixed salt crystal techniques. Each method brings its own unique qualities to your cured meats, and there's much more to discover about these ancient preservation arts.
Dry Salt Box Method
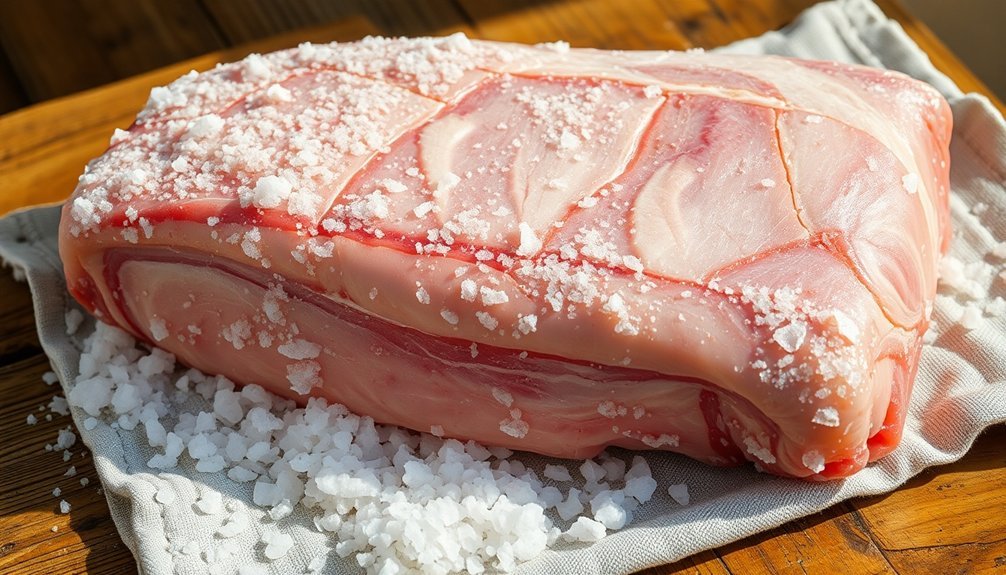
A salt box serves as the cornerstone of traditional meat preservation. When you're ready to cure meat using this time-tested method, start by selecting pure salt without any additives or anti-caking agents.
You'll need to prepare your meat by cleaning it thoroughly and guaranteeing it's ready for the curing process. The salt draws out moisture, creating an environment where harmful bacteria cannot thrive.
Begin by generously coating your meat with salt, making sure you've covered every surface and worked the salt into all crevices. You can place the salted meat in a suitable container or tray, or use a ziplock bag for smaller cuts. If you'd like to enhance the flavor, add celery seed or black pepper before applying the salt.
Store your salt-covered meat in the refrigerator and turn it every other day to guarantee even curing. The process takes 5-14 days for thinner cuts, while thicker pieces require up to two weeks. Larger cuts might need 30-40 days.
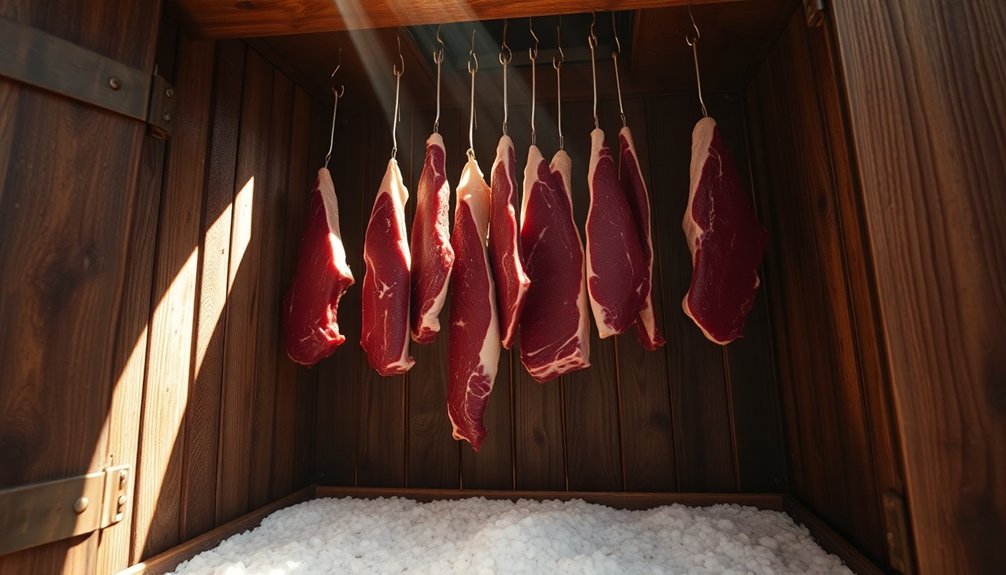
During curing, you'll notice liquid being drawn out – discard this regularly. Once curing's complete, rinse off excess salt, pat the meat dry with a lint-free towel, and hang it in a cool, dark place until it loses at least 35% of its original weight.
Salt and Spice Blend
Building on the traditional salt box method, a more sophisticated approach involves creating a specialized salt and spice blend for ideal curing results.
You'll want to start with pure salt as your base, free from anti-caking agents, and combine it with precise amounts of curing salt containing sodium nitrite. The standard ratio is 93.75% table salt to 6.25% sodium nitrite in your curing mixture. This mixture is SQF-certified in USA to ensure premium quality and safety.
To enhance flavor, you can add celery seed, black pepper, and other spices to your blend.
When you're applying the mixture, you've got several options: coat the meat directly, mix it with liquid ingredients, or use it in vacuum-sealed bags for equilibrium curing. For the latter, you'll need to use 3% of the meat's weight in salt.
Safety is essential when you're working with curing salts. You'll need to measure precisely – about 1 teaspoon for every 5 pounds of meat.
Once you've applied your blend, store the meat in a cool area and monitor it for signs of over-salting.
After the curing period, don't forget to rinse off excess salt and pat the meat dry before proceeding with your next steps.
Two-Stage Progressive Curing
You'll begin the first salt phase by thoroughly coating your meat with a heavy layer of salt and placing it in a container to cure for 3-4 days.
When you notice the salt has dissolved and created a brine, you'll need to drain the liquid and reapply fresh salt to continue the preservation process.
This method is considered an excess cure protocol that effectively preserves meat but can result in an overly salted product.
After completing both salt applications, you'll rinse the meat and proceed to the final preservation stage where the meat is hung to dry in a controlled environment until it reaches the desired firmness and weight loss.
First Salt Phase Process
During the first phase of traditional salt box curing, meat undergoes an intensive salting process that initiates preservation through controlled moisture removal.
You'll need to coat your meat thoroughly with pure salt, making sure to avoid any salts containing anti-caking agents or added minerals. Place your meat in a container and bury it completely in salt to guarantee uniform coverage. If you'd like to add flavoring, you can incorporate celery seed and black pepper at this stage.
The science behind this initial phase relies on two key processes: diffusion and osmosis. As you store your container in a cool area between 32°F and 40°F, salt begins to dissolve in the moisture on the meat's surface.
Through osmosis, water from inside the meat moves toward the salty exterior while salt simultaneously penetrates inward. You'll notice the meat becoming firmer as it loses moisture, creating an environment that inhibits harmful bacterial growth while promoting salt-tolerant bacteria.
The thickness of your meat determines the duration of this first phase – thicker cuts require longer curing times, potentially up to two weeks or more to achieve proper salt penetration and moisture reduction.
Salt Reapplication Timing Methods
The second phase of salt box curing requires precise timing calculations based on your meat's specific characteristics. You'll need to calculate curing duration using the standard rate of one day per kilogram (or two pounds) of meat, though you may need to adjust this for thicker or fattier cuts.
If you're working with smaller, thinner pieces like lonzino, you can expect faster curing times.
When you're ready to reapply salt, consider your meat's composition carefully. Fat content, skin presence, and connective tissues will affect how quickly the salt penetrates. You'll want to maintain temperatures between 36-40°F and control humidity levels in your curing chamber for best results.
To prevent over-salting, you'll need to measure your salt precisely at 2.5-3.5% of the meat's weight. During the curing process, you should flip your meat regularly to guarantee even salt distribution.
If you're using vacuum sealing, you'll get better contact between the salt and meat surfaces. Don't forget to massage the salt thoroughly into the meat's surface and place it in appropriate containers that allow for proper drainage.
Monitor the process daily, watching for consistent moisture draw-out and salt absorption.
Final Preservation Stage Steps
After mastering the salt reapplication timing, advancing to the final preservation stage introduces a two-stage progressive curing method that maximizes preservation and flavor development.
You'll need to maintain consistent temperatures between 32° and 40°F while monitoring the meat's weight loss until it reaches 30-40% of its original mass.
During the first stage, you'll rinse off excess salt and pat the meat dry with a lint-free towel. This step prevents moisture from re-entering the meat while ensuring proper salt distribution, particularly around joints and end sections.
You'll then hang the meat in a cool, dark environment for the second stage of drying.
The final drying phase continues until your meat reaches approximately 65% of its initial weight. You'll know it's ready when the texture becomes firm and chewy, with no liquid being drawn out.
At this point, you've achieved shelf stability, and you can slice the meat thinly for serving.
Remember that while most cured meats are ready to eat, poultry products may require cooking before consumption.
You can serve your finished product on a board with complementary items like fruits, cheeses, and specialty condiments.
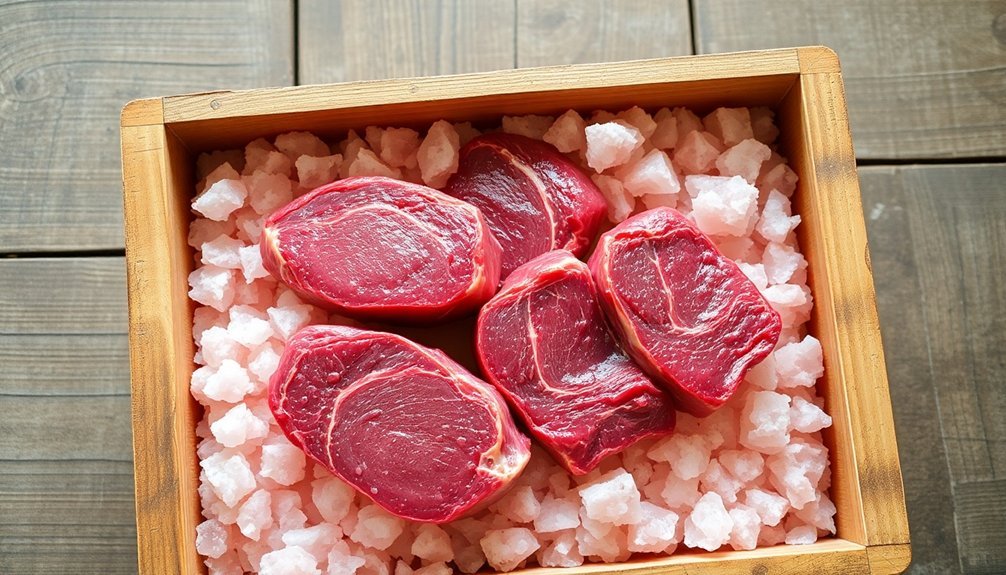
Layered Salt Preservation
You'll need a salt box, non-iodized salt, and clean towels to begin the layered salt preservation process.
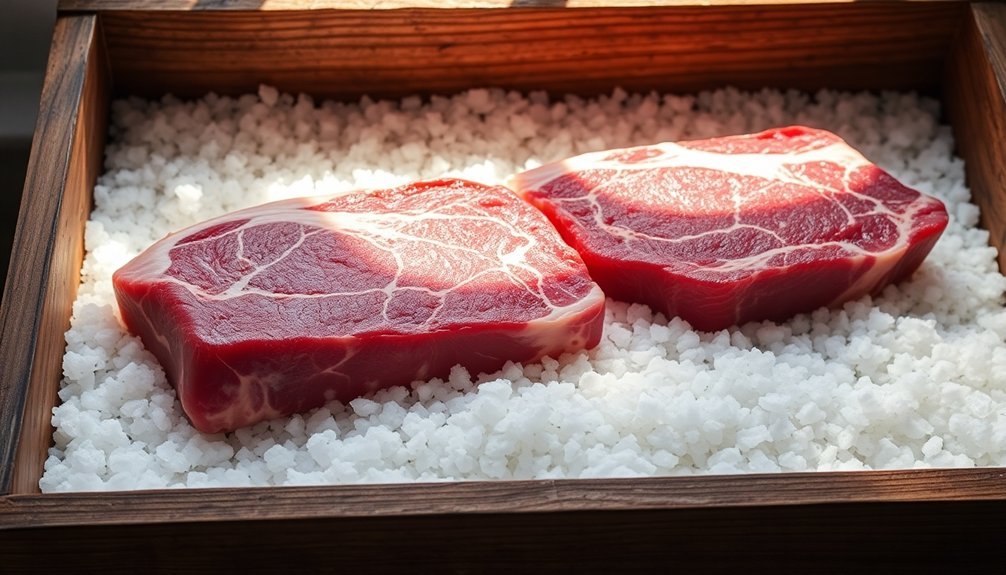
Start by spreading a thick base layer of salt in your container, ensuring it's deep enough to prevent the meat from touching the bottom.
Place your prepared meat cuts on the salt bed and completely cover them with additional salt, making sure there are no exposed areas where the meat could make direct contact with the container or other meat pieces.
Salt Layering Basic Steps
Mastering salt layering requires a methodical approach to achieve proper meat preservation. You'll need to start with pure salt, free from anti-caking agents, and maintain precise temperature control between 36-40 degrees F throughout the process.
| Step | Action |
|---|---|
| 1 | Apply 3% salt by meat weight evenly across surface |
| 2 | Place in sealed container or food-grade bag |
| 3 | Store in refrigerator for 5-14 days |
| 4 | Monitor liquid extraction until complete |
Begin by weighing your meat to calculate the exact amount of salt needed – you'll want 3% of the meat's total weight. As you apply the salt, make certain you're coating every surface evenly, including crevices and folds. If you're using additional flavorings like celery seed or black pepper, incorporate them during this initial application.
You'll need to maintain the meat in a sealed container for at least five days, though thicker cuts may require up to two weeks. During this time, you'll notice liquid being drawn out – this is normal and essential for proper curing. Once the initial curing is complete, rinse off excess salt and begin the drying phase. Your goal is a 30-40% weight reduction for maximum preservation.
Essential Equipment and Materials
For successful salt-box meat curing, gathering the right equipment and materials stands as your first critical step.
You'll need large containers or bus tubs made of non-reactive material to hold your meat and salt mixture. Be sure to select pure kosher or sea salt without anti-caking agents, as additives can interfere with the curing process.
You'll want to set up your curing station with proper drainage systems using trays or racks to keep meat from sitting in liquid.
Essential tools include non-lint producing towels for drying, meat hooks, and twine for hanging. If you're planning to use the equilibrium method, you'll need a vacuum sealer, while traditional methods require cheesecloth or food-grade bags.
Your curing environment needs careful consideration. You'll need access to a cool space maintaining temperatures between 33-40°F, with proper ventilation and low humidity.
Keep a thermometer and humidity gauge handy for monitoring. Don't forget to gather basic supplies for tracking progress, including a scale for weight measurements and a logbook for recording daily observations.
Optional but beneficial additions include celery seed, black pepper, and other spices for enhanced flavoring.
Salt Box Aging Chamber
A well-designed salt box aging chamber serves as the cornerstone of successful meat curing, combining precise environmental controls with the natural properties of salt.
You'll find that the chamber's most vital element is its salt integration, which naturally draws moisture from the meat while creating an antibacterial environment that promotes beneficial mold growth and enhances flavor development.
When setting up your chamber, you'll need to choose between Himalayan or kosher salt, making sure it's pure and free from anti-caking agents.
The salt wall in your chamber won't just maintain ideal humidity levels; it'll also contribute to the overall curing environment through its natural antibacterial properties.
You'll want to monitor your chamber's conditions closely as your meat progresses through the curing process.
The environment should maintain consistent temperature and humidity levels, which the salt walls help regulate naturally.
If you're using an illuminated salt wall, you'll get the added benefit of visual monitoring while creating an attractive display.
Remember that your chamber's construction must resist salt damage to guarantee long-term functionality, so proper coating and materials are essential for maintaining the integrity of your curing space.
Heritage Cold Smoking Process
While salt box curing preserves meat through controlled environments, heritage cold smoking adds deep flavor through time-honored techniques.
You'll need to set up two separate chambers: a firebox for generating smoke and a smoking chamber for holding the meat. The firebox requires proper ventilation to control heat and smoke production, while your smoking chamber can be as simple as a converted barrel or old refrigerator.
Before smoking, you must thoroughly cure your meat using salt and sometimes sugar to draw out moisture and create an environment that prevents harmful bacteria growth. This critical step intensifies flavors and guarantees safety since cold-smoked meat won't reach high cooking temperatures.
You'll maintain temperatures between 60-80°F (15-27°C) during smoking, using ice blocks if needed to keep conditions cool.
The smoking process takes several days to a week, during which you'll need to monitor the fire and temperature constantly. Different wood types, like apple or hickory, impart unique flavors to your meat.
While this method isn't FDA-recommended due to safety concerns, following traditional techniques passed down through generations can help you achieve properly cured and smoked results.
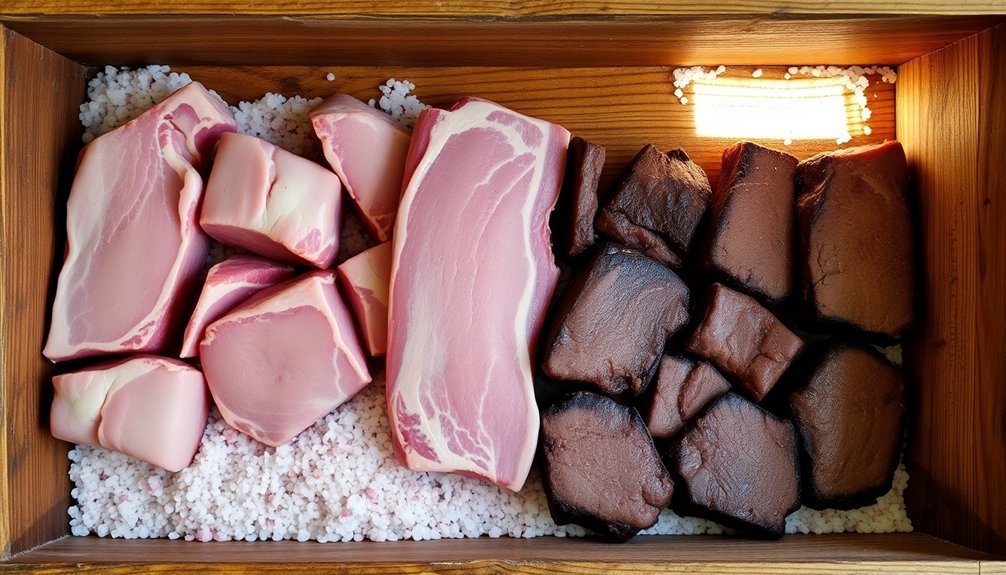
Mixed Salt Crystal Technique
The Mixed Salt Crystal Technique relies on up to several types of salt crystals working together to create a more complex and effective cure.
You'll need to start with pure salt that's free from anti-caking agents or added minerals. When you're combining different salt crystals, it's essential to thoroughly mix them to guarantee even distribution throughout your curing mixture.
For best results, you'll want to create a balanced cure by combining your salt crystals with other essential ingredients. A proven ratio includes 8 pounds of your salt crystal mixture, 3 pounds of sugar, 2 ounces of sodium nitrate, and 1/2 ounce of sodium nitrite.
Before applying your mixed salt cure, you'll need to clean your meat thoroughly and remove excess fat.
Apply your salt crystal mixture evenly across all surfaces of the meat, paying special attention to areas around bones where spoilage is more likely to occur.
You'll want to maintain a temperature between 36°F and 40°F throughout the curing process, which can take five days to two weeks depending on your meat's thickness.
Remember to rinse the meat once curing is complete and pat it dry before proceeding with the final drying phase.
Frequently Asked Questions
Can I Reuse the Salt From a Previous Curing Project?
You shouldn't reuse curing salt as it can harbor bacteria and lose effectiveness. It's not worth risking food safety or compromising your results. Always use fresh salt for each new curing project.
How Do Different Types of Salt Affect the Final Taste?
You'll notice pure salt gives a clean, sharp taste, while table salt can be metallic. Curing salts add complexity and that distinctive "cured" flavor. Specialty salts may contribute subtle mineral notes.
What Signs Indicate the Meat Has Spoiled During Curing?
You'll know your meat has spoiled if you notice off-odors, discoloration, slimy textures, or fuzzy mold growth. Watch for ammonia smells, sticky surfaces, and unusual colors. Don't consume if these signs appear.
Is Vacuum Sealing Necessary When Storing Cured Meats Long-Term?
While vacuum sealing isn't necessary for storing cured meats, you'll get better results if you use it. It'll extend shelf life, prevent freezer burn, and help maintain flavor during long-term storage.
Does Meat Thickness Affect the Amount of Salt Needed?
No, you don't need more salt for thicker cuts – just longer curing time. You'll use the same salt concentration regardless of thickness, but you must cure thicker pieces longer for proper penetration.
In Summary
You've now explored seven time-honored methods for salt box meat curing that'll help preserve your cuts with authentic flavor. Whether you're using the simple dry salt approach or experimenting with complex spice blends, these traditional techniques offer reliable results. Remember to maintain proper temperature and humidity levels throughout the curing process, and you'll soon master the art of salt box preservation just like generations before you.


Leave a Reply