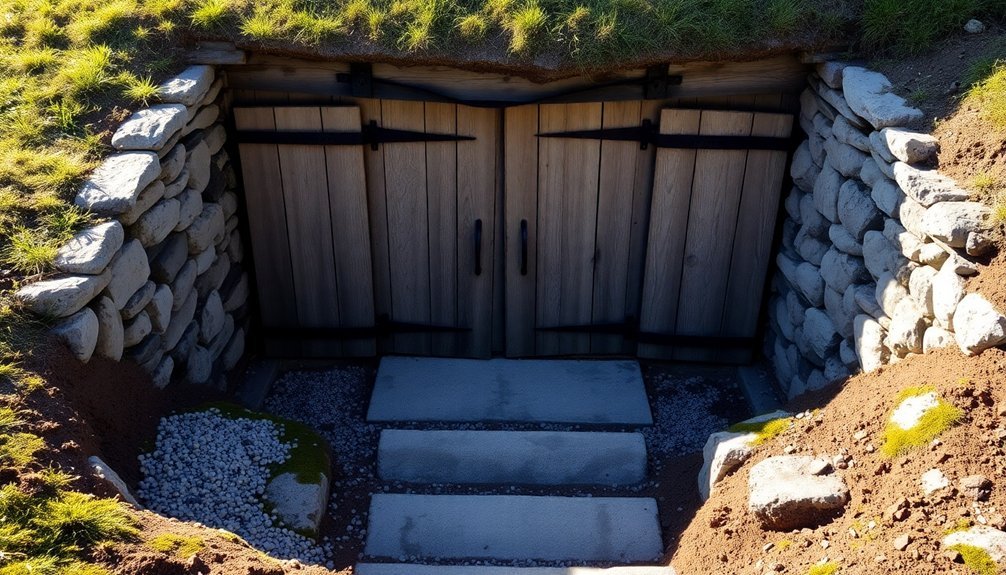
Choose a north-facing slope with natural shade and good drainage for your root cellar's location. You'll need to dig at least 4 feet deep to maintain ideal storage temperatures between 32-40°F. Install a proper drainage system with French drains and gravel to prevent water damage. Use waterproof materials like reinforced concrete or cinder blocks for structural integrity. Don't forget dual ventilation points at ground level and ceiling to control humidity. Plan for adequate space – a typical family needs about 100 square feet with 3-4 feet of headspace. These essential elements just scratch the surface of creating your perfect underground storage solution.
Location Scout Your Perfect Spot
Finding the perfect spot for your root cellar requires careful consideration of several essential factors.
You'll need to balance convenience with ideal environmental conditions to guarantee your cellar functions effectively year-round.
Start by identifying a location that's easily accessible from both your garden and home. You'll want to transport harvests efficiently and check on your stored produce regularly, especially during winter months. If possible, consider utilizing one of your home's foundation walls to serve as a cellar wall, saving on construction costs and materials. A well-planned root cellar can help achieve significant cost savings on your grocery bills throughout the year.
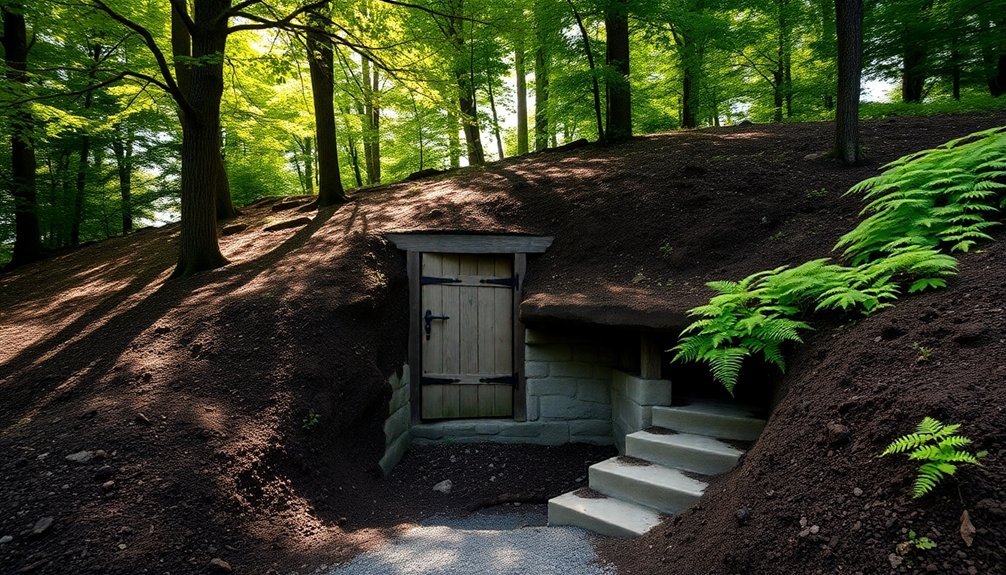
Choose a naturally cool, shaded area, preferably on a north-facing slope. This orientation helps maintain consistent temperatures throughout the year. Natural shade from trees or existing structures will provide additional temperature regulation and protection from harsh winds.
Don't overlook drainage when selecting your spot. Use a soil probe to test ground conditions and avoid areas where water pools after rain. The site should have proper slope for water runoff, and you'll need stable ground for a secure foundation.
Before digging, verify there aren't any underground utilities in the area that could complicate construction or pose safety hazards.
Assess Local Climate Factors
Before breaking ground on your root cellar, you'll need to carefully evaluate your local climate patterns to guarantee ideal storage conditions. Start by checking your region's typical ground temperatures at 4-foot depth, as this will determine how well you can maintain the ideal 32-40°F storage range year-round.
If you're in a warmer climate, you'll need to dig deeper or add additional insulation to achieve proper temperatures. Using proper building materials like stone or wood can enhance natural insulation properties.
Study your area's water table and soil conditions using local hydrology maps. You can't build an underground cellar if groundwater levels are too high, as this will compromise your structure's integrity.
Pay attention to seasonal variations in groundwater movement, as these can affect soil temperatures and overall storage conditions.
Consider your region's extreme weather patterns. If you experience severe winters, you'll need to carefully position vents and doors facing north to minimize temperature fluctuations.
You'll also want to plan for adjustable ventilation that you can modify seasonally. In particularly cold areas, incorporate a way to shut off ventilation temporarily to prevent freezing, while maintaining enough airflow to prevent mold growth and manage ethylene gas buildup.
Plan Your Drainage System
With your climate assessment complete, a properly designed drainage system becomes your next priority. You'll need to dig drainage channels level with your cellar floor, angling them slightly away from the structure. Install perforated French drain pipes surrounded by 4-6 inches of gravel, guaranteeing they daylight beyond your cellar. The remote-controlled gravel shooter can make backfilling around drainage pipes much more efficient.
Key attention points for your drainage system:
- Layer at least 18 inches of gravel around drainage pipes to maximize water flow efficiency
- Install multiple drains at different wall heights for thorough moisture control
- Protect drain openings with heavy wire mesh to prevent rodent infiltration
- Create a slight slope in your drainage pipe layout to guarantee proper water flow
- Extend drainage trenches up to 90 feet away from the cellar for effective water dispersal
Don't skip waterproofing the exterior walls and installing footer drainage pipes to prevent foundation-level water accumulation.
As you build, backfill with gravel alongside the walls. For long-term durability, cement around drain exits and use black corrugated drainage pipes.
Consider installing a backup sump pump for flood protection, and remember to schedule regular system inspections to maintain peak functionality.
Choose Structural Materials Wisely
When building your root cellar's walls, you'll need to select waterproof materials that can withstand constant moisture, with cinder blocks and concrete being top choices for their durability and resistance to decay.
Your foundation should consist of reinforced concrete with proper rebar placement to prevent cracking and guarantee long-term structural integrity.
You'll want to add extra reinforcement at load-bearing points, particularly where the roof meets the walls and around the entrance, using steel beams or additional concrete support as needed.
Lasting Waterproof Wall Options
Selecting the right structural materials for your root cellar's walls stands as one of the most critical decisions you'll make during construction. You'll need to choose materials that not only provide structural strength but also offer superior moisture resistance and insulation properties.
Concrete and cinder blocks remain a popular choice due to their durability and cost-effectiveness, while poured concrete delivers exceptional structural integrity when reinforced with rebar.
For maximum waterproofing effectiveness, you'll want to implement a multi-layered approach. Apply waterproof membranes to your chosen wall material before backfilling, and don't forget to install proper drainage systems, including French drains and gravel beds around the perimeter.
- Concrete and cinder blocks offer excellent moisture resistance and can be enhanced with external waterproof membranes
- Poured concrete walls, when properly reinforced, provide superior structural integrity and consistent temperature control
- Stone and composite walls extend below the frost line for added stability
- Structurally Insulated Panels (SIPs) work well for above-ground cellars with proper waterproofing
- Interior waterproof coatings like DryLok add an extra layer of moisture protection
Foundation Material Selection Guidelines
A solid root cellar foundation depends on careful material choices that'll support your structure for decades to come. When building with concrete block walls, you'll need footers that are 16 inches wide, while poured concrete walls require 8-inch-wide footers. Make certain your footers are at least 7 ¼ inches deep to properly accommodate standard lumber dimensions.
You've got several reliable options for your wall construction. If you're using bricks, mix your mortar using four parts sand to one part cement, adding a small amount of mortar and lime additive. As you lay each brick, clean off excess mortar immediately to maintain a professional appearance.
For a budget-friendly alternative, consider cinder blocks – you'll need roughly 350 blocks for an 8 x 8 foot cellar.
If you're interested in natural materials, earthbags offer an innovative solution. Fill them with clay-rich dirt and arrange them in curved formations for maximum strength.
Don't forget to incorporate reinforcing rods in your concrete footers and allow three to seven days of curing time before starting your walls. Whatever material you choose, use a level consistently to ascertain your walls stay straight and true.
Reinforcement For Load Bearing
Three vital elements determine a root cellar's load-bearing capacity: wall thickness, reinforcement placement, and material choice.
When you're building your root cellar walls, you'll need to guarantee they can withstand significant earth pressure and vertical loads. Start with a wider base that gradually tapers upward, and incorporate steel reinforcement rods or mesh within your chosen wall material.
For concrete construction, use blocks in 8-inch multiples or opt for poured concrete with embedded steel rods. Your footer should extend at least 16 inches for block walls and 8 inches for poured concrete.
If you're using brick, mix your mortar with four parts sand, one part cement, and add lime for flexibility.
- Steel reinforcement bars must cross and tie together in the roof structure
- Wall thickness should increase proportionally with depth
- Incorporate a damp-proof course to prevent moisture damage
- Use barbed wire between earthbag layers for alternative construction
- Install bond beams to distribute load evenly across wall tops
Remember to consult a structural engineer before finalizing your design, as proper reinforcement placement is vital for long-term stability and safety.
Design Natural Ventilation Pathways

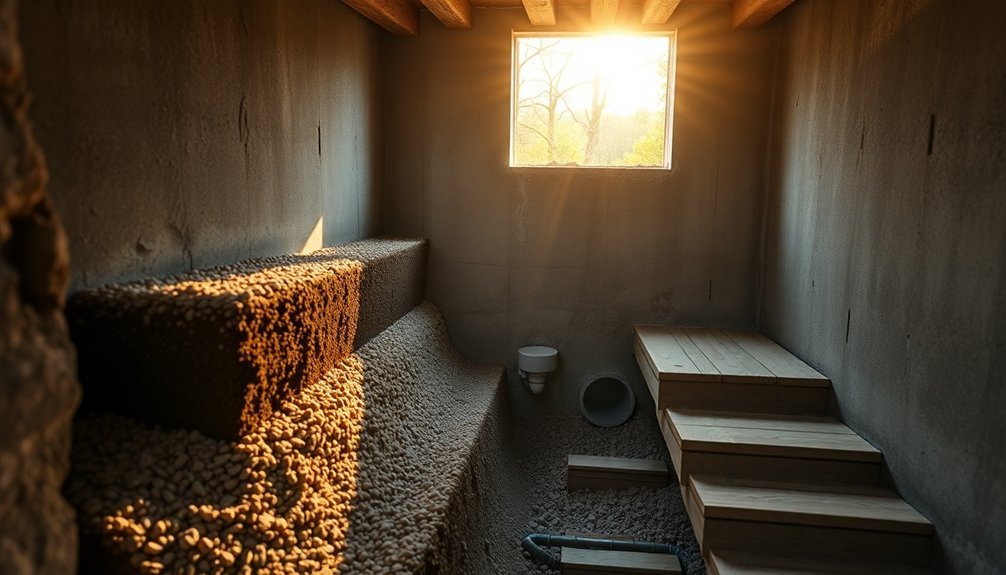
Proper ventilation pathways form the backbone of an effective root cellar design. You'll need to install two 4" PVC pipes that lead outdoors, positioning one near the floor and the other close to the ceiling on opposite sides of your cellar. This setup creates a natural air circulation system where warm air rises and exits through the upper vent while cool air enters through the lower one.
Make sure you can control these vents by installing mechanisms that let you open and close them as needed. You'll use this control to regulate your cellar's temperature and humidity, opening the vents during fall to cool the space and closing them once you've reached your target temperature.
Keep a remote temperature sensor handy to monitor conditions accurately.
When planning your cellar's layout, you'll want to elevate storage crates a few inches off the floor to allow air movement underneath. Remember that proper air circulation isn't just about temperature control – it also helps remove vegetable odors and ethylene gas that can spoil your stored produce.
In larger cellars, both intake and outlet vents are essential for maintaining this airflow.
Calculate Essential Storage Space
Calculating your root cellar's storage space starts with a realistic assessment of your family's needs and harvest yields. For a typical family of four, you'll want to plan for approximately 100 square feet of storage space. This allows enough room for multiple storage bins, walking paths, and proper air circulation around your preserved goods.
Key storage considerations you won't want to overlook:
- A root cellar measuring 6×8 feet to 8×10 feet will accommodate most household needs
- Factor in 3-4 feet of headspace for stacked storage bins and easy access
- Include 2-3 feet wide pathways between storage areas for comfortable movement
- Allow 6-inch gaps between walls and shelving units for air circulation
- Plan separate zones for different produce types based on temperature requirements
When designing your layout, incorporate sturdy shelving units along the walls and designate specific areas for different storage methods.
You'll need space for sand-filled bins storing root vegetables, hanging racks for onions and garlic, and stacked containers for other preserves.
Remember to calculate cubic footage based on your specific storage containers and ascertain you've planned enough room for seasonal rotations and produce maintenance.
Build Strong Foundation Systems
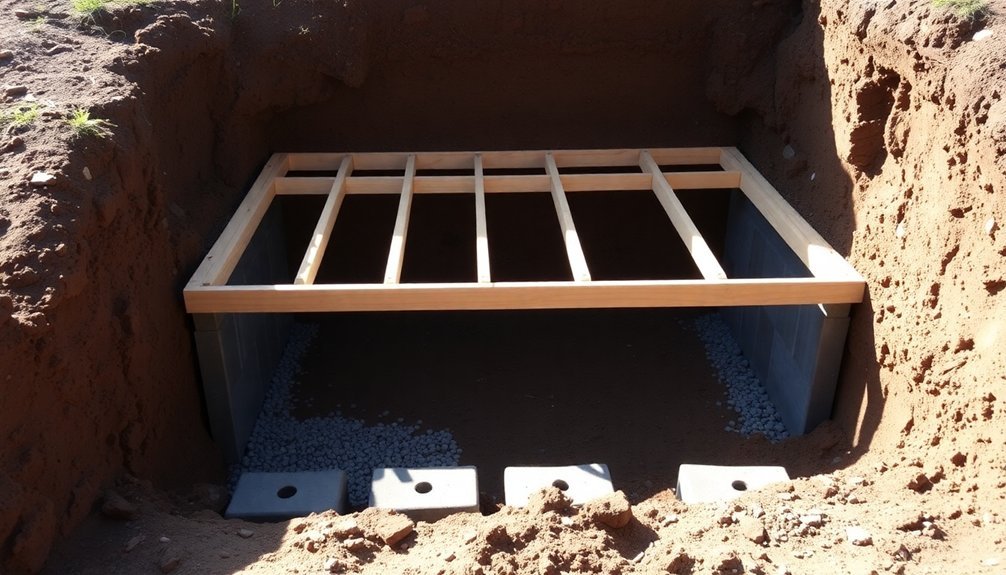
You'll need to start with a properly leveled concrete footer that's twice as wide as your planned wall thickness to create a stable base for your root cellar.
Make sure you're installing drainage channels and gravel beneath the footer to prevent water accumulation that could compromise the structure's integrity.
Your footer must extend below the frost line and cure for at least three days before you continue with the wall construction.
Pour Level Concrete Base
A strong root cellar begins with pouring a precise, level concrete base. You'll need to calculate the exact amount of concrete by multiplying length x width x thickness, then dividing by 27. Pour the concrete in manageable 4-foot sections to control weight and pressure distribution. For narrow walls, use a pump hose, while a chute works better for floors and roofs.
Before pouring, verify you've got these critical elements in place:
- Level forms built with 2×4 studs and ¾" plywood sheets
- Secure bracing at 45-degree angles on all corners
- Wales and snap ties properly positioned to hold forms
- Pre-drilled holes for rebar placement
- Proper drainage slope integrated into the design
Once you're ready to pour, you'll need to work efficiently to trowel, screed, and float the concrete to achieve a perfectly level surface.
Don't rush this process – proper finishing is essential for long-term stability. Let the concrete cure completely before moving forward. This typically takes several days, depending on weather conditions and concrete mix.
The finished base should be smooth, free of voids, and ready to support your root cellar's walls and roof structure.
Install Proper Drainage Footer
Proper drainage footers serve as the cornerstone of any successful root cellar foundation system. You'll need to start by digging below your area's frost penetration depth and installing poured concrete footers to prevent future wall shifting. Verify your footer placement extends beyond the frost line, as this will protect your entire structure from seasonal frost damage.
To create an effective drainage system, you'll want to install a perforated 4-inch drainpipe across the back of your cellar. Place this pipe on a 3-inch gravel bed, maintaining a slope of 1 inch per 8 feet to guarantee proper water flow. Cover the pipe with heavy roofing paper or 6-mil plastic sheeting to prevent soil and debris from clogging the system.
Don't forget to incorporate a French drain around the perimeter to manage runoff effectively.
When backfilling, add a layer of gravel above the drainpipe to aid drainage and prevent silt accumulation. You'll want to tamp the soil firmly but not excessively as you backfill.
Remember to keep your cellar's interior floor level higher than the outside soil to facilitate natural water drainage away from the structure.
Install Temperature Control Methods
Once you've excavated your root cellar, controlling its internal temperature becomes the next critical step.
You'll need to implement both natural and artificial insulation methods to maintain ideal storage conditions. If you're building into a hillside, you've already got a head start with natural earth insulation. For flat land construction, make sure you're at least 10 feet underground to benefit from stable soil temperatures.
Install dual ventilation systems with one vent at ground level and another at the ceiling to promote proper air circulation. You'll want to manage these vents carefully, closing them during extreme cold spells to maintain temperature stability.
Here are your essential temperature control components:
- Layer your walls with rigid foam insulation or straw bales between the concrete and earth
- Install mineral wool batts in wall cavities and ceilings for maximum insulation
- Create an ice storage system using winter-made ice blocks for summer cooling
- Set up a dual-vent system with adjustable openings for airflow control
- Add extruded polystyrene foam (minimum 2 inches) to interior surfaces
Remember to take into account your local hydrology, as underground water movement can notably affect soil temperatures and your cellar's overall effectiveness.
Create Proper Humidity Balance
Temperature control works hand-in-hand with humidity management in your root cellar's success.
You'll need to maintain humidity levels between 80-95% to keep your produce fresh and prevent withering. Too much moisture above 95% can trigger mold growth, while levels below 80% will cause vegetables to dry out and lose flavor.
To achieve the right balance, you'll want to use natural and mechanical methods. Install a hygrometer to monitor relative humidity and add moist wood shavings or water containers to boost moisture levels.
If you've built an underground cellar, take advantage of the earth's natural moisture, but don't forget to waterproof your interior walls and install rain gutters to control excess water.
You can regulate airflow with vents and fans, which help maintain consistent humidity throughout your storage space. Keep a close eye on humidity levels and adjust as needed.
Organize your produce with proper spacing for air circulation, and remove any spoiled items immediately. In spring, you might need a dehumidifier to combat rising moisture levels.
For fine-tuning, add moisture-absorbing materials like charcoal or rice to problem areas.
Test Before First Storage
You'll need to run thorough tests on your root cellar for at least a month, paying close attention to temperature fluctuations throughout different times of day.
Check your drainage system during heavy rains to guarantee water flows away properly and doesn't pool inside the cellar.
Track the humidity levels daily using reliable gauges, making necessary adjustments to your ventilation system until you achieve consistent readings between 85-95%.
Monitor Temperature for Month
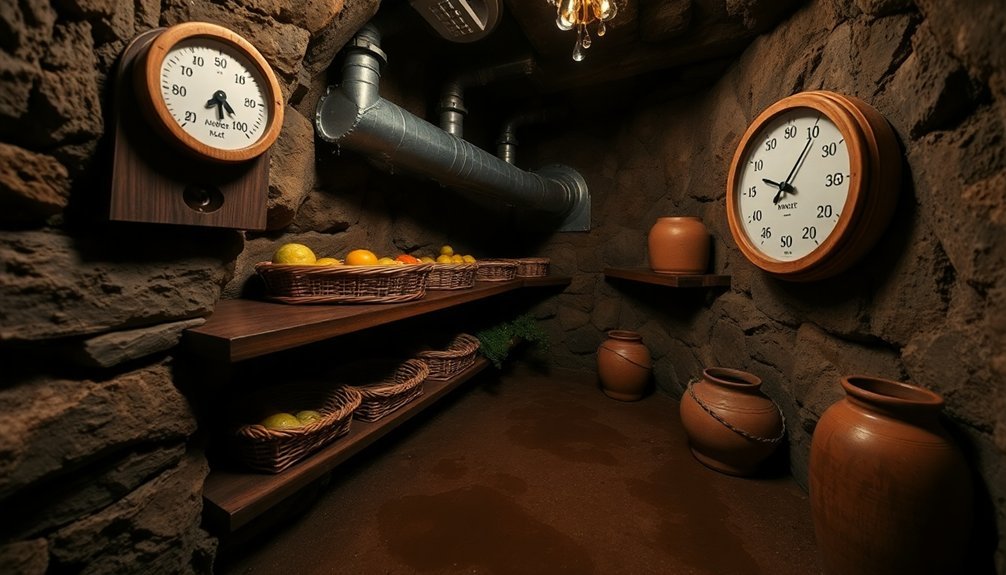
Before stocking your root cellar with vegetables, it's essential to monitor its temperature for a full month to guarantee consistent and ideal storage conditions. You'll need to maintain temperatures between 32-40°F (0-4°C) to prevent sprouting and decay while avoiding freezing.
Install thermometers at different levels throughout your cellar, as warm air rises and creates temperature variations from floor to ceiling. Place temperature gauges on the exterior to minimize unnecessary entry, and use thermometers with minimum/maximum readings to track fluctuations.
You'll need to adjust ventilation and insulation based on your monitoring results to achieve ideal conditions.
Key monitoring steps you can't skip:
- Check temperatures at least twice daily, recording both highs and lows
- Position thermometers at different heights to identify temperature stratification
- Test ventilation adjustments during different times of day and weather conditions
- Monitor outside temperature's influence on cellar conditions
- Document temperature patterns to prepare for seasonal changes
If temperatures aren't staying consistent, you might need additional insulation or ventilation modifications before storing your harvest.
Check Drainage System Performance
Now that you've confirmed stable temperatures in your root cellar, testing the drainage system becomes the next priority before storing any produce. Simulate heavy rainfall conditions to evaluate how well your drainage components work together. You'll want to observe water movement through the French drain, gravel base, and perforated pipes to guarantee proper flow away from the structure.
| Test Component | What to Check |
|---|---|
| French Drain | Water flows through gravel, away from walls |
| Drainage Pipes | No clogs or backups in perforated piping |
| Ground Slope | Water moves away from cellar naturally |
| Wall Seepage | No moisture penetration through waterproofing |
| Ventilation | Air circulation supports moisture control |
During your drainage test, pay close attention to any water accumulation points or dampness on the walls. You'll need to verify that the drainage slope angles correctly away from the cellar and that all perforated pipes remain clear of debris. Don't forget to check how your ventilation system interacts with moisture levels – proper air circulation helps maintain the efficiency of your drainage setup. If you spot any issues, address them immediately before proceeding with produce storage.
Measure Humidity Levels Daily
Maintaining proper humidity levels stands as a critical first step before storing any produce in your root cellar. You'll need to verify your cellar maintains 85-95% humidity to keep your vegetables fresh and flavorful. Install a hygrometer on the outside of your cellar to monitor levels without frequent entry, and make daily checks part of your routine.
To achieve ideal humidity, you've got several effective methods at your disposal:
- Place containers of water strategically around your cellar, but watch for signs of excessive moisture.
- Cover your stored vegetables with moist straw or leaves to retain moisture.
- Sprinkle water on the dirt floor when humidity drops below 85%.
- Use natural soil moisture by maintaining an earthen floor.
- Set up a simple rainwater collection system for humidity regulation.
If you notice humidity dropping below 85%, your produce will start to shrivel and lose quality. Conversely, levels above 95% can trigger mold growth.
Keep a close eye on ventilation too, as proper airflow prevents ethylene gas buildup while maintaining moisture levels. Remove any spoiled items immediately to protect your stored produce and maintain consistent humidity throughout the space.
Frequently Asked Questions
How Long Does It Typically Take to Build a Root Cellar?
You'll need between 2-4 months to build a root cellar, from planning to completion. Your timeline depends on factors like size, materials, method (DIY or contractor), and whether you've obtained necessary permits.
Can I Store Different Types of Vegetables Together in the Cellar?
You'll need to separate your vegetables based on storage requirements. Don't store damp-loving roots with dry-storage vegetables like onions, and keep ethylene-producing items away from others to prevent premature spoilage.
What Are Signs That My Root Cellar Isn't Functioning Properly?
You'll notice problems if your vegetables freeze or rot, humidity's too high or low, there's poor air circulation, or you spot mold growth. Check for temperature swings, withering produce, and ethylene gas buildup.
How Often Should Root Cellar Maintenance Be Performed?
You should check your root cellar daily for temperature and humidity levels, perform weekly inspections for spoilage and pests, conduct monthly maintenance on ventilation systems, and deep clean seasonally (every 3-4 months).
Are Permits Required for Building an Underground Root Cellar?
You'll need to check with your local authorities as permit requirements vary by location. Most areas require permits for new construction, but some may classify root cellars as agricultural structures with different regulations.
In Summary
You'll get the most from your root cellar by testing it thoroughly before storing your first harvest. Monitor temperature and humidity levels for at least two weeks, making adjustments to ventilation and drainage as needed. Once you're satisfied with the environment's stability, start small with hardy vegetables before expanding to more delicate produce. Your well-built root cellar will serve your homestead for generations to come.
Leave a Reply