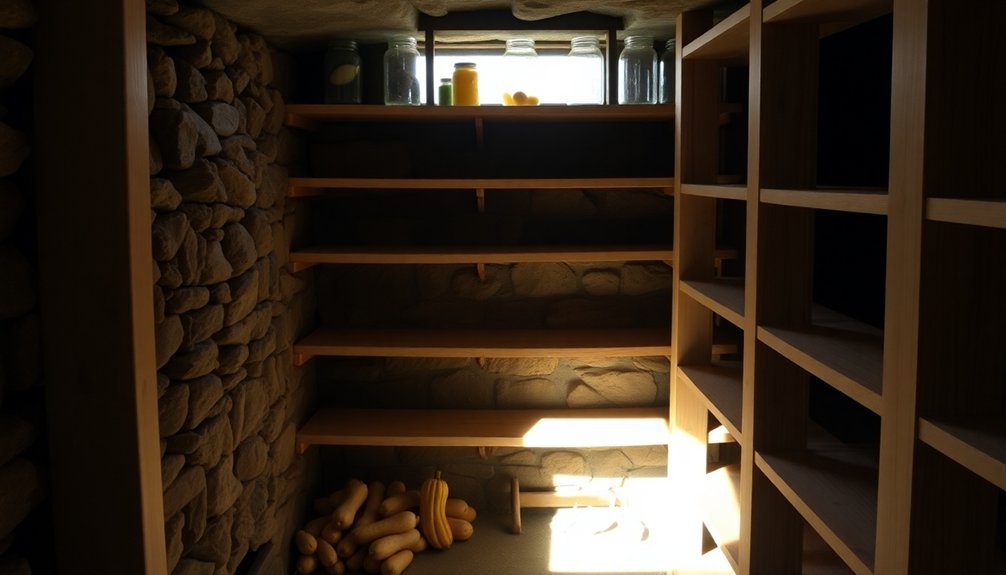
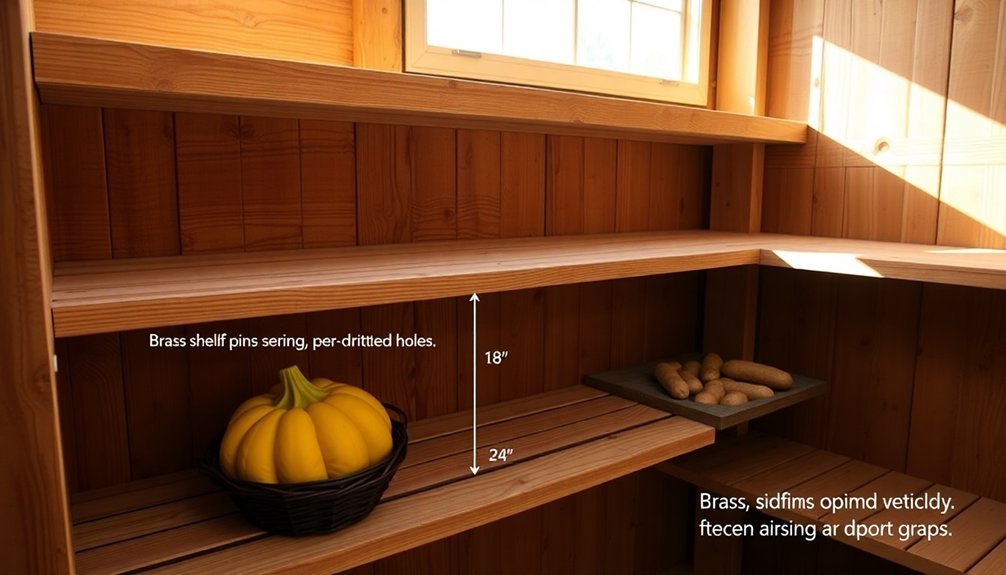
You'll want to space your root cellar shelves 12-18 inches apart vertically to guarantee proper air circulation and accommodate different vegetable heights. Keep bottom shelves 4-6 inches off the floor for airflow, and maintain a 1-2 inch gap between shelves and walls to prevent moisture buildup. For storage flexibility, position cold-loving vegetables like beets and carrots on lower shelves (32-40°F) and warmer-tolerant items like onions on upper shelves (40-50°F). Space stored items 2-3 inches apart to control humidity levels. These spacing guidelines are just the beginning of creating an efficient root cellar storage system.
Essential Shelf Spacing Measurements
For ideal functionality, construct your shelving system using 1×3s for side supports and implement 1½-inch wide cleats with 1¾-inch spaces between them.
This arrangement provides flexibility while maintaining structural integrity. You'll find this spacing particularly useful when sliding bins and shelves in and out of position.
Remember to secure all components with wood glue and finish nails or screws to create a sturdy framework that withstands the humid root cellar environment. Elevating shelves and crates allows for proper air circulation underneath, which is essential for preventing spoilage.
Vegetable Height Requirements
When planning your root cellar shelves, you'll need to account for the varying heights of different produce, from tall celery stalks requiring 18-24 inches of vertical space to shorter root vegetables needing only 6-8 inches.
Your stackable storage system should incorporate adjustable shelving that accommodates both single-layer items like tomatoes and multi-layer storage for root vegetables like carrots and beets. Maintaining proper humidity of 85-95% helps preserve the quality of stored produce.
You'll want to take into account seasonal changes in your storage needs, as summer and fall harvests may require different shelf configurations than winter storage crops.
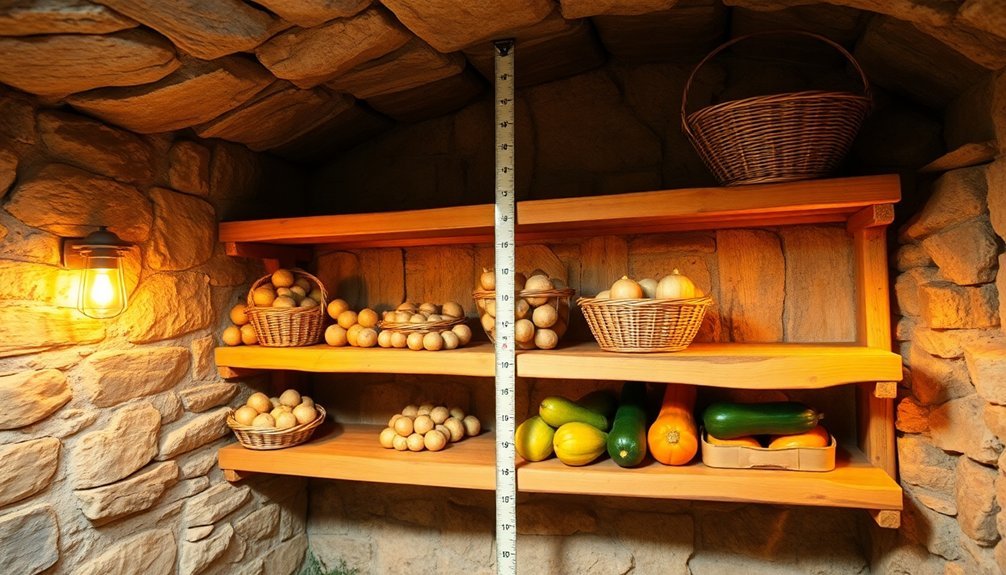
Tall Vs Short Produce
Root vegetables and tall produce require different shelf spacing strategies in your root cellar. For tall items like squash and tomatoes, you'll need to space your shelves farther apart and position them higher up, where temperatures are naturally warmer (40-50°F).
You should leave 1-2 inches between the shelf and wall to maintain proper air circulation, and guarantee your shelves can support substantial weight – over 2,000 pounds. Using L-brackets for support will help ensure structural integrity of your shelving system.
For shorter produce like beets and carrots, you can place shelves closer together to maximize storage space. These items perform best on lower shelves where temperatures are cooler (32-40°F).
You'll want to maintain higher humidity levels (90-95%) for these root vegetables compared to taller produce (85-90%). When constructing your shelves, use rot-resistant materials like white oak and incorporate spacers using 1" x 3" boards for stability.
Remember to organize your produce strategically: tall items go on top shelves, while shorter items stay below. This arrangement not only maximizes space efficiency but also aligns with the natural temperature gradients in your root cellar.
Keep your shelving system adjustable to accommodate different container sizes and seasonal storage needs.
Stackable Storage Solutions
Building on your shelf height strategy, stackable storage containers offer an efficient way to multiply your root cellar's capacity.
You'll find that using five-gallon plastic buckets layered with straw provides excellent storage for root vegetables, while boxes filled with sand or damp sawdust create ideal conditions for long-term preservation.
For your hanging produce, you've got several practical options. You can store onions, leeks, and garlic in mesh bags or thread them through panty hose for vertical storage.
If you're working with specialized vegetable storage racks, these'll help maximize your vertical space while maintaining proper air circulation.
When you're organizing your stackable storage, remember to reflect on temperature variations at different heights.
Place your squash and pumpkins on higher levels where it's moderately warm and dry. If you're storing green tomatoes, position them in the warmer zones, which can reach up to 70°F.
For root vegetables that prefer cooler temperatures, use your stackable containers on lower levels where temperatures naturally stay colder.
This arrangement lets you take full advantage of your root cellar's natural temperature gradients while maximizing storage space.
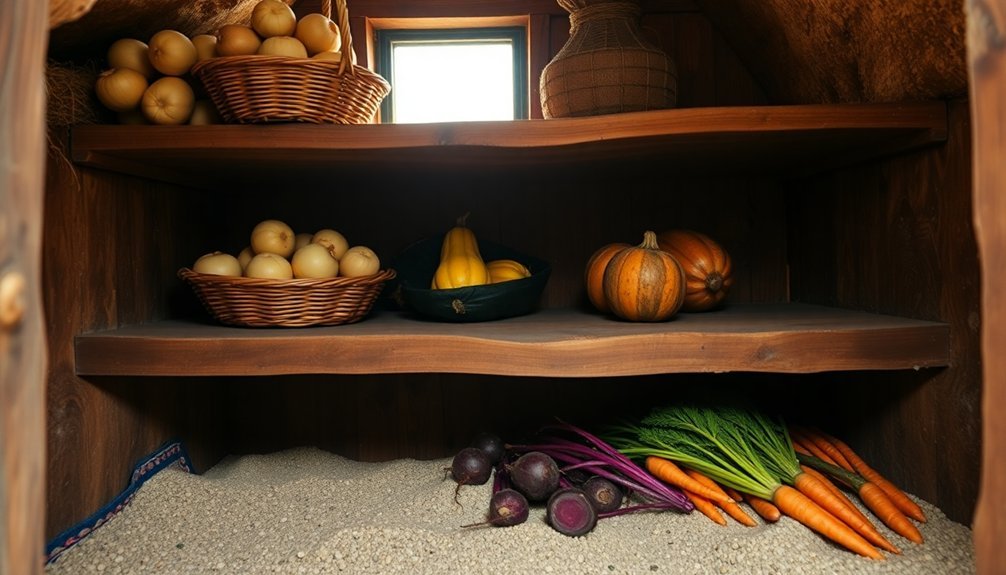
Seasonal Height Adjustments
Seasonal storage heights play an essential role in maximizing your root cellar's efficiency.
You'll need to adjust your shelving heights throughout the year to accommodate different types of produce and their specific temperature requirements. Since warm air rises and cool air sinks, you can use these natural temperature variations to your advantage.
Position your root vegetables like carrots, beets, and potatoes on the lower shelves where temperatures remain cooler.
You'll want to place heat-sensitive produce closer to the floor level, as this area maintains the most consistent cool temperatures year-round. For vegetables that prefer warmer conditions, such as eggplants, peppers, and tomatoes, arrange them on the upper shelves where temperatures are naturally higher.
Make certain your shelving system allows for easy adjustments to match these seasonal needs.
You can use spacers and adjustable frames to modify shelf heights as your storage requirements change. When you're planning your shelf layout, consider installing slotted or grooved supports that let you quickly change shelf positions without major reconstruction.
This flexibility guarantees you're providing ideal storage conditions for each type of produce throughout the changing seasons.
Temperature Zones and Shelf Placement
Understanding temperature zones is essential for organizing your root cellar shelves effectively. You'll want to maintain temperatures between 32-40°F for ideal long-term storage, while some areas can be slightly warmer (40-50°F) for shorter-term storage of specific vegetables.
Take advantage of your cellar's natural temperature variations by placing shelves strategically. Since warm air rises, the area near your ceiling will be warmer than the floor space. Position cold-loving vegetables like beets and carrots on lower shelves, while items that tolerate warmer temperatures, such as onions and sweet peppers, can go on higher shelves.
You'll need to take into account humidity levels alongside temperature. Create zones that match specific storage requirements:
- cold and very damp (32-40°F, 90-95% humidity) for root vegetables,
- cold and damp (32-40°F, 80-90% humidity) for apples and potatoes,
- and cool and dry (35-40°F, 60-70% humidity) for garlic and onions.
If you're in an area with extreme temperatures, protect your storage from vents and exterior doors by using anterooms or double doors to maintain stable conditions.
Ventilation Gaps for Food Storage
You'll need precise shelf spacing in your root cellar to maintain proper airflow, with a minimum 3-inch gap between the wall and shelves, and 2-4 inches between stored items.
Your shelves should be elevated at least 4 inches off the floor using slatted or wire designs that allow air to move freely beneath stored produce.
Creating these ventilation gaps helps prevent moisture buildup while ensuring consistent air circulation throughout your storage space.
Optimal Air Flow Spacing
Between each shelf in your root cellar, proper air flow spacing plays an essential role in preserving stored foods. You'll want to guarantee adequate vertical spacing between shelves to promote air circulation and prevent the buildup of ethylene gas and unwanted odors.
When designing your storage system, keep shelves at a maximum depth of 16 inches and arrange them with temperature zones in mind – cooler items on lower shelves and warmer-preferring produce on higher ones.
For ideal ventilation, you'll need to take into account both horizontal and vertical air movement. Install vents near the floor for cool air intake and ceiling-level vents for warm air exhaust, creating a natural circulation pattern throughout your cellar.
- Raise bottom shelves several inches off the floor to prevent moisture buildup and allow air flow underneath.
- Space shelves far enough apart to allow proper air circulation between stored items.
- Position intake and outlet vents on opposite sides of the room for cross-ventilation.
- Use screened vent pipes angled downward to keep out precipitation and pests while maintaining airflow.
Remember to properly seal your vents during winter months to maintain stable temperature and humidity levels.
Wall-to-Shelf Gap Requirements
Proper ventilation extends beyond shelf spacing to include the crucial gap between your shelves and the root cellar walls. You'll need to maintain a 1-2 inch gap between your shelves and the walls to guarantee adequate air circulation. This seemingly small space plays an essential role in preventing moisture buildup and maintaining ideal storage conditions.
When you install your shelves, make certain they don't touch the walls. This gap creates a channel for air movement that helps regulate temperature and humidity while preventing condensation on both walls and stored items. If you block this space, you'll risk creating areas where moisture can accumulate, potentially leading to mold growth and spoilage of your stored produce.
You'll want to regularly check that nothing has shifted to obstruct these ventilation gaps. It's easy for items to get pushed back during routine use, accidentally blocking the airflow.
Make this inspection part of your weekly maintenance routine when you're checking for spoiled produce. By maintaining these wall-to-shelf gaps, you're creating an environment where cool air can circulate effectively, helping preserve your stored food for longer periods.
Slatted Design Measurements
Slatted shelving design requires precise spacing measurements to optimize airflow in your root cellar. You'll need to create gaps between slats that allow proper ventilation while maintaining enough surface area to support your stored produce.
The slats should be positioned to prevent smaller items from falling through while still enabling adequate air circulation to control humidity and ethylene gas.
When constructing your slatted shelves, focus on these essential measurements:
- Space slats approximately 1/2 to 3/4 inch apart to guarantee proper airflow while preventing smaller produce from falling through.
- Keep shelf depth at 16 inches maximum to maintain effective air circulation throughout the storage area.
- Install shelves with a 2-3 inch gap from the wall to promote air movement behind stored items.
- Elevate bottom shelves 4-6 inches off the floor to allow air circulation underneath.
Your shelf construction should incorporate support cleats at regular intervals to prevent sagging under the weight of stored produce.
Remember to use moisture-resistant materials that can withstand the high humidity levels (90-95%) typical in root cellars without deteriorating or promoting mold growth.
Load Bearing and Support Design
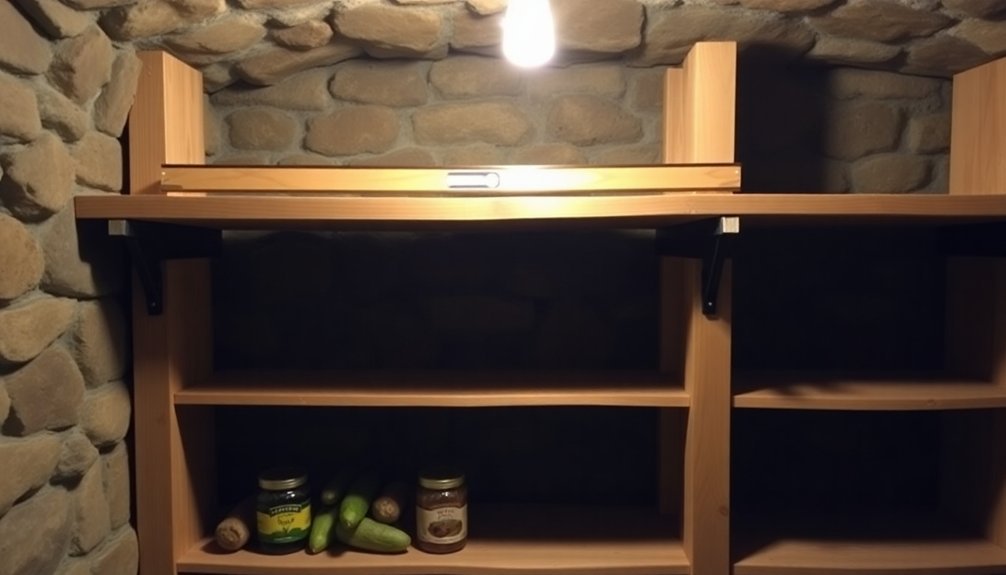
Building strong root cellar shelves requires careful attention to load-bearing capacity and support design. You'll need to construct shelves that can support over 2,000 pounds of food storage, including heavy jars and produce-filled containers. To achieve this strength, use rot-resistant materials like white oak for the main structure.
Create your support frames using 2×3 oak lumber with notched tops, and secure them firmly to both the floor and walls. You'll want to add 10-inch spacers at the bottom of these frames to accommodate storage crates underneath.
For the shelf floors, use 1×12 boards nailed to ladder rungs, or opt for 3/4-inch plywood for a solid surface. Strengthen your shelving unit by incorporating 2×2 or 2×3 lumber for the support frames and brace them with scrap wood for added stability.
Don't forget to use wood glue and drywall screws during assembly, and add L-brackets for extra support. If you're working in a tight space, you can build the shelves in place within the cellar.
Remember to check that your shelves are square to the slats using a framing square to guarantee maximum stability and load-bearing capacity.
Humidity Control Through Spacing
When designing your root cellar shelves, maintaining ideal spacing between units is crucial for controlling humidity levels and air circulation.
You'll need to guarantee proper ventilation by placing vents near the top and bottom of your cellar, allowing hot air to escape while cool air enters. The spacing between shelves directly impacts humidity distribution, with closer spacing creating higher humidity zones and wider gaps promoting better airflow.
Temperature and humidity work together in your root cellar, so you'll want to take into account both when arranging your shelves. Lower shelves naturally maintain cooler temperatures and higher humidity due to their proximity to the earth, making them ideal for produce requiring these conditions.
- Space shelves 12-18 inches apart vertically to allow adequate air circulation
- Leave 2-3 inches between stored items to prevent moisture buildup
- Install vents at opposite ends of the cellar for cross-ventilation
- Position shelves 6-8 inches away from walls to prevent condensation
You can fine-tune humidity control by using moisture-absorbing materials or water containers between shelves.
Remember to monitor humidity levels regularly with a humidistat and adjust shelf spacing accordingly to maintain the best range of 60-95%, depending on your stored produce.
Shelf Adjustments for Seasonal Changes
Seasonal changes demand strategic adjustments to your root cellar shelf configuration to maintain ideal storage conditions throughout the year. During winter months, you'll need to protect your stored produce from freezing by moving shelves away from vents and exterior walls. In extreme cold, you might need to temporarily plug vents while still maintaining minimal airflow.
As seasons evolve, you'll want to adjust your shelf heights and positions to accommodate changing temperature patterns:
| Season | Recommended Adjustments |
|---|---|
| Winter | Move produce away from vents, add insulation near doors |
| Spring | Increase ventilation, adjust shelf spacing for better airflow |
| Summer | Position heat-sensitive items on lower shelves, maximize air circulation |
| Fall | Prepare for new harvest, clean and reorganize shelf layout |
| Winter Prep | Check seals, adjust vent controls, verify shelf stability |
Monitor your root cellar's temperature regularly, aiming to maintain 32-40°F (0-4°C). You'll need to be particularly vigilant during seasonal changes when temperature fluctuations are most common. Remember to track storage conditions and produce placement to optimize your shelf configuration based on what works best in your specific root cellar environment.
Frequently Asked Questions
Can Shelf Spacing Affect the Spread of Mold Between Different Produce Types?
Yes, proper shelf spacing directly affects mold spread. You'll reduce cross-contamination when you leave adequate gaps between shelves, as this allows air to circulate and prevents moisture from transferring between different produce types.
What Materials Are Best for Removable Shelf Dividers in Root Cellars?
You'll want to use rot-resistant woods like cedar, cypress, or white oak for your removable shelf dividers. They'll handle moisture well and won't contaminate your produce, while avoiding metal that could rust over time.
How Often Should Shelf Spacing Be Adjusted During Different Seasons?
You don't need to adjust shelf spacing seasonally. While you'll store different produce throughout the year, your focus should be on maintaining proper ventilation and adjusting temperature and humidity levels instead of changing shelf distances.
Do LED Lights Between Shelves Impact Produce Storage Life?
Yes, LED lights can harm your stored produce. You'll want to keep them off as much as possible since any light exposure can cause premature sprouting and degradation. Only use lights briefly when you're accessing items.
Should Shelf Spacing Be Different for Home-Canned Goods Versus Fresh Produce?
You don't need different shelf spacing for canned goods versus fresh produce, but if you're storing both, it's best to separate them into different sections to maintain ideal storage conditions for each.
In Summary
You'll find 12-18 inches between shelves works best for most root cellar storage needs. Make sure you've got adjustable shelves to accommodate taller items and different seasonal produce. Don't forget to leave 2-3 inch gaps between shelves and walls for proper air circulation. By following these spacing guidelines, you'll maximize your storage capacity while maintaining ideal preservation conditions for your harvest.


Leave a Reply