To design a simple cellar drainage system, you'll need to start by mapping your cellar's fixed elements and water accumulation points. Create a layout that slopes 1/4 inch per 10 feet toward your planned sump pump location, ensuring proper water flow. You'll want to dig trenches twice the width of your drainage pipes, typically 2 feet wide and 6 feet deep, then line them with geotextile fabric. Install perforated PVC pipes surrounded by 3/4-inch clean gravel, and connect them to a reliable sump pump system. While these basics will get you started, there's much more to examine for a fully effective drainage solution.
Planning Your Drainage Layout
Proper planning of your cellar drainage layout is essential for an effective water management system.
You'll need to start by identifying fixed elements in your basement, including the furnace, water heater, and load-bearing walls, as these can't be moved and will affect your drainage paths. Map out areas where water typically accumulates and note the location of your main drain exit point through the basement wall. The drain exits 4 feet above slab.
Next, examine your basement's natural slope and determine the high and low points. You'll want to make sure your drainage system maintains a slope of 1/4 inch per 10 feet toward your sump or collection basin. For larger basements, plan cross-floor span channels to achieve thorough drainage coverage.
Consider the placement of future fixtures like bathrooms when designing your layout.
Don't forget to include clean outs and inspection ports at strategic locations where they won't be obstructed. These access points are important for maintenance and must comply with local plumbing codes.
You'll also need to verify that your design meets the Uniform Plumbing Code requirements and can handle worst-case water ingress scenarios.
Consider your soil type's impact on drainage and plan accordingly.
Essential Components and Materials
When you're selecting materials for your cellar drainage system, you'll need to carefully consider your choice of drainpipes, sump pump capacity, and the specific type of stone or gravel that best suits your soil conditions.
Your drainpipe selection will typically come down to either corrugated HDPE or PVC, while your pump should be sized according to your expected water volume and the height it needs to lift water.
You'll also need essential tools like a level, measuring tape, and proper fastening hardware to guarantee your system is installed correctly and functions efficiently. To ensure maximum effectiveness and prevent foundation damage, a proper vapor barrier installation should be included to control moisture migration through walls and floors.
Drainpipe and Pump Selection
A well-designed cellar drainage system depends heavily on selecting the right drainpipes and pumps for your specific needs.
You'll need to choose between PVC, HDPE, or corrugated plastic tubing for your perforated pipes, with diameters ranging from 3 to 24 inches. Select larger diameters for main lines and smaller ones for laterals, making sure they'll handle your expected water volume. The ideal flow velocity range should be maintained between 0.5 to 2.0 feet per second to ensure proper drainage and prevent sediment buildup.
When installing drainpipes, you'll need to lay them in trenches surrounded by gravel or drainage matting. Connect these pipes to a sump pit or drainage outlet, and verify you're following expert guidelines for proper depth and spacing based on your cellar's topography.
For your sump pump selection, focus on matching the pump's capacity to your drainage system's requirements. Install the pump at the lowest point of your cellar floor, and confirm it has an automatic activation feature that triggers when water levels rise.
Don't forget to include a backflow prevention valve to prevent water from flowing back into your cellar. You'll also want to test the system thoroughly after installation and establish a regular maintenance schedule to keep everything working efficiently.
Stone and Gravel Types
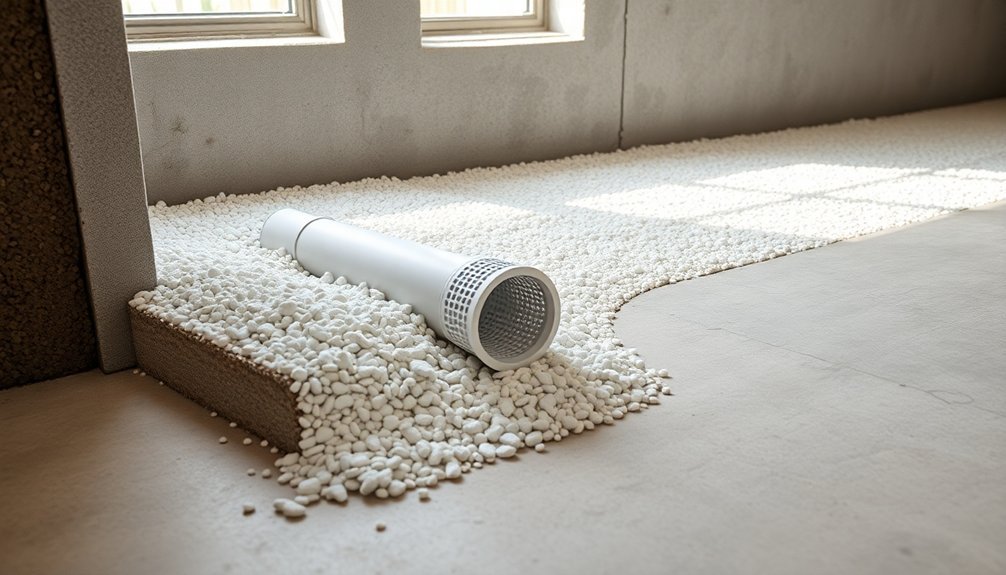
Selecting the right stone and gravel types lies at the heart of an effective cellar drainage system. You'll want to use irregular-shaped stones, specifically Number 57 or 67 Stone, as they provide ideal drainage performance. These stones create essential void spaces that allow water to flow freely while preventing debris from clogging your system.
When installing your cellar drainage system, you'll need to establish a proper gravel base beneath the drainpipe. This foundation helps distribute weight evenly and acts as a preliminary filter for water flow. Don't use round rocks or decorative stones, as they'll slide around and won't compact properly, potentially leading to system failure.
Key benefits of using irregular-shaped stones include:
- Better compaction and weight distribution
- Enhanced void spaces for efficient water flow
- Natural filtering of debris and dirt
- Stable positioning that prevents shifting
Remember to layer your gravel carefully, ensuring there's adequate coverage both below and around your drainpipe.
If you're looking for extra protection, consider adding geotextile fabric over your gravel layer. This combination will create a robust drainage system that effectively manages water flow while maintaining long-term structural integrity.
Required Tools and Hardware
Beyond choosing the right stones, you'll need specific tools and components to build an effective cellar drainage system. Your primary materials should include perforated drainage pipes with smooth, non-corrugated surfaces and strategically placed holes on opposite sides to manage water from both cold joints and rising groundwater.
You'll need a reliable sump pump and pit system, complete with a check valve to prevent backflow. Confirm your sump pit is adequately sized to accommodate both the pump and necessary water volume.
For moisture protection, you'll require vapor barriers and waterproofing membranes that can be securely attached to wall surfaces, along with proper sealing materials for edges and joints.
Don't forget essential control components like backflow prevention valves and drainage outlets. You'll also need a dehumidifier to manage indoor moisture levels.
For the installation process, gather basic construction tools for trenching, pipe laying, and membrane application. If you're installing an exterior system, you'll need additional tools for proper grading and landscaping to guarantee water flows away from your foundation.
Remember to include gutter and downspout components in your materials list to manage surface water effectively.
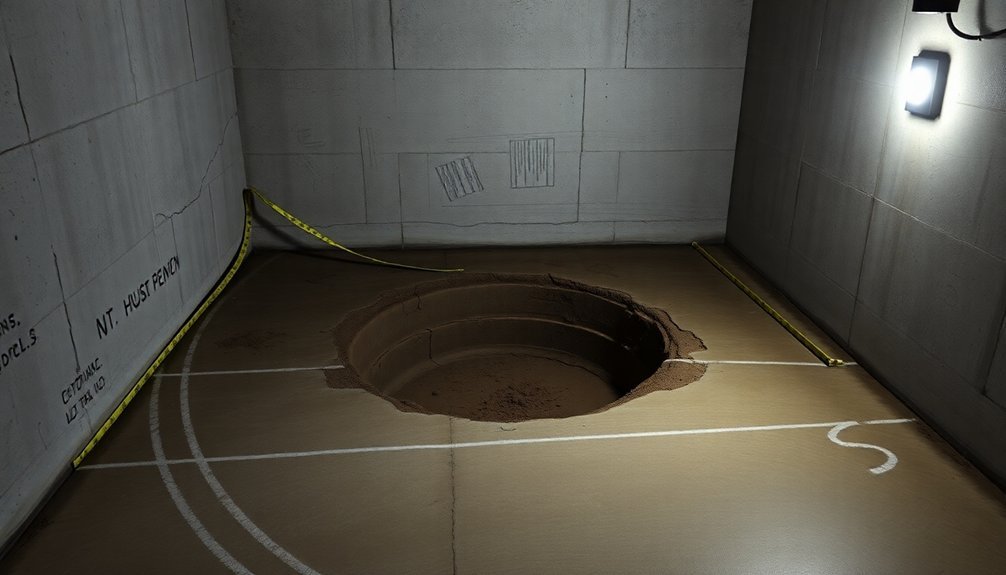
Trench Design and Preparation

Your trench needs to be twice the width of your drainage pipe, which typically means a 2-foot-wide opening to accommodate standard basement drainage systems.
You'll want to dig the trench to a depth of 6 feet, ensuring the pipe sits below the frost line and can effectively channel water away from your cellar.
When selecting stones for your trench, opt for clean, angular gravel between 3/4 inch to 1-1/2 inches in diameter, as this size range provides ideal drainage while preventing pipe clogging.
Proper Trench Dimensions Required
The proper dimensions of your cellar drainage trench are vital for effective water management. You'll need to dig a trench that's approximately 6 inches wide and between 18 to 24 inches deep. Make certain you create a consistent downward slope toward the exit point to guarantee water flows properly and doesn't pool in the trench.
When determining your trench dimensions, consider these significant factors:
- Site restrictions and existing utility lines that might require adjustments to depth or width
- The severity of your moisture problem, which may necessitate a wider trench
- The expected water flow rate through your drainage system
- Local building codes and requirements that might affect trench specifications
You can customize your trench dimensions based on your specific needs, but don't compromise on the minimum requirements.
If you're dealing with heavy water flow, you might need to increase the width beyond 6 inches. Remember to maintain proper slope throughout the entire length of the trench, as this is vital for efficient drainage.
Take careful measurements and mark your dimensions clearly before starting to dig to guarantee accuracy and consistency.
Stone Selection For Trenches
When designing a cellar drainage system, selecting the right stone for your trench plays an important role in its long-term effectiveness. You'll want to use crushed stone or gravel, with sizes ranging from 1/2 inch to 1-1/2 inches. The most commonly recommended option is 3/4-inch stone with no fines, as it provides ideal drainage capabilities.
You'll need to surround your perforated pipe with stone to guide water effectively. Place a layer of stone below the pipe first, then add more around and above it. This arrangement helps capture water and prevents pipe damage from backfill pressure.
Make certain you don't compress the stone while filling the trench, as this could block water flow.
To prevent system clogging, you'll need to install geotextile fabric around your stone layer. This fabric acts as a vital barrier that keeps soil and debris from entering the drainage system while allowing water to pass through freely. Without this protection, your system can eventually silt up, reducing its effectiveness.
When laying sharp aggregate, guarantee it's properly separated from any waterproofing membranes to prevent damage.
Drainpipe Installation Steps
Installing a proper cellar drainage system requires careful attention to four main phases: trench preparation, layering materials, pipe placement, and backfilling.
Begin by digging trenches that are at least 16 inches deep and wide, guaranteeing they're 10 inches deeper than your footing or slab. You'll need to create a proper slope for water flow using stakes and string as guides.
Once you've prepared your trenches, lay down geotextile fabric and add a 2-inch layer of clean gravel. Place your perforated drainpipe on the gravel with the holes facing downward, and connect it to non-perforated pipe for discharge.
You'll then need to cover the pipe with more gravel and wrap it all in the geotextile fabric.
Key installation points to remember:
- Guarantee a minimum slope of 1/2-inch per foot for proper drainage
- Use filter fabric to prevent soil from clogging the system
- Make secure connections between all pipe sections
- Test the system thoroughly before final backfilling
Complete the installation by backfilling the trench carefully, maintaining the integrity of your layered system.
Remember to extend the discharge pipe at least 10 feet from your foundation before daylight release.
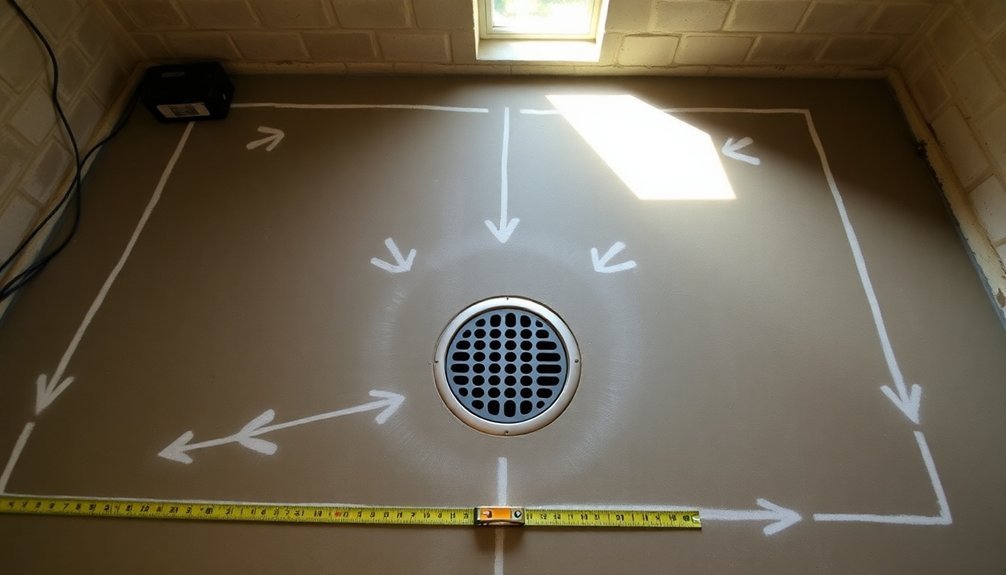
Sump Pump Location Selection
Selecting the right location for your sump pump builds upon the success of your drainage system installation. You'll want to focus on basement corners or low-lying areas where water naturally collects. The ideal spot should be near your foundation footings and at the lowest point of your floor to maximize water removal efficiency.
When choosing your location, consider your soil type, as it affects water retention. Clay soil holds water longer than sandy soil, which might influence where water pools in your basement. You'll need to position the pump near a power source to avoid stretching cords across the floor, and guarantee it's accessible for regular maintenance.
Install your pump near a wall to simplify the discharge pipe's exit route. You'll want to avoid high-traffic areas while maintaining the pump's effectiveness at collecting water. Remember, water follows gravity, so your chosen location must allow for natural water flow toward the pump.
Don't forget to account for the proper pit size and include a check valve to prevent backflow. Consider installing a backup system, either battery or water-powered, to maintain protection during power outages.
Water Flow Management
Proper water flow management serves as the backbone of any effective cellar drainage system. You'll need to guarantee water moves consistently away from your foundation through strategically placed perforated pipes and drainage components.
Start by designing trenches with proper slope gradients that direct water toward drainage outlets, then install perforated pipes covered with gravel and filter fabric to prevent clogging.
To maximize your drainage system's effectiveness, you'll want to incorporate these essential components:
- Interior French drains connected to your sump pump system for basement water management
- Exterior French drains and curtain drains to intercept groundwater before it reaches your foundation
- Traditional floor drains positioned at key collection points for higher water volumes
- Properly sized and positioned sump pumps to efficiently remove collected water
You'll need to maintain consistent water flow by regularly clearing debris from all system components. This includes checking pipe joints for leaks, removing blockages with snakes or high-pressure water jets, and keeping sump pump baskets clean.
Remember that effective water flow management reduces hydrostatic pressure and protects your foundation's structural integrity while maintaining a dry cellar environment.
Gravel and Stone Specifications

With your water flow management system in place, the right gravel and stone specifications will determine your drainage system's success.
You'll need to use gravel that's between 2mm and 9.5mm in size, with at least 50% of the particles falling between 1.0 and 4.0mm. Make sure no more than 10% of particles exceed 4mm, and less than 30% are smaller than 0.25mm.
Layer your gravel to a minimum thickness of four inches across the entire subgrade, ensuring it conforms to the final surface grade within one inch of tolerance. You'll want to use clean, washed, crushed stone or pea gravel, and avoid soft limestones, sandstones, or shales as they're prone to weathering.
Choose angular-shaped gravels for better water movement.
Test your materials thoroughly – they should pass the sulfate soundness test with less than 12% weight loss and score under 40 on the LA Abrasion test. All gravel must pass through a ½" sieve, with no more than 10% passing through a 2mm sieve.
When integrating with other layers, maintain proper ratios: the D15 of your gravel should be less than eight times the D85 of the root zone while remaining at least five times greater than the root zone's D15.
Ventilation and Moisture Control
An effective cellar drainage system isn't complete without a robust ventilation and moisture control strategy. You'll need to implement measures that regulate humidity levels and prevent water damage to protect your cellar's structural integrity.
Start by installing a ventilation system that facilitates constant air movement, preventing stagnant air and allowing moisture to dissipate effectively.
To maintain ideal moisture control in your cellar, focus on these essential elements:
- Install adjustable vents near the ceiling for warm air escape and at ground level for cool air intake, guaranteeing proper natural circulation.
- Seal all cracks and gaps in the walls and floors, then apply waterproof coatings to create an effective moisture barrier.
- Set up mechanical ventilation systems like exhaust fans and dehumidifiers to actively remove excess moisture.
- Cover your sump basin with a sealed lid to prevent water evaporation.
Remember to regularly inspect and maintain your ventilation components while monitoring humidity levels.
You'll also want to confirm your ventilation system's capacity matches your cellar's size for peak performance.
Frequently Asked Questions
How Long Does a Properly Installed Cellar Drainage System Typically Last?
You'll find that a properly installed cellar drainage system's lifespan varies: interior systems last 10-20 years, while exterior systems like French drains can serve you well for 30+ years with regular maintenance.
Can a Cellar Drainage System Be Installed During Winter Months?
Yes, you can install a cellar drainage system during winter. You'll benefit from quicker service since it's a less busy season, and professional crews won't be hindered by cold temperatures or frozen ground conditions.
What Are Signs Indicating an Existing Drainage System Needs Replacement?
You'll need to replace your drainage system if you notice sewer odors, frequent backups, damp spots on your lawn, foundation cracks, recurring basement flooding, or if multiple drains keep clogging despite regular maintenance.
How Much Does Professional Installation Typically Cost per Square Foot?
You'll typically spend $40-85 per linear foot for professional basement drainage installation. For a standard basement perimeter system, expect to pay roughly $5,000-$8,000 total for about 120 linear feet of drain tile.
Are Permits Generally Required for Installing a Cellar Drainage System?
You'll likely need permits for a cellar drainage system, especially if you're connecting to municipal systems or have a high water table. Check with your local building department to understand specific requirements and regulations.
In Summary
You've now got all the key elements needed to create an effective cellar drainage system. Remember to regularly inspect your drains, clean the sump pump, and monitor moisture levels to keep everything working smoothly. If you're not confident about any part of the installation, don't hesitate to consult a professional. With proper maintenance, your drainage system will protect your cellar from water damage for years to come.


Leave a Reply