For your root cellar, you'll want to implement a combination of proven drainage systems that keep your space dry and functional. Start with a perimeter French drain using filter fabric and #57 gravel, sloped at 1 inch per 8 feet. Add a 4-inch perforated pipe system leading to daylight, protected with roofing paper. Install floor drains at the lowest points, connected to an external trench network. Use waterproof wall membranes, gravel bed foundations, and rodent-proof covers at exit points. Consider adding cross-ventilation with strategically placed vents for moisture control. These essential elements work together to create the perfect environment for your food storage needs.
Perimeter French Drain Installation
A properly installed French drain around your root cellar starts with accurate site preparation and marking. You'll need to stake out the drain's path using string, ensuring a minimum slope of 1 inch per 8 feet for proper water flow.
Before digging, call 811 to locate underground utilities, or hire a professional locator service if you're uncertain about line locations. Professional installation can cost between $10-100 per linear foot depending on complexity.
Dig your trench approximately 18 inches wide and 24 inches deep, though you may need to go 6-8 feet deep when installing near your root cellar's foundation. Use a level to verify the proper slope throughout the trench's length.
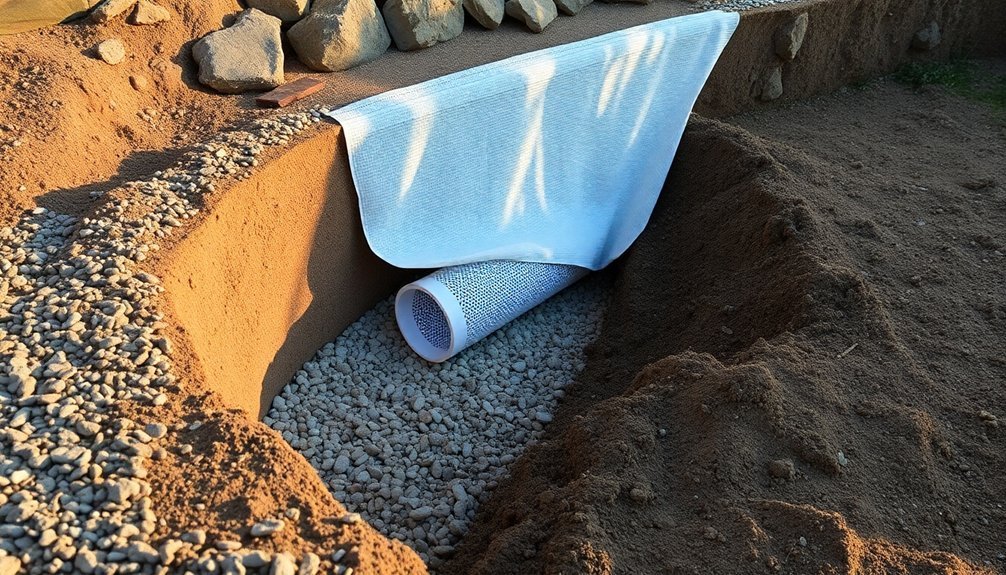
Line the entire trench with filter fabric, leaving enough excess to fold over the top later. Fill the trench with a 12-inch layer of #57 washed gravel, then install the perforated pipe with holes facing downward.
You'll want to use rigid PVC pipe for its durability and ease of maintenance. After connecting all pipe sections, fold the filter fabric over the gravel layer and backfill with soil.
Create a slight mound to accommodate settling, and restore your lawn with sod or grass seed to complete the installation.
Sloped Drain Pipe Systems
Throughout your root cellar's drain system, proper slope remains critical for effective water management. You'll need to maintain a slope of 1 inch for every 8 feet of pipe to guarantee water flows away from your cellar efficiently.
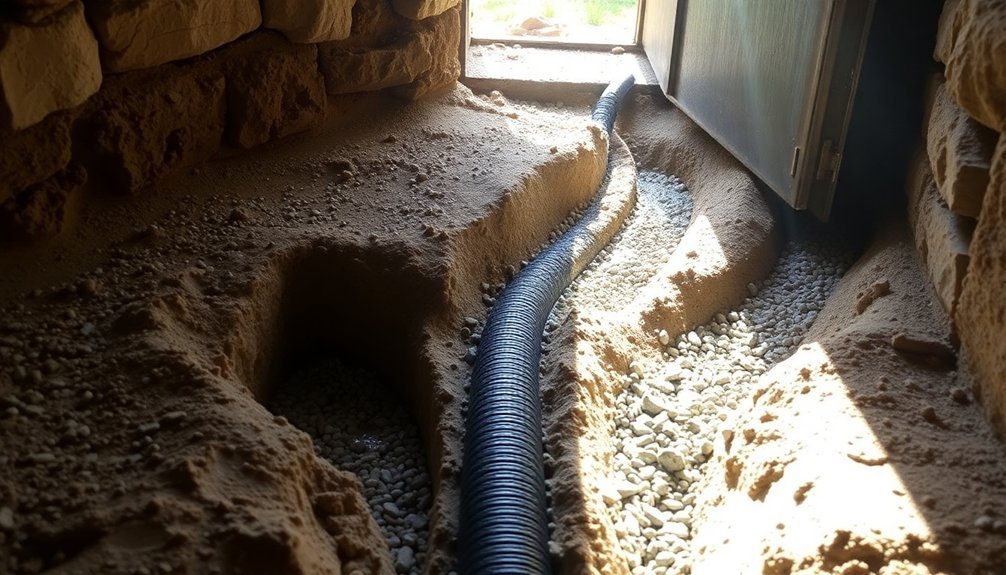
When installing the system, start by digging a trench that leads to daylight and place your 4-inch perforated drainpipe on a gravel bed. Consider installing a waterproofing compound on the exterior walls before laying the drainage system.
You'll want to protect your drainage system by covering the pipe with heavy roofing paper or 6-mil plastic sheeting to prevent silt from clogging the perforations. Position the black perforated pipe at the cellar's rear, and cement around the drain exit to prevent crushing.
Don't forget to cover the opening with heavy wire mesh to keep rodents out.
During construction, integrate the drainpipes into the footer and guarantee your cellar floor sits higher than the outside soil level. Add a gravel layer above the pipe to enhance drainage performance.
When backfilling, use a board to gradually fill soil behind the pipe, and tamp it lightly to avoid over-compaction. You'll need to monitor the system regularly and maintain the slope to prevent water accumulation around your cellar walls.
Gravel Bed Foundation Drainage
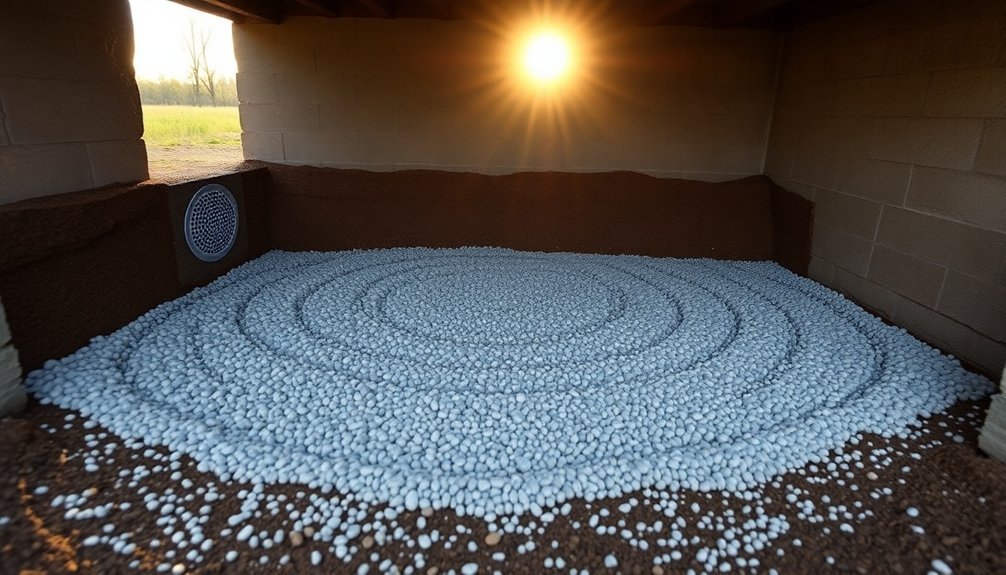
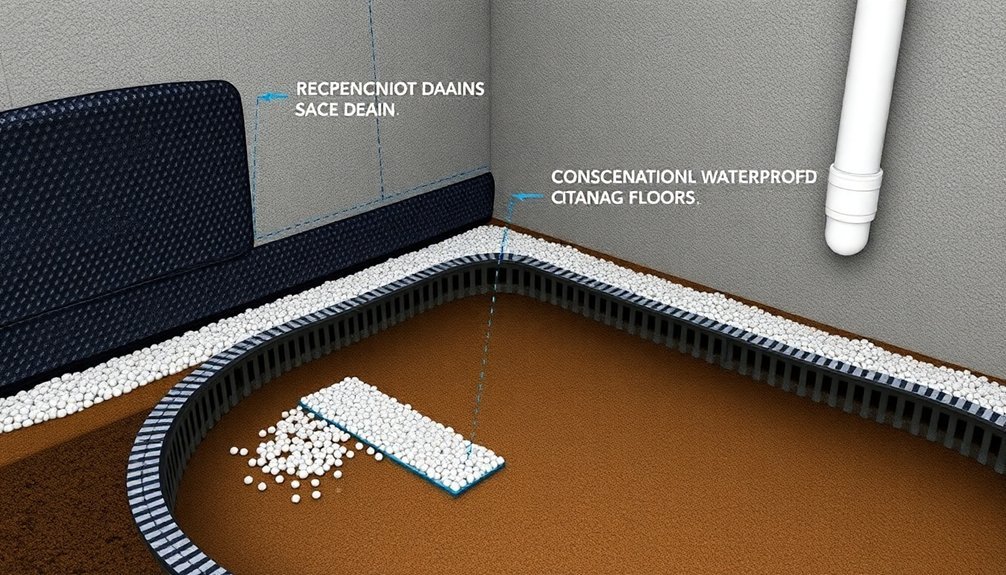
Gravel bed foundation drainage serves as your root cellar's first line of defense against water damage. When properly installed, a 6-8 inch layer of gravel around your root cellar's perimeter acts as a natural filter and distributor, preventing water accumulation that could compromise your structure's integrity.
You'll want to combine your gravel bed with perforated pipes made from durable materials like PVC, ABS, or corrugated HDPE. This combination creates a thorough drainage system that quickly channels water away from your foundation. The addition of a 12-foot black pipe helps ensure proper water management beyond the immediate perimeter.
The gravel bed's porous nature guarantees even water distribution, reducing the risk of localized flooding and foundation damage.
For your root cellar specifically, gravel bed drainage helps maintain the stable, dry environment that's essential for food preservation. It works alongside other components like vertical drainage pipes and sump pumps to provide complete water management.
You'll appreciate the low maintenance requirements, as the gravel's natural filtering properties help prevent system clogging and reduce the need for frequent repairs.
External Trench Drainage Network
You'll need to dig your external drainage trenches at least 24 inches deep, with deeper depths required for areas with heavy rainfall or poor soil drainage.
Position coarse gravel in 4-inch layers both below and above your drainage pipe, ensuring proper water filtration and preventing soil infiltration.
Make the most of natural ground slopes by aligning your trenches to follow the land's contours, allowing gravity to direct water flow away from your root cellar's foundation.
Optimal Trench Depth Guidelines
Proper trench depth planning plays an essential role in an effective root cellar drainage system. You'll need to guarantee your trench extends at least 10 feet underground to benefit from natural insulation, while also accounting for your area's frost penetration depth. This depth isn't arbitrary – it protects your root cellar's foundation and maintains consistent temperature control.
When determining your trench depth, consider these critical factors:
- Dig below the frost line to prevent structural damage to your footer and guarantee year-round functionality.
- Account for local soil conditions and climate patterns that might affect drainage efficiency.
- Calculate the proper slope (1 inch per 8 feet) to maintain consistent water flow.
Your trench should connect to a broader drainage network, incorporating perforated pipes that direct water away from your root cellar's perimeter.
Position the trench to work with your property's natural grade, guaranteeing water flows away from the structure. If you're dealing with particularly challenging soil conditions, you might need to adjust your depth beyond the standard recommendations.
Don't forget to include a reliable exit point for water, such as a catch basin or sewer connection, to complete your drainage system.
Gravel Layer Positioning Tips
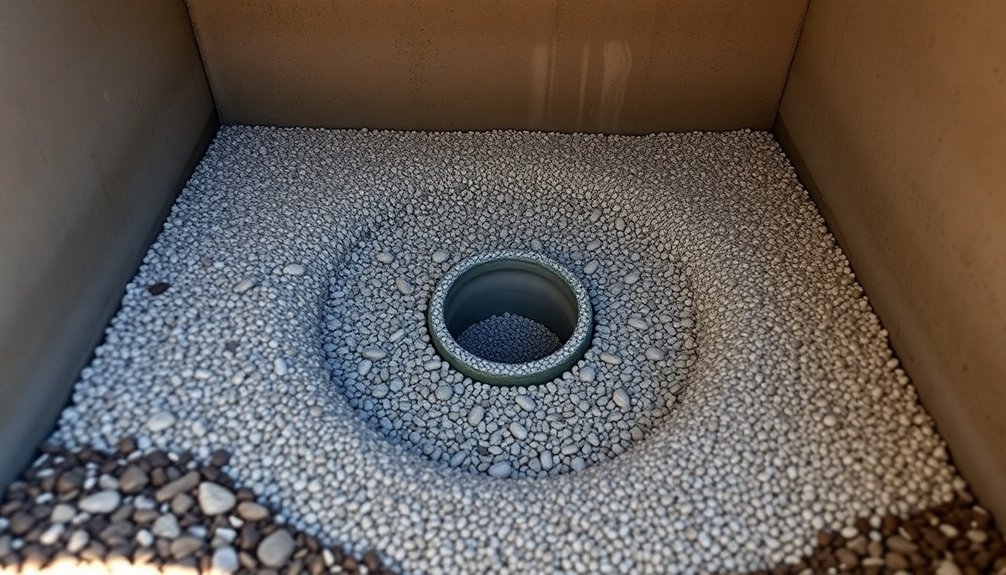
The drainage bedrock of your root cellar begins with strategic gravel layer positioning. You'll need to lay a perforated 4-inch drainpipe around the outer walls at floor level, placing it over a 3-inch gravel base. Position the pipe 12 inches deep and surround it with pea rock that extends 6 inches beyond the tile's diameter.
For ideal drainage, connect your system to daylight if you're building into a hill, or install a French drain for flat terrain. Cover the pea rock with geotextile fabric to prevent soil infiltration and maintain long-term effectiveness.
| Component | Specification |
|---|---|
| Main Pipe | 4-inch perforated |
| Base Layer | 3 inches of gravel |
| Burial Depth | 12 inches |
| Pea Rock Cover | 6 inches above pipe |
| Protective Layer | Geotextile fabric |
Remember to maintain proper grading as you install the drainage network. The pipe should slope away from your cellar at a minimum grade of 1/4 inch per foot. You'll want to guarantee water flows efficiently away from the structure, preventing any potential pooling that could compromise your cellar's integrity.
Strategic Water Flow Design
A well-designed drainage network forms the backbone of your root cellar's water management system.
You'll need to create trenches that slope away from your cellar at a rate of 1 inch per 8 feet, extending them until they reach daylight. The trenches should accommodate both your drainage pipe and sufficient gravel for proper water flow.
Install perforated drainage pipes on a gravel bed and cover them with heavy roofing paper or 6-mil plastic sheeting to prevent silt infiltration. You'll want to secure the pipe at its exit point and protect it with wire mesh to keep pests out. Proper backfilling with gravel around the pipe guarantees efficient water movement and prevents clogging.
Here's why strategic water flow design matters:
- It prevents structural damage by reducing hydrostatic pressure against your cellar walls.
- It manages soil expansion during freeze-thaw cycles that could otherwise compromise your cellar's integrity.
- It creates a consistent drainage path that diverts water away from your stored produce.
When backfilling, work gradually behind a board to maintain even distribution, and avoid over-compacting the soil.
Remember to extend your drainage system at least 90 feet if necessary to reach a safe discharge point.
Layered Backfill Drainage Solutions
Implementing effective layered backfill drainage solutions transforms a basic root cellar into a water-resistant storage space.
You'll need to start with a four-inch layer of gravel at ground level to establish proper drainage foundations. Install perforated plastic drainfield pipes at three critical levels: ground level, mid-wall height, and near the top of your structure.
To maximize water protection, you'll want to place a French drain 2-3 feet below the post-fill ground level. Use sandy, light soil for your backfill material – it's essential for reducing soil pressure while improving drainage capability.
If you're dealing with particularly challenging conditions, add an extra layer of gravel or hay at the cellar's bottom.
When you're backfilling, work in layers and compact each one thoroughly to prevent future settling issues. Make sure you maintain the original ground contour on the downslope wall to prevent water pooling.
Keep the top of your walls at least a foot below your lawn's grade – this simple step will prevent surface water from entering your cellar. Remember to slope your floor base strategically for ideal drainage flow.
Ventilated Drainage Design
To maximize your root cellar's drainage and ventilation, you'll need to coordinate your vent pipe placement with strategic drain patterns that work together as a unified system.
Your 4-inch vent pipes should run opposite each other, with one extending to the floor and another near the ceiling, while ensuring they don't interfere with the 4-inch drain holes and pipes laid to daylight.
This cross-ventilation setup works hand-in-hand with your drainage system, as proper airflow helps prevent moisture buildup while the drains remove any excess water that could compromise your storage conditions.
Air Flow Drain Patterns
Proper airflow throughout a root cellar depends on strategically placed intake and outlet vents.
You'll want to position intake vents low to the ground where cool air naturally settles, while placing outlet vents near the ceiling to release warm air. In larger cellars, installing vents on opposite sides creates ideal circulation, though smaller storage areas might only need a single outlet vent if they've natural cracks for air intake.
During summer months, you'll need to keep your vents open to maintain consistent airflow, which helps control both temperature and humidity levels.
This ventilation system also removes ethylene gas and vegetable odors that can accumulate in your storage space. When winter arrives, seal these vents using packed cloth, expanding foam, or rubber gaskets to prevent freezing air from entering.
For effective air flow patterns, follow these key principles:
- Create height difference between intake and outlet vents to encourage natural air movement
- Install multiple vents in larger spaces to guarantee thorough air circulation
- Position drain pipes to work in harmony with your ventilation system, allowing both air and water to flow efficiently
Vent Placement With Drainage
A well-designed root cellar combines strategic vent placement with effective drainage systems to create an ideal storage environment. You'll need to place intake vents low to the ground and outlet vents near the ceiling, creating a natural airflow that removes warm air and ethylene gas while bringing in fresh air.
Your drainage system must work in harmony with your ventilation. Install PVC vent pipes at a 3-4 inch diameter, angled to prevent water infiltration, and connect them to mesh screens that keep out pests and debris. Make sure your cellar floor sits higher than the external soil level, with floor drains leading to daylight.
| Component | Requirement |
|---|---|
| Intake Vents | Ground level placement |
| Outlet Vents | Ceiling proximity |
| Vent Pipes | 3-4" PVC, angled design |
| Floor Drainage | Higher than outside soil |
| Wall Protection | Water barrier sealing |
Don't forget to incorporate a perforated drainpipe across the cellar's back, set in a gravel bed. This prevents soil pressure while managing water flow. Use gravel backfill above the drainpipe to enhance drainage and prevent soil from clogging your system.
Smart Cross-Ventilation Systems
Smart cross-ventilation systems elevate your root cellar's performance by combining strategic airflow patterns with efficient drainage design.
You'll find that properly positioned vents work in harmony with your drainage system, creating an environment that naturally regulates temperature and moisture levels while preventing stagnant air pockets.
To maximize your root cellar's ventilation efficiency, you'll need to evaluate these critical design elements:
- Position inlet vents on the windward side and outlet vents on the leeward side, ensuring they're integrated with your drainage system to prevent water infiltration while maintaining consistent airflow.
- Install adjustable vent covers that let you control air exchange rates based on seasonal changes and humidity levels, working in tandem with your drainage setup.
- Incorporate a slight slope in your floor design that directs both air and water movement toward your drainage points, creating a synchronized system.
Your cross-ventilation system should complement your drainage design by promoting air movement that helps maintain ideal storage conditions.
When you align vent placement with drainage pathways, you'll create a natural flow that removes excess moisture, regulates temperature, and vents ethylene gas while protecting your stored produce from water damage.
Waterproof Wall Protection Methods
Effective waterproofing of root cellar walls requires choosing between several proven protection methods, each offering distinct advantages for specific situations. You'll find that membrane systems, particularly HDPE-faced products like WM 40, provide exceptional durability and consistent protection against moisture infiltration. When you're dealing with dynamic soil conditions, liquid membranes like Stretch-Flex offer superior flexibility to accommodate ground movement.
| Method | Key Advantage | Best Application |
|---|---|---|
| Sheet Membrane | High puncture resistance | Flat, stable surfaces |
| Liquid Membrane | Seamless coverage | Areas with movement |
| Cementitious | Easy application | Concrete walls |
| Bentonite Clay | Natural solution | New construction |
For concrete retaining walls, cementitious waterproofing creates a strong bond with the surface, though you'll want to monitor for potential cracking over time. If you're seeking an environmentally friendly option, bentonite clay systems naturally expand when wet to create a reliable barrier. Remember that proper installation is essential – sheet membranes need clean, dry surfaces and often primer, while liquid membranes require trained applicators. For maximum protection, consider combining methods, such as using cementitious coating with a membrane system.
Floor Drain Layout Strategy
You'll want to position your floor drains at strategic points that follow the natural slope of your root cellar, with the main 4-inch drain hole placed near the doorway at the lowest point.
Your floor should maintain a consistent 4-6 inch downward slope from back to front, directing water flow towards multiple exit points that connect to your French drain system.
Setting up multiple drainage paths, including perimeter drains connected to exterior holding systems, gives you backup options if one drain becomes temporarily blocked.
Optimal Drain Placement Patterns
Inside every well-designed root cellar, proper drain placement forms the cornerstone of effective moisture control. You'll want to position a 4-inch drain hole near the door, making it easier to hose out the cellar at season's end and maintain cleanliness throughout the year. The drain's placement should follow a deliberate slope, ensuring water flows out efficiently without pooling or creating moisture issues.
To maximize your drain system's effectiveness, incorporate these critical placement strategies:
- Install the main floor drain at the lowest point near the entrance, using perforated plastic drainfield pipe to enhance water removal capacity.
- Position drainage pipes in a broad arc pattern, extending beyond the cellar walls to daylight on both sides, ensuring thorough water management.
- Set up supplementary vertical drainage along the hill's lower side using black corrugated pipe to handle any excess water accumulation.
You'll need to lay your drain pipes at least 12 inches deep, surrounded by a minimum of four inches of gravel. This setup creates an efficient pathway for water movement while preventing clogs and maintaining ideal drainage conditions throughout your root cellar's lifespan.
Strategic Slope and Flow
Throughout a root cellar's design, proper floor slope and drain layout work together to create a reliable water management system. You'll need to maintain a minimum slope of 1 inch per 8 feet to prevent water from pooling. The slope must remain consistent throughout the cellar floor to effectively channel water toward your drains.
Position your drainpipes to daylight, installing them on a gravel bed at least 12 inches deep. You'll want to protect them with heavy roofing paper or 6-mil plastic sheeting to prevent silt infiltration. The pipe system should extend across the entire back of your cellar, including around corners.
For effective drainage, lay 6-8 inches of gravel at the cellar's base before installing your floor. As you backfill around the cellar walls, work in layers and tamp the soil firmly.
On the roof, you'll need 2-4 feet of earth coverage with grass plantings to prevent erosion. If your cellar's on a slope, install a French drain system on the upper side. Keep the floor level higher than the outside soil to guarantee water flows away from your structure.
Multiple Exit Point Design
Strategic floor drainage extends beyond a single slope, requiring multiple exit points to create a robust water management system.
You'll need to install perforated drainage pipes around the outer walls at floor level, with 4-inch pipes buried 12 inches deep and arcing to daylight on each side of the cellar. Cover these pipes with 18 inches of gravel and use repurposed materials like tin sheets to prevent soil compaction.
For ideal moisture control, you'll want to integrate your drain system with ventilation. Install a 4-inch drain hole in the cellar floor and coordinate it with your vent placement. Position air intake pipes near the floor and exhaust pipes near the ceiling for balanced circulation.
Key elements for a successful multiple exit point design:
- Install a second perforated pipe 2-3 feet below soil surface to manage groundwater and prevent freeze damage.
- Cement around drain exits and cover openings with heavy wire mesh to protect against rodents and structural damage.
- Extend all drainage points beyond the cellar's footprint to prevent water re-entry and maintain structural integrity.
Regular maintenance through hosing and periodic system checks will guarantee your drainage network remains effective.
Natural Material Drainage Techniques
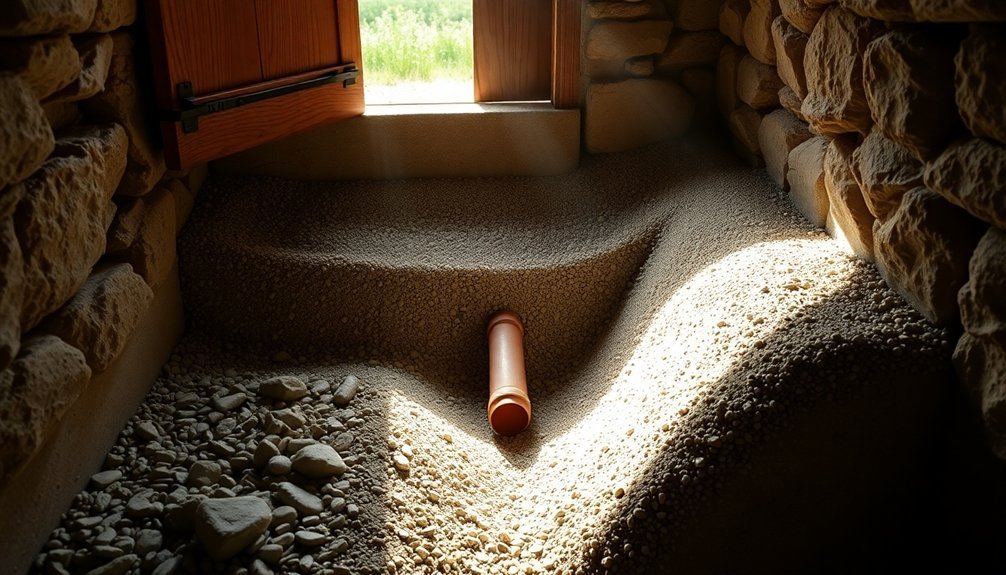
Natural materials form an essential foundation for successful root cellar drainage. You'll want to start with a 3-inch gravel bed as your base layer, which provides vital support for your 4-inch perforated drainpipe. Cover the pipe with heavy roofing paper or 6-mil plastic sheeting to prevent silt from clogging your drainage system.
When backfilling, you'll need to work systematically with gravel and soil. Start by adding gravel around and above the pipe, then carefully tamp the soil as you fill in the sides. Keep adding soil as the ground settles, maintaining the interior floor slightly higher than the exterior grade.
| Material | Purpose |
|---|---|
| Gravel | Creates pathways for water flow and prevents soil compaction |
| Damp Sawdust | Maintains humidity and protects stored vegetables |
| Natural Grass | Stabilizes roof soil and manages rainwater runoff |
You can enhance your cellar's natural drainage by strategically placing excavated earth on both sides. Plant grass on the roof to prevent soil erosion during heavy rains. For internal moisture control, use natural materials like damp burlap bags or sand to maintain ideal humidity levels while storing your vegetables.
Rodent-Proof Drain Covers
Protection against rodents starts with selecting the right drain cover materials and design. You'll want to use galvanized metal, aluminum flashing, or stainless steel covers that resist both gnawing and corrosion.
These materials, when paired with double flaps or valve systems like the Nordisk Rat Blocker TX11, create an impenetrable barrier while maintaining proper drainage.
When installing your rodent-proof covers, use mounting poles that can rotate for a precise fit. Make sure the expanding collars accommodate your pipe diameter and secure them with arms or springs for ideal positioning.
You'll need to maintain enough looseness for regular inspections without compromising effectiveness.
For maximum protection, follow these essential steps:
- Test your covers thoroughly by ensuring they prevent entry even with food attractants on the other side
- Seal all surrounding gaps and holes around foundations and walls
- Install additional hardware cloth or metal collars around nearby conduits and pipes
Remember to cap any unused pump-out ports and regularly inspect your covers for potential freezing or blockages.
Combining these physical barriers with proper maintenance will keep your root cellar drain system rodent-free and functioning efficiently.
Frequently Asked Questions
How Often Should Root Cellar Drainage Systems Be Inspected and Maintained?
You'll need to inspect your root cellar drainage system twice yearly and after major weather events. Don't forget annual maintenance tasks like cleaning debris and flushing pipes. Consider professional inspections every 2-5 years.
Can Existing Root Cellars Be Retrofitted With Modern Drainage Systems?
Yes, you can retrofit your existing root cellar with modern drainage systems. You'll need to assess the structure, install French drains, add waterproof coatings, and update ventilation to guarantee proper moisture control.
What Are Signs That Indicate a Root Cellar Drainage System Is Failing?
You'll notice pooling water, damp walls, musty odors, and visible mold growth. Watch for cracks in the foundation, water stains, and standing water after rain – these're clear signs your drainage system's failing.
Do Root Cellar Drainage Systems Require Special Winter Maintenance in Freezing Climates?
You'll need to regularly clear snow from drain outlets, check for ice blockages, and guarantee proper slope remains intact. In freezing climates, it's essential to monitor pipe insulation and maintain gravel beds throughout winter.
How Long Do Properly Installed Root Cellar Drainage Systems Typically Last?
Your properly installed root cellar drainage system will typically last 10-20 years with regular maintenance. You'll get longer life from PVC components (15-25 years) compared to ventilation parts (5-10 years).
In Summary
You'll find these root cellar drainage systems help protect your stored produce and preserve your cellar's structural integrity. Don't forget to regularly inspect and maintain whichever system you choose to guarantee peak performance. Whether you opt for a French drain, sloped pipes, or natural materials, proper drainage remains essential. Take time to plan your installation carefully – you'll thank yourself later when your cellar stays dry year-round.


Leave a Reply