
When you hear that distinctive click sound in your jar lids, it's actually the vacuum seal doing its job. As your filled jars cool after processing, the heat-expanded air inside contracts, creating a pressure differential that pulls the lid downward. This vacuum effect happens because the cooling process forces air out of the jar, while the rubber seal on the lid prevents new air from entering. You'll know it's working when you hear that satisfying "pop" or click sound, and you can see the lid become slightly concave. A proper vacuum seal isn't just satisfying – it's essential for keeping your preserved foods safe and fresh for months to come.
The Science Behind Vacuum Seals
The science behind this process relies on precise pressure differentials. When there's less pressure inside the jar than outside, the lid maintains its tight seal against the rim.
This mechanism isn't just about keeping the lid in place – it's essential for food preservation. The vacuum environment you've created prevents harmful microorganisms from entering while limiting oxidation and moisture exposure, which could otherwise lead to spoilage. Regular maintenance and inspection of jar seals helps ensure continued effectiveness of the preservation process.
Understanding Proper Jar Sealing
When you process jars in a canner, the heat creates steam pressure that forces air out of the jar while the sealing compound softens to form a tight connection with the rim.
As the jar cools, a vacuum forms inside, pulling the lid downward and creating that satisfying "click" sound that lets you know you've achieved a proper seal.
You'll confirm a successful seal when the lid stays firmly down, doesn't flex when pressed, and makes a clear ringing sound when tapped with a spoon. For optimal preservation, store your sealed glass jars in a cool, dry place.
Vacuum Creates Secure Seal
Modern vacuum sealing creates an airtight environment inside your jar through a precise mechanical process. When you attach the adapter to your jar and press the button, the vacuum sealer begins removing oxygen from the container. You'll notice the lid being pulled downward as the air is extracted, creating negative pressure inside the jar. The efficient process typically takes 40-45 seconds to complete.
| Process Step | What You'll Observe |
|---|---|
| Initial Setup | Clean lid placed on dry jar rim |
| Adapter Connection | Secure fit between sealer and lid |
| Vacuum Activation | Air being pulled out of jar |
| Seal Formation | Lid clicks down and stays firm |
The vacuum's strength pulls the lid down tightly against the jar's rim, forming a secure seal that's different from traditional canning methods. You'll know you've achieved a proper seal when you hear a distinctive 'pop' sound and see the lid pulled down. Unlike canning, which relies on heat to create a seal, vacuum sealing uses mechanical suction to remove air. This process works perfectly for storing dehydrated foods and dry pantry items, though it's not a substitute for proper canning of wet foods. You can test your seal by gently lifting the jar by its lid – it should hold firmly in place.
Heat And Cooling Process
Proper heat processing stands apart from vacuum sealing as the gold standard for preserving wet foods and ensuring long-term storage safety. When you heat-process your jars, you're not just creating a seal – you're destroying harmful microorganisms and forcing out trapped air that could compromise your preserves.
During the filling process, you'll need to remove air bubbles by sliding a plastic spatula between the food and jar wall. After cleaning the rim with a damp cloth, place the lid gasket-side down and screw on the band just fingertip tight. Don't overtighten, as this can interfere with proper sealing.
Once processed, you'll need to let your jars cool undisturbed for 12-24 hours on towels or racks. During this time, the contents will contract as they cool, pulling the lid downward to create that essential vacuum seal. You might notice the liquid level drop, especially in raw-packed foods – this is normal and shouldn't cause concern.
After cooling, remove the screw bands to prevent rusting and difficult removal later. You can check your seal by pressing the lid's center or tapping it – a proper seal will have a concave lid and produce a high-pitched ring.
Signs Of Proper Sealing
Seal security tests help you confirm whether your canning jars have properly vacuum-sealed after processing. You'll want to check for multiple indicators to verify food safety and preservation quality.
Visual inspection is your first line of defense. Look for a concave lid that curves downward in the center, and make sure it's evenly aligned with the jar rim without any gaps or bulging. The lid shouldn't move when you press on it, and it should stay firmly in place even when you lift the jar by the lid alone.
You can also rely on sound testing. Tap the lid's center with a spoon – you should hear a clear, high-pitched ringing sound. If you hear a dull thud instead, that's a warning sign of an improper seal, unless food is touching the lid directly.
After the jars have completely cooled, you can remove the screw bands. A properly sealed lid will stay firmly attached without the band.
Store your sealed jars at temperatures between 50°F and 70°F to maintain seal integrity. While you can reuse the metal bands, never reuse the flat lids for canning, as this could compromise your seal.
Heat and Pressure Effects

Several physical forces work together during the canning process to create that satisfying "click" sound when jars seal properly. When you heat your jars during processing, the air and food inside expand, forcing air to escape through the jar's seams. You'll notice small bubbles rising as this happens, which is exactly what you want to see.
The real magic happens during cooling. As your jars cool down, the contents inside contract, creating a partial vacuum. This vacuum effect pulls the lid downward, forming a tight seal against the jar rim. The lid's gasket, which softens during heating, plays a vital role by flowing slightly to cover the jar's sealing surface completely.
You'll need to be careful with the screw band tightness – it should only be fingertip tight. If you overtighten it, you'll prevent air from escaping during processing, which can lead to seal failures.
During storage, your jars will maintain their seal best if you remove the screw bands and keep them at temperatures between 50°F and 70°F, avoiding extreme temperature fluctuations that could compromise the vacuum seal.
Listening for the Click
You'll hear a distinctive clicking or pinging sound when your jar seals properly as the vacuum forms during the cooling process.
While checking for seals, listen for a tinny sound when tapping the lid with a spoon, which indicates a good seal, rather than a hollow sound that suggests a poor one.
When you break the seal to open a properly sealed jar, you'll hear a satisfying pop or hiss as the vacuum releases.
Sound Signals Vacuum Formation
Listening for distinct sounds during the canning process can help confirm that your jars are sealing properly. As your jars cool, you'll often hear a distinctive "ping" or clicking sound that signals the vacuum seal forming. This happens when the lid contracts and curves downward, creating the airtight seal that's vital for food preservation.
- A clear "ping" sound indicates the vacuum seal is forming
- You can tap sealed jars with a spoon to hear a high-pitched ring
- Not hearing a click doesn't always mean the seal failed
- The sound may be muffled but still indicate proper sealing
- Listening for sounds is just one way to verify proper sealing
While sound signals are helpful indicators, you shouldn't rely on them alone. You'll want to check for other visual signs of proper sealing, such as the lid's concave shape.
After the jars have completely cooled, press the center of each lid. If it doesn't spring back when pressed, you've achieved a proper vacuum seal. Remember that the cooling process is essential for seal formation, as it creates the vacuum that pulls the lid firmly against the jar's rim.
Distinct Pop When Opening
The distinct pop when opening a properly sealed jar provides another key confirmation of successful preservation.
When you open a properly sealed jar, you'll hear a noticeable pop sound as air rushes in to equalize the vacuum pressure that's been maintaining the seal. This sound indicates that your jar has maintained its airtight seal throughout storage.
You can rely on this pop sound as a critical safety check before using your preserved foods. When you break the seal by lifting the lid, the sudden release of the vacuum creates this characteristic noise. If you don't hear this sound when opening a jar, you'll want to examine the contents carefully, as this could suggest the seal was compromised during storage.
To guarantee you'll hear this confirmation pop, store your sealed jars without their rings. This practice makes it easier to detect any seal failures and prevents false security from tight bands.
You'll also want to avoid stacking jars directly on top of each other, as this can hide potential seal issues.
Remember that this distinctive pop sound is your final verification that your preserved foods have remained safely sealed.
Testing Seal Through Sound
During the canning process, testing jar seals through sound provides a reliable method for confirming proper preservation. You'll want to use a metal spoon to tap the center of each lid, listening carefully for a high-pitched, ringing sound that indicates a proper seal. If you hear a dull or hollow sound instead, the jar likely hasn't sealed correctly.
- A properly sealed jar produces a distinct, high-pitched ring when tapped
- An unsealed jar makes a dull, hollow sound
- The lid should feel solid and slightly concave when pressed
- You can test the seal by lifting the jar by the lid alone
- Compare sounds between multiple jars to recognize the difference
Don't worry if you don't hear an immediate "ping" sound after processing, as seals can take time to form. When testing, tap the lid with the bottom of a teaspoon multiple times to verify consistency in the sound.
Remember that smaller jars mightn't produce as loud a sound as larger ones, but they can still be properly sealed. Always avoid touching the lids during cooling, as this can interfere with proper seal formation and create false results.
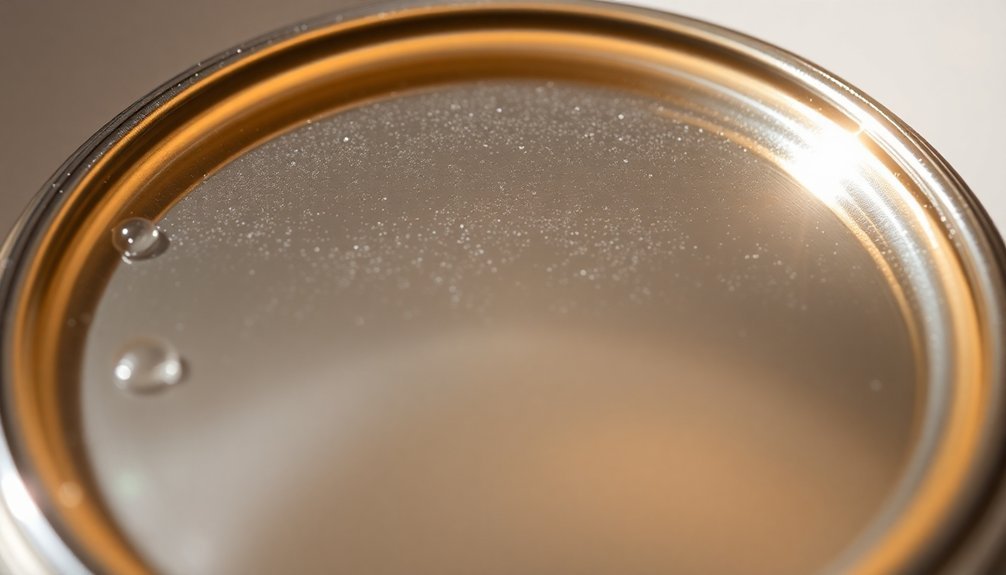
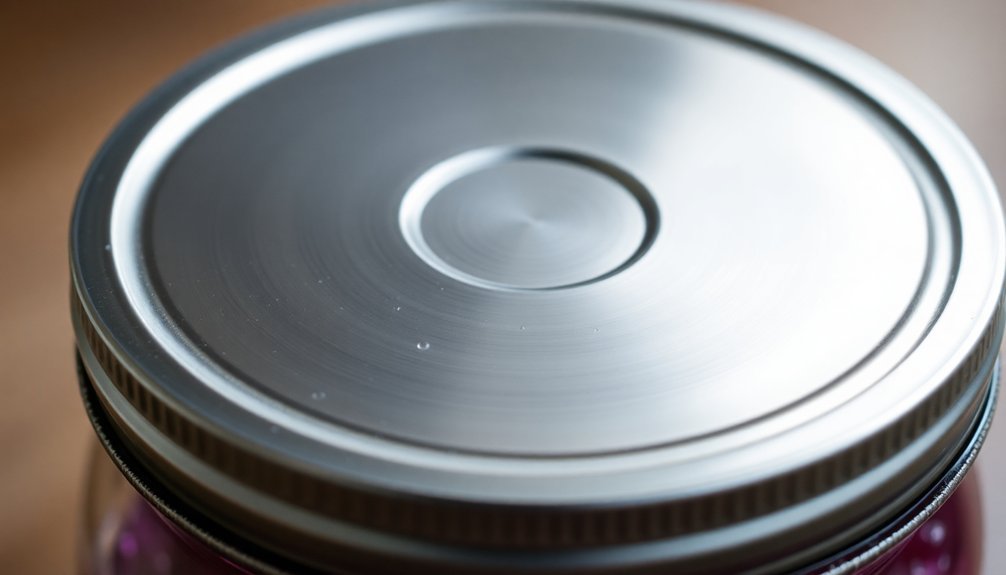
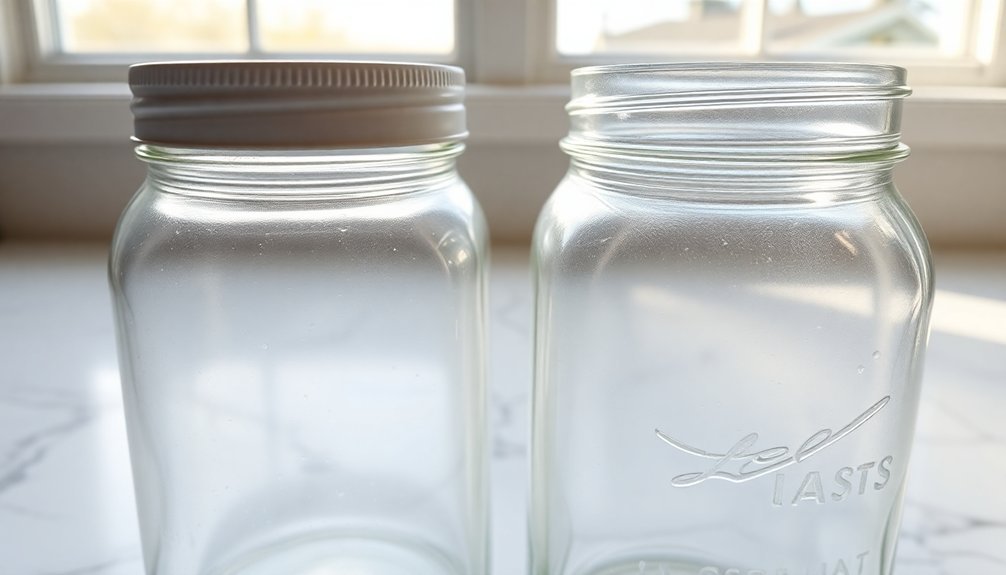
Visual Signs of Sealing
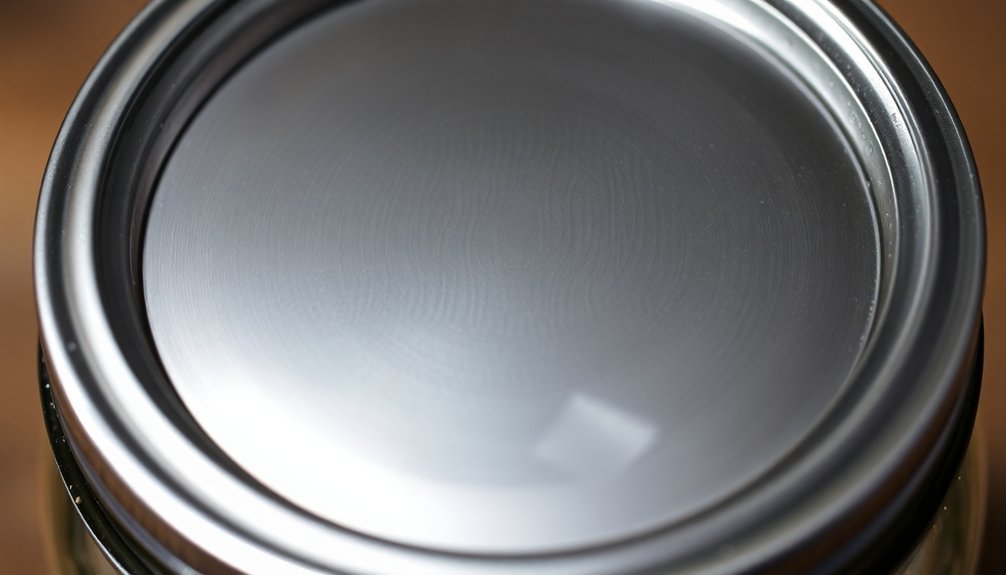
Successfully sealed jars display a distinct visual indicator when their lids become concave, curving slightly downward in the center. You'll notice this depression forms due to the vacuum seal created during the proper canning process. To check your jar's seal, hold it at eye level and examine the lid's center – it should curve noticeably downward.
| Lid Appearance | What It Means | Action Required |
|---|---|---|
| Concave (down) | Properly sealed | Safe to store |
| Flat | Failed seal | Reprocess or refrigerate |
| Bulging | Unsafe/spoiled | Discard immediately |
If you're uncertain about the seal's integrity, you can perform additional checks. Remove the screw band first – this gives you a clear view of the lid and guarantees you're not mistaking band tightness for a proper seal. A sealed lid should stay firmly in place even without the band. If you notice any lid that's flat or bulging upward, don't take chances – these are clear signs of seal failure. Remember that proper visual inspection is your first line of defense in guaranteeing food safety through home canning.
Common Sealing Problems
Understanding common sealing problems can help prevent frustrating failures in your home canning projects. Several factors can interfere with proper sealing, from basic cleanliness issues to technical problems with your equipment.
You'll need to pay careful attention to jar preparation, lid handling, and processing techniques to guarantee success.
- Food particles or grease on the jar rim will prevent a proper seal
- Reused or improperly heated lids won't seal correctly
- Damaged jars with chips or cracks can't form an airtight seal
- Overtightened or rusty bands can interfere with the sealing process
- Incorrect processing times or methods lead to seal failures
To avoid these issues, always clean jar rims with a damp cloth just before adding lids, and don't reuse metal lids.
Heat your lids in hot (not boiling) water to soften the rubber seal, and tighten bands only to "finger-tip tight."
You'll also want to inspect your jars for damage and guarantee you're using proper canning jars with compatible lids.
During processing, maintain appropriate heat levels and follow recommended processing times.
Don't rush the cooling process, as this can cause liquid to escape and compromise your seal.
Temperature's Role in Sealing

Don't retighten hot lids, as this can damage the gasket and compromise your seal.
The cooling process is when the magic happens – as the temperature drops, the air pressure inside decreases, creating the vacuum that pulls your lid down.
Environmental temperatures matter too – if you're storing your canned goods, remember that extreme heat can soften sealing materials, while cold temperatures might make them less flexible.
That's why proper storage conditions are essential for maintaining your seals' integrity.
Safety Through Proper Sealing
You'll find that proper vacuum seals are essential for preventing food spoilage and protecting against harmful bacteria entering your preserved foods.
The temperature changes during the canning process directly impact your food's safety by creating the necessary vacuum and activating the sealing compound to form an airtight barrier.
You can confirm a proper seal through visual checks like the lid's downward curve, listening for a clear ring when tapping the lid, and testing that the center doesn't flex when pressed.
Vacuum Seals Prevent Spoilage
Proper vacuum sealing creates three essential barriers against food spoilage in home canning. First, it removes oxygen that bacteria and mold need to grow, creating an anaerobic environment that prevents most microorganisms from thriving.
Second, it forms an airtight seal that stops new contaminants from entering the jar.
Third, it helps maintain the food's quality by preventing dehydration and oxidation.
You'll know your vacuum seal is working correctly when you hear that satisfying "click" as the lid becomes concave during cooling. This process happens as the jar's contents contract and pull the self-sealing lid firmly against the jar rim, where the sealing compound has softened and flowed to create an impenetrable barrier.
- Your food will maintain its color, texture, and flavor longer when properly sealed
- You'll reduce food waste by extending the shelf life of your preserved goods
- Your preserved foods will be protected from freezer burn and dehydration
- You'll prevent most harmful bacteria and mold from contaminating your food
- Your jars will remain safely sealed until you're ready to use them
Remember to handle specific foods with care, as some items like raw onions, fresh mushrooms, and garlic aren't suitable for vacuum sealing due to botulism risks.
Temperature Impact On Safety
Through careful temperature control, the safety of home-canned foods depends on a precise balance of heat and timing.
You'll need more than just a good seal to guarantee your food is safe – proper heat processing is essential to destroy harmful microorganisms that could cause spoilage or illness.
When you're processing your jars, the temperature must be high enough not only to create the seal but also to kill pathogens.
While the sealing compound softens at relatively low temperatures, you'll need sustained higher temperatures to make your food shelf-stable.
Don't assume that because your jar has sealed, the food inside is safe to store.
During the canning process, you'll want to guarantee proper air escape by applying screw bands "fingertip tight."
If you overtighten them, trapped air can prevent proper sealing and compromise food safety.
You shouldn't retighten hot lids either, as this can damage the gasket and lead to seal failure.
Remember to let your jars cool undisturbed at room temperature for 12-24 hours.
Temperature fluctuations during storage can affect your seals, but proper initial processing will help maintain seal integrity and food safety.
Visual Inspection Methods
Visual inspection of your canned jars involves both high-tech and manual methods to confirm safety. While commercial facilities use advanced color-based inspection systems with high-resolution cameras and multispectral illumination, you'll need to rely on careful manual inspection techniques at home.
Professional systems can detect subtle defects like chips, cracks, and imperfections that might compromise your seal's integrity.
When inspecting your jars, you'll want to focus on these critical checkpoints:
- Run your fingertip around the rim to detect any chips, cracks, or uneven surfaces that could prevent proper sealing.
- Check for any glass fragments, debris, or food particles that might interfere with the seal.
- Examine the rim in good lighting to spot any dips, tilts, or irregularities in the sealing surface.
- Look for proper lid placement and alignment before applying the ring.
- Inspect the seal after processing by checking if the lid has properly clicked down.
Before applying lids, you'll need to wipe the jar rims with a clean, damp cloth to confirm there's nothing between the lid and the sealing surface.
Remember to apply rings only "finger-tip tight" to allow proper venting during the canning process.
Testing Your Jar Seals
Safe preservation demands thorough testing of your jar seals after the recommended cooling period of 12-24 hours. During this time, don't disturb the jars or tighten the screw bands, as this can compromise the sealing process. You'll notice the content level may lower as the jars cool, which is completely normal.
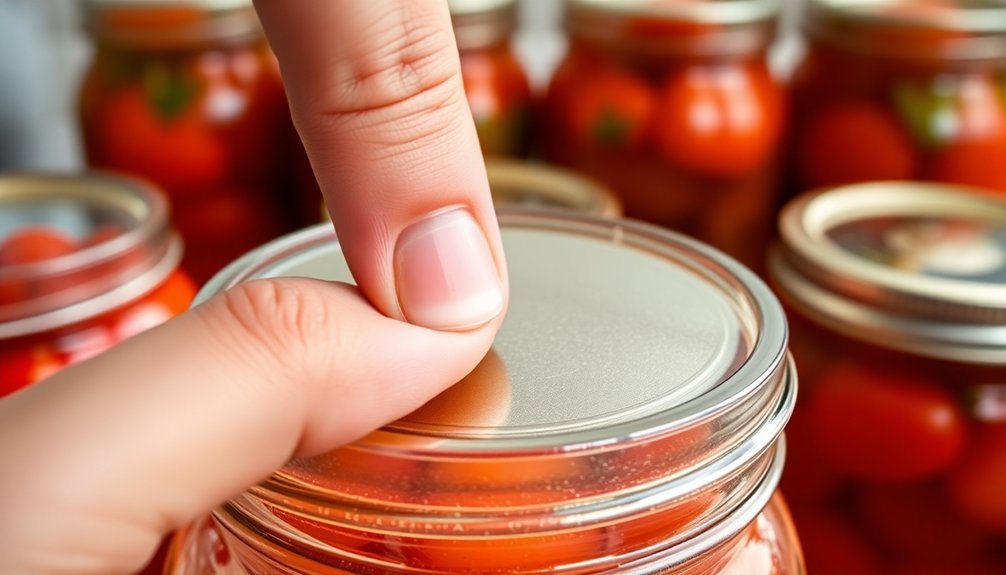
You can test your jar seals using three reliable methods. First, try the press test by pushing down on the center of the lid with your finger. If it doesn't spring back up, you've got a proper seal.
The spoon tap test offers another approach – tap the lid with a metal spoon's bottom. You'll hear a clear, high-pitched ring if it's sealed correctly, while a dull sound suggests a failed seal.
For visual confirmation, hold your jar at eye level and look for a concave depression in the lid. A properly sealed lid curves slightly downward from the edges to the center. If you notice any flatness or bulging, the seal may be compromised.
Remember to check each jar using multiple methods to verify the safest possible preservation of your food.
Preserving Food Quality
Proper food preservation relies on two critical factors: eliminating harmful microorganisms and creating an environment that prevents their return. When you're preserving food through canning, the heating process destroys microorganisms while driving out air, creating a vacuum seal that keeps your food safe and fresh.
This method not only prevents bacterial growth but also maintains the food's nutritional value and sensory qualities.
Key benefits of proper preservation for food quality:
- Your food retains its original taste and aroma when you follow correct canning procedures
- The process inactivates enzymes that could lead to spoilage while preserving nutrients
- You'll get consistent texture and quality through uniform heating and cooling
- Your preserved foods remain stable at room temperature for extended periods
- You won't need continuous refrigeration, saving energy while maintaining food safety
The combination of heat processing and vacuum sealing creates an ideal environment for long-term storage.
Maintaining Vacuum Sealed Jars
Maintaining the integrity of vacuum sealed jars requires consistent monitoring and careful handling throughout their storage life. To preserve your sealed jars effectively, you'll need to implement specific storage practices and regularly check for any compromises in the seal.
Once your jars have cooled completely, remove the screw bands and clean them thoroughly. You don't need to replace these bands during storage, as a properly sealed lid will stay firmly in place.
Store your jars in a cool, dry location where temperatures remain between 50°F and 70°F to prevent seal failure from temperature fluctuations.
You should periodically inspect your stored jars for signs of seal integrity. Press the center of each lid – it should remain concave and immobile. If you can lift the jar by the lid alone without it detaching, that's another positive indication of a proper seal.
You can also tap the lid with a spoon; a clear ringing sound confirms the seal is intact.
When handling your jars, always use a jar lifter to prevent damage. If you discover any compromised seals, you'll need to reprocess the contents using new lids and following the original processing time.
Storing Sealed Jars Correctly
Successful storage of sealed jars depends on four critical factors: environment, organization, handling, and support.
You'll need to store your jars in a clean, cool, dark place where temperatures stay between 50-70°F. Keep them away from heat sources like pipes, furnaces, or direct sunlight, as temperatures above 95°F can compromise the seals.
Key storage requirements you can't ignore:
- Remove ring bands after 12-24 hours to prevent moisture and mold
- Clean and dry jars thoroughly before storage
- Stack jars no more than two layers high
- Use support between layers to protect seals
- Keep jars away from dampness to prevent lid corrosion
When cooling your newly sealed jars, place them on a clean, dry towel away from drafts for 12-24 hours.
Don't rush this process, as proper cooling guarantees a strong seal. Once cooled, label each jar with the date, contents, and processing method.
If you choose to stack your jars, place larger ones on the bottom and smaller ones on top, always positioning them against the back wall of your storage area.
Identifying Failed Seals
Routinely checking your jar seals after processing helps prevent spoilage and guarantees food safety. You can identify failed seals through three reliable methods: visual inspection, tactile testing, and auditory checks.
For visual inspection, examine the lid at eye level – it should be concave (curved downward) in the center. A flat or bulging lid indicates a failed seal.
When using the tactile method, press the center of the lid with your finger. If it springs back when released, you've got an unsealed jar. A properly sealed lid won't move when pressed.
For the auditory test, tap the lid with a metal spoon – sealed jars produce a high-pitched ring, while unsealed ones make a dull sound.
Several factors can cause seal failures. Verify you're cleaning jar rims thoroughly, especially with greasy products, using a vinegar-dampened cloth if needed.
Maintain proper headspace to allow for adequate vacuum formation. Don't overtighten bands – they should only be fingertip tight to allow proper venting during processing.
Watch for siphoning, where food seeps between the rim and lid, as this can create false seals.
Frequently Asked Questions
Can Sealed Jars Be Safely Transported in High-Altitude Areas?
Yes, you can safely transport sealed jars at high altitudes since vacuum seals aren't affected by elevation changes. Just guarantee they're properly sealed beforehand and protect them from physical damage during the journey.
How Long Can Empty Mason Jars Be Stored Before Affecting Sealing Quality?
You can store empty Mason jars for 10-13 years before their sealing quality declines. If you've maintained them well, they'll last longer, but watch for hairline cracks and wear on sealing surfaces.
Does Extreme Humidity Affect the Clicking Sound of Properly Sealed Jars?
You won't notice any difference in your jar's clicking sound due to humidity. The clicking happens because of pressure changes inside the jar, and extreme humidity doesn't affect this mechanical process.
Can Jar Seals Be Affected by Nearby Electrical Appliances or Magnetic Fields?
You don't need to worry about electrical appliances or magnetic fields affecting your jar seals. The sealing process relies purely on thermal and mechanical forces, not electrical or magnetic interactions.
Why Do Some Brands of Jars Click Louder Than Others?
You'll hear different clicking volumes because jar brands use varying lid materials and thicknesses. The design, manufacturing process, and flexibility of the metal all affect how loudly the vacuum seal pops down.
In Summary
Now that you've learned about the science of vacuum sealing and jar preservation, you'll be able to confidently identify proper seals by listening for that satisfying "click" and checking visual indicators. Remember, proper sealing isn't just about the sound – it's about creating a secure vacuum that'll keep your preserved foods safe and fresh. Keep practicing these techniques, and you'll become an expert at home food preservation.


Leave a Reply