To prevent mold when air-drying fish, you'll need to start with proper salt brining for 2-24 hours, depending on thickness. Cut your fish into uniform strips no thicker than ¼ to ⅜ inch, ensuring consistent size for even drying. Choose cool, dry weather with temperatures below 50°F and humidity under 75%. Set up your drying racks 1-2 feet above ground in a well-ventilated area with good airflow. Control temperature and humidity levels carefully, rotate fish pieces regularly for even drying, and store finished products in airtight containers. These seven fundamental steps will get you started, but mastering the details makes all the difference.
Salt Brining Before Air Drying
Salt brining is an essential first step in successfully air-drying fish. You'll need to create a brine solution using water, salt, and sugar, ensuring the mixture isn't too concentrated to avoid over-salting your fish. For the best results, dissolve these ingredients in warm water, then let the solution cool to room temperature before adding your chosen spices or seasonings.
When you're ready to brine, submerge your fish completely in the solution and refrigerate it. You'll want to let it soak for about 2 hours, though you can extend this to overnight depending on the size of your fish. Low-oil fish varieties work best for this process, as they'll dry more effectively after brining. Paper towel blotting after rinsing helps prepare the fish for optimal air drying results.
Once the brining time is complete, don't skip the vital step of thoroughly rinsing your fish under cold water to remove excess salt.
This brining process serves two important purposes: it helps maintain moisture within the protein while creating the right conditions for proper preservation. The salt penetrates the fish tissue until it reaches equilibrium, ensuring even distribution throughout the meat and setting the stage for successful air-drying.
Proper Fish Cutting Techniques
You'll want to start by either butterflying your fish along the backbone or filleting it completely, depending on its size and thickness.
When cutting the fish into strips, maintain a consistent thickness between ¼ to ⅜ inch to guarantee even drying throughout the piece.
For the cleanest results, remove the skin by placing the fish skin-side down on your cutting board and carefully working your knife between the flesh and skin at a slight angle.
Consider using a spruce bark surface when preparing your fish, as this traditional material provides better grip and prevents slipping during cutting.
Butterfly or Fillet Method
Both butterflying and filleting are essential techniques for preparing fish before air-drying. Before you begin either method, you'll need to clean the fish thoroughly, removing all intestines, scales, and gills.
Pat the fish completely dry with paper towels and remove the head if it's longer than 8 inches or weighs more than half an ounce.
For the butterfly method, position the fish with its head facing you and the gut cavity exposed. Make two precise incisions to remove the spine while keeping the skin and fins intact along the fish's back. The method works particularly well for lean fish species like cod and haddock.
Break the spine near the tail, leaving a small portion attached, then spread the fish open to guarantee even drying when hung.
If you prefer filleting, start by following the same cleaning steps. After removing the head and gills, carefully peel away the skin.
Use your knife to slide down the spine, separating one half of the fish at a time. Once you've removed the spine, check for any remaining bones in the fillet and remove them.
Both methods work well for air-drying, but butterflying is often preferred as it makes hanging easier and promotes more consistent drying.
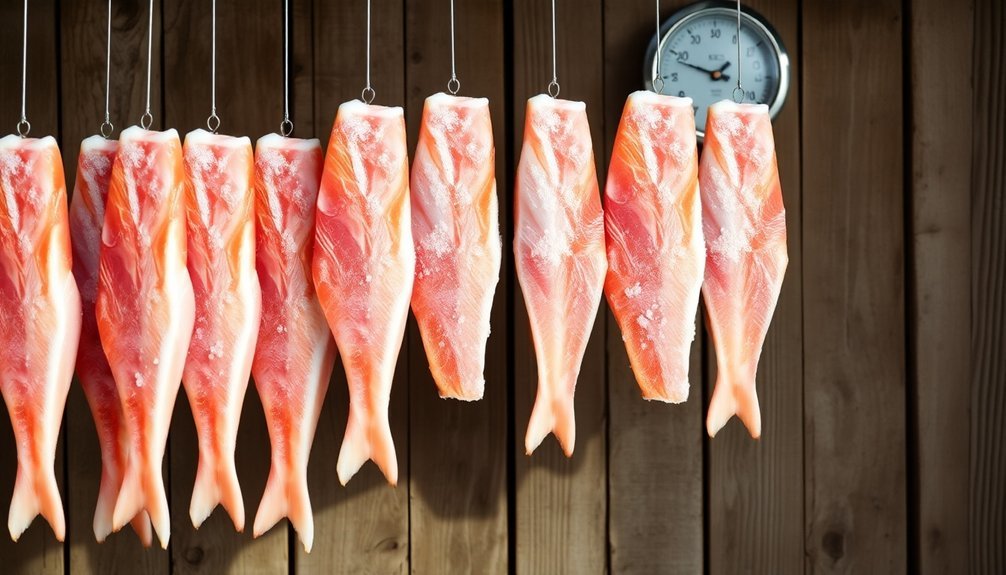
Cross-Cut Thickness Guidelines
Cross-cut precision plays a vital role in successfully air-drying fish without mold. You'll want to guarantee your cuts maximize surface area exposure while maintaining uniform thickness throughout each piece. Keep your cuts no thicker than 40mm, as thicker pieces are prone to spoilage before they're fully dried.
When cutting, score the fish multiple times to create folds that allow air and smoke to penetrate effectively. Make your cuts at a downward angle to help moisture run off rather than pool. If you're working with particularly thick fish, cut all the way through to the skin to guarantee even drying throughout.
You'll need to adjust your cutting technique based on weather conditions. In damp weather, cut your fish thinner than usual to prevent souring. It's important to maintain uniformity in your cuts so all pieces dry at the same rate – this helps prevent mold growth and guarantees consistent quality.
When splitting fish, make sure both halves have similar weight to prevent them from slipping off drying poles. Remember, lean fish species are your best choice for air-drying, as they dry more effectively than fatty varieties.
Fish Skinning Best Practices
Proper skinning technique serves as the foundation for successfully air-drying fish. You'll need to start by positioning your fish on a stable cutting board and using a sharp fillet knife for precise control. Keep your fingers tucked safely away while holding the fish firmly in place.
Begin at the tail end by making a small angled cut through the flesh without piercing the skin. You'll want to keep your knife blade almost parallel to the board as you work.
Once you've made the initial incision, slide your knife between the flesh and skin, maintaining steady pressure as you separate them. If you're having trouble gripping the skin, use a paper towel for better traction.
Push your knife forward while pulling the skin back in one fluid motion. When you encounter resistance, use gentle back-and-forth movements to work through it. Continue this process until you've nearly removed all the skin.
Complete the process by trimming any remaining skin or scales, then rinse the fillet under cold water. Pat it dry thoroughly with paper towels and inspect it carefully to verify you've removed all skin fragments before proceeding with the air-drying process.
Optimal Weather Conditions
Successful air-drying of fish depends heavily on specific weather conditions that prevent mold growth and guarantee proper preservation. You'll need temperatures below 10°C/50°F for natural drying, while keeping relative humidity under 75% to avoid moisture absorption. Constant wind movement and proper sun exposure are equally vital.
Choose spring or autumn for ideal drying conditions, as these seasons typically offer the perfect mix of temperature and wind. During wet weather, you'll need to adjust your cutting thickness and possibly move fish indoors.
| Weather Factor | Ideal Conditions | What to Avoid |
|---|---|---|
| Temperature | Below 10°C/50°F natural 63°C/145°F dehydrator |
Above 60°C/140°F for cold smoking |
| Humidity | 50-60% ideal range | Levels above 75% |
| Wind | Constant breeze | Stagnant air |
| Sun Exposure | Direct sunlight with turning every 2 hours |
Prolonged exposure without turning |
| Season | Spring or autumn | Wet summer months |
For high-humidity areas, you'll need to dry at lower temperatures (35-40°C), while drier conditions allow for higher temperatures (60-70°C). Remember to protect your fish during nighttime or rainy conditions, and always bring them inside if humidity levels spike above 75%.
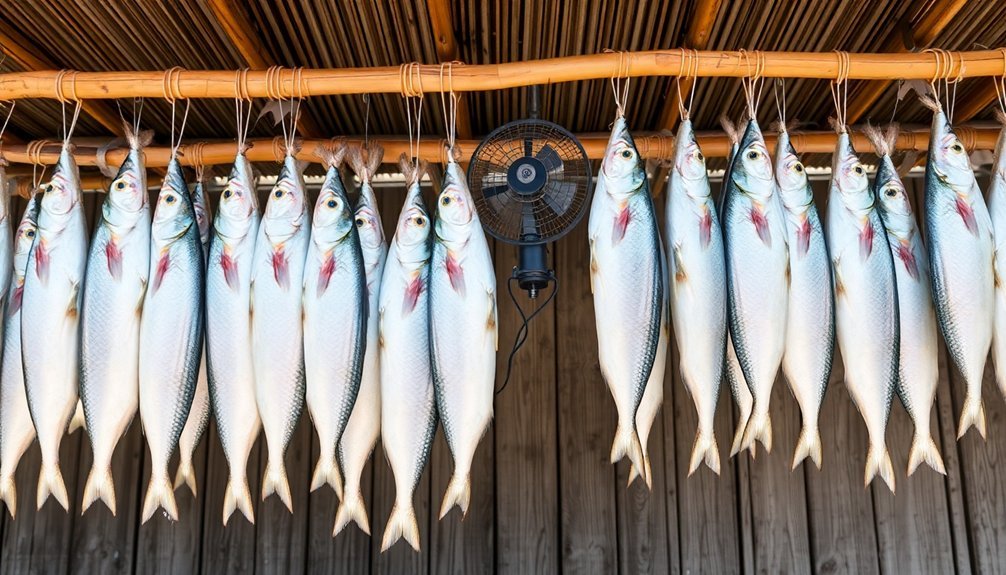
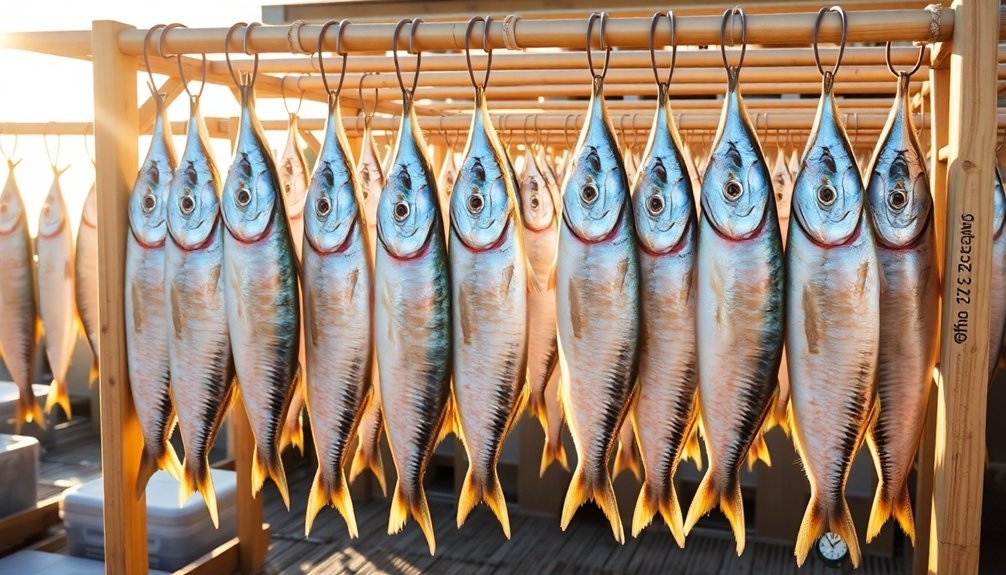
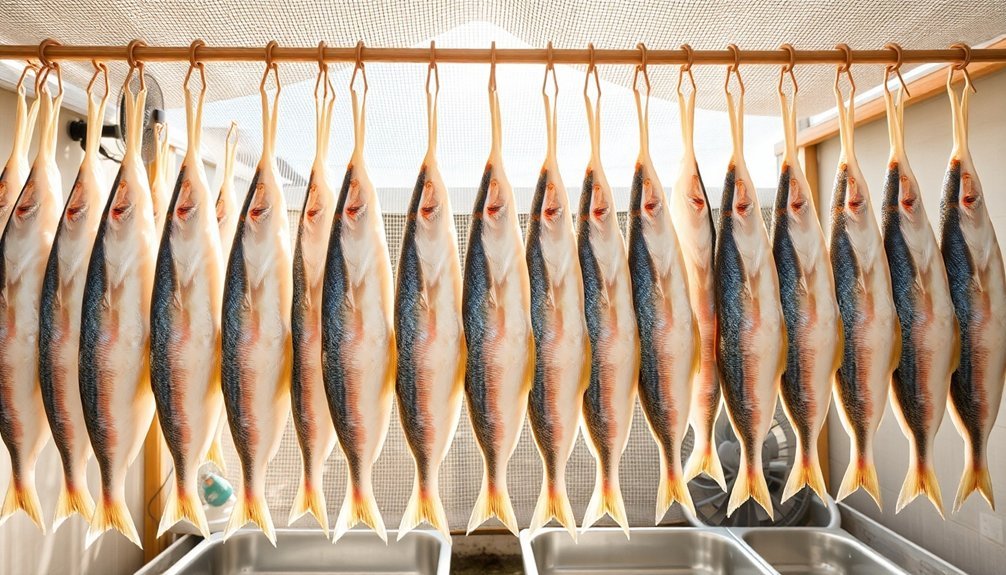
Air Circulation Setup
Position your drying racks with 6-8 inches of space between them to allow ideal hot air movement throughout your setup, taking advantage of circulating fans to maintain consistent airflow.
You'll want to direct the airflow horizontally across the fish pieces while ensuring the air moves evenly from bottom to top of your rack system.
Space individual fish pieces at least 1 inch apart on stainless steel trays, preventing them from touching each other to maximize air exposure and promote uniform drying.
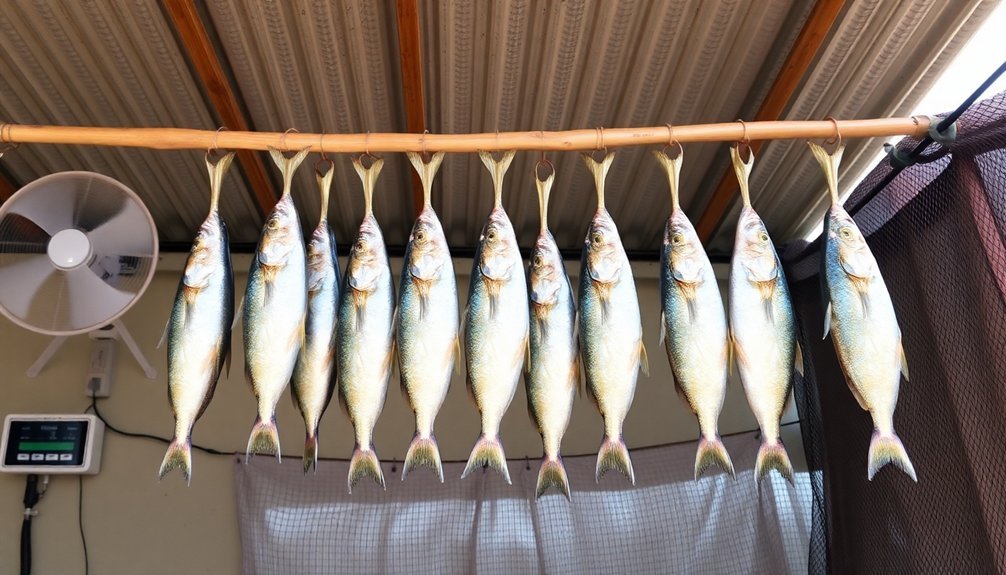
Strategic Rack Placement Tips
A well-orchestrated air circulation setup starts with strategic rack placement. You'll want to position your drying racks 1-2 feet above ground level, which not only enhances air movement but also protects your fish from ground moisture and unwanted pests.
Make sure the height allows you to easily access and monitor the fish during the drying process.
Choose a location with low humidity and maximum exposure to natural airflow. You'll get the best results by placing your racks in sunny areas that aren't prone to shade or moisture accumulation. The site should have consistent air movement to facilitate effective drying.
Don't forget to protect your fish from the elements. Keep tarpaulins or plastic sheets handy to cover the fish at night and during rainfall. You can use cheesecloth as an additional barrier against insects while maintaining proper ventilation.
Consider setting up a simple shelter over your racks for protection against extreme weather conditions.
For your rack construction, opt for durable materials like casuarina poles or treated hardwood that can resist heat, fungi, and insects.
You can use chicken wire or mosquito netting for the mesh surface, and consider coating the lower portions of support poles with tar to prevent rotting.
Airflow Direction Control
Mastering airflow direction is crucial for preventing mold during the fish-drying process. You'll need to establish a controlled environment where hot air circulates uniformly through your drying chamber. By using an efficient ventilation system with strategically placed ducts, you can maintain consistent airflow that removes moisture while preserving the quality of your fish.
To enhance your airflow direction control, focus on these critical elements:
- Install exhaust systems at strategic points to effectively remove moist air, preventing humidity buildup that could lead to mold growth.
- Position heating elements or gas burners so they work in harmony with circulation fans for even heat distribution.
- Set up temperature sensors throughout the drying chamber to monitor and adjust airflow patterns as needed.
- Maintain temperatures between 40°C to 60°C for ideal moisture removal and mold prevention.
- Confirm your recirculation system is properly configured to reuse heated air efficiently.
Don't forget to monitor your digital controls regularly and adjust parameters based on your fish type and thickness.
Your ventilation system should quickly recover prime conditions after any disruptions, such as door openings, to maintain consistent drying throughout the process.
Spacing Fish Correctly
Proper spacing between fish pieces creates the foundation for successful air-drying. You'll need to arrange your fish on 304 stainless steel trays with enough space between each piece to allow for complete air circulation. Don't let any pieces touch or overlap, as this will create moisture traps and lead to mold growth.
Position your trays on sturdy racks, guaranteeing there's adequate spacing between each level. Before placing your fish, lightly grease the trays or use cooking spray to prevent sticking. For best results, arrange your fish according to this spacing guide:
| Fish Size | Minimum Space Between Pieces | Tray Level Spacing |
|---|---|---|
| Small (<6") | 1 inch | 4 inches |
| Medium (6-12") | 2 inches | 5 inches |
| Large (>12") | 3 inches | 6 inches |
If you're using mesh racks or grills, you'll benefit from enhanced airflow around your fish. Remember to make uniform cuts in thicker portions of the fish to guarantee even drying throughout. Position your racks in areas where air can freely circulate, and you'll greatly reduce the risk of mold development during the drying process.
Temperature and Humidity Control
Maintaining precise temperature and humidity levels stands at the core of successful fish air-drying.
You'll need to control temperatures based on your fish type, keeping them below 30°C for temperate species and under 45°C for tropical varieties. As you progress through the drying process, you can gradually increase temperatures up to 115°C, but start low to manage dehydration effectively.
Modern drying systems offer automatic temperature and humidity controls that'll help you maintain ideal conditions. You'll want to use desiccant dehumidifiers, especially during the initial drying stages with lower temperatures. The process stops when your fish reaches equilibrium humidity with the ambient air.
Here are key points to monitor for ideal results:
- Keep air circulation constant during the initial drying stage to maintain uniform drying rates
- Use adjustable air distribution plates to guarantee even drying across all fish
- Monitor wet-bulb air temperature, particularly during constant-rate drying periods
- Implement forced ventilation to prevent moisture buildup
- Use PLC-controlled systems when possible for precise 24-hour temperature and humidity management
Your success depends on maintaining these controls consistently throughout the entire drying process.
Fish Rotation Methods
With temperature and humidity controls in place, regular fish rotation becomes your next key focus.
You'll need to turn your fish pieces every couple of hours to guarantee they're drying evenly on all sides. Thread or thin wire works best for hanging fish strips, as these materials make rotation simple and won't damage the flesh during turning.
If you're using drying racks or trays, space your fish pieces apart to allow proper air circulation.
You'll want to handle the fish gently during rotation to prevent breakage, especially as they become more brittle throughout the drying process. For mechanical drying setups, use trays that distribute the fish evenly and allow air to flow freely around each piece.
When rotating, check that each piece maintains its shape and isn't sticking to the drying surface.
If you notice any areas that aren't drying as quickly as others, adjust the position of those pieces to areas with better airflow.
Remember to bring your fish indoors at night to protect them from dew, and always return them to their drying positions with the less-dried side facing the air current for best results.
Clean Storage Solutions
Once your fish is thoroughly dried, selecting the right storage container becomes crucial for preventing mold growth.
You'll want to choose airtight jars or vacuum-sealed bags that completely prevent moisture and air from entering. Glass or plastic containers with tight-fitting lids work well, but make sure they're clean and completely dry before use.
Store your dried fish in a cool, dry location away from direct sunlight and heat sources. Keep the storage temperature below 70°F and ascertain good ventilation.
If you're dealing with a humid environment, consider using desiccants or a dehumidifier to maintain ideal conditions.
For maximum preservation, here's what you'll need to monitor:
- Regular inspections for signs of mold, mildew, or rancid smells
- Storage area humidity levels and temperature consistency
- Container seals to guarantee they remain airtight
- Proper labeling with dates and fish types
- Rotation of stored fish to maintain freshness
For extended shelf life, you can store your dried fish in the refrigerator or freezer.
Wrap it tightly in plastic wrap or aluminum foil before refrigerating, or freeze it to preserve quality for up to a year.
Frequently Asked Questions
How Do You Know When Air-Dried Fish Has Gone Bad?
You'll know your air-dried fish has gone bad when you notice a strong, unpleasant odor, mold growth, discoloration, or a slimy texture. If it's mushy or has an ammonia smell, don't eat it.
Can You Air-Dry Different Types of Fish Together?
Yes, you can air-dry different fish types together, but you'll need to group them by size and moisture content. Make sure they're cut uniformly and don't touch each other during drying for best results.
What Insects Are Most Problematic During Fish Drying?
You'll need to watch out for flies that lay maggots during early drying, and beetles (especially Dermestidae and Cleridae) that attack throughout the process. Mites are also troublesome during storage of dried fish.
How Long Can Properly Air-Dried Fish Last in Storage?
If you've dried and stored your fish properly, it'll last 6-12 months in a cool, dry place. You'll get the best longevity when you maintain consistent storage conditions and check periodically for quality.
Should You Remove Fish Scales Before Air-Drying?
Yes, you'll need to remove the scales before air-drying your fish. It prevents bacterial growth, guarantees even drying, and improves the final quality. Don't skip this step, as scales can trap moisture and cause spoilage.
In Summary
Now you've learned the key techniques for successfully air-drying fish at home. By following proper brining, cutting, and drying methods while monitoring weather conditions and maintaining good airflow, you'll prevent mold growth and achieve excellent results. Remember to rotate your fish regularly and store it properly once it's dried. With these smart approaches, you'll preserve your catch safely and enjoy delicious dried fish year-round.


Leave a Reply