
Wood ash preservation effectively extends your vegetables' shelf life through seven proven methods. You'll want to start with selecting firm, unblemished produce at peak ripeness, then collect clean hardwood ash using either wet or dry processing techniques. Layer your vegetables, especially tomatoes, in breathable containers using 1.5-inch ash beds, keeping produce from touching. Cover each layer completely with sifted ash, and store in a cool, dark space between 50-59°F. Regular monitoring helps prevent spoilage, while proper ventilation and moisture control are essential for success. These time-tested techniques open up a world of traditional food preservation possibilities.
Understanding Wood Ash Properties
Wood ash packs a powerful punch when it comes to preserving vegetables, thanks to its complex chemical makeup and physical properties. You'll find it's rich in calcium, making up 7-33% of its composition, along with significant amounts of carbon (5-30%) and potassium (3-10%). These major elements work together to create an environment that's inhospitable to decay-causing organisms. Research shows that 1.5 kg of ash provides optimal preservation results for tomatoes.
When you're working with wood ash, you'll need to take into account its temperature sensitivity. Higher combustion temperatures transform calcium carbonate into calcium oxide, which can affect its preservation properties.
You'll want to store your ash in a cool, dry place, as moisture can leach out its valuable potassium content. The ash's texture varies from powdery to chunky, so you'll need to sift it to remove debris before use.
The ash's alkaline nature plays an essential role in preservation, as it creates an environment that inhibits bacterial growth. You'll find various compounds in wood ash, including carbonates and trace elements like manganese and phosphorus, which contribute to its preservative effects.
Don't use ash from treated timber, as it can contain harmful chemicals that could contaminate your vegetables.
Proper Vegetable Selection
You'll need to carefully inspect each tomato before starting the wood ash preservation process, checking for any damage, bruising, or signs of decay that could compromise storage success.
When selecting tomatoes for preservation, pick only those that have reached their peak ripeness but aren't overripe, as this guarantees the best preservation results.
Make certain to examine the entire surface of each tomato, paying special attention to spots where decay might begin, such as around the stem or any existing blemishes.
The tomatoes should be placed upside down in your storage container, as this proven method helps maintain freshness during the preservation process.
Inspect Before Preservation
Before starting the wood ash preservation process, proper inspection of your vegetables is essential for success.
You'll need to thoroughly clean your vegetables using clean water to remove all field dirt and debris, making certain your hands and equipment are clean to prevent contamination. Poor handling during cleaning can create entry points for pathogens.
Once cleaned, you'll want to carefully examine each vegetable for quality indicators. Check their firmness, size, weight, color, shape, and maturity level.
Look closely for any signs of mechanical damage, disease, or insect infestation. You can perform this inspection manually or use separation machines if you're handling large quantities.
You must remove any damaged parts from your vegetables before preservation. Cut away outer contaminated leaves, trim spoiled sections, and remove stems where necessary.
If you spot any decay or injury, remove those portions immediately to prevent spoilage from spreading to healthy areas.
Finally, grade your vegetables based on their condition and appearance.
You'll want to separate them according to size and quality, discarding any that don't meet your standards.
Make certain the vegetables you select are suitable for wood ash preservation to guarantee the best results.
Choose Peak Ripeness Only
Selecting vegetables at their ideal ripeness stage is essential for successful wood ash preservation. You'll want to choose mature vegetables that are slightly underripe, similar to what you'd select for canning or pickling. This guarantees better texture retention and reduces the risk of spoilage during the preservation process.
When preserving with wood ash, vegetables should be firm but not hard, with colors that aren't fully developed yet showing some vibrancy.
Remember that overripe or fully ripe vegetables aren't suitable for wood ash preservation methods. These softer textures can lead to mushy results and potential spoilage. Instead, focus on selecting vegetables that are uniform in size and shape, which will help guarantee even preservation throughout your batch.
- Choose vegetables that are mature but slightly underripe
- Look for firm texture that's still slightly resistant to pressure
- Select produce with uniform sizes for consistent preservation
- Avoid any vegetables showing signs of softness or overripeness
- Check for vibrant but not fully developed coloring
Following these guidelines for vegetable selection will greatly enhance your success rate with wood ash preservation methods and help maintain quality during storage.
Ash Collection and Processing
You'll need to start with clean wood ash from cool cooking fires or chimneys, being careful to wear protective gear and avoid inhaling fine particles during collection.
Process your ash by either using the wet method, mixing it with water and letting it settle, or employing the dry method of multiple siftings through fine mesh sieves to remove impurities and unburned materials.
Store your processed ash in a dry, secure container to maintain its quality and prevent moisture contamination that could affect its preservative properties.
Safe Ash Source Selection
Successful vegetable preservation with wood ash starts with choosing the right source materials. You'll want to focus on hardwoods like Sugar Maple, Beech, and Hickory, as they provide the best quality ash for preservation.
Don't use softwoods like Pine or Fir, and while lumpwood charcoal ash is acceptable, avoid ash from briquettes or treated timber.
When collecting ash, you can safely gather it from wood fires, bonfires, wood-burning stoves, or cooking fires. You'll need to process the ash properly by ensuring it's completely cold and sieving it to remove unburned materials and debris.
Since wood ash is caustic and corrosive, always wear protective gear including gloves, boots, and a face mask during handling.
- Choose hardwood sources like Sugar Maple, Beech, or Hickory for ideal preservation results
- Collect ash only from clean wood sources, avoiding treated timber and non-wood fuels
- Sieve thoroughly to remove unburned carbon, debris, and sharp particles
- Allow ash to cool completely before processing or handling
- Wear appropriate protective gear to protect against caustic properties
Remember to store your processed ash in a dry place and keep it free from contaminants until you're ready to use it for preservation.
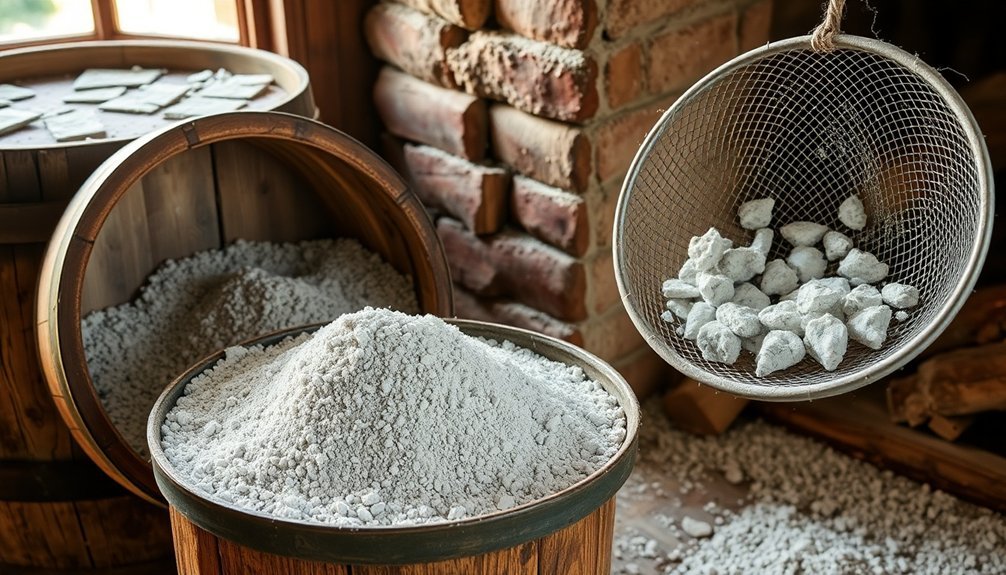
Proper Cleaning Methods
Now that you've identified the right wood sources, proper ash collection and processing will determine the quality of your preservative.
You'll need to collect ash from clean, dry sources like your chimney or wood stove, ensuring it's completely cool before handling. Make sure you're gathering ash that hasn't been exposed to rain or other contaminants, and prioritize hardwood ash for better results.
Start your cleaning process by sifting the ash through mesh or hardware cloth to remove large particles and charcoal chunks. You'll want to repeat this sifting process three to four times until you achieve a fine, gray dust consistency.
During sifting, carefully remove any unburned wood pieces, debris, or foreign materials you spot.
Inspect your processed ash thoroughly for contaminants, including signs of mold, moisture, or chemical residues. Once you're satisfied with the cleanliness, store your ash in airtight containers or sealed bags in a cool, dry place away from sunlight.
Don't forget to label your containers clearly and use the ash within a reasonable timeframe to maintain its preservative properties.
Storage and Sifting Steps
Storing and sifting wood ash requires four essential steps to guarantee excellent preservation results.
You'll need to collect ash from a wood fire or chimney, ensuring it's completely cool before handling. When collecting, choose ash only from untreated wood to avoid harmful chemicals that could contaminate your vegetables. Make sure you gather the ash in a dry, ventilated area to prevent moisture absorption, which can reduce its effectiveness.
For proper processing, you'll need to sift the ash multiple times through a hardware cloth or fine-mesh sieve. This removes unwanted debris and creates a uniform texture suitable for vegetable preservation. Store your processed ash in a dry location until you're ready to use it for layering with your vegetables.
- Choose a clean, dry container with appropriate size for your preservation needs
- Line your container with paper to create a barrier between ash and container walls
- Sift ash thoroughly to remove all debris and achieve consistent texture
- Layer ash and vegetables alternately, maintaining proper thickness
- Store sealed containers in a cool, dry place for excellent preservation
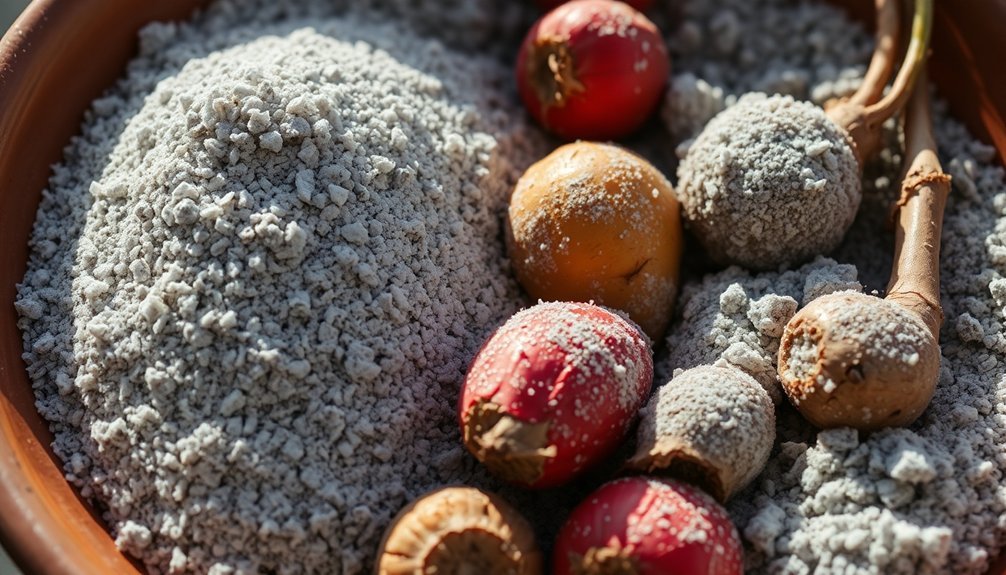
Layering Techniques for Storage
Proper layering stands at the heart of wood ash preservation for tomatoes.
You'll need to start by placing a 1.5-inch layer of cool, sifted wood ash at the bottom of your container. Arrange your tomatoes stem-end down in a single layer, guaranteeing they don't touch each other. Cover them completely with a thin layer of ash before adding the next row.
As you build your layers, you'll want to make certain each tomato is fully encased in ash, which acts as a natural preservative and pest deterrent. Continue this process until you've filled your container, maintaining consistent layers throughout.
While it's normal for the tomatoes' skin to wrinkle during storage, the pulp should stay juicy.
Choose a cool, dry, and dark location for storage to maintain ideal preservation conditions. You'll need to keep the container away from any water sources and areas exposed to wind.
Check your stored tomatoes periodically for signs of spoilage. The ash's antibacterial properties will help prevent decay, but proper monitoring guarantees long-term success.
Container Types and Setup
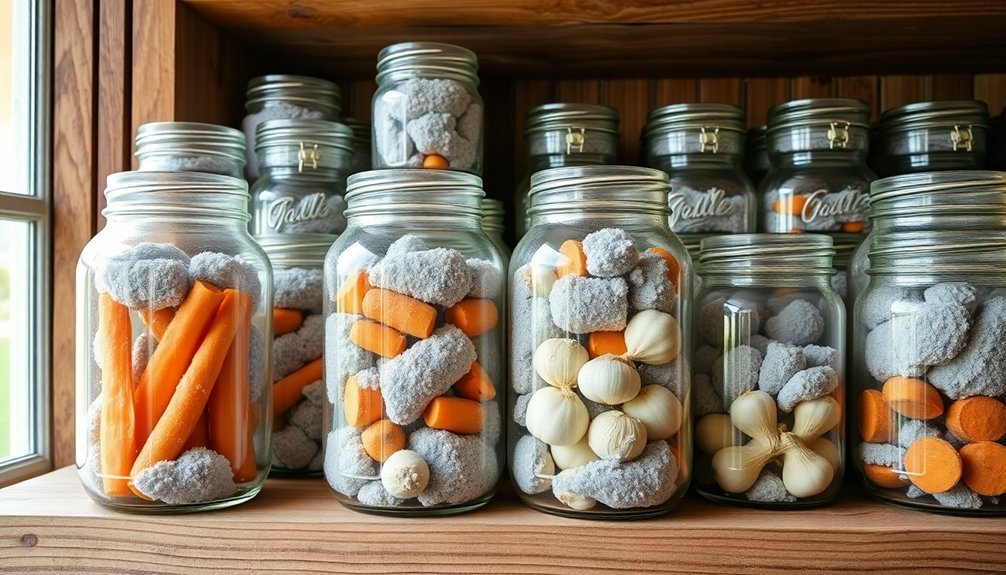
Successful wood ash preservation begins with selecting the right container. You'll need a wooden box, cardboard container, or woven basket that's large enough to accommodate multiple layers of tomatoes and ash.
Before you start, make sure your container is thoroughly cleaned and completely dry to prevent any contamination that could spoil your vegetables.
Line your chosen container with paper or another breathable material to create a protective barrier between the vegetables and the container surface. You'll want to place the container in a cool, dry location away from any combustible materials, preferably on a cement or brick surface if storing outdoors.
- Choose containers that provide adequate space for layering tomatoes and ash without overcrowding
- Clean and dry your container thoroughly before use to prevent contamination
- Line the container with breathable material for proper moisture control
- Select containers with enough depth to accommodate multiple layers
- Make sure your container has a loose-fitting cover for proper sealing
When handling the setup process, don't forget to wear appropriate protective gear, including gloves and a face mask, especially when working with sifted wood ash.
This protects you from potential skin irritation and prevents ash inhalation.
Storage Environment Requirements
A well-controlled environment holds the key to effective wood ash preservation. You'll need to locate a dry, cool space away from direct sunlight, ideally a cellar or dark room that maintains consistent conditions. Your storage area should stay between 10°C to 15°C (50°F to 59°F), as temperature stability is vital for slowing down the ripening process and preventing spoilage.
Moisture control is fundamental for successful preservation. You'll want to keep your storage containers off the ground and away from areas prone to dampness or water exposure. Using sifted wood ash helps reduce moisture absorption, but you'll still need to guarantee your storage space remains consistently dry. Avoid basements with high humidity levels, as they can compromise the preservation process.
The ambient conditions of your storage space require careful consideration. You'll need good air circulation without excessive airflow that could disturb the ash. Keep the area clean and pest-free, and avoid storing near strong odors or contaminants that could affect your preserved vegetables.
Use a loose-fitting cover over your containers to maintain proper airflow while keeping the ash undisturbed.
Monitoring and Maintenance

Maintaining your wood ash preservation system requires consistent monitoring and attention to detail. You'll need to regularly check soil pH levels every 2-3 years using a simple testing kit from your local garden center.
When applying wood ash, don't exceed 50-70g per square meter, and always sieve it first to remove unwanted debris. It's vital to monitor your vegetable types, as some plants won't tolerate the alkaline conditions created by wood ash.
For safe and effective monitoring, you'll want to wear protective gear, including gloves, eye protection, and a dust mask. Be certain you're applying ash to moist soil and avoiding windy conditions.
Don't forget to check for even distribution and avoid creating lumps or piles that could cause salt concentration issues.
- Test pH levels before each application to verify they don't exceed 7.0
- Monitor plant response and watch for signs of alkalinity stress
- Check moisture levels when applying ash to prevent dust problems
- Inspect ash quality to confirm it's from untreated wood sources
- Track application dates and rates in a garden journal for future reference
Frequently Asked Questions
Can Wood Ash Preservation Affect the Taste of Tomatoes?
You won't notice significant taste changes when using wood ash to preserve your tomatoes. Research shows it maintains freshness without altering the flavor profile, though you'll see some skin wrinkling over time.
What Happens if I Accidentally Use Hot Ash Instead of Cooled Ash?
If you use hot ash, you'll risk burning your vegetables, triggering rapid spoilage, and creating safety hazards. The heat can cook your produce, destroy nutrients, and release harmful fumes. Always let ash cool completely.
Is It Safe to Eat Ash-Preserved Tomatoes During Pregnancy?
While you can eat ash-preserved tomatoes during pregnancy, it's best to consume them in moderation. There's no evidence of specific risks, but you'll want to guarantee they're properly preserved and thoroughly washed before eating.
Can This Method Work for Green Tomatoes That Need Ripening?
You shouldn't use wood ash for ripening green tomatoes – it won't work. Instead, try placing them in a paper bag with a ripe banana or apple, which produces ethylene gas needed for ripening.
Should Tomatoes Be Washed Before Preserving Them in Wood Ash?
You don't need to wash tomatoes before preserving them in wood ash. Just make sure they're free of bruises and blemishes. Focus on selecting firm, ripe tomatoes that aren't soft or overripe.
In Summary
You'll find wood ash preservation surprisingly effective when you've mastered these seven methods. Start with clean, dry ash and properly prepared vegetables for the best results. Remember to check your stored produce regularly and maintain ideal storage conditions. Whether you're storing root vegetables or preserving garden surplus, these time-tested techniques will help you extend your harvest's shelf life naturally and affordably.

Leave a Reply