Wood ash root cellaring offers you a time-tested method for preserving root vegetables through winter without electricity. You'll need to maintain temperatures between 32-40°F and humidity at 85-95% while using wood ash's natural preservative properties. Start by creating a 1-inch base layer of wood ash mixed with sand or sawdust in your storage container, then layer your cleaned (but not washed) root vegetables with half-inch ash layers between them. Cover everything with 2-3 inches of ash on top. Regular monitoring prevents spoilage and pest problems. With these ancient techniques and modern adaptations, you'll reveal centuries of food preservation wisdom.
Understanding Root Cellaring History

Throughout North American history, root cellaring emerged as an essential food preservation method when European settlers, particularly those from England and Ireland, brought their storage practices to the New World in the 1600s.
You'll find early examples in Jamestown, Virginia, where settlers constructed cellars shortly after their 1607 arrival, using them not only for food storage but also for metallurgy, blacksmithing, and animal processing. Wild game remains like bobcat and sturgeon bones have been discovered in these early cellars.
While Europeans were developing these techniques in North America, it's worth noting that Indigenous Australians had already mastered the art of preserving food through burial methods – a practice that would eventually influence European storage techniques.
By 1767, you'd commonly hear Americans using the term "root cellar" in their everyday language.
These essential storage spaces varied dramatically in size, from modest 3-4 foot square holes to impressive chambers extending beyond 20 feet.
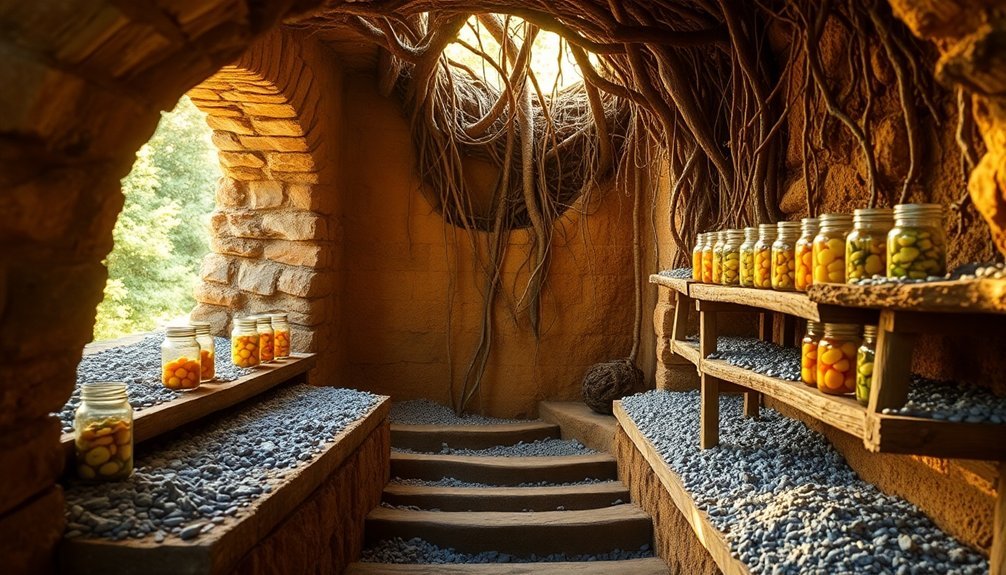
You'll discover that their construction typically involved brick, stone, or later concrete walls built into hillsides, often featuring wooden roofs and sometimes including shed structures with floor access.
This design wasn't just about convenience – it was vital for maintaining the perfect environment for long-term food preservation.
Benefits of Wood Ash Storage
Wood ash powerhouses provide multiple benefits for root cellar storage and gardening applications. When you're storing root vegetables, wood ash creates an ideal environment by naturally raising soil pH levels and delivering essential nutrients like calcium and potassium.
You'll find it's particularly effective for preserving carrots and parsnips, as the potash content supports their long-term storage needs. The ash's highly water-soluble properties make it more efficient than limestone for pH adjustment.
You can maximize your root cellar's effectiveness by using wood ash as a natural pest deterrent. Sprinkling it around your stored vegetables creates a protective barrier against common storage pests like slugs and ants. The ash's pest-repelling properties help maintain your produce's quality throughout the storage period.
For best results, you'll want to layer wood ash strategically in your root cellar. It helps neutralize odors while providing valuable minerals to your stored vegetables.
You can also use it to address any moisture issues, as wood ash helps regulate humidity levels. If you're storing root vegetables that prefer alkaline conditions, you'll find wood ash particularly beneficial, though remember to avoid using it with acid-loving crops like potatoes.
Choosing the Right Container

Selecting the right container for wood ash root cellaring can make or break your storage success. You'll want to choose rot-resistant materials like locust, cedar, or cypress for your shelving, while avoiding pressure-treated or creosoted wood that could contaminate your produce. Maintaining 90 to 95 percent humidity is crucial for optimal storage conditions in your containers.
| Material | Best Use |
|---|---|
| Cedar | Shelving & containers |
| Oak planks | Heavy-duty storage |
| Fiberglass | Outdoor setups |
| Plastic tubs | Moisture control |
When designing your container system, verify you've got proper air circulation by keeping containers 1-2 inches from walls using cleats. You'll need to seal or perforate containers to control humidity and ethylene gas levels. Don't forget to label everything clearly, especially if you're burying items in sand or other materials.
For moisture control, you'll want to layer damp peat moss or cedar shavings between produce. Place newspaper between layers to absorb excess moisture. If you're using plastic containers, make sure they're either sealed or perforated based on your storage needs. Remember to screen all vents and verify doors fit tightly to keep pests out while maintaining your desired environment.
Selecting Root Vegetables
You'll want to choose proven storage varieties like Red Ace F1 beets and American Purple Top rutabagas for their exceptional keeping qualities and disease resistance.
When harvesting your root vegetables, timing is vital – pick them at peak maturity before the first hard frost to guarantee they'll store well through winter.
Before placing your roots in storage, gently brush off excess soil rather than washing them, as moisture can lead to rot and shortened storage life.
Best Root Storage Varieties
Successful root cellaring begins with choosing vegetables that naturally store well for extended periods.
You'll want to focus on varieties that maintain their quality through the winter months while requiring minimal maintenance. Some root vegetables are naturally better suited for long-term storage than others.
The longest-lasting root vegetables you can store include onions and sweet potatoes, which both keep for up to 9 months when stored properly.
Potatoes aren't far behind, lasting 5-8 months in cool, dark conditions. For best results, select these proven storage varieties:
- Onions: Store in cool, dry conditions away from potatoes, maintaining good air circulation
- Sweet Potatoes: Keep in warmer spaces (55-60°F) with high humidity
- Potatoes: Place in dark locations with consistent cool temperatures
- Carrots: Store with damp towels in temperatures just above freezing
You'll also find success with celeriac, turnips, and rutabagas, which all store well for 4-6 months when kept in proper conditions.
Remember that your storage success largely depends on choosing unblemished, fully mature vegetables at harvest time and maintaining ideal temperature and humidity levels throughout storage.
Harvest Timing Matters
A root crop's harvest timing can make or break your storage success. You'll want to target the cool shoulder seasons of spring and fall when temperatures hover between 45°F and 75°F for ideal harvesting conditions. In warmer regions, you can even plant and harvest during winter months.
Each root vegetable displays unique signs of readiness that you'll need to monitor:
| Vegetable | Size at Harvest | Timing Indicator | Frost Tolerance |
|---|---|---|---|
| Beets | 2-3 inches | Full size | Light frost ok |
| Carrots | Variable | Orange shoulder visible | Light frost ok |
| Parsnips | 1.5-2 inches | After first frost | Very tolerant |
| Garlic | Full size | Toppled foliage | Harvest before frost |
When you're ready to harvest, use a garden fork to carefully lift the roots, avoiding any damage that could compromise storage life. Remove all but ½ inch of foliage tops, and gently brush off excess soil without washing. While light frosts won't harm most root crops, you'll need to complete your harvest before any heavy freezes set in. Some varieties, like rutabaga and salsify, actually develop better flavor after a light frost.
Cleaning Before Storage
Once your root vegetables are harvested, proper cleaning and selection become the next critical steps for successful storage.
You'll need to gently rinse your roots with a fine water spray to remove dirt, being careful not to scrub or damage their protective waxy skins. After rinsing, let them dry in a well-ventilated space, then pat them dry with a clean kitchen towel.
Before storing your root vegetables, you'll need to properly prepare the tops and inspect for any damage. Cut the greens to about an inch from the root's crown, and remove any long tails to prevent moisture loss.
Don't forget to check each vegetable carefully for signs of decay or damage.
For ideal storage success, follow these essential preparation steps:
- Remove seriously blemished or insect-damaged roots and use them first
- Store only intact, undamaged vegetables for long-term storage
- Pack cleaned vegetables loosely in perforated plastic bags or breathable containers
- Line storage containers with muslin cloth or cheesecloth to maintain proper humidity
Remember to maintain high humidity levels (90-95%) in your storage area and keep the space cool and dark for maximum preservation.
Preparing Wood Ash

Properly preparing wood ash requires three essential steps: collection, drying, and safe handling. You'll need to source your ash from wood-burning fireplaces or fire pits, ensuring it's completely cooled before collection. Once collected, sift the ash to remove any large particles or sharp debris that could damage root vegetables during storage.
For best results, your ash must be thoroughly dried and stored in a well-ventilated area. Don't use ash that's been exposed to rain or moisture, as this diminishes its effectiveness. When handling wood ash, always wear protective gear including gloves, eye protection, and a face mask.
| Process | Key Requirements | Safety Measures |
|---|---|---|
| Collection | Cool ash only | Wear protective gear |
| Sifting | Remove large debris | Use in ventilated area |
| Drying | Keep moisture-free | Avoid inhaling dust |
| Storage | Well-ventilated space | Keep away from children |
| Application | Use on calm days | Rinse if contact occurs |
The chemical composition of your wood ash will contain primarily calcium carbonate and potassium, with trace amounts of other beneficial minerals. Remember that the ash's alkaline properties make it effective for root cellaring, but you'll need to handle it carefully to avoid irritation to skin, eyes, or lungs.
Layering Techniques for Root Storage
When layering vegetables in your root cellar, you'll want to start with a 1-inch base layer of wood ash mixed with sand or sawdust.
Space your root vegetables about 2 inches apart to allow proper airflow and prevent direct contact between items.
Add thin layers of the ash mixture between each row of vegetables, using roughly 1/2 inch of material to separate the layers while maintaining proper humidity levels.
Ash Depth Requirements
Throughout the root cellaring process, maintaining precise ash depth is critical for successful vegetable storage. You'll need to carefully layer your wood ash while guaranteeing uniform application and proper moisture levels to prevent caking.
When spreading ash between root vegetable layers, use calibrated measurements to achieve consistent coverage, just as you'd when applying it to soil.
To achieve ideal storage conditions, follow these essential depth requirements:
- Create a base layer of 1-2 inches of ash on a level surface, ensuring it's well-distributed to prevent direct contact between roots and the cellar floor.
- Apply thin, uniform layers between vegetable rows, using approximately ½ inch of ash to separate each layer.
- Cover the topmost vegetable layer with 2-3 inches of ash to provide adequate protection from moisture and air exposure.
- Monitor ash moisture content regularly, as overly wet ash will cake and reduce effectiveness.
Remember to incorporate the same careful handling practices you'd use in field applications – avoid dusty conditions, maintain proper coverage, and guarantee the ash isn't too wet or too dry.
You'll want to store your ash supply indoors or under cover to maintain its quality throughout the storage season.
Root Spacing Guidelines
Beyond ash depth requirements, successful root cellaring demands careful attention to spacing and layering techniques. You'll need to arrange your roots in single layers, keeping them separated to prevent moisture transfer and decay.
When layering your roots in wood ash, make sure each root has adequate space around it for proper air circulation. Between each layer of roots, you'll want to add moist (but not wet) packing material. While wood ash serves as your primary medium, you can enhance the layering process with materials like sawdust, wood shavings, or peat.
Start and end with your packing material to create a protective buffer for your roots. You should maintain proper ventilation throughout your storage setup. Don't crowd your roots together, as this can lead to spoilage and make it difficult to inspect them regularly.
If you're storing yam tubers, opt for shelf storage rather than tying them to frameworks, which can cause damage. Remember to leave strategic openings in your storage system to regulate moisture and air flow. This careful spacing approach, combined with proper layering, will greatly extend your roots' storage life while maintaining their quality.
Optimal Storage Conditions

Successful wood ash root cellaring depends heavily on maintaining precise storage conditions.
You'll need to monitor and maintain specific temperature and humidity levels to guarantee your produce stays fresh throughout the storage period. The ideal temperature range falls between 32-40°F (0-4°C), while humidity should be kept at 85-95%.
Proper ventilation plays a vital role in preventing spoilage and removing ethylene gas, which can accelerate ripening. You'll want to check your ventilation system regularly and make certain air circulates effectively throughout your storage space.
For best preservation, follow these essential guidelines:
- Position thermometers and hygrometers at different heights to monitor conditions accurately
- Keep the environment dark to prevent light-induced spoilage and sprouting
- Check stored produce weekly for signs of decay or moisture-related issues
- Maintain consistent airflow through properly positioned vents or windows
Your root cellar's underground location provides natural insulation and humidity, but you'll still need to actively manage these conditions.
Don't forget to arrange your produce strategically, preventing moisture sharing between different crops and guaranteeing adequate spacing for air circulation.
Common Mistakes to Avoid
You'll need to be extra careful when using wood ash in your root cellar, as applying too much fresh ash can drastically alter the pH and harm your stored produce.
When storing wood ash, protect it from moisture and keep it in sealed containers to prevent it from becoming caustic or developing harmful compounds.
Never use ash from treated wood, charcoal briquettes, or manufactured logs, as these contain chemicals that can contaminate your root cellar and stored vegetables.
Over-Applying Fresh Ash
A common and serious mistake in root cellaring is over-applying fresh wood ash to your soil.
You'll need to be extra cautious since wood ash is more soluble and reactive than limestone, causing rapid pH changes that can harm your stored root vegetables. When you're preparing your root cellar soil, it's essential to understand that excessive ash can create nutrient imbalances and affect the quality of your stored crops.
To avoid over-application problems, follow these essential guidelines:
- Test your soil's pH before adding any ash – if it's already 7.5 or higher, don't add more.
- Mix the ash thoroughly into the top 2-4 inches of soil rather than leaving it on the surface.
- Apply ash during fall or spring, avoiding windy days and dry conditions.
- Keep your ash dry before application to preserve its potash content.
You'll want to be particularly careful if you're storing potatoes, as excessive ash can promote potato scab.
Remember that root crops like parsnips and turnips can develop off-flavors when soil pH rises too high. If you're uncertain about application rates, it's better to err on the side of caution or consult a soil test for specific recommendations.
Improper Storage Methods
Proper storage methods can make or break your root cellaring success, yet many gardeners overlook critical mistakes that lead to spoiled crops. You'll need to maintain temperatures between 33°F and 40°F, as fluctuations trigger ethylene gas production and accelerate decay. Install reliable thermometers and insulate your storage area to protect against external temperature changes.
Don't neglect humidity control – aim for 80-90% humidity levels using a hygrometer to monitor conditions. You're risking dehydration with low humidity and mold growth with excessive moisture. Consider using straw or sand to help maintain ideal moisture levels, but guarantee proper ventilation through slatted storage containers or periodic airing.
You'll want to establish a regular inspection routine, carefully checking stored vegetables for signs of spoilage. When you spot damaged or decaying produce, remove it immediately – one rotting vegetable can quickly compromise your entire harvest.
Space your vegetables to allow air circulation around each item, and watch for warning signs like musty odors or visible mold. Remember, effective storage isn't just about the initial setup – it requires consistent monitoring and maintenance throughout the storage period.
Mixing Contaminated Ash
Contaminated ash's devastating effects on root cellars can't be overstated, making proper identification of wood sources critical before storage.
When you mix contaminated ash with clean ash, you're creating a dangerous cocktail of toxins that can leach into your stored produce and the surrounding environment.
Pressure-treated wood ash is particularly hazardous, containing concentrated levels of arsenic, chromium, and lead that can contaminate your entire root cellar system.
To protect your root cellar and stored produce, you'll need to be vigilant about these contamination risks:
- Heavy metals from treated wood ash can leach into groundwater beneath your cellar, creating long-term environmental hazards and potentially contaminating your drinking water.
- The high leachability of wood ash means toxins can migrate through soil and affect nearby garden beds or agricultural areas.
- Fly ash accumulation in your cellar's ventilation system can release dangerous particles into the air you breathe when accessing stored goods.
- Continuous exposure to moisture in root cellars can transform metal oxides back into carbonates, increasing their mobility and toxicity.
Never mix ashes from unknown wood sources or treated lumber with your root cellar's ash collection, as this mistake can render your entire storage system unsafe.
Checking and Maintaining Stored Roots

Regular inspections of your stored roots can mean the difference between a successful harvest and spoiled produce. You'll need to check your roots frequently for any signs of rot, mold, or pest damage, removing affected items immediately to prevent spread to healthy specimens.
Make certain you're maintaining proper airflow throughout your storage area. Don't place roots directly on concrete floors, as they'll absorb excess moisture. Instead, use wooden boxes, woven baskets, or cardboard containers lined with slightly damp sawdust or sand.
Keep the roots covered with newspaper to block out light while maintaining necessary humidity levels.
You'll want to monitor your storage area's temperature, keeping it just above freezing at around 32°F. The humidity should stay at 90% or higher, but don't let condensation build up. If you're using wood ash in your storage setup, regularly check the soil pH to confirm it hasn't shifted dramatically.
Don't forget to protect your storage area from rodents. Even small gaps can allow pests to enter and damage your stored produce. When you're checking your roots, look for any signs of animal intrusion and seal entry points immediately.
Seasonal Timing for Storage
During the growing season, successful root cellaring depends on careful timing of both planting and harvesting. You'll want to start your early spring plantings as soon as the soil can be worked, typically in mid-April, with onions, garlic, and potatoes going into the ground first.
Throughout late spring and summer, you'll need to maintain a succession planting schedule to guarantee continuous harvests for your cellar.
Your harvest timing is essential for best storage success. You'll notice the best results when you follow these critical harvest points:
- Harvest potatoes at different intervals – early potatoes in June/July and late potatoes in October/November, allowing them to dry in the sun.
- Keep roots intact when harvesting broccoli, Brussels sprouts, and cabbage to maintain freshness.
- Cut winter squash with stems attached to prevent rot during storage.
- Time your root vegetable harvest (carrots, beets) for late fall when temperatures are cooling.
Remember that proper post-harvest handling is just as important as timing. You'll need to cure certain vegetables, like potatoes, for about two weeks at 60-75°F before moving them into permanent storage.
This preparation step guarantees they'll keep well throughout the winter months.
Modern Adaptations of Traditional Methods

While proper timing sets the foundation for root cellaring success, today's methods blend time-tested wisdom with innovative approaches. You'll find that incorporating traditional wood ash storage techniques with modern monitoring systems creates an excellent environment for your produce. Smart sensors can now track humidity levels while wood ash continues its centuries-old role of moisture control and pest prevention.
You can enhance your root cellar's effectiveness by combining earthbag construction with digital temperature monitoring, letting you maintain superior conditions while using sustainable materials. Traditional knowledge about air circulation patterns pairs perfectly with modern ventilation systems, giving you precise control over storage conditions.
| Traditional Element | Modern Addition |
|---|---|
| Wood Ash Layering | Smart Humidity Sensors |
| Natural Ventilation | Automated Venting Systems |
| Earth-Based Insulation | Digital Temperature Control |
If you're planning your root cellar, consider incorporating reclaimed materials alongside contemporary innovations. You'll find that community knowledge sharing through online platforms helps you perfect these hybrid approaches. By documenting traditional methods digitally, you're also helping preserve valuable cultural practices while adapting them for today's needs.
Frequently Asked Questions
Can Wood Ash From BBQ Grills Be Used for Root Cellaring?
You can use BBQ grill wood ash if it's from hardwoods or lumpwood charcoal. Make sure it's completely cool and free of additives. Don't use ash from coal or treated timber for root cellaring.
How Does Wood Ash Storage Compare to Sand Storage Methods?
You'll find sand storage far more effective than wood ash for root cellaring. Sand maintains better moisture levels, provides stable temperatures, and won't affect produce quality, while wood ash poses safety risks and humidity concerns.
Will Vegetables Stored in Wood Ash Affect Their Cooking Time?
You won't notice significant changes in cooking time when using wood ash-stored vegetables. They'll cook normally since the ash mainly preserves freshness, though slightly dried vegetables might cook a bit faster than usual.
Does Wood Ash Storage Impact the Nutritional Value of Root Vegetables?
When you store root vegetables in wood ash, you won't lose nutritional value. In fact, the minerals in wood ash can help preserve nutrients while preventing rot and maintaining moisture levels in your produce.
Can Wood Ash Be Reused for Multiple Storage Seasons?
You shouldn't reuse wood ash for multiple storage seasons as it loses its mineral content and effectiveness over time. It's best to use fresh ash each season for ideal preservation and safety.
In Summary
You've now learned how to preserve root vegetables using wood ash, a time-tested method that'll serve you well. By following these guidelines for proper ash preparation, vegetable selection, and storage maintenance, you're ready to start your root cellaring journey. Whether you're embracing traditional methods or adapting them to modern needs, you'll find that wood ash storage offers a reliable, sustainable way to keep your harvest fresh year-round.


Leave a Reply